SHERER ARCHITECTS

Categories
Uncategorized

architecture and sustainable design: Commercial edition

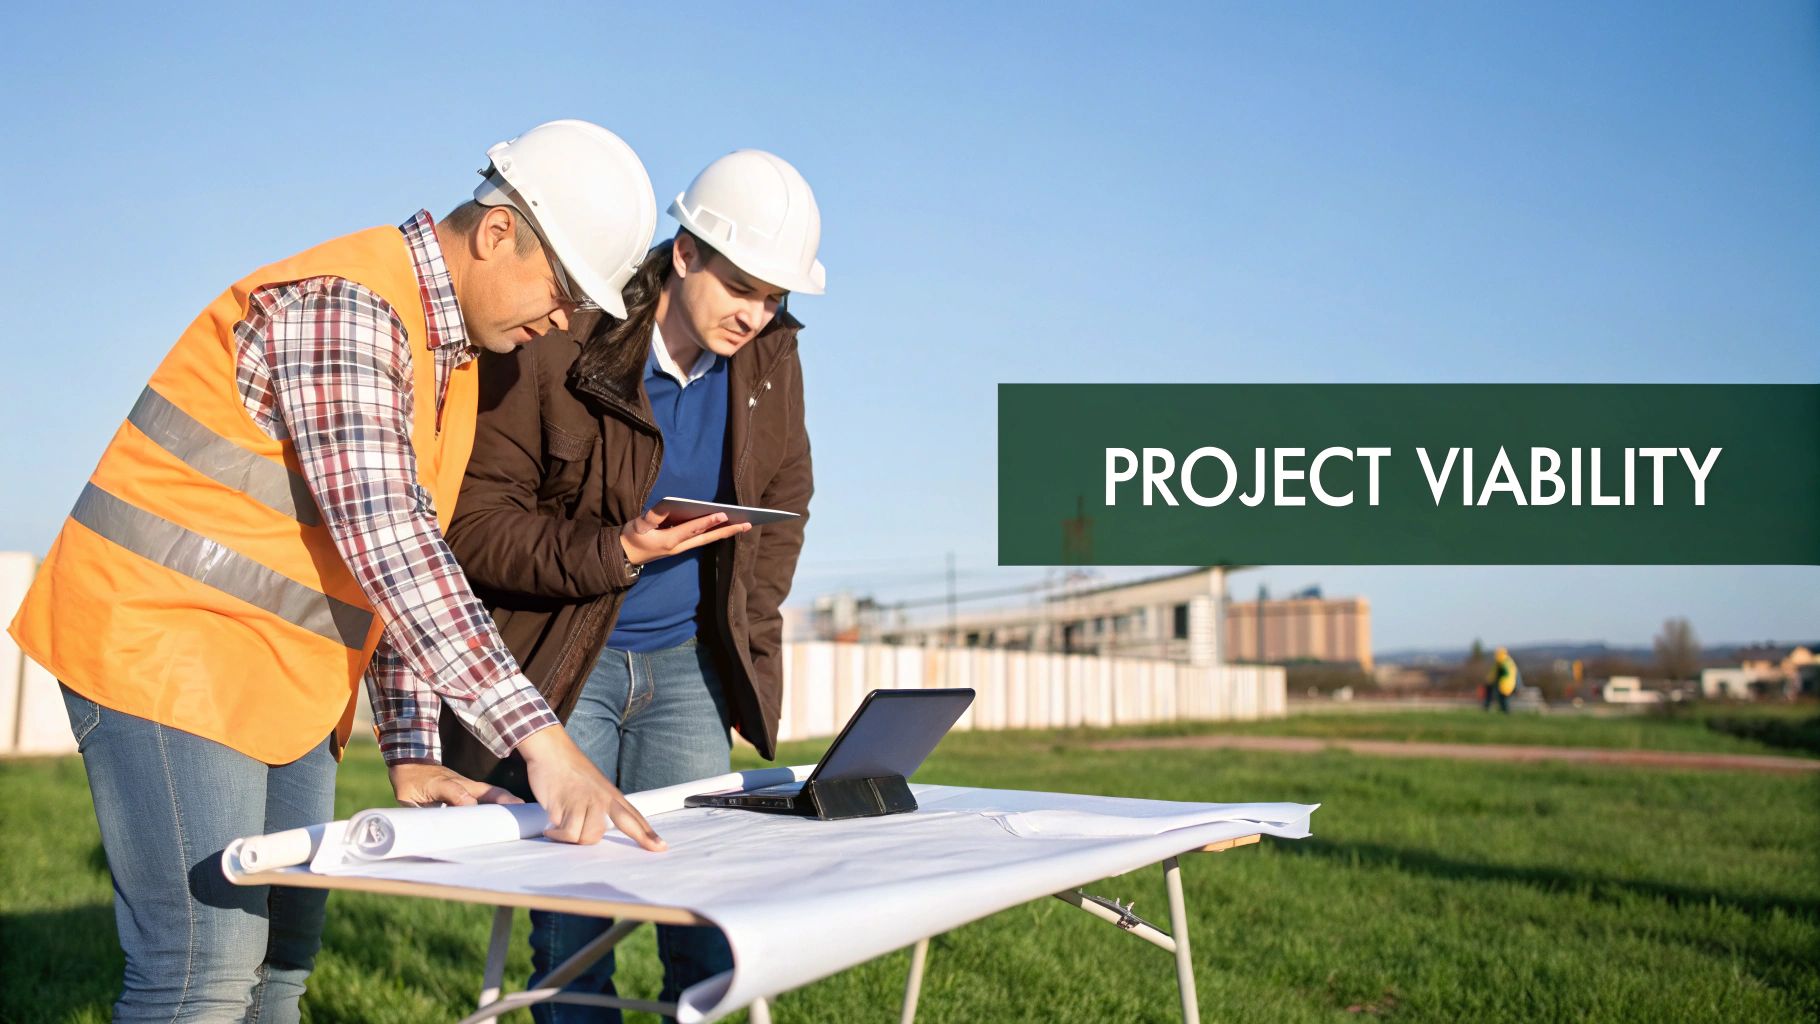
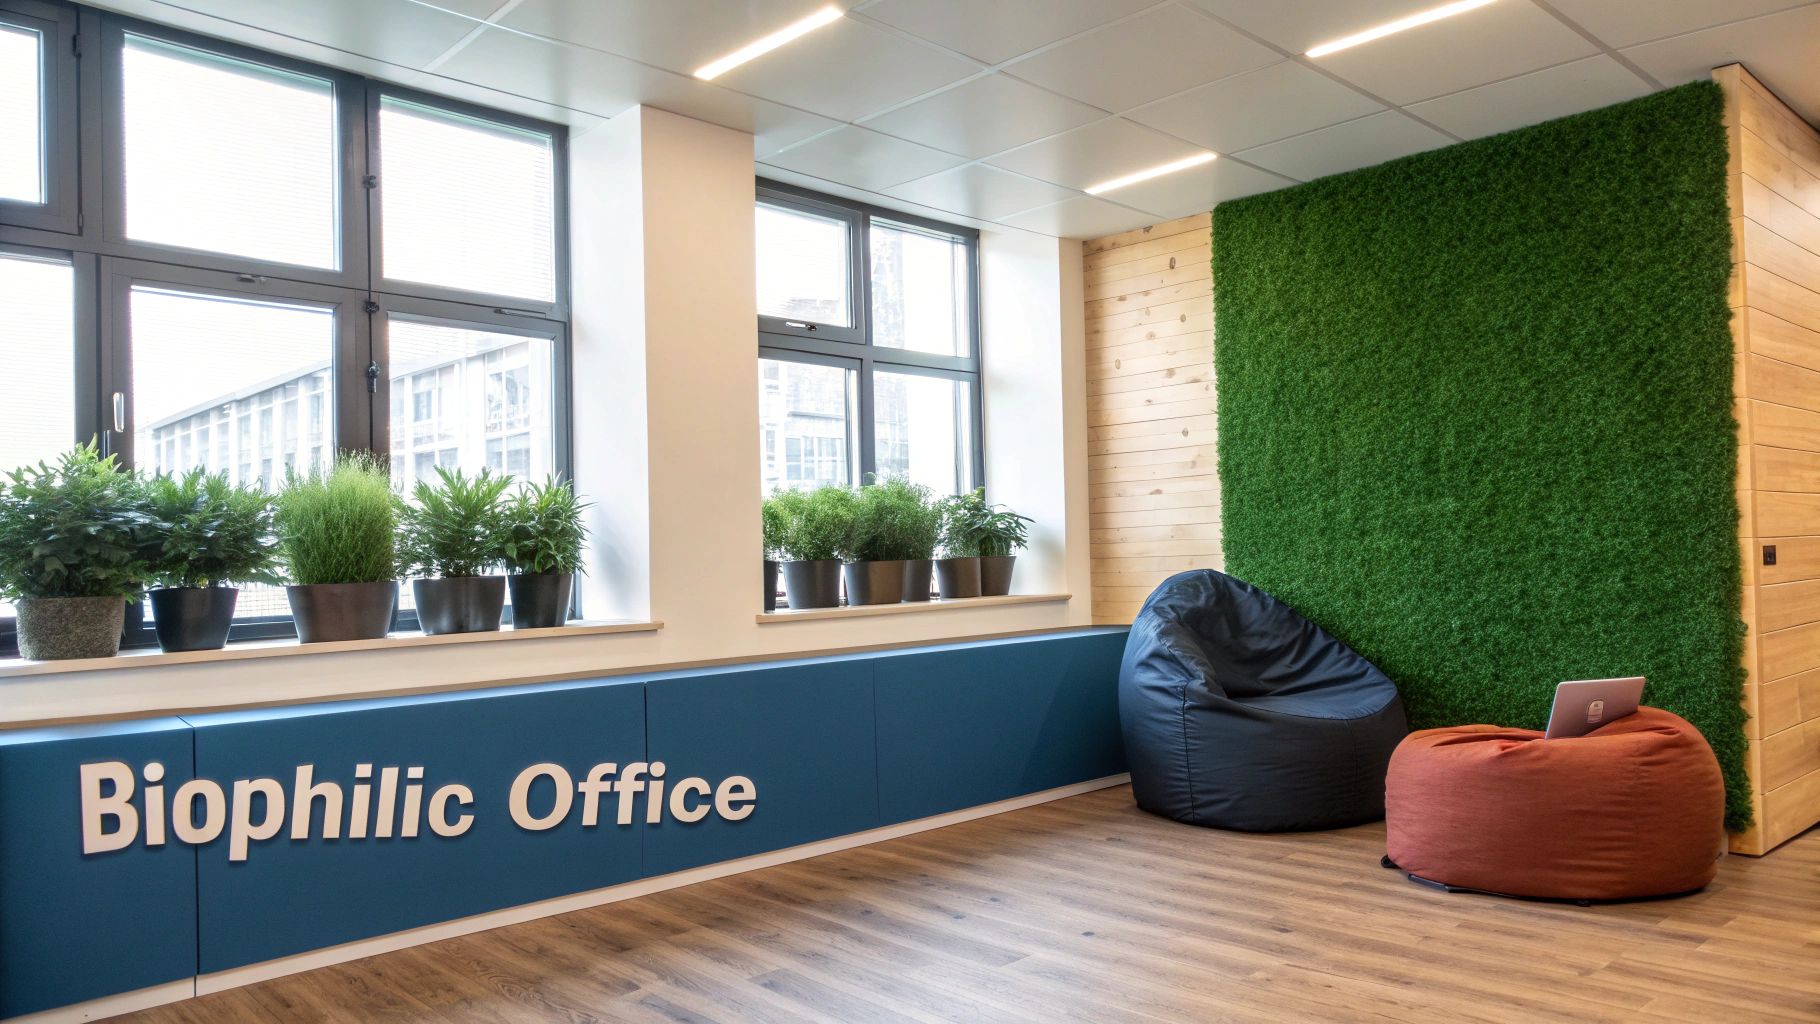
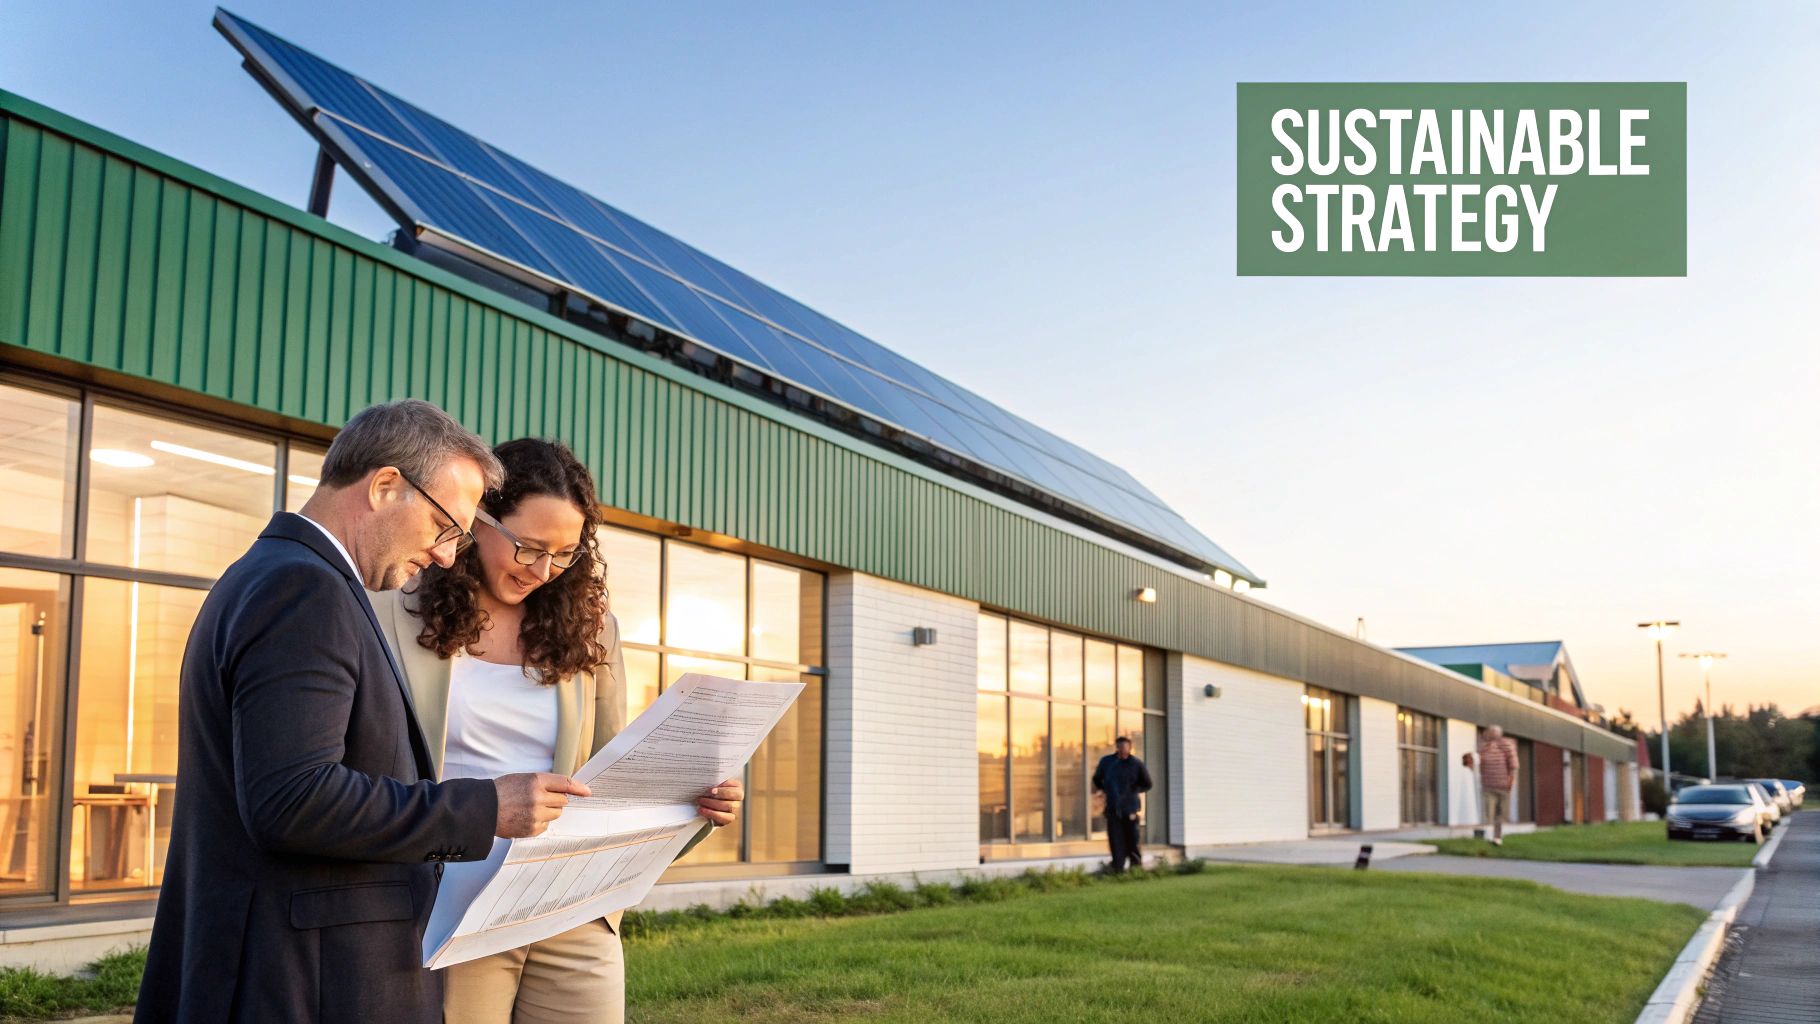
In commercial real estate, architecture and sustainable design has moved far beyond a niche interest—it’s now a core business strategy. It’s an approach that engineers buildings for peak performance, guaranteeing long-term financial health, better well-being for the people inside, and critical environmental responsibility.

Why Sustainable Design Is No Longer Optional

Man and woman discussing sustainable architecture plans next to a building with rooftop solar panels.

Think of a modern commercial building like a high-performance engine. Every single component, from the windows and insulation to the HVAC system and lighting, has to work together perfectly. When that "engine" is engineered with sustainability in mind, it simply runs better—it consumes less fuel (energy), produces fewer emissions, and needs less maintenance, which all adds up to a superior return on investment.

This isn’t just a nice analogy; it’s a necessary response to a pretty stark reality. The global buildings and construction sector is a massive driver of environmental damage. It’s responsible for a staggering 32 to 37 percent of both global energy demand and CO₂ emissions.

Just last year, operational emissions from buildings hit a record 9.8 gigatonnes, with another 2.9 gigatonnes coming from embodied carbon—that’s all the emissions from making and shipping the materials in the first place. This massive footprint puts a heavy weight on the shoulders of developers, owners, and architects. Ignoring it is no longer an option, not just for ethical reasons, but for smart financial ones, too.

A Fundamental Shift in Commercial Real Estate

The pressure to build sustainably is fundamentally reshaping the industry. Regulations are getting tougher, tenants are actively seeking healthy, green spaces, and investors are putting their money into assets that meet high Environmental, Social, and Governance (ESG) standards. This shift has officially moved sustainable design from the "nice-to-have" column squarely into the "must-have" category for any modern development.

A sustainably designed building isn't just an environmental statement; it's a future-proofed asset. It anticipates regulatory changes, attracts premium tenants, and lowers operational risk, making it a smarter, more resilient investment.

To get a sense of the bigger picture, it’s worth exploring strategies for decarbonizing cities and achieving net-zero goals.

The Immediate Benefits for Developers and Owners

When you bake architecture and sustainable design into a project from day one, the advantages are immediate and tangible. These principles do a lot more than just save on the power bill; they create real value across the board.

Here’s what you stand to gain:

  • Lower Operating Costs: An efficient building uses less energy and water, which directly slashes utility bills for the entire life of the asset.
  • Increased Asset Value: It’s a fact that green-certified buildings often command higher rents and sale prices, attracting top-tier corporate tenants who want the best.
  • Enhanced Occupant Well-being: Features like clean air and abundant natural light are proven to make people more productive, happier, and less likely to call in sick.

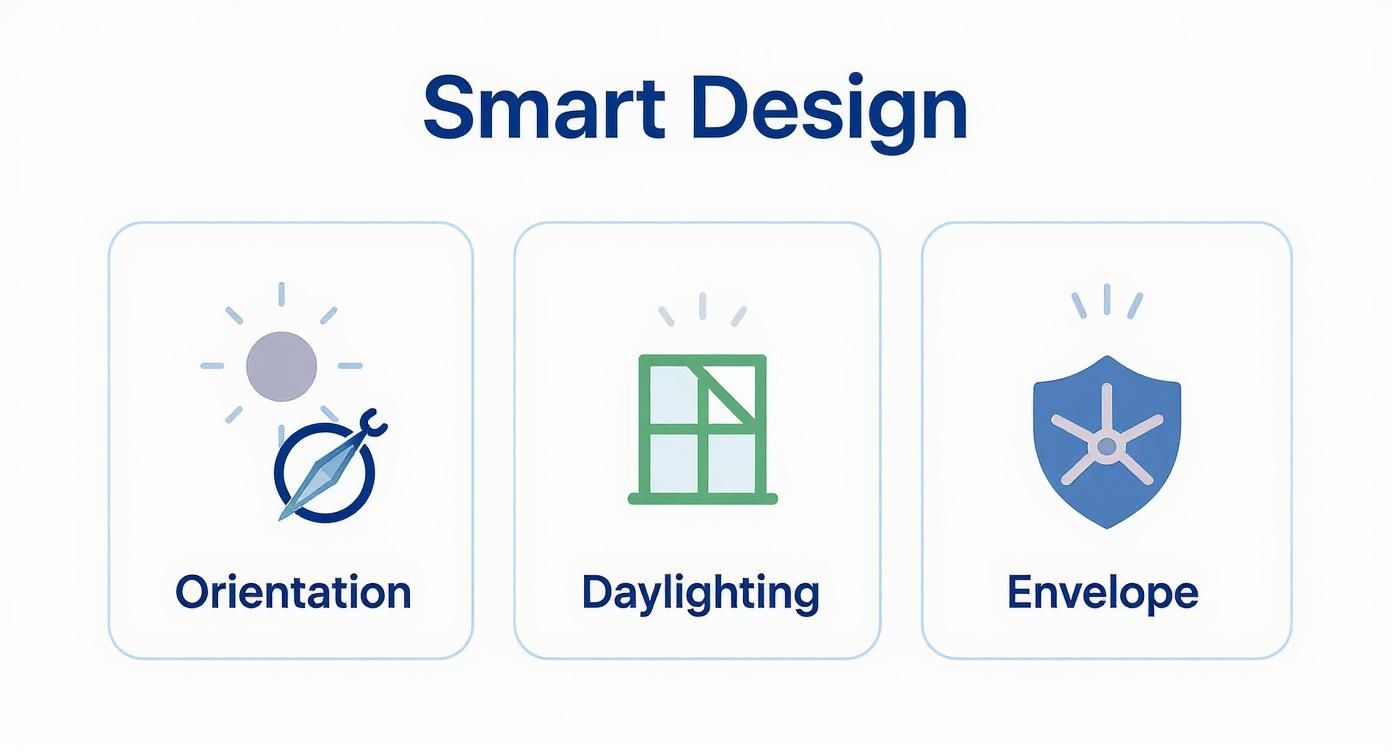
Smart Design Before You Build

The biggest wins in sustainable commercial building—and the most cost-effective ones—happen long before anyone breaks ground. Think of the choices made in the earliest design phase as a building's DNA. They set the code for its performance, efficiency, and operating costs for its entire life. This is where architecture and sustainable design delivers its greatest punch.

Trying to bolt "green" tech onto an inefficiently designed building later on is like trying to fix a gas-guzzler by upgrading the sound system. It's a costly patch that misses the point entirely. Instead, by focusing on passive design principles first, you’re baking efficiency right into the building's bones.

These aren't complicated gadgets. They are fundamental, time-tested architectural strategies that work with nature, not against it. By simply respecting the site, the sun, and the local climate from day one, you create a building that naturally needs less energy to run. That means more comfortable occupants and lower bills for owners.

Harnessing the Sun with Smart Orientation

The most powerful resource you have is completely free: the sun. A building’s orientation—the direction it faces—has a massive impact on how much energy it will need. It's the difference between a building that's constantly fighting the climate and one that uses it to its advantage.

In a place like South Carolina, the game is all about letting in useful daylight while blocking the intense solar heat, especially during our long, hot summers. This all comes down to strategic placement.

  • North-Facing Facades: These get gentle, indirect sunlight all day. It’s perfect for spaces needing consistent, glare-free light, like offices or design studios.
  • South-Facing Facades: In the Northern Hemisphere, south-facing windows catch low-angle sun in the winter, giving you free passive heating. In the summer, the sun is high overhead, so it's easily blocked with simple overhangs or awnings to prevent the building from cooking.
  • East and West Facades: These are the real challenge. They get blasted by low-angle sun in the morning (east) and late afternoon (west), causing a ton of heat gain and glare. Smart design either minimizes windows on these sides or uses tools like high-performance glazing and external shading to take the edge off.

Just by rotating a building on the site plan, you can cut its energy use by 20-30% before you’ve even picked out a single brick. It’s a zero-cost move with decades of payoff.

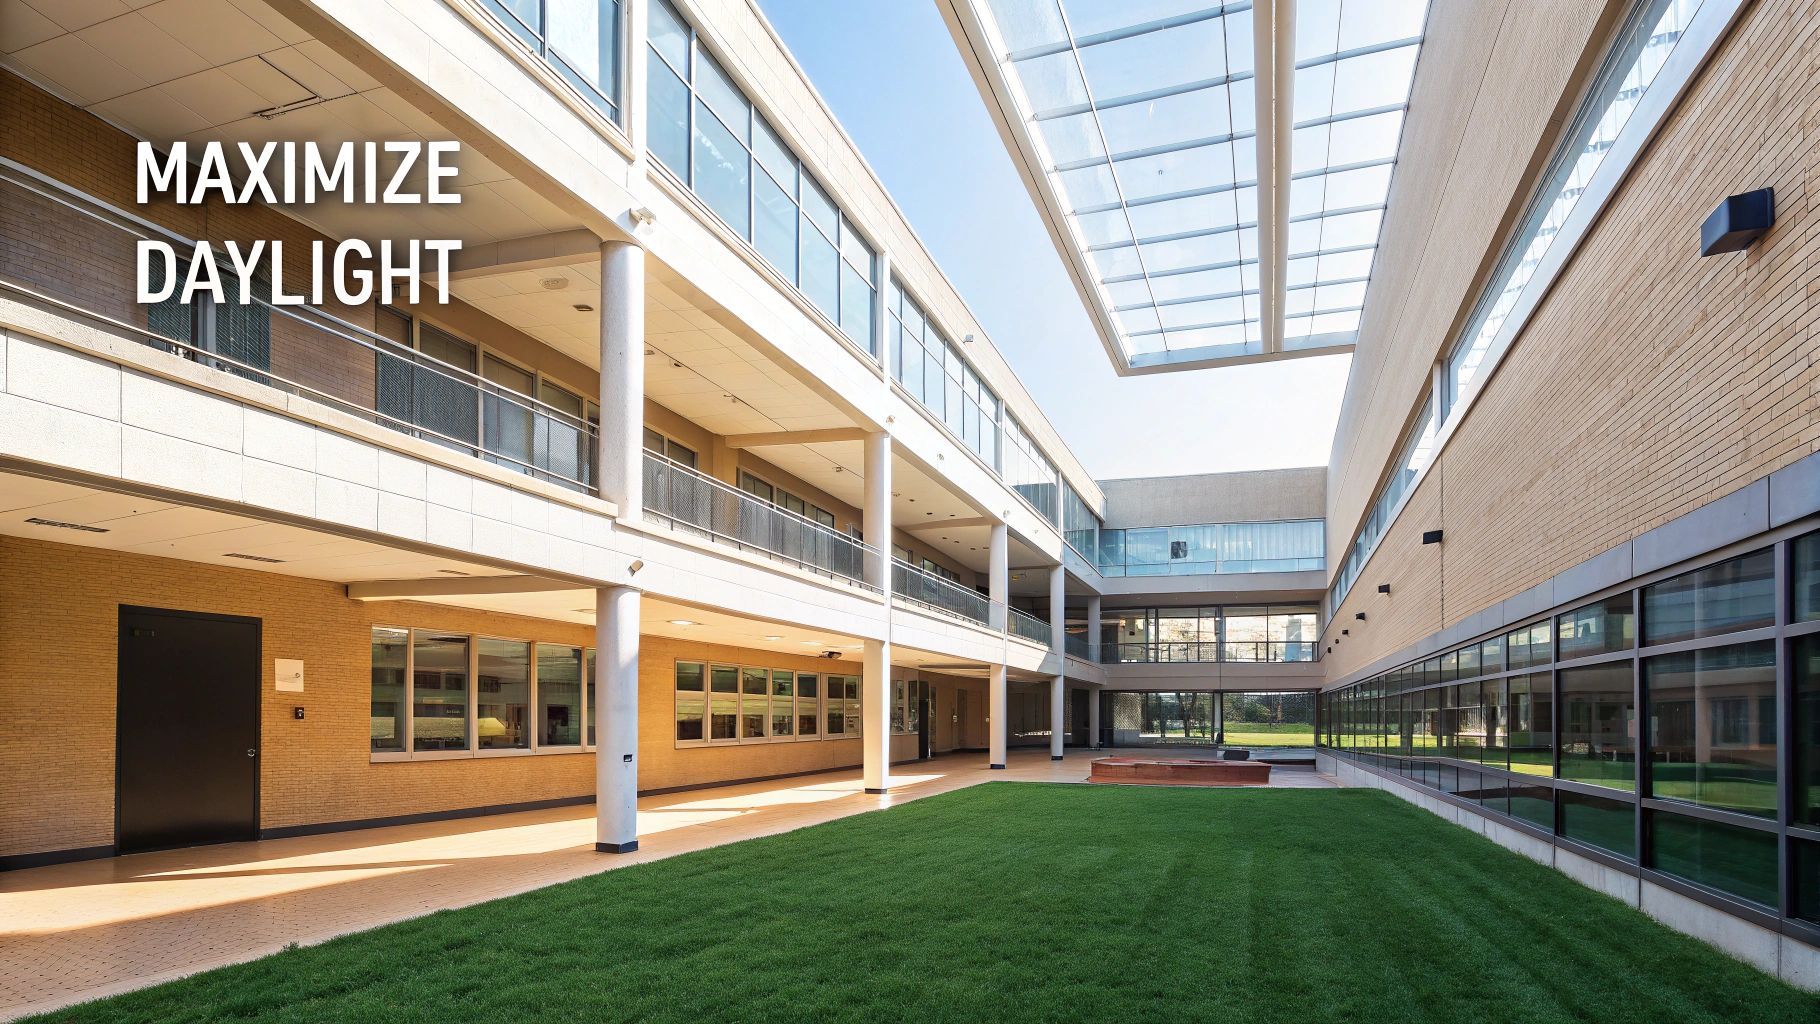
Daylighting for Healthier and More Productive Spaces

Letting in natural light does more than just lower the electricity bill. Daylighting is about creating spaces that feel alive, and it has a direct, measurable effect on the people inside.

Study after study shows that access to natural light boosts mood, reduces eye strain, and can make people up to 15% more productive. For a developer or landlord, that’s a powerful selling point. You're offering a premium space that tenants want because it supports their team's well-being. Good daylighting isn't just about more windows; it's about smart design—using light shelves to bounce sunlight deeper into rooms, choosing interior finishes that reflect light, and opening up floor plans so light can reach the building's core.

A well-daylit space does more than save energy; it connects people to the outdoors and the natural rhythm of the day. This creates a healthier, more engaging environment that sets a property apart from the competition.

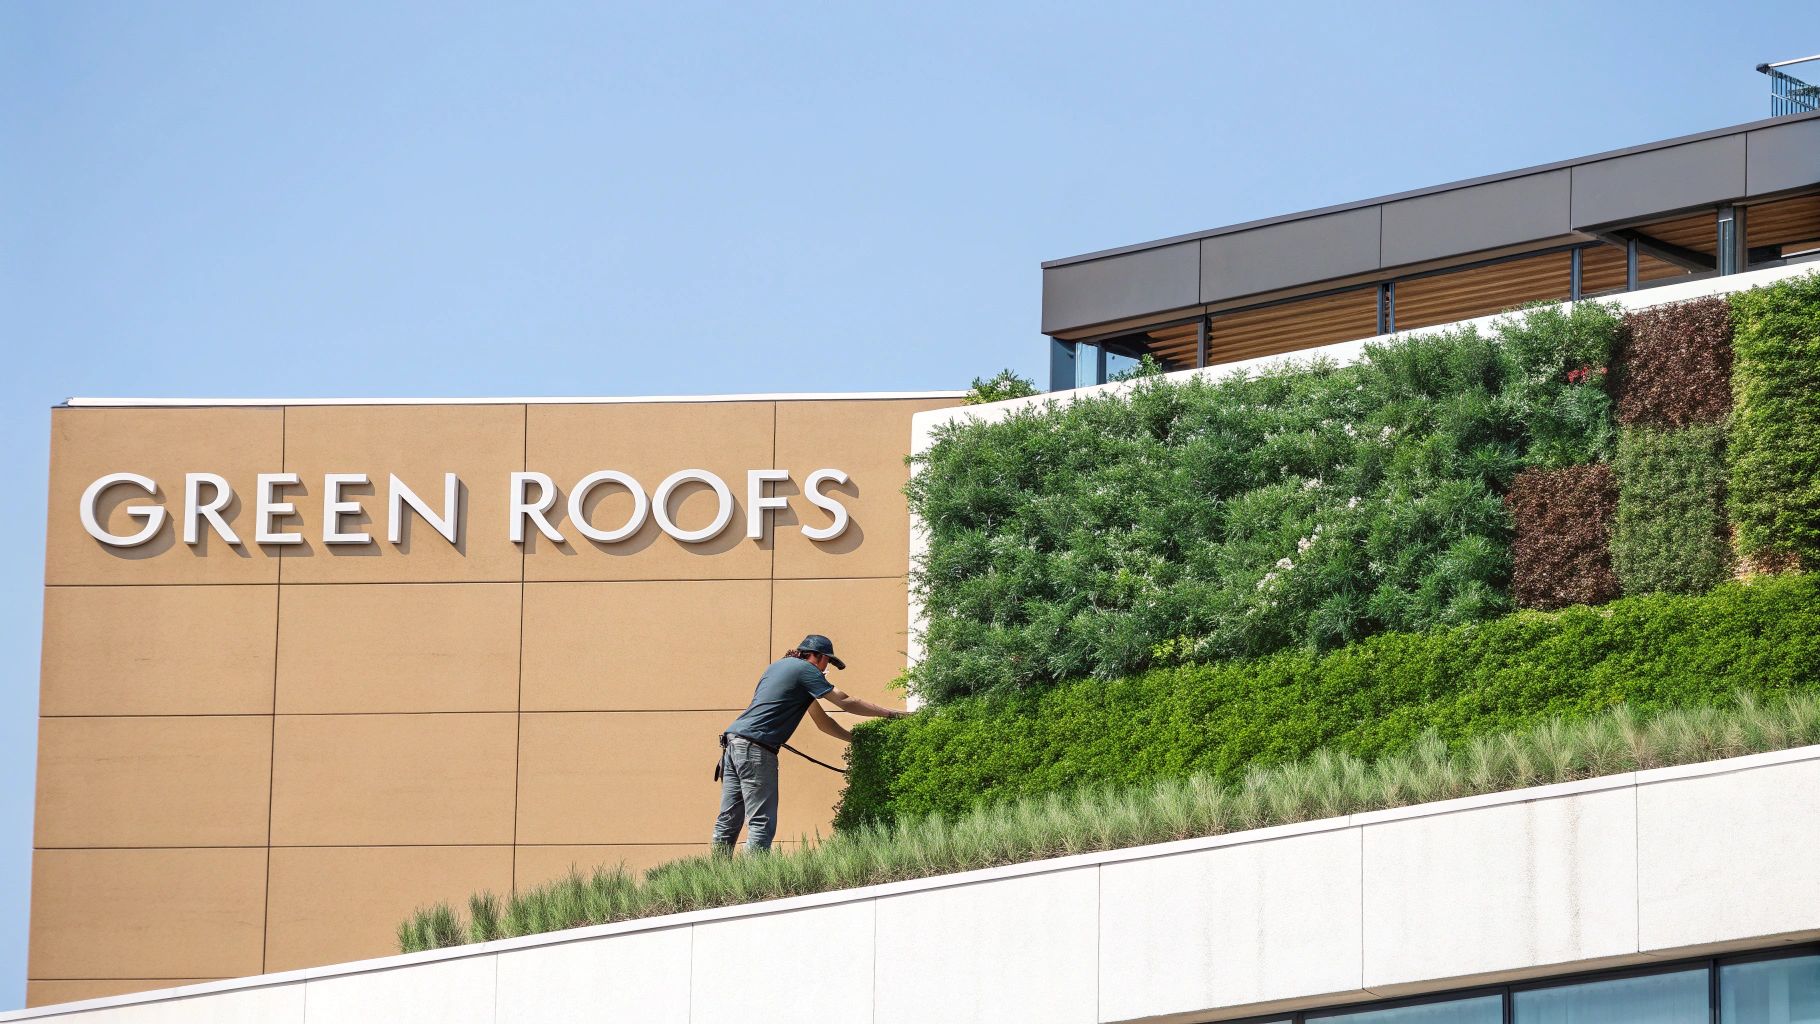
Defining the Building Envelope

If a building is a body, its building envelope is the skin. This is the complete physical barrier between the comfortable inside and the weather outside—the roof, walls, windows, doors, and foundation. A high-performance envelope is the single most important factor in achieving top-tier energy efficiency.

A leaky, poorly insulated envelope is like wearing a mesh jacket in a blizzard. You're constantly losing heat and burning energy just to stay comfortable. A truly robust envelope, on the other hand, is like a high-tech thermal shell. It maintains a stable interior temperature with very little help from the HVAC system.

Three things are absolutely critical for a great building envelope:

  1. Continuous Insulation: This is all about eliminating "thermal bridges"—spots like uninsulated steel studs where heat can zip right through the wall. Wrapping the exterior of the structure with a continuous layer of insulation creates an unbroken thermal blanket.
  2. High-Performance Windows: You can now get windows tuned for a specific climate. For South Carolina, that means specifying glass with a low Solar Heat Gain Coefficient (SHGC) to block unwanted summer sun while still letting in plenty of visible light.
  3. Airtight Construction: Tiny, uncontrolled air leaks can add up to huge energy losses. Meticulous air sealing around every joint, seam, and opening is crucial to keep your conditioned air in and the humid outside air out.

Investing in a superior envelope isn't an optional upgrade; it's fundamental. It dramatically shrinks the heating and cooling loads, which often means you can install smaller, less expensive HVAC systems from the start and enjoy lower energy bills for decades.

Choosing Materials That Reduce Your Carbon Footprint

While smart design strategies are fantastic for cutting down a building's operational carbon emissions—the energy it uses day-to-day—there's another huge piece of the puzzle: embodied carbon.

Think of it as the carbon "price tag" already attached to every single material showing up at your job site.

This price tag covers everything from mining raw materials and manufacturing products to shipping them to your project and even their eventual disposal. It’s the carbon debt your building racks up before the lights are even turned on. In some new buildings, embodied carbon can account for up to 75% of the total carbon footprint over the first decade.

Focusing on materials with a lower carbon price tag is a game-changer. It’s about making conscious choices to shrink your project’s immediate environmental impact, looking beyond just long-term efficiency to the building's entire lifecycle.

Understanding The Lifecycle of Building Materials

To really tackle embodied carbon, you have to look at the complete story of a material, from cradle to grave. This is what a lifecycle assessment (LCA) does. An LCA is a deep dive that measures environmental impacts at every stage, giving you the hard data needed to compare different options.

This is where material choices intersect with the foundational principles of smart, sustainable design.

An infographic illustrating smart design principles: orientation, daylighting, and building envelope, with descriptive icons.

These core strategies—orientation, daylighting, and the building envelope—are the perfect partners for thoughtful material selection. Together, they create a truly high-performance, sustainable building.

Low-Carbon Material Alternatives

The good news? The market for low-carbon building materials is expanding fast. These alternatives often perform just as well—if not better—than conventional options while slashing your project's environmental debt.

Here's where we're seeing some of the biggest wins:

  • Mass Timber: Products like cross-laminated timber (CLT) and glulam are engineered wood marvels that can replace steel and concrete for a building's main structure. Since trees absorb and store carbon as they grow, mass timber can have a neutral or even negative carbon footprint.
  • Recycled Steel: Making new steel is incredibly energy-intensive. But using recycled steel? That requires about 75% less energy. Simply specifying a high percentage of recycled content is one of the easiest and most effective moves you can make.
  • Locally Sourced Materials: This one is just common sense. Choosing materials extracted and made nearby—like stone from a South Carolina quarry—drastically cuts the transportation emissions baked into your project. Plus, it keeps money in the local economy.

Even the smaller details add up. For instance, selecting eco-friendly and sustainable blinds can contribute to both better energy efficiency and a lower overall carbon footprint.

The most sustainable choices are often rooted in simplicity and locality. By prioritizing materials that are renewable, recycled, or sourced nearby, you are directly investing in a healthier planet and a more resilient local supply chain.

When you're evaluating your options, comparing the embodied carbon of different materials can really put things into perspective.

Comparing Common Building Materials by Embodied Carbon

This table gives a quick snapshot of how swapping out just a few key materials can make a significant difference in your project's upfront carbon emissions.

Material Conventional Option Sustainable Alternative Key Benefit of Alternative
Structure Concrete, Virgin Steel Mass Timber (CLT, Glulam) Carbon sequestering; stores carbon instead of emitting it.
Insulation Polystyrene Foam (XPS) Cellulose, Cork, Wood Fiber Made from recycled/renewable sources; lower energy to produce.
Cladding Aluminum Composite Panel Reclaimed Brick, Local Stone Drastically reduces manufacturing and transportation emissions.
Flooring Vinyl Composition Tile (VCT) Bamboo, Polished Concrete Renewable resource (bamboo) or uses the existing slab.

Looking at these comparisons makes it clear that sustainable alternatives aren't just hypotheticals—they are practical, available, and powerful tools for reducing embodied carbon.

Using EPDs for Transparent Choices

So, how do you actually compare the carbon footprint of two different products with confidence? The answer is the Environmental Product Declaration (EPD).

Think of an EPD as a nutrition label for a building material. It's a standardized, third-party verified report that clearly lays out a product's environmental impact across its entire lifecycle.

EPDs give you transparent data on factors like global warming potential (the official term for embodied carbon), allowing for a true apples-to-apples comparison. By asking manufacturers for EPDs and specifying products with lower embodied carbon, you can be sure your choices are backed by solid, verifiable data.

This commitment to material transparency is a cornerstone of modern sustainable design. It empowers developers and owners to build not just for today, but for a far more resilient and responsible future.

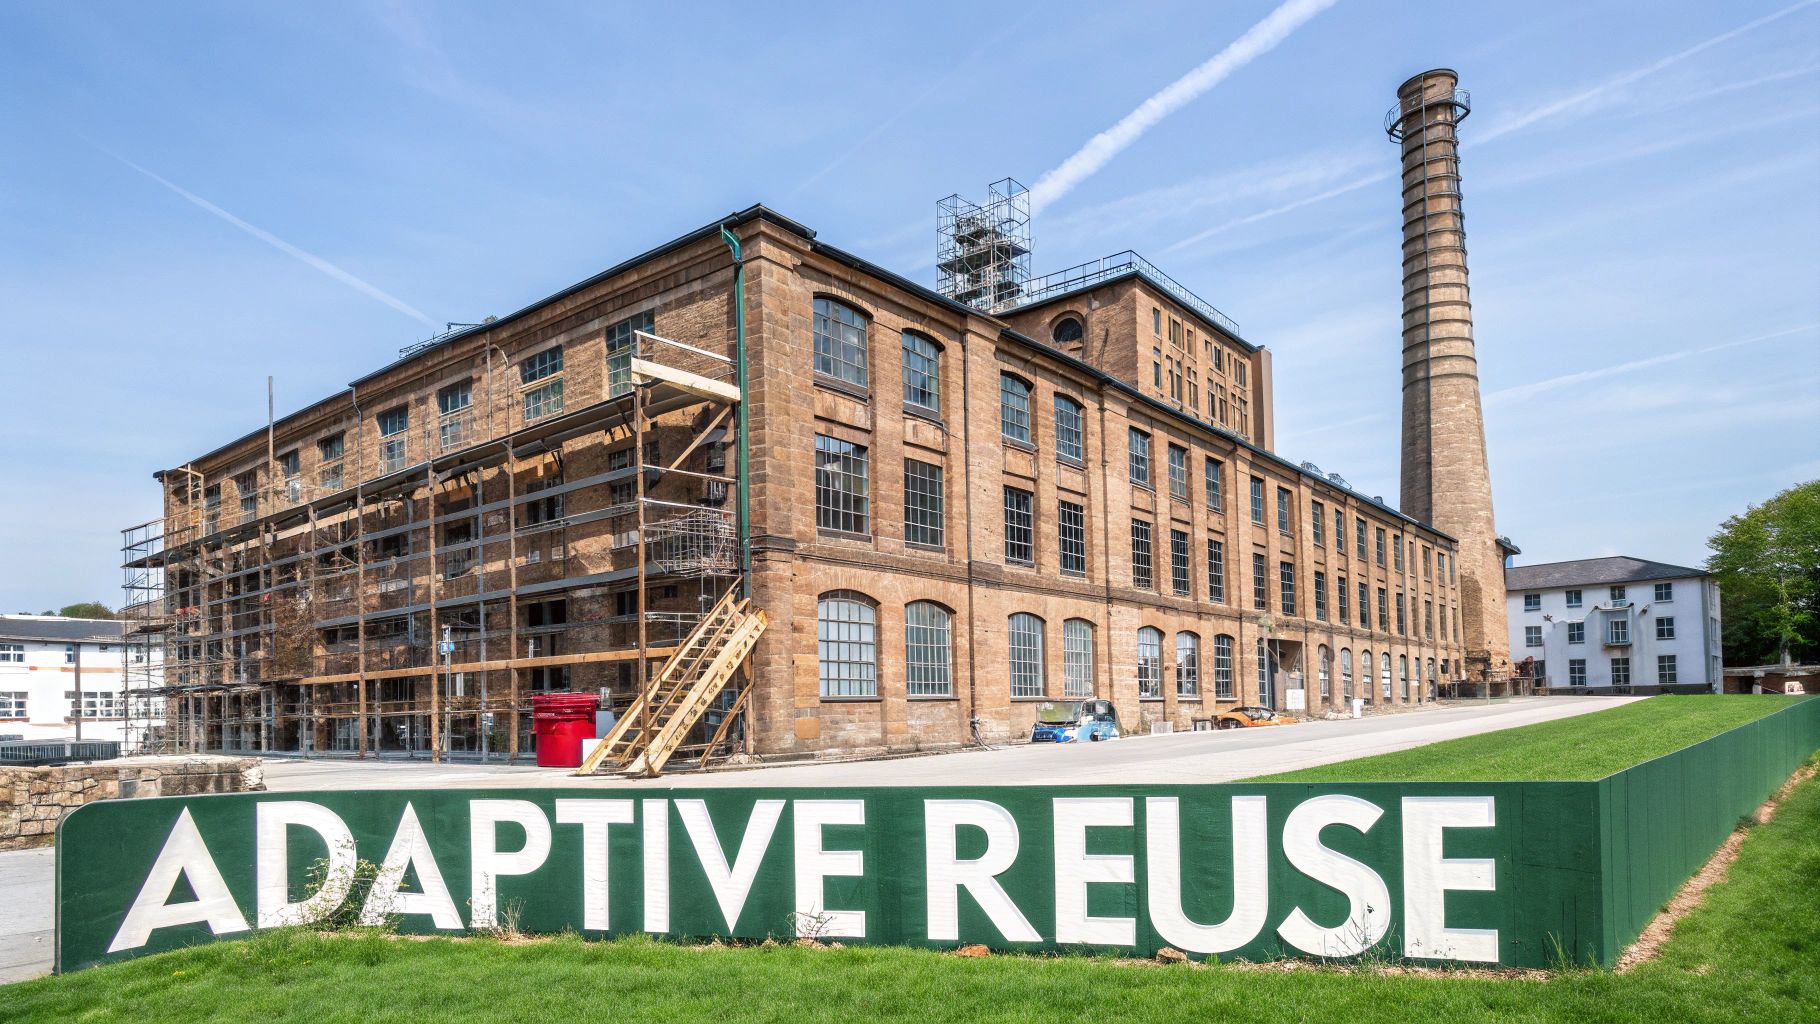
Unlocking the Hidden Value in Existing Buildings

An open-plan office space with exposed brick, glass roof, greenery, and people working, highlighting adaptive reuse.

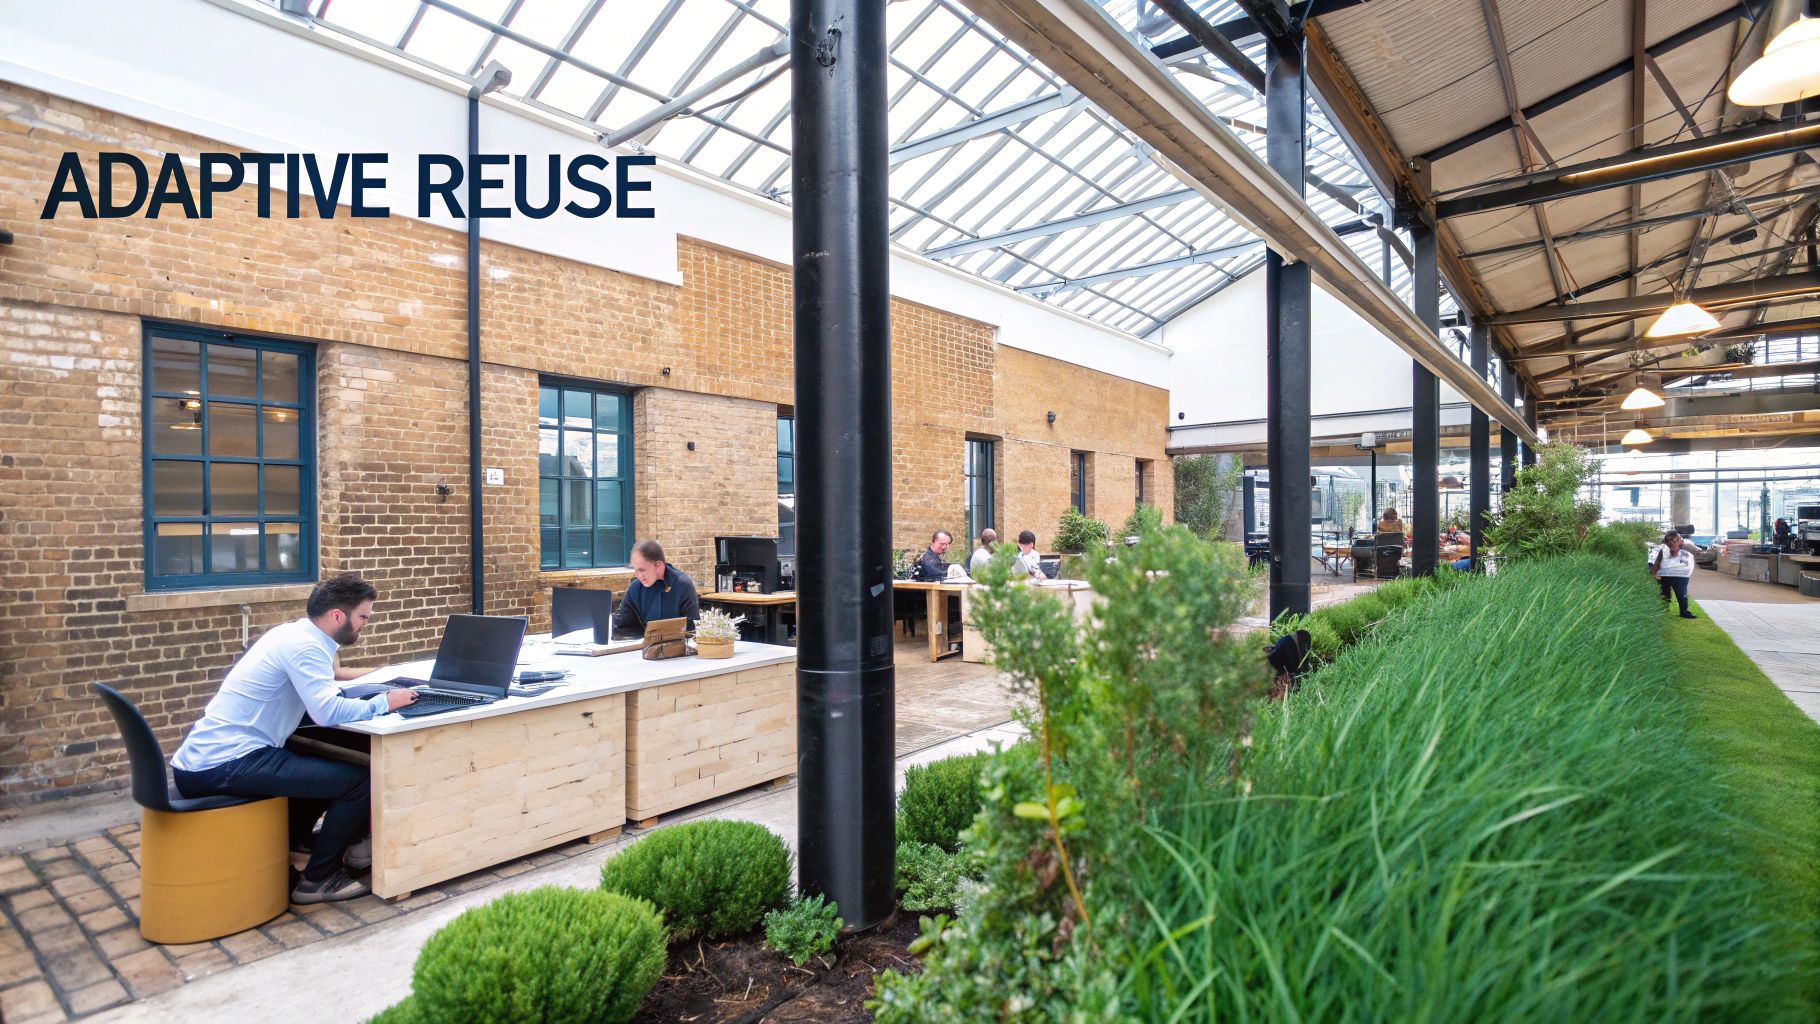
While we often focus on low-carbon materials for new projects, one of the biggest moves we can make in architecture and sustainable design is to look at the buildings we already have. There’s a well-known saying in the industry: "the greenest building is the one that’s already built." And it’s absolutely true. This idea gets to the heart of adaptive reuse—the art of breathing new life into old structures by repurposing them for today's needs.

Think of it this way: every existing building is a massive vault of embodied carbon. All the energy that went into manufacturing its steel, concrete, and bricks is locked right into the structure. When we tear a building down, we not only waste those materials but also release a huge amount of carbon in the demolition and hauling process. Adaptive reuse lets us sidestep that entire carbon hit.

But it's about more than just avoiding waste. This approach preserves the character and history woven into a community's fabric. That forgotten textile mill can become a bustling hub with apartments and shops. A century-old bank can be transformed into a sleek, modern office. You get all the benefits of a new space without sacrificing the architectural soul that gives a place its identity.

Making Adaptive Reuse Work in the Real World

Turning an old building into a modern, high-performing asset is a bit like solving a complex puzzle. It's a different game than starting from scratch on an empty lot, and it demands a thoughtful, strategic approach to get it right.

A successful adaptive reuse project usually follows a few key steps:

  1. Digging into the Details: It all starts with a deep-dive assessment. We have to understand the building's bones—its structural integrity, the state of its electrical and plumbing systems, and whether there are any hazardous materials like asbestos to deal with.
  2. Smart Upgrades, Not Just Repairs: The goal isn't to just patch things up. It’s about a strategic modernization. This means weaving in new, energy-efficient systems, beefing up the insulation to tighten the building envelope, and reimagining the interior layout to fit how people live and work now.
  3. Wrangling the Rules: Getting an older building to meet modern codes for things like accessibility, fire safety, and energy use is often the biggest hurdle. This is where a deep knowledge of both historic preservation rules and current regulations becomes critical.

Navigating these challenges is precisely where an experienced architecture firm proves its worth, finding creative ways to turn potential deal-breakers into design opportunities.

The Financial Incentives That Make Preservation Pay Off

Beyond the obvious environmental wins, adaptive reuse often makes incredible financial sense. This is largely thanks to some powerful incentives designed to make saving old buildings the smart business move. For developers, these programs can completely change the math on a project's profitability.

Adaptive reuse is where sustainability meets smart business. By leveraging historic tax credits and other incentives, developers can turn underutilized properties into highly valuable, sustainable assets with a unique market identity.

Federal and State Historic Tax Credits are the real game-changers here. Together, these programs can offer a tax credit of up to 40% of the project's qualified rehabilitation costs for income-producing historic properties. We’re talking about a direct, dollar-for-dollar reduction in what you owe in taxes, which can dramatically boost a project’s ROI.

  • Federal Historic Tax Credit: Provides a 20% income tax credit.
  • South Carolina Historic Tax Credit: Offers an additional 10-25% state income tax credit, which can be stacked on top of the federal credit.

These aren't just minor perks; they are fundamental to building a strong financial case for preservation. They make it clear that investing in our existing building stock is a winning strategy that pays dividends—environmentally, socially, and on the bottom line. For developers who know how to tap into this potential, our old buildings represent some of the smartest opportunities on the market today.

Building the Business Case for Green Construction

For years, there’s been a myth floating around that sustainable construction is a noble but costly affair, something best reserved for passion projects with deep pockets. Let’s put that idea to rest, right here and now.

In today's market, choosing architecture and sustainable design isn’t about sacrificing profit for the planet. It’s about making a smarter, more lucrative financial decision. The numbers don't just support this—they prove that green construction is a powerful engine for profitability.

The most common objection I hear is about higher upfront costs. Yes, high-performance insulation, better windows, or an advanced HVAC system might require a greater initial investment. But focusing only on that is incredibly shortsighted. It's like comparing a cheap gas-guzzler to a high-efficiency hybrid based only on the sticker price, completely ignoring what you’ll save on fuel over the car's lifetime.

A sustainably designed building is an operational powerhouse. That efficiency translates directly into substantial, long-term savings that start piling up the day you open the doors.

From Upfront Costs to Long-Term Gains

The return on investment (ROI) for sustainable design isn't some abstract concept; it's a measurable financial reality. And the biggest driver of that ROI? Drastically lower operational expenses.

An energy-efficient building slashes utility bills year after year, creating a predictable and significant boost to the property's net operating income (NOI). On top of that, high-quality, durable materials and systems mean less frequent maintenance and replacement, which cuts down even further on long-term spending. These savings compound over the life of the asset, often paying back that initial "green premium" in just a few years.

The conversation around sustainable building costs has to shift. Instead of asking "how much more will it cost?" we need to be asking, "how much more will it earn?" Lower operational expenses, higher rents, and increased asset value create a financial case that simply outperforms conventional construction.

This financial upside is becoming impossible for the market to ignore. The global green building market is projected to hit a staggering $1.37 trillion by 2034. This explosion is fueled by real, tangible benefits—including 16.9 percent reduced operational costs for green buildings compared to their conventional counterparts. With numbers like that, the financial argument is undeniable. You can find more green building statistics and insights that back this up.

Attracting Premium Tenants and Higher Market Value

Beyond just saving money on operations, sustainable buildings hold a distinct advantage in the open market. They're magnets for high-value tenants and consistently command premium prices.

Think about it from the tenant's perspective. Corporate clients are increasingly driven by their own Environmental, Social, and Governance (ESG) goals. They are actively hunting for office spaces that reflect their values and are absolutely willing to pay more for buildings that offer healthier environments and lower carbon footprints. For building owners, this demand translates directly into stronger financial metrics.

Here’s a look at how green buildings consistently outperform the competition:

  • Higher Rental Rates: Study after study shows that green-certified buildings can command rental rates that are up to 20% higher than comparable non-certified properties.
  • Lower Vacancy Rates: These highly desirable buildings attract and retain tenants more effectively, which means more stable occupancy and reliable cash flow for you.
  • Greater Resale Value: As market awareness and regulations continue to grow, energy-efficient and sustainable properties are seen as less risky, future-proofed assets. This perception results in significantly higher sale prices down the road.

At the end of the day, ESG-focused investors are actively seeking out these exact kinds of properties. A building with strong sustainability credentials isn't just a well-designed structure anymore—it's a top-tier financial asset that perfectly aligns with modern investment priorities. By embracing sustainable design, developers and owners aren't just building better buildings; they're building a more profitable and resilient portfolio.

Bringing Sustainable Design Home to South Carolina

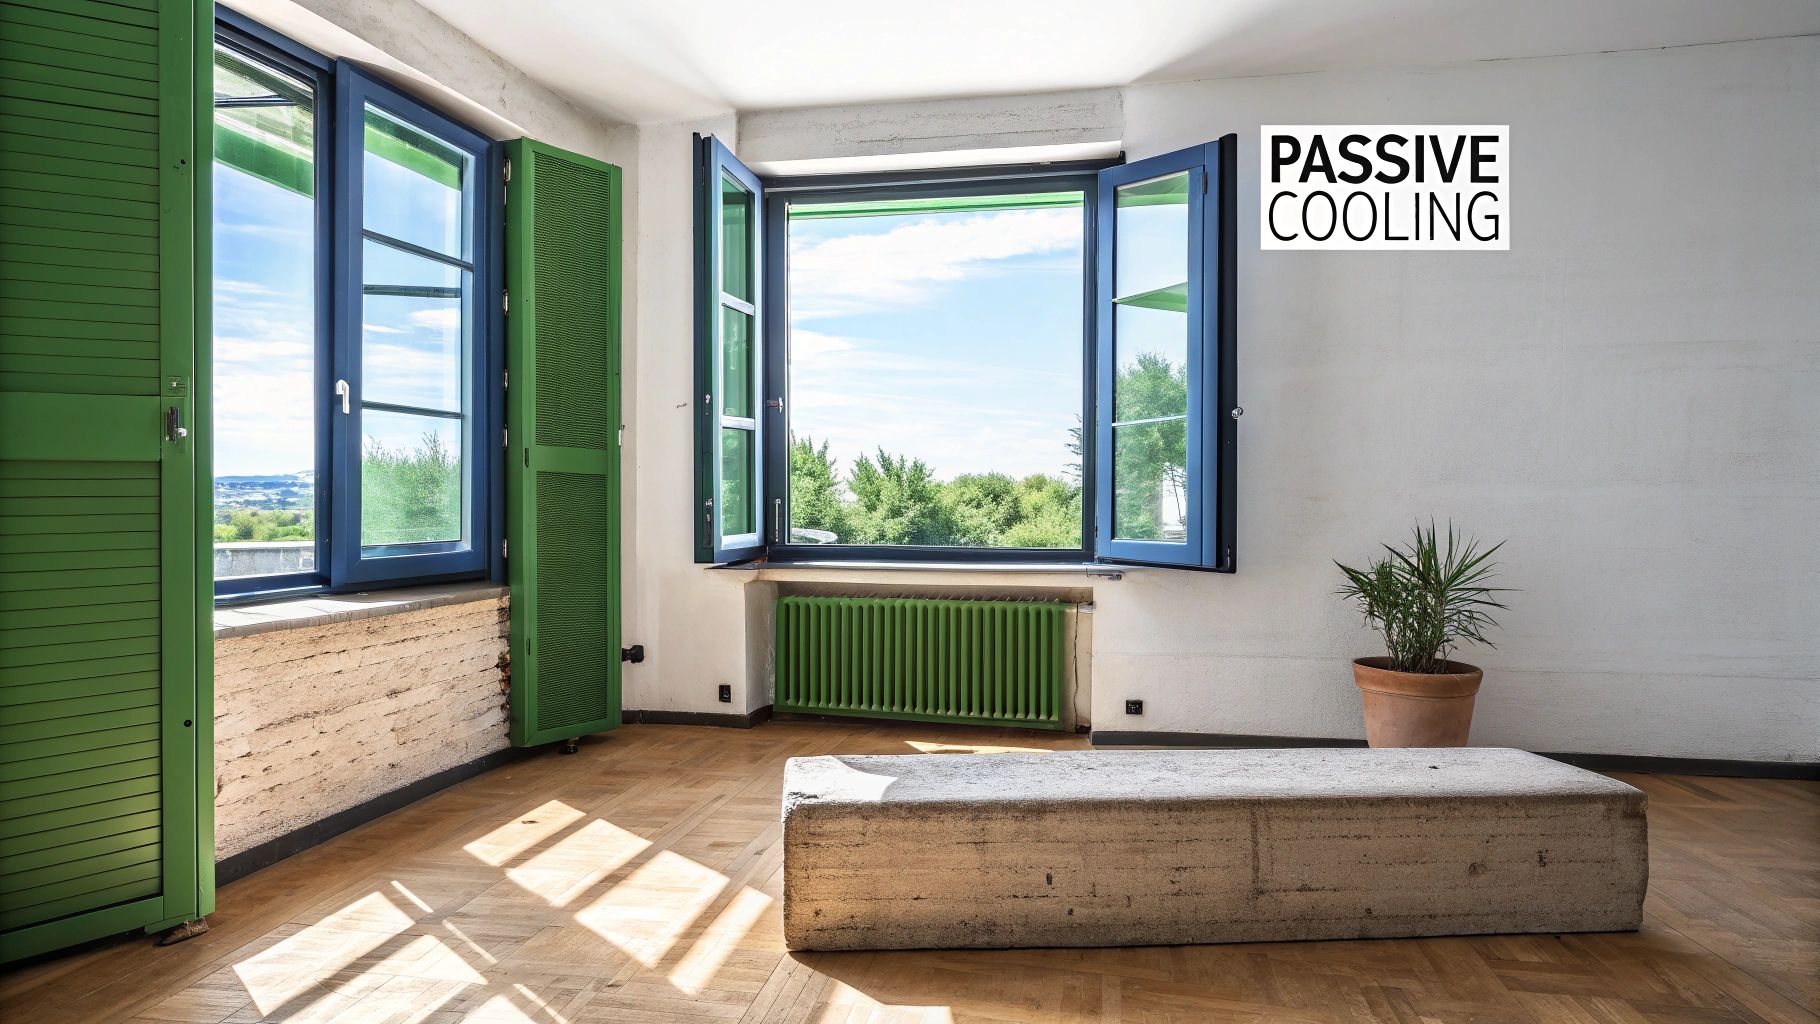
Global principles of sustainable architecture are great on paper, but they only really come to life when you put them to work in a specific place. For anyone building in South Carolina, that means getting real about our biggest local challenge: the relentless heat and humidity. The whole point is to design buildings that work with our climate, not in a constant, energy-guzzling battle against it.

This shift in thinking has to happen right at the start of a project. Instead of just defaulting to a bigger, more powerful air conditioning system, the smarter approach is to lean on passive strategies first. We're talking about simple but powerful moves like orienting a building to avoid the brutal afternoon sun, using deep overhangs to shield windows in the summer, and designing for natural airflow to cut down on how much you have to rely on mechanical cooling.

These aren't just academic ideas. They are tried-and-true methods for making spaces that are genuinely comfortable and efficient, even when the heat index is off the charts.

What's Working Right Here in SC

You don't have to look far to see this in action. South Carolina has a growing roster of commercial projects that prove sustainable design isn't just possible here—it’s a recipe for success. Whether it's the clever adaptive reuse of historic buildings in Charleston or new LEED-certified offices in Columbia and Greenville, these projects offer a practical playbook.

They showcase a few key strategies that really move the needle:

  • Airtight Building Envelopes: This is all about top-notch insulation and sealing up every crack and crevice to keep the cool, conditioned air in and the sticky, humid air out.
  • Cool Roofs: Simply choosing light-colored, reflective roofing materials can bounce a huge amount of solar heat back into the atmosphere, dramatically lowering the building's cooling demand.
  • Smart Landscaping: Using native, drought-tolerant plants doesn't just look good; it slashes irrigation costs and helps support the local ecosystem.

Lessons from Global Innovators

While our focus is local, it never hurts to see what's happening on the world stage. Some truly incredible projects show just how far we can push the envelope. Take Stockholm Wood City in Sweden, set to be the world's largest urban district built from mass timber. Or The Edge in Amsterdam, which earned a near-perfect BREEAM sustainability score of 98.36 out of 100 and is often called the smartest, greenest building on the planet. These examples aren't just inspiring; they prove what’s possible when ambition meets innovation. You can dig into more of these pioneering sustainable buildings and their features to see what the future holds.

Tapping into Local and State Incentives

Let's talk money. Building sustainably in South Carolina isn't just an environmental win; it's a smart financial move, thanks to some valuable incentives. Developers who know where to look can find programs that seriously improve a project's bottom line.

By combining climate-savvy design with the right local and state incentives, developers can build high-performing assets that are good for the planet and great for their portfolio right here in the South Carolina market.

The opportunities are out there. Utility providers like Duke Energy and Dominion Energy offer rebates for everything from high-efficiency lighting and HVAC systems to other major building upgrades. On top of that, the South Carolina State Energy Office frequently has grants and low-interest loans available for projects that integrate renewable energy or achieve major efficiency gains. When you add it all up, these programs make the business case for going green undeniable, giving sustainable design a real competitive edge.

Frequently Asked Questions

What’s the single biggest thing I can do for sustainable design?

If you have to pick just one area to focus on, put your energy into the building envelope. Think of it as the building's skin—its roof, walls, windows, and foundation. A high-performance envelope with top-notch insulation, airtight sealing, and high-efficiency windows is the most powerful move you can make.

This isn't an active, energy-consuming system; it's a passive strategy that works silently, 24/7, for the entire life of the building. It dramatically cuts the energy needed for heating and cooling, which means you can often install smaller, less expensive HVAC systems. The payoff, both for the planet and your wallet, starts immediately.

Are green building certifications like LEED really worth the hassle and cost?

For most commercial developers and owners, the answer is a firm yes. Pursuing a certification like LEED (Leadership in Energy and Environmental Design) isn't just about getting a plaque for the lobby. It’s a rigorous, third-party stamp of approval that tells the world your building is efficient, healthy, and built to last.

This kind of verification makes your property far more attractive to top-tier tenants who increasingly demand sustainable spaces. It can also lead to higher rents and faster lease-ups. Beyond marketing, the certification process itself provides a clear, proven framework for making smart design choices and often opens doors to green financing and tax incentives that can offset the initial investment.

A green building certification is more than a plaque on the wall; it’s a trusted signal to the market that your property is a high-quality, future-focused asset.

How can I make my existing building more sustainable without a massive renovation?

You don't have to gut the building to make a real difference. The smartest first step is a professional commercial energy audit to pinpoint exactly where you're losing the most energy and money. It takes the guesswork out of the equation.

Based on the audit, you can target a few high-impact upgrades:

  • Swap out old lighting for LEDs. This is often the fastest, easiest way to slash your electricity bill.
  • Install smart thermostats and modern building controls to optimize when and where you use energy.
  • Add insulation where it’s easiest to access, like in the attic or roof assembly.
  • Replace old fixtures with low-flow toilets and faucets to cut water usage with minimal investment.

Even just one or two of these focused improvements can deliver significant savings on your utility bills and make the building a much more comfortable place for everyone inside.


Ready to unlock the value in your next commercial project through smart, sustainable design? Contact Sherer Architects, LLC to align your vision with enduring, profitable, and responsible architecture. Learn more at https://shererarch.com.

Categories
Uncategorized

Renovation vs Remodeling What Developers Need to Know

When you get down to it, the real difference between renovation and remodeling comes down to one thing: intent. A renovation is all about restoring or updating a space that’s already there. A remodeling project, on the other hand, transforms it by changing its very structure or function. Knowing which path you’re on from the start is crucial, as it dictates whether you're simply refreshing a property or completely altering its DNA.

Defining Renovation and Remodeling

Split image: green house exterior with lawn and interior room with blueprint, text 'CORE DIFFERENCES'.

While most people use these terms interchangeably, in the world of commercial development, they carry serious legal and financial weight. Getting this distinction right is the first step toward creating an accurate project scope, building a realistic budget, and successfully navigating the maze of building codes and permits.

Think of a renovation as bringing a space back to a good state of repair. It’s essentially a major cosmetic upgrade—you’re improving the look and feel of a space without messing with its core design. These projects are all about refreshing and restoring what you already have.

Remodeling, however, is about fundamentally changing a building’s character or purpose. This nearly always means altering the structure itself, whether that’s moving walls, combining two offices into one, or even raising a ceiling. You’re not just updating the space; you’re creating something entirely new from the old framework.

At a Glance Comparing Renovation and Remodeling

This "refresh vs. transform" dynamic shows up in smaller-scale projects, too. For example, understanding the distinctions between hardwood floor refinishing and resurfacing is a perfect micro-level illustration. A renovation is like refinishing—you're working with the existing material—while a remodel often requires a much bigger overhaul.

Here’s the simplest way I explain it to clients: Renovation means 'to make new again,' while remodeling means 'to change the model.' One restores the past, and the other redefines the future of the space.

For a quick reference, here's a breakdown of how these concepts stack up in practice. This table helps clarify the key differences developers need to consider when planning their next move.

Factor Renovation Remodeling
Primary Goal Restore, repair, or update a space. Transform the layout, structure, or purpose.
Structural Impact Minimal to none; works within the existing layout. Significant; often involves moving walls or altering systems.
Typical Cost Lower upfront cost, mostly cosmetic. Higher upfront cost due to complexity.
Project Examples Painting, installing new fixtures, replacing flooring. Combining rooms, adding a bathroom, reconfiguring an office.

Ultimately, this high-level view is a great starting point for weighing your options and aligning your project's scope with its intended outcome.

Understanding the Scope of Each Approach

To really get to the heart of renovation versus remodeling, you have to look past the dictionary definitions and see what they mean on a job site. The difference isn't just about semantics; it dictates everything from the first sketch to the final certificate of occupancy. Getting this right from the start is critical, especially in today's market.

The global home renovation market was valued at an eye-watering USD 1,994.02 billion in 2024 and is expected to climb to USD 2,659.60 billion by 2032. That kind of growth underscores why developers and owners need to be crystal clear on whether their project is a straightforward renovation or a much more involved remodel. You can dig into the numbers and what’s driving them in the full report from Fortune Business Insights. Knowing this landscape helps you make smarter, more strategic decisions.

What Renovation Looks Like in Practice

Renovation is all about bringing something back to good condition. Think restoration, cosmetic fixes, and material upgrades. The building's bones—its structure and its purpose—stay exactly the same. You're focused on refreshing what's already there, giving it a new lease on life without changing its fundamental layout.

Some classic commercial renovation jobs include:

  • Restoring a historic facade, which might involve repairing old brickwork and applying a fresh coat of paint to match its original look.
  • Swapping out old, drafty windows for new, energy-efficient units that fit into the existing openings.
  • Upgrading all the lighting in a building to modern LEDs to cut down on energy bills and improve the atmosphere.
  • Refinishing the original hardwood floors or ripping out worn-down carpet in an office lobby.

Notice a pattern? The blueprint doesn't change. These are all surface-level jobs intended to boost a property's appearance, functionality, or efficiency within its existing footprint.

The key distinction for developers is this: Renovation refreshes a space, while remodeling redefines its purpose. One polishes what exists; the other creates something entirely new.

The Transformative Nature of Remodeling

Remodeling, on the other hand, is about fundamentally changing a space’s structure or function. It's a true transformation that redefines how a building is used. You go down this path when the current layout just isn't working anymore for the owner or the market. It’s a far more complex undertaking that demands serious planning, engineering, and construction expertise.

Real-world remodeling projects are where things get interesting. We're talking about major changes like:

  • Carving up a single-tenant office floor into a buzzing multi-suite co-working space, which means putting up new walls and running new plumbing and electrical.
  • Knocking down load-bearing walls to create a wide-open retail floor, a move that requires a structural engineer to ensure the building stays standing.
  • Completely reconfiguring a building's interior, like turning an old warehouse into residential lofts. This is a classic example of adaptive reuse.
  • Adding a brand-new bathroom or kitchen to a commercial space that never had one before.

These projects do more than just update the look; they reinvent the property's design and what it can be used for. They aren't just cosmetic fixes—they are strategic moves designed to unlock new value. This inherent complexity is what truly separates a remodel from a simple renovation.

Comparing the Critical Factors for Developers

For any developer, deciding between a renovation and a remodel comes down to a hard-nosed look at a few key factors. While both can boost a property's value, they take you down completely different paths when it comes to scope, cost, schedule, and red tape. Getting these distinctions right is everything if you want to hit your financial and strategic goals.

This isn't just about aesthetics; it's about market reality. The remodeling sector has exploded, now making up over 56% of all residential building construction companies. That's a huge jump from its 38-39% share during the mid-2000s housing boom, showing a massive shift in how property owners are thinking about asset improvement. You can dig into this industry transformation in the full analysis from the National Association of Home Builders.

Scope and Complexity

The most obvious difference between a renovation and a remodel is the sheer scope of the project. A renovation works within the building's existing footprint, focusing on updates and surface-level improvements. It’s a fairly contained process with a predictable outcome.

A remodel, on the other hand, is a whole different beast. It changes a building's structure or function, which almost always creates a domino effect on other systems.

  • Renovation Scope: Think of projects like painting, swapping out fixtures, or putting in new floors. These are self-contained jobs. The work is clear, and any surprises are usually minor, like finding some drywall damage behind old cabinets.
  • Remodeling Scope: Now, imagine moving a wall. That isn’t just about demolition. You're now rerouting electrical wiring, reconfiguring HVAC ductwork, and patching up the floor. You'll likely need a structural engineer to make sure you're not compromising the building's integrity.

This distinction is crucial. A renovation spruces up a space’s individual parts, while a remodel re-engineers the whole system.

The real difference in scope is this: Renovation is about the what—the materials and finishes. Remodeling is about the where—the layout and structure. It’s this jump from component-level tweaks to system-level changes that defines a remodel's complexity.

Cost and Investment ROI

From a financial perspective, these two approaches serve very different investment strategies. Renovations are known for their lower upfront costs and a faster, though often smaller, return on investment. They're perfect for a quick flip or refreshing a commercial space between tenants.

Remodeling requires a much bigger pile of cash. But that major investment is meant to unlock significant long-term value by fundamentally changing the property’s use, capacity, or position in the market.

Financial Factor Renovation Remodeling
Upfront Cost Lower and more predictable. Budgets are mostly for materials and labor. High and often variable. Costs include demolition, structural work, and system upgrades.
Return on Investment Quick ROI from better aesthetics and immediate rental or sale appeal. Slower, long-term ROI based on unlocking new revenue streams or a higher valuation.
Financing Often funded from operating budgets or smaller, straightforward loans. Usually requires substantial construction loans backed by detailed financial models.

A simple lobby renovation might run $20,000 and help you land a new tenant right away. But a remodel—say, converting that same building's ground floor from offices to retail space—could cost $500,000 while potentially doubling your annual rental income.

Timeline and Disruption

In development, time is money, and the schedules for these two project types are worlds apart. Renovations are generally quick and cause minimal disruption, often allowing other parts of the building to stay open for business.

Remodeling projects, by their very nature, are long and disruptive. The scale of the work often means the entire space—or sometimes the whole building—has to be emptied out for a long time.

  • Renovation Timeline: A commercial office refresh (new paint, carpet, lights) might take just 2-4 weeks.
  • Remodeling Timeline: A full gut remodel of that same office floor to create an open-plan layout could easily stretch to 4-6 months or more once you factor in design, permitting, and construction.

That extra time on the clock directly impacts your holding costs and lost rental income, which has to be baked into your financial model from day one. The short, low-impact schedule of a renovation is one of its biggest draws for developers looking for a fast turnaround.

Permits and Building Codes

Finally, the regulatory hurdles are a huge differentiator. Dealing with permits and codes is just part of the game, but the level of scrutiny is completely different for a renovation versus a remodel.

Renovations often fly under the permit radar. Since you're not messing with the building's structure or use, many cosmetic jobs need only simple, over-the-counter permits, if any at all. You won't need a permit just to paint or replace flooring.

Remodeling is a whole other story. Any project that touches structural elements, changes how a space is used (like from residential to commercial), or modifies plumbing, electrical, or HVAC systems will trigger a full-blown permitting process. This means submitting architectural plans, engineering reports, and getting through multiple inspections to prove you’re up to code. Mess this up, and you're looking at expensive stop-work orders and fines, which is why having an expert guide you through it is non-negotiable.

A Decision Framework for Your Next Project

Deciding between a renovation and a remodel isn't just a matter of semantics—it's a strategic call that hinges entirely on your goals for the asset. Are you looking for a short-term boost or a long-term transformation? Getting this right from the start is crucial, so let's break down which path aligns with different commercial real estate objectives.

To get a sense of the market, it helps to look at where the money is going. The U.S. remodeling industry is projected to hit $164.5 billion in 2025, and a lot of that is concentrated in specific areas. Kitchens account for 38% of projects and bathrooms 26%, which tells us that the focus is often on high-impact spaces that redefine function and appeal. You can dig deeper into these trends with IBISWorld's comprehensive remodeling industry report.

Choose Renovation When Your Goal Is Preservation or Refreshment

Think of renovation as the right move when you need to maintain or moderately improve a property without changing its fundamental purpose. It’s about working with the existing structure to make it better, more appealing, and ready for its current use—a tactical play focused on quick returns and minimal disruption.

You should lean toward renovation in a few common scenarios:

  • Refreshing a property between tenants. When a long-term commercial lease is up, a quick renovation—fresh paint, new flooring, and upgraded lighting—can make the space feel new again and attract prospects with very little downtime.
  • Making cosmetic upgrades for a quick sale. If you're prepping a building for the market, targeted updates like modernizing a lobby or improving the landscaping can deliver a huge cosmetic impact for a relatively low cost, seriously boosting curb appeal.
  • Complying with historic preservation rules. For designated historic buildings, the name of the game is restoration, not alteration. Renovations let you repair original features and meet preservation guidelines, which can often unlock valuable tax credits.

This diagram breaks down the key decision factors—cost, timeline, and permits—that really separate renovation from remodeling.

A diagram titled 'Renovation vs Remodeling' showing a 'Tree' node branching to cost, timeline, and permits.

As you can see, renovations typically mean lower costs and faster turnarounds, while remodeling demands a bigger investment and a more involved permitting process.

Choose Remodeling When Your Goal Is Transformation or Repositioning

Remodeling is your answer when the property's current layout or purpose just isn't cutting it anymore. This is a strategic, long-term play to unlock new value by completely changing how the building is used. You aren't just sprucing it up; you're redefining the asset itself.

A remodel makes sense when you need to make a major shift:

  • Repositioning an asset in the market. Is that old downtown office building underperforming? Remodeling it into residential lofts (a classic adaptive reuse project) fundamentally changes its market position and opens up entirely new revenue streams.
  • Accommodating a long-term tenant's custom needs. A high-value tenant might need you to completely reconfigure a space—think knocking down walls for an open-plan tech office or installing specialized infrastructure. A remodel is what it takes to secure that kind of long-term income.
  • Fundamentally increasing net operating income (NOI). When you need to seriously boost a property's financial performance, a remodel can get you there by adding leasable square footage, turning common areas into income-generating spaces, or justifying much higher rental rates.

A developer renovating an old office lobby is making a tactical move to attract tenants for its existing use. In contrast, a developer remodeling that same building into residential lofts is making a strategic play to capture an entirely new market segment.

At the end of the day, the renovation vs. remodeling debate comes down to your investment horizon and your strategic intent. A renovation protects and enhances the value you already have, while a remodel creates entirely new value from the ground up.

Navigating Adaptive Reuse and Historic Properties

An old brick industrial building undergoing renovation with scaffolding, a tall chimney, and an 'ADAPTIVE REUSE' sign.

The lines between renovation and remodeling get particularly interesting when you're dealing with special assets like historic buildings or structures being repurposed. These projects come with their own unique set of challenges and opportunities, demanding a crystal-clear understanding of your goals and the regulatory landscape right from the start.

For commercial developers, this is where the renovation vs. remodeling distinction isn't just academic—it's a critical factor that shapes everything from financial viability to historical compliance.

Adaptive Reuse: A Masterclass in Remodeling

Adaptive reuse is really remodeling dialed up to eleven. Think of it as taking a building with an outdated purpose—an old industrial warehouse, a defunct textile mill—and completely transforming it into something new. That warehouse might become creative lofts, or the mill could be reborn as modern apartments.

This process is the ultimate expression of changing a building's purpose. You're not trying to restore what was; you're creating something entirely different to meet today's market needs. This naturally involves a massive overhaul of the building's systems, layout, and sometimes even its core structure to support its new life.

The real trick is striking a balance between the old and the new. Developers have to modernize all the essential systems—HVAC, plumbing, electrical—to meet current codes, all while preserving the architectural character that makes the property so unique in the first place. This often means complex structural work, like reinforcing old timber beams or carving new window openings into thick masonry walls, putting it squarely in the remodeling camp.

Historic Preservation: The Art of Renovation

On the flip side, historic preservation is almost always an exercise in pure renovation. When a property has a historic designation, the main objective is to restore and maintain its original character, not fundamentally change it. All work has to follow strict guidelines set by preservation authorities.

These projects are all about repair, not replacement. The focus is on the meticulous restoration of original features—fixing ornate plasterwork, refinishing original hardwood floors, or tracking down period-accurate materials for any repairs. The building's structure and layout are essentially untouchable to preserve its historical integrity.

For developers, here's the key takeaway: Adaptive reuse is a strategic remodel designed to unlock new economic value by changing a building's purpose. Historic preservation is a highly regulated renovation aimed at protecting cultural value by keeping it as it was.

One of the biggest drivers for taking on these demanding projects is financial. Historically accurate renovations can qualify for significant federal and state tax credits, which can often offset 20% or more of the total project costs. These incentives are directly tied to meeting preservation standards, making renovation the only way to go. If you try to remodel a designated historic property, you're not just facing regulatory headaches—you're likely forfeiting those valuable financial benefits.

When you're dealing with the complexities of older or significant structures, a good practical guide to listed building renovation is an indispensable resource. Knowing the rules is the first step toward a successful project. In the end, the choice comes down to a simple question: does the building's value lie in what it could become, or in what it has always been?

Assembling the Right Professional Team

Expert team of engineers reviewing architectural blueprints and construction plans outdoors.

Any successful project—whether it's a straightforward renovation or a complete remodel—hinges on the quality of the professionals you bring on board. The specific skills you need are directly tied to your project's scope. It's the work that dictates the team, not the other way around.

A simple renovation might just need a solid general contractor and their go-to subcontractors. But once you step into a major remodel, you’re looking at a coordinated team, usually led by an architect who can wrangle structural engineers, MEP (mechanical, electrical, plumbing) specialists, and the construction crew.

A common mistake is hiring a team based on price alone. An experienced architect or contractor who understands local permitting can save you thousands in delays and rework, making their expertise a sound investment from day one.

Building Your Renovation Team

For renovations, the name of the game is craftsmanship and execution. Your team will likely be smaller and more focused on restoring or upgrading what's already there.

  • General Contractor: This person is your project manager, responsible for scheduling trades and making sure the work is done right.
  • Specialized Artisans: If you're working on a historic property, you may need specialists in things like plaster restoration or period-specific millwork.
  • Painters and Finishers: High-quality cosmetic work is key to a successful renovation, so skilled finishers are essential.

Assembling Your Remodeling Team

Remodeling demands a team that gets the big picture—building systems, codes, and structural design. This is a highly collaborative effort right from the start.

  • Architect: This is the visionary who creates the new design, draws up the construction documents, and steers the project through the permitting maze.
  • Structural Engineer: You absolutely need a structural engineer for any project that involves moving load-bearing walls, building an addition, or altering the building’s frame.
  • MEP Engineers: These experts design and integrate the new electrical, plumbing, and HVAC systems needed to support the new layout and its intended use.
  • General Contractor: They take the architect’s plans and make them a reality, managing everything from demolition to the final construction phase.

When you're vetting potential partners, their portfolio is your best friend. Look for projects with a similar scope and complexity to yours. A contractor who’s fantastic at cosmetic renovations might not have the chops to manage a full-scale commercial remodel.

Be sure to ask pointed questions about their knowledge of local codes, how they handle surprises on the job, and their communication style. A well-defined contract that clearly outlines the scope, timeline, and payment schedule isn’t just a good idea—it’s non-negotiable for protecting your investment and ensuring a successful outcome.

Frequently Asked Questions

Even with a solid plan, the real-world differences between a renovation and a remodel can bring up some tricky questions. Getting these details right is what separates a smooth project from a costly one. Let's tackle a couple of the most common questions we hear from developers.

How Do Renovation and Remodeling Affect Property Insurance?

The impact on your insurance policy is drastically different for each type of project, and it all comes down to risk.

A renovation usually falls under a standard builder's risk policy or a simple endorsement to your existing property insurance. Because you’re not messing with the building's core structure, the risk is fairly low. The main goal is to protect new materials and cover liability for the cosmetic work being done.

A remodeling project is a whole other beast. Since it involves structural changes—like moving load-bearing walls—it requires a much more robust course of construction insurance. This isn't just about covering the new work; it's about protecting the entire structure from potential damage. Moving one wall can have a ripple effect you didn't see coming.

Key Takeaway: You absolutely must notify your insurance provider before a single hammer swings, especially for a remodel. If you don't, you risk voiding your coverage entirely. That could leave you on the hook for major structural failures or system damages, a financial disaster no developer wants to face.

Does Renovation or Remodeling Offer Better Property Valuation?

Both can boost a property's value, but they play different games. Think of it as a short-term gain versus a long-term transformation.

  • Renovation: This is your path to a quick, reliable bump in valuation. Cosmetic updates—a modern lobby, fresh fixtures, new flooring—have an immediate impact on appraisals and tenant appeal. It makes the property look good now, which is perfect if you're aiming for a quick sale or lease. The ROI is usually pretty predictable.

  • Remodeling: This is the long game. The upfront investment is significantly higher, but so is the potential reward. A well-executed remodel, like turning an outdated office building into sought-after residential lofts, completely changes the property's function and earning power. This can lead to a massive increase in its long-term valuation, though it comes with more risk and a longer timeline to see that return.

A renovation polishes what you have, while a remodel creates something entirely new. In the end, the project that adds the most value is the one that best meets what the market is looking for.


At Sherer Architects, LLC, we help developers navigate the maze of renovation, remodeling, and adaptive reuse every day. Whether you're bringing a historic landmark back to life or giving a commercial building a new purpose, our team has the deep experience needed to create lasting value. Let's start putting the pieces of your next project together. Visit us at https://shererarch.com to learn more.

Categories
Uncategorized

Real Estate Development Feasibility Study: A Practical Guide

So, what exactly is a real estate development feasibility study? Think of it as a comprehensive, boots-on-the-ground investigation to see if a proposed project can actually succeed. It’s the ultimate stress test for your idea, designed to answer one crucial question before you sink a single dollar into the ground: “Is this project actually worth building?”

Why a Feasibility Study is Your Project's Bedrock

Two construction professionals in hard hats review blueprints and a tablet at a construction site.

Jumping into a development project without a proper feasibility study is like trying to navigate a ship in a storm without a compass. It's a huge gamble, and every unknown factor dramatically increases the risk of making a catastrophically expensive mistake. This structured analysis is the bedrock of your project, turning a promising concept into a solid, data-backed business plan.

This isn't just about ticking boxes. It’s a strategic deep dive that methodically picks apart every critical piece of your proposed development. By weaving together market trends, financial modeling, and a hard look at regulations, it gives you a clear, unvarnished picture of both the potential rewards and the hidden risks.

The Strategic Value of Early Analysis

The whole point is to give developers, investors, and lenders the confidence to green-light a project—or the critical insight needed to walk away from a bad deal. A thorough study uncovers potential deal-breakers early on, giving you time to pivot or solve problems before they can derail the entire project.

A well-executed feasibility study equips everyone involved with the clarity to make smart decisions, sidestep potential pitfalls, and ultimately transform a real estate vision into a profitable reality.

By identifying and putting a number on risks from day one, you can develop real strategies to manage them. This proactive approach is infinitely cheaper and less stressful than trying to put out fires halfway through construction. In short, the study moves you from guesswork to strategic confidence.

Core Questions a Feasibility Study Answers

At its core, this entire process is about finding clear, defensible answers to the make-or-break questions that will determine a project's fate. For a broader look at getting started, this smart project planning guide for real estate feasibility studies offers a helpful overview.

A solid analysis will always dig into these key areas:

  • Market Viability: Is there a real, sustainable demand for what we want to build, right here, right now? Who are our buyers or tenants, and what do they want?
  • Financial Soundness: Will the money coming in cover all the costs of building and running this thing, and still provide a return that makes the risk worthwhile?
  • Legal & Regulatory Compliance: Does the project fit within the local zoning laws, land use plans, and environmental rules? Are we going to hit a wall of red tape?
  • Site Suitability: What's the deal with the land itself? Are we facing challenges with soil quality, utility access, or the site’s physical layout?

Getting straight answers to these questions provides the proof you need to secure financing, bring on partners, and steer your project from a simple idea to a successful, completed development.

Gauging Market Demand and Economic Viability

Every successful real estate project starts with one simple, gut-check question: “Does anyone actually need this?” Before a single line is drawn or a spreadsheet is built, you have to prove there’s a real, measurable demand for what you want to build. This is the first, and arguably most important, hurdle in any real estate development feasibility study. It’s where a good idea starts to look like a smart investment.

This isn’t about confirming a vague need for “more housing” or “office space.” It’s about getting specific. If you’re planning luxury condos, you need to find a growing pocket of high-income earners who want to live there. If it's a new industrial warehouse, you'd better be able to point to a boom in local logistics or e-commerce that makes that space essential.

Digging into the Data

To make your case, you have to become a bit of a data detective. You’re looking for the hard evidence—the economic and demographic signals—that a community is primed for your project. This is how you move from a hunch to a bankable business plan.

Your investigation should cover:

  • Demographic Trends: Is the local population growing? What's the mix of ages and average household incomes? A surge in young professionals might scream "new rental apartments," while a graying population could signal an opportunity for a senior living community.
  • Employment Growth: A healthy job market is the engine of real estate demand. Are major employers moving in? Are certain industries expanding? Low unemployment and high job growth are powerful indicators that new people—and businesses—are on their way.
  • Local Economic Indicators: Look beyond the big numbers. Are retail sales climbing? Are new business permits being issued? Is the city investing in new roads, parks, or public transit? These are all tell-tale signs of a community on the rise.

This data helps you forecast a critical metric: the absorption rate. That's just a fancy term for how quickly available properties in the area are being snapped up (sold or leased). A high absorption rate tells you that demand is strong and your project likely won't be sitting empty for long.

Sizing Up the Competition

No project is an island. A huge piece of your real estate development feasibility study involves a brutally honest look at who you’re up against. You need to know exactly who else is vying for your target tenants or buyers and figure out how your project is going to be different—and better.

Get ready to ask some pointed questions:

  1. What similar projects are already out there, and how full are they (what are their vacancy rates)?
  2. Is anyone else building something that will compete with you? Are there projects in the pipeline?
  3. What are they offering? Look at their amenities, finishes, and, most importantly, their price points.
  4. Where are they falling short? This is your opportunity. Maybe they lack modern amenities, have poor layouts, or are priced too high. Your project can be designed to fill that gap.

This competitive deep-dive helps you carve out your unique space in the market. It might reveal that nobody is serving the need for smaller, more affordable commercial units, or that there's a desperate shortage of family-sized rentals. That’s not just data; that’s your strategic advantage.

A strong market analysis does more than just list facts and figures. It weaves them into a compelling story that connects the dots between population growth, a booming economy, and the undeniable need for your specific project.

Thinking big is just as important as drilling down into local stats. Globally, the real estate market was valued at roughly USD 10 trillion in 2023 and is on track to hit USD 15 trillion by 2032, driven by massive urbanization and infrastructure investment. You can explore more about these global real estate trends to see the bigger picture. Your local analysis gains power when it's clear you understand how these larger forces are playing out on your home turf. By proving the demand is there, you lay the rock-solid foundation for the entire project.

The Seven Core Components of a Feasibility Study

A proper real estate development feasibility study isn’t just one big step; it’s a series of careful, deliberate investigations. Think of it like a master chef preparing a complex dish. They don't just throw ingredients in a pot. They source, prep, and test each component—the protein, the vegetables, the spices—to ensure the final meal is a success. A misstep with one ingredient can ruin the whole thing.

In the same way, a feasibility study methodically examines seven core components. When pieced together, they give you a complete, 360-degree picture of your project's real potential, turning a hopeful idea into a plan you can bank on.

Let's walk through this essential checklist.

1. Detailed Site Analysis

Before you even think about what you’re going to build, you have to understand the canvas you’re working on: the land itself. A detailed site analysis goes way beyond just looking up the address. It’s a deep dive into the physical reality of the parcel and all its quirks.

This involves digging into:

  • Topography and Soil Conditions: Is the land flat as a pancake, or are you dealing with a steep slope? Are there hidden soil contamination issues or poor drainage that will send your foundation costs through the roof? A geotechnical report isn't optional here; it's critical.
  • Utility Access: How easily can you hook into essential services like water, sewer, electricity, and gas? Having to extend utility lines a long distance can become a massive, unexpected expense if they aren't already at the property line.
  • Accessibility and Infrastructure: We confirm how close the site is to major roads, public transit, and other key infrastructure. This directly impacts the property's value and how attractive it will be to future tenants or buyers.

2. Zoning and Regulatory Review

Imagine designing your dream building, pouring money into the plans, only to find out it's illegal to build it there. The zoning and regulatory review is what prevents that nightmare. This is where your vision crashes into the hard reality of local laws.

You need definitive answers to a few key questions:

  • What, exactly, is this piece of land zoned for? What uses are permitted?
  • Are there strict limits on building height, density (how many units you can build), or setbacks from the property line?
  • What does the local entitlement process look like, and more importantly, how long will it take to get the permits you need?

Here in South Carolina, this phase often means navigating local Design Review Boards or historic preservation committees, which adds another layer of complexity and time. This review spots the bureaucratic hurdles early on, so you can either plan for them or decide they’re just too high to clear.

3. Conceptual Design and Space Planning

Once you have a solid handle on the site and the rules that govern it, you can start to sketch out what’s possible. Conceptual design isn’t about drafting final blueprints. It’s about creatively testing different ideas to figure out the highest and best use of the property.

This is the stage where we translate all the market data and site constraints into a physical form. It’s the bridge between the numbers on a spreadsheet and a real building that solves a specific need in the community.

An architect might whip up several massing studies or layout options. We'd explore how many units can comfortably fit, how to configure parking efficiently, or how to orient the building to maximize views and natural light. This ensures the final design is not just beautiful, but also smart, efficient, and profitable.

4. Construction and Operating Cost Estimation

A project can look brilliant on paper, but it’s dead on arrival if the numbers don't add up. This is the part of the feasibility study where we put a price tag on your vision. It demands a realistic, detailed estimate of every single cost, from the day you break ground to the day-to-day cost of running the building.

Costs generally fall into two buckets:

  • Hard Costs: These are the tangible expenses of actually building the thing—labor, concrete, steel, lumber, and site work.
  • Soft Costs: This covers everything else, like architectural and engineering fees, permits, legal services, insurance, and the cost of financing.

Just as important is projecting the long-term operating expenses: things like property management fees, routine maintenance, property taxes, and insurance. Ignoring these ongoing costs is a surefire way to watch your project's profitability vanish over time.

5. Comprehensive Market Analysis

So, who is actually going to rent, buy, or use this new development? The market analysis answers that fundamental question. It’s an objective look at the supply and demand dynamics in your specific area for your specific product type.

A hierarchical diagram outlining market viability factors: Market Need, Demographics, Economy, and Competition.

As the diagram shows, a project's viability hinges on the interplay of several factors. It's not just about one thing, but about the combined strength of real market demand, a healthy local economy, and a clear edge over the competition. We look at demographic trends, absorption rates for similar properties, and what competitors are charging to make sure your project is positioned to succeed.

6. The Financial Pro Forma

This is where it all comes together. The financial pro forma is the master spreadsheet that tells your project’s financial story. It projects all the potential revenues and expenses over a multi-year period (typically 5-10 years) to model profitability and potential returns.

The pro forma is the ultimate test of financial viability. It translates all the previous research into the language that investors and lenders speak: metrics like Net Operating Income (NOI), Cash-on-Cash Return, and Internal Rate of Return (IRR). It models everything—from rental income and vacancy rates to debt payments and the eventual sale price.

7. Risk and Return Analysis

Finally, no study is complete without an honest look at what could go wrong. The risk and return analysis identifies potential threats and evaluates their impact. What happens if construction is delayed by six months? What if interest rates shoot up? What if the market softens and it takes longer to lease up the building?

This often involves a sensitivity analysis, where we stress-test the financial model to see how the project's returns hold up if our key assumptions change. By identifying and quantifying these risks ahead of time, you can build in contingency plans and make a fully informed decision about whether the potential rewards truly justify the risks involved.


To help tie this all together, here’s a quick summary of what each component is designed to achieve.

Key Components of a Real Estate Feasibility Study

Component Primary Goal Key Questions
1. Site Analysis To understand the physical constraints and opportunities of the land itself. Is the site buildable? What are the hidden costs related to topography, soil, or utilities?
2. Zoning & Regulatory To confirm what can be legally built and navigate the approvals process. What is the property zoned for? What are the height/density limits? How long will permitting take?
3. Conceptual Design To determine the "highest and best use" that is physically and legally possible. What is the most efficient and profitable layout for the site? How many units can we fit?
4. Cost Estimation To develop a realistic budget for both construction and long-term operations. What are the total hard and soft costs? What will it cost to run the building each year?
5. Market Analysis To verify that there is genuine demand for the proposed project. Who are the target tenants/buyers? What is the competition? What rents/prices can we expect?
6. Financial Pro Forma To model the project's financial performance and calculate potential returns. Is the project profitable? What are the key financial metrics (IRR, NOI, Cash-on-Cash)?
7. Risk & Return To identify potential threats and determine if the reward justifies the risk. What could go wrong? How would that impact returns? Do we have a contingency plan?

Each of these components builds upon the last, creating a progressively clearer picture of the project's viability. Skipping a step or relying on guesswork is a recipe for a very expensive mistake.

Building Your Financial Pro Forma Step by Step

If your market analysis is the foundation of your real estate development feasibility study, then the financial pro forma is the steel frame holding everything up. This is where all your research, cost estimates, and revenue projections finally come together to tell a story with numbers.

Think of it as a detailed, multi-year forecast, usually in a spreadsheet, that predicts whether your project will sink or swim financially. It’s the tool that translates your vision into the language investors and lenders care about most: the bottom line. A solid pro forma gives you the clarity to make that final, confident go/no-go decision.

Assembling Your Key Financial Inputs

The old saying "garbage in, garbage out" has never been more true. The accuracy of your pro forma lives and dies by the quality of the numbers you feed it. This isn't the time for wishful thinking or overly optimistic guesses; every figure needs to be backed by the hard research you did during your market analysis and cost estimation.

Here are the essential ingredients you'll need for your financial model:

  • Projected Income: This is your top-line revenue, almost always from rent. You'll base this on current market rates for comparable properties and project modest annual increases (rent growth) based on historical data and economic forecasts.
  • Vacancy Rates: No property stays 100% occupied forever. A realistic vacancy rate, often somewhere in the 5-10% range, accounts for the natural churn of tenants and the time it takes to lease up empty units.
  • Operating Expenses (OpEx): These are the ongoing costs to keep the lights on and the property running smoothly. Think property management fees, routine maintenance, insurance, property taxes, and utilities.
  • Debt Service: This is simply your loan payment. It’s the total amount you'll pay each year on your construction and permanent financing, covering both the principal and the interest.

Beyond just plugging in numbers, a truly professional pro forma also incorporates strategies for managing financial risk to protect the project's long-term profitability.

Interpreting the Critical Metrics

Once all your inputs are in place, the pro forma will spit out several key performance indicators (KPIs) that act as a scorecard for your project's financial health. Knowing what these metrics mean is crucial for actually evaluating the investment.

The goal isn't just to build a spreadsheet; it's to use that spreadsheet to answer the big questions. Does this project actually generate cash? Is the return worth the risk we're taking? How long until we get our initial investment back?

Let's break down the most important ones in plain English:

  1. Net Operating Income (NOI): This is your property's pure, unadulterated profit from operations. It’s the total income left over after you've paid all the operating expenses but before you've made your loan payment or paid income taxes. It's the cleanest measure of a building's ability to generate cash.
  2. Cash-on-Cash Return: This is a straightforward metric that tells you the annual pre-tax cash flow you receive compared to the total cash you initially invested. If you put $1 million of your own money into a deal and get $80,000 back in cash flow that year, your cash-on-cash return is 8%. It’s that simple.
  3. Internal Rate of Return (IRR): A more sophisticated metric, the IRR calculates the project's total annualized return over its entire life, factoring in the final sale price. It's the gold standard for comparing the profitability of your project against other, completely different investment opportunities.

Preparing for Uncertainty with Sensitivity Analysis

A pro forma built on a single, perfect set of assumptions is brittle. Real life is messy—interest rates spike, construction gets delayed, a recession hits. This is where sensitivity analysis proves its worth.

This process is all about stress-testing your model. You intentionally change key variables to see how much it hurts your returns. What happens to my IRR if interest rates climb by 1%? How does a 10% jump in construction costs crush my cash flow?

By running these "what-if" scenarios, you can pinpoint the project's biggest vulnerabilities and start building contingency plans. It shows investors and lenders that you’re not wearing rose-colored glasses—you understand the risks and are prepared for a few curveballs. This is what turns a simple financial forecast into a truly powerful decision-making tool.

Navigating Construction Costs and Supply Chains

A sophisticated financial model is only as good as its weakest assumption. Once you've confirmed there's a market for your project and sketched out potential revenue, the feasibility study has to get real about the tangible, often unpredictable, world of construction costs and supply chain headaches. This is where your spreadsheet meets the hard reality of lumber prices, labor shortages, and logistical nightmares.

Getting this part right is everything. It’s the bridge connecting your financial dreams to the physical act of building. If you underestimate these costs, your project’s profit can vanish before you’ve even poured the concrete. But if you're too conservative, you might kill a perfectly good project, walking away from a fantastic opportunity.

Hard Costs Versus Soft Costs

First things first, you need to split your expenses into two main buckets: hard costs and soft costs. It's a fundamental distinction, and getting it right is key to building a budget that holds up.

  • Hard Costs: These are the tangible expenses—the stuff you can literally see and touch. Think bricks, steel, concrete, and all the labor needed to assemble it. Site prep, landscaping, and hooking up utilities all fall into this category.
  • Soft Costs: These are the less obvious but equally critical expenses that make the project happen. They aren’t part of the physical building but support the whole process. We're talking about architect and engineering fees, permits, legal bills, the cost of financing, and insurance.

A classic rookie mistake is fixating on the hard costs and glossing over the soft costs. Be careful—those soft costs can easily chew up 25-30% of your total project budget.

The Realities of Modern Supply Chains and Labor

Today’s global supply chains are a tangled, volatile mess. A factory shutdown on the other side of the planet can halt your project in its tracks, sending material prices through the roof and causing massive delays. These are the external pressures that can blow a hole in your financial projections.

A project’s budget isn't a static document set in stone. It's a living forecast that must be actively managed to account for real-world variables like inflation, labor shortages, and unexpected material delays.

This volatility means you have to plan for the unexpected. For instance, forecasts for 2025 point to a huge drop in new commercial real estate completions, largely due to high construction costs and not enough skilled workers. U.S. office completions, in particular, are expected to plummet by around 73%. This creates a really weird supply dynamic that can mess with your project's timing and profitability. For a deeper dive, you can explore the 2025 Global Real Estate Outlook and see these trends for yourself.

To handle this, your feasibility study needs a solid contingency plan. A contingency fund—usually 5-10% of the total construction cost—isn't a sign of bad planning. On the contrary, it’s a mark of a pro. It gives you the breathing room to absorb those inevitable surprises without sinking the entire venture. When you account for these variables honestly, your financial model goes from a simple guess to a powerful, resilient tool.

How an Architect Supports Your Feasibility Study

Two male architects review blueprints and a building model on a table with an 'Architect Partner' banner.

Bringing an architect on board early in your real estate development feasibility study is one of the smartest moves you can make. It’s a decision that pays for itself long before a single shovel hits the dirt. They do far more than just sketch final designs; an experienced architect is a crucial partner who grounds your financial projections in the physical world.

Think of them as the bridge connecting your market data to what's actually possible on a piece of land. They translate the site's quirks, the jungle of zoning rules, and the demands of the market into tangible, conceptual designs. This ensures your vision is not just inspiring, but also buildable, efficient, and ultimately, profitable. This kind of collaboration is key to de-risking a project from day one.

Maximizing Value Through Conceptual Design

One of the most valuable things an architect does right away is help figure out a site's "highest and best use." This isn't just about cramming in the maximum number of units. It's about finding the sweet spot—the optimal layout that boosts profitability, grabs the market's attention, and creates long-term value.

During the feasibility phase, an architect can quickly generate practical tools to guide your decisions:

  • Massing Studies: These are essentially simple 3D models. They let us test different building shapes and sizes to see how they fit within the property lines, zoning envelopes, and required setbacks.
  • Test-Fit Plans: Think of these as quick-and-dirty floor plans. We use them to explore different unit mixes and layouts to confirm exactly how many rentable square feet you can realistically get, which feeds directly into your revenue projections.
  • Site Planning Options: Architects are experts at analyzing how cars will move through the property, how to design efficient parking, and where to place amenities to create a site that’s both functional and appealing.

This whole process turns your abstract financial goals into a concrete, spatial strategy.

An architect’s early involvement turns the feasibility study from a purely theoretical exercise into a practical roadmap. They help answer the crucial question "What can we actually and profitably build here?" before you commit significant capital.

By exploring different design concepts from the start, an architect can spot hidden opportunities to boost your project's returns. Maybe it’s a subtle shift in the building's orientation to capture premium views, or a smarter parking layout that frees up land for a money-making amenity. This early strategic input is what makes sure the final design is perfectly aligned with the financial goals of your study.

Got Questions? Let's Talk Feasibility Studies.

Even with a solid plan, it's natural to have questions before diving into a real estate development feasibility study. Think of this section as a conversation where we tackle the practical "what ifs" and "how muches" that developers and investors ask us all the time.

How Much Does a Real Estate Feasibility Study Cost?

There's no one-size-fits-all answer here. The cost is a direct reflection of your project's size and complexity. For a relatively simple commercial infill project, you might be looking at a few thousand dollars. But for a large-scale, multi-phase mixed-use development, the cost can easily climb into the tens of thousands.

What drives that number? A few key things:

  • Project Size and Scope: A bigger, more complicated project simply has more moving parts to analyze.
  • Location and Data Access: Digging up reliable data in a small, out-of-the-way market is often tougher (and more expensive) than in a major city where information is readily available.
  • Specialized Expertise: If we need to bring in experts like environmental engineers or traffic analysts, their fees will be part of the total cost.

It's easy to see it as just another expense, but a good feasibility study is one of the best risk-management tools you can buy. That upfront cost is a tiny fraction of what you could lose by moving forward with a project that's destined to fail.

How Long Does a Feasibility Study Take to Complete?

Just like cost, the timeline is all about complexity. A quick, high-level look might only take a few weeks. However, a truly comprehensive study—the kind that involves deep site analysis, extensive market research, and detailed financial modeling—usually takes somewhere between four to twelve weeks.

The timeline can stretch depending on how quickly we can get accurate data, how responsive the local zoning office is, and how many design options we need to explore to land on the best path forward. It's tempting to rush, but this is one area where patience pays off. Cutting corners here can lead to some very expensive mistakes later.

What Are the Biggest Red Flags in a Feasibility Study?

Think of your feasibility study as a check-up for your project's health. Some findings are minor, but others are serious warning signs you absolutely can't ignore. Pushing past these red flags is a recipe for financial trouble.

Keep a sharp eye out for these deal-breakers:

  • Rose-Colored Projections: If the financial forecast assumes pie-in-the-sky rent growth and impossibly low vacancy rates with no data to back it up, the numbers aren't real.
  • A Skimpy Contingency: A budget with less than a 5-10% contingency for construction costs isn't realistic. It shows a failure to plan for the unexpected delays and cost overruns that happen on almost every project.
  • Major Zoning Headaches: Uncovering a need for a long, contentious rezoning process or finding out there's strong local opposition can stop a project dead in its tracks.

Answering these questions and making sense of the final report is where having an experienced partner makes all the difference. At Sherer Architects, we provide the strategic architectural insight that keeps your feasibility analysis grounded in what’s actually buildable and profitable. We help you make sure every piece of the puzzle fits.

Let's talk about making your vision viable. Visit us at https://shererarch.com.

Categories
Uncategorized

How to Choose an Architect for Your Project

Choosing the right architect for your commercial project is a critical decision. It starts with defining your project inside and out, building a targeted shortlist, digging into portfolios, and conducting sharp interviews. Ultimately, you'll compare detailed proposals to find the firm whose skills perfectly match the unique demands of your project—whether it's a new build, an adaptive reuse, or a historic preservation.

Before You Even Think About Architects, Define Your Vision

Before you start looking for an architect, you need to become the undisputed expert on your own project. This is the bedrock. It’s less about architectural drawings and more about translating your business goals into a clear, actionable roadmap.

Honestly, a well-defined project brief is the most powerful tool you have. It attracts the right talent and saves you from expensive missteps later. It acts as a filter, making sure only firms who get what you're trying to do even make it to the table.

Think of it this way: you're defining the problem. An architect's job is to solve that problem with creativity and skill. If you can't articulate the problem clearly, even the best architect in the world will be flying blind.

Getting Specific: Articulating Your Project's Core Needs

You need to move past fuzzy ideas and get down to specifics. This isn't just a wish list; it's a strategic outline of what this project must accomplish to be a success. A developer planning a new retail center has completely different priorities than an investor turning an old warehouse into loft offices.

Start by hammering out the fundamentals. I always break it down into three key areas:

  • Functionality: How will people actually use this space every day? Think about workflow, how many people it needs to hold, accessibility (ADA compliance is non-negotiable), and which spaces need to be next to each other. For example, a restaurant kitchen has incredibly specific health code and equipment requirements that will dictate a huge part of the design.
  • Aesthetics: What's the vibe? Are you going for a sleek, modern look for a tech company's headquarters, or a classic, warm feel for a historic hotel? Don't just pull images from a magazine; try to define the feeling you want the space to evoke for your employees, customers, or tenants.
  • Long-Term Goals: Look beyond day one. What's the building's bigger purpose? Are you aiming for LEED certification to attract high-value tenants? Is the goal to create an iconic landmark, or is it purely about maximizing leasable square footage on a tight budget? These big-picture goals will drive major decisions on design, materials, and systems.

Nailing this down clarifies your project's DNA, which in turn informs everything from scope to budget.

A three-step process diagram illustrating the flow from vision to scope to budget for project planning.

This process shows you can't just jump to the budget. A clear vision defines the scope, and only then can you build a realistic budget. Get the order wrong, and you're setting yourself up for failure.

Tailoring Your Brief for the Type of Project

A generic brief is a waste of time. It won't attract the specialized expertise you need for complex projects like adaptive reuse or historic preservation. You have to tailor your "ask" to the challenge at hand.

Here's a framework to help you think through the specific criteria for your project type before you even speak to an architect.

| Key Project Criteria to Define for Your Architect |
| :— | :— | :— | :— |
| Criteria | New Commercial Build | Adaptive Reuse | Historic Preservation |
| Primary Goal | Maximize ROI, efficiency, and brand identity on a clean slate. | Unlock hidden value in an underutilized structure; blend old with new. | Faithfully restore and protect a building's historical character. |
| Key Challenges | Site constraints, zoning hurdles, entitlement process, new utility infrastructure. | Unknown structural issues, hazardous materials, integrating modern systems. | Strict material/method requirements, navigating review boards, sourcing rare materials. |
| Architect's Role | Visionary creator, master planner, and entitlement navigator. | Creative problem-solver, building detective, and repurposing expert. | Historian, materials scientist, and skilled diplomat with preservation agencies. |
| Must-Have Info | Market analysis, pro forma, desired tenant mix, branding guidelines. | Existing building survey, structural assessment, history of the property. | Historic designation reports, list of character-defining features, SHPO guidelines. |

This table should give you a starting point. By being this specific, you're not just outlining a building; you're setting the terms for a successful partnership and finding a firm that can actually deliver what you need.

For an adaptive reuse project, your brief needs to be all about investigation. What are the structural skeletons in the closet of that old textile mill you want to convert? Is there asbestos or lead paint? The architect you need is part detective, skilled at uncovering a building's secrets and finding creative ways to turn its quirks into strengths.

A great architect for an adaptive reuse project doesn't just see the old building; they see the new building dormant within it. Their expertise lies in unlocking that potential while navigating the constraints of the existing structure.

On the other hand, a historic preservation brief is about authenticity and strict compliance. Your document has to detail the property's historical significance and pinpoint the specific elements that must be preserved. It also needs to acknowledge the governing bodies—like the State Historic Preservation Office or local landmark commissions—whose approval is everything. The right architect for this job is part historian, part diplomat, and part materials expert.

This upfront clarity is your single best asset in finding a firm that will turn your vision into a profitable, lasting reality.

Okay, you've done the foundational work—you know what you want to build, what the constraints are, and what the budget looks like. Now it’s time to find the right architect to bring that vision to life. This isn't about a quick Google search; it's about building a highly curated list of real contenders.

The goal here is to narrow the field to a solid shortlist of three to five firms. These should be architects who don't just have a great portfolio but are genuinely a good fit for your specific project's DNA.

Architectural blueprints, house model, tablet, and pen on a desk, representing real estate project vision.

Where to Find Qualified Architects

Finding the best talent means tapping into established professional networks. A warm referral from a trusted source is worth more than a dozen slick websites.

  • Industry Peers and Referrals: This is your first stop. Talk to other commercial developers, general contractors, or property managers you respect. Who did they love working with? Who actually delivered what they promised? You want to hear about the architects who solved problems, not the ones who created them.
  • Professional Organizations: The American Institute of Architects (AIA) is the industry's gold standard. Local AIA chapters are fantastic resources, often with searchable directories you can filter by specialty. Need someone with deep expertise in historic preservation? This is the place to look.
  • Real Estate and Development Circles: Don't overlook the experts on the ground. Commercial real estate brokers and land-use attorneys are in the trenches every day. They have firsthand knowledge of which firms are skilled at navigating the local entitlement process and who has a reputation for being reliable.

Once you have a handful of names, the real detective work begins.

How to Critically Review a Portfolio

An architect’s portfolio is their resume, and you need to read between the lines. It's easy to be wowed by glossy photos, but your job is to look past the surface and evaluate their work through the lens of your own project.

Think relevance above all else. If you're tackling an adaptive reuse of a 1920s warehouse, a firm that only showcases new-build suburban office parks probably isn't the right partner, no matter how beautiful their work is. You're looking for demonstrated experience with projects that share your project's scale, complexity, and typology.

Don't just look at the glamour shots of the finished building. Dig into the project descriptions. Look for clues about how they handled tight budgets, navigated tough zoning challenges, or solved unique structural problems. That’s where you’ll see their real-world problem-solving skills in action.

You should also get a feel for their design philosophy. Do their projects feel thoughtful? Do they consistently prioritize things you care about, like sustainability or creating flexible commercial spaces? Their past work is the single best predictor of what they’ll do for you.

Essential Due Diligence Checklist

Before you even think about picking up the phone, a final background check is non-negotiable. This step protects you and your investment by verifying every firm's professional standing.

Make sure you confirm these details for every candidate on your long list:

  • State Licensure: Is the firm and its principal architect licensed to practice in your state? This is a basic, must-have legal requirement.
  • Professional Liability Insurance: Ask for their certificate of Errors and Omissions (E&O) insurance. This is critical—it protects your project from financial losses if a design mistake happens down the road.
  • Disciplinary History: A quick check with your state’s architectural licensing board can reveal any public complaints, sanctions, or disciplinary actions. Better to know now.
  • Geographic Reach and Capacity: Can they actually handle a project in your location? It’s an interesting time in the industry; while the total number of licensed architects in the U.S. is around 116,000, the number of reciprocal (out-of-state) licenses has soared to over 150,000. This trend means many elite firms are expanding their reach, which could be a huge plus for your project. You can dig into more of this data on the National Council of Architectural Registration Boards.

Completing this vetting process leaves you with a powerful, pre-qualified shortlist. Now you're ready for the most important part: the interviews.

How to Conduct an Insightful Architect Interview

The portfolio got them on your shortlist, but the interview is where you decide if they're the right partner to build your vision. This is your chance to get past the polished images and see the real-world chemistry, problem-solving skills, and communication style of a potential architect. Think of it less as an interrogation and more as a strategic dialogue.

A successful commercial project is a long-term relationship. You'll likely be working together for years, navigating high-stakes challenges along the way. You need to know, without a doubt, that you can collaborate effectively with this team, especially when the unexpected happens.

A green folder with a laptop and documents on a wooden table, near a 'SHORTLIST ARCHITECTS' sign.

Go Beyond the Standard Questions

To really understand how a firm operates, you have to ask questions that reveal how they think, not just what they've done. Generic questions will only get you generic, rehearsed answers. Instead, frame your inquiries around real-world scenarios that relate directly to your project.

Let's say you're planning an adaptive reuse of a historic downtown building. Don't just ask, "Have you worked on historic projects?" That's a simple yes-or-no question.

Instead, try a more probing approach: "Our project involves converting a 1930s textile mill with known structural unknowns. Can you walk me through a similar project where you uncovered unexpected conditions, and how your team navigated the technical and budgetary fallout?" This kind of question forces them to tell a story, revealing their process, transparency, and problem-solving grit.

Structure Your Interview for Clarity

A well-structured interview ensures you cover all your bases and can compare firms apples-to-apples later. By organizing the conversation into distinct phases, you respect everyone's time and get the specific insights you need.

A smart interview flow might look something like this:

  • Project Grasp: First, see if they've truly absorbed your project brief. Do they understand the core business objectives driving the architecture?
  • Process and Philosophy: Next, dig into how they work. This is where you explore their design philosophy, project management style, and communication habits.
  • Team Dynamics: Get a clear picture of who you'll actually be working with day-to-day. Who is the project manager? Who will be your primary point of contact?
  • Real-Time Problem-Solving: Present them with a hypothetical challenge specific to your project. Their response will be incredibly telling.

This framework moves the conversation from the general to the specific, helping you build a comprehensive picture of each candidate.

The goal of the interview isn't just to validate their portfolio; it's to simulate the working relationship. You're looking for a partner who listens intently, communicates clearly, and demonstrates a genuine enthusiasm for solving your project's unique puzzles.

To help you get the most out of this critical conversation, I’ve put together a table of key questions. Think of this as a checklist to guide your interview and ensure you don’t miss anything important.

Key Interview Questions to Ask Potential Architects

A checklist of essential questions, categorized by topic, to help you conduct a comprehensive and effective evaluation.

Category Sample Question What to Listen For
Project Understanding Based on our brief, what do you see as the biggest challenge and the greatest opportunity for this project? Do they grasp the core business goals? Do they offer a fresh perspective or just repeat your brief back to you?
Experience & Expertise Walk me through a past project that faced significant zoning hurdles or community opposition. How did you resolve it? Look for strategic thinking, diplomacy, and a realistic understanding of the approvals process.
Design & Philosophy How do you balance your design vision with the client's budget and functional requirements? A good partner prioritizes the client's success. Red flags are architects who seem fixated on their own "vision" at all costs.
Project Management Describe your process for managing the project budget during the design phase to avoid surprises in construction. Listen for specific methods like cost estimating at key milestones, value engineering, and transparent reporting.
Collaboration & Team Who from your firm will be my primary point of contact, and who will be leading the project day-to-day? You want to meet the people you'll actually be working with, not just the firm's principals who handle sales.
Technical Skills What software and technology (e.g., BIM, project management tools) do you use to coordinate with engineers and contractors? Look for a modern, efficient workflow. Proficiency with BIM (Building Information Modeling) is a strong plus for complex projects.

These questions are a starting point. Tailor them to your specific needs, and don’t be afraid to ask follow-up questions to dig deeper into their answers.

Probing for Project Management and Communication Style

Beautiful design is only half the battle. A project’s success often lives or dies by meticulous project management and proactive communication. This is where many projects go off the rails, so it's critical to dig deep here.

Ask direct questions about their process:

  • How do you keep clients informed of progress and potential issues?
  • What is your approach to budget management and cost control?
  • Can you describe how you coordinate with engineers, contractors, and other consultants?

Their answers should give you confidence that they have robust systems in place. You're listening for specifics—mentions of software, regular meeting cadences, and clear reporting structures. Vague answers about "staying in touch" are a major red flag.

For example, a great answer might be: "We hold bi-weekly owner-architect-contractor (OAC) meetings with a shared action-item log. Every Friday, you'll get a concise project update email summarizing progress, upcoming decisions, and any budget impacts. We also manage all project documents through a cloud-based portal like Procore for 24/7 access." Now that's a systematic approach that signals professionalism and reliability.

Decoding Proposals and Architect Fee Structures

Getting that first stack of proposals is a fantastic feeling. It’s the moment your project starts to feel real, and you've got qualified firms eager to help you build it. But this is where the real work begins. Comparing these documents is more art than science, and you have to look well beyond the bottom-line number.

A proposal isn't just a price tag; it's a firm's strategic plan for turning your vision into a physical asset. Your job is to decode that plan, understand the value hiding behind the cost, and make sure there are no expensive surprises down the road. If you misinterpret a fee structure or a scope of work now, you're setting yourself up for budget overruns and a lot of friction later on.

Understanding the Three Main Fee Models

Architects generally price their work in one of three ways. Each approach has its own rhythm, and the best fit really depends on how complex and predictable your project is. Getting a handle on these is the first step to making a true apples-to-apples comparison.

Here’s a quick rundown of the structures you’ll likely see:

  • Percentage of Construction Cost: This is the old-school model. The architect’s fee is a set percentage—say, 8-12%—of the total construction bill. It’s simple to understand, but it can create a weird incentive. The more the project costs to build, the more they make.
  • Fixed Fee (Stipulated Sum): This is exactly what it sounds like. The architect quotes one flat price for a clearly defined scope of services. Developers and investors love this because it offers budget certainty. The catch? The scope has to be crystal clear from day one, because any changes will mean extra service requests and extra costs.
  • Hourly Rate (Time and Materials): Here, you pay for the actual hours the team puts in, usually with a "not-to-exceed" cap to protect you. This is perfect for the early, messy stages of a project when the scope is still squishy, like a feasibility study for an old building. It offers transparency, but it can be tough to budget for.

For instance, on a tricky adaptive reuse project with tons of unknowns, you might start with an hourly agreement for the initial discovery phase. Once the scope is locked in, you could switch to a fixed fee for the rest of the work. For a straightforward new commercial build, though, a fixed fee from the get-go makes perfect sense.

Look Beyond the Final Number

Let me be blunt: the cheapest proposal is almost never the best one. A lowball bid is a massive red flag. It could mean the firm is inexperienced, they’ve completely misunderstood the project's complexity, or they're giving you a bare-bones scope and plan to hit you with add-on fees for every little thing. A smart proposal review is about finding the best value, not the lowest cost.

So, when you get those proposals, it's time to get surgical. I recommend creating a simple spreadsheet to compare the key components of each one side-by-side.

A great proposal is a clear and comprehensive roadmap. A weak one is vague and full of holes. Pay just as much attention to what isn't said—that’s often where the real risk is hiding.

Look for a detailed breakdown of what they’ll deliver in each project phase:

  • Schematic Design
  • Design Development
  • Construction Documents
  • Bidding & Negotiation
  • Construction Administration

Does one proposal include 3D renderings and early cost estimates as part of their standard service, while another lists them as an add-on? Little differences like that can add up fast and seriously affect your ability to make good decisions.

What a Comprehensive Proposal Includes

A strong proposal doesn’t leave you with a bunch of questions. It shows you that the architect was actually listening, that they get your goals, and that they’ve already put some real thought into how to get you there.

Here’s a checklist of what you should be looking for:

  1. A Detailed Scope of Services: It needs to clearly list every task and deliverable for each phase. Vague phrases like "general project coordination" are a warning sign.
  2. A Clear Fee Breakdown: The proposal must explain exactly how the fee is calculated and what the payment schedule looks like.
  3. The Project Team: Who are you actually going to be working with day-to-day? It should name the principal-in-charge, the project manager, and other key players.
  4. Proposed Timeline: You want to see a realistic schedule with major milestones. A good one will also acknowledge potential hurdles like permitting or public reviews.
  5. List of Consultants: The architect manages a team of engineers (structural, MEP, civil). The proposal should be explicit about whether their fees are baked into the architect's fee or are a separate cost.
  6. Exclusions and Additional Services: A transparent firm will tell you exactly what is not included (e.g., city permit fees, hazardous material testing) and what their rates are for any work that falls outside the base scope.

By methodically taking each proposal apart, you shift from just comparing prices to truly evaluating potential partners. This deep-dive analysis is the only way to pick a firm that not only offers a fair price but also provides the comprehensive service and straight-shooting transparency your project deserves.

Evaluating an Architect's Tech and Sustainability Skills

A beautiful design is one thing. A building that is efficient, digitally managed, and environmentally responsible is another entirely. When you’re vetting an architect, their portfolio is just the starting point. How they handle technology and sustainability tells you a lot about their firm's readiness for the future. This isn't about finding a "nice-to-have" bonus—it's a critical step to protect your investment and keep your project running smoothly from day one.

Proficiency with modern tools isn't optional anymore. The industry is deep into a digital shift, and an architect's fluency with data modeling, visualization, and collaborative software is a huge differentiator. With over 1 million patents in the global architecture industry and an annual patent growth rate of 5.11%, innovation is moving fast. Tech competency is a core requirement for any firm you should be considering. You can find more insights on these architecture market trends on lviassociates.com.

Assessing Proficiency with BIM and Digital Tools

The single most important technology in commercial architecture today is Building Information Modeling (BIM). Don’t mistake it for simple 3D modeling. BIM is a whole process for creating and managing all the information about your project, from the first sketch to final demolition. Think of it as a shared digital blueprint of the building, where every single component contains intelligent data.

For commercial projects, this approach is a complete game-changer. It gets the architect, structural engineer, and MEP (mechanical, electrical, plumbing) consultant all working from the same coordinated model. This drastically cuts down on clashes—like a duct trying to run through a steel beam—that would otherwise turn into expensive change orders and painful delays on site.

BIM transforms the design process from a stack of disconnected drawings into a single source of truth. It lets you catch errors on a screen, where they cost nothing to fix, instead of on-site, where they can blow up budgets and timelines.

So, when you interview architects, ask them to show you how they use BIM. Don't just tick a box if they say "yes." Ask them to walk you through a real project example. You're looking for them to articulate tangible benefits, such as:

  • Clash Detection: How did they spot and fix conflicts between building systems before a single shovel hit the ground?
  • Visualization: Can they generate realistic renderings and virtual walkthroughs that help you see the space and make better decisions?
  • Data Management: How does the model help with material take-offs, cost estimates, or even planning for future facility management?

To get a better handle on their tech stack, it’s worth familiarizing yourself with the top architectural rendering software that leading firms use to create their designs.

This image is a perfect example of how BIM pulls together all the layers of a building—structural, architectural, and MEP systems—into one intelligent model. This integrated view is exactly what allows teams to coordinate complex designs with incredible precision, spotting problems long before construction begins.

Verifying Sustainability and Green Building Credentials

Sustainability is no longer a fringe interest; it's a core business driver. Between regulatory pressures, tenant expectations, and the clear benefit of long-term operational savings, it's something you can't afford to ignore. A savvy architect won't just talk about "green" materials; they will guide you through the intricate systems and certifications that define a high-performance building.

Their expertise needs to be specific and proven. During your evaluation, dig into their experience with actual standards and practices.

Ask targeted questions about their track record:

  • LEED Certification: Have they successfully taken projects to LEED Silver, Gold, or Platinum? Ask for the story—what were the challenges and how did they solve them?
  • Net-Zero Design: What's their experience with principles that let a building produce as much energy as it uses?
  • Energy-Efficient Systems: How do they approach high-performance HVAC, advanced insulation, and smart lighting controls?
  • Sustainable Materials: What's their process for sourcing materials with a low environmental impact, like those with recycled content or from local suppliers?

A truly skilled architect will connect these sustainable strategies directly to your bottom line. They should be able to clearly explain how an upfront investment in better systems translates into significant long-term savings and a higher property valuation.

Making Your Final Decision and Signing the Contract

An architect uses a computer to design a modern building, showcasing technology and sustainability.

You’ve made it through the portfolios, the proposals, and the interviews. Now comes the moment of truth: pulling all that information together—from hard data to your own gut instinct—to make a confident choice. This is where you connect the dots, making sure a firm's philosophy matches its real-world performance.

The most powerful tool you have left is the reference check. A lot of people treat this as a formality, but that’s a huge mistake. A well-conducted reference call can give you insights into a firm’s communication style and problem-solving abilities that you simply can't find anywhere else.

Digging Deep with Reference Checks

When you get a past client on the phone, don't just ask, "Were you happy with them?" You need to dig deeper. Ask specific, scenario-based questions that reveal how the architect really performs when things get complicated.

Try a few of these to get to the heart of the matter:

  • "Can you walk me through a time an unexpected issue came up during construction? How, specifically, did the architect handle it?"
  • "How was the team's responsiveness once construction was underway? Were your questions and concerns addressed promptly?"
  • "Did the architect do a good job of managing the budget? Were you alerted to potential cost overruns ahead of time, or were they a surprise?"
  • "Were the final construction documents clear and well-coordinated? Did you see a lot of change orders because of them?"

Pay close attention not just to what they say, but how they say it. Any hesitation or vague answers can be just as telling as a direct comment. Your goal here is to paint a complete picture of what it’s like to work with this firm from beginning to end.

Putting It All Together for the Final Call

With feedback from references in hand, it’s time to make the decision. The best choice is almost never based on a single factor; it’s a balanced assessment of everything you’ve learned.

The right architect isn’t just the one with the most beautiful portfolio or the lowest fee. It’s the firm that acts like a true partner—a team that brings the right blend of creative vision, technical chops, and reliable communication to meet your business goals.

Weigh all the elements together: the portfolio’s relevance, the proposal’s clarity, the chemistry from the interview, and what you heard in the reference checks. Trust your intuition, but make sure it’s grounded in the solid due diligence you've just completed. Once you've notified the winning firm, the next immediate step is to make the partnership official.

Inking the Deal

Before a single line is drawn, you need a signed contract. Most architects use standard agreements from the American Institute of Architects (AIA), which are generally well-regarded and fair. Still, never sign anything without having your own legal counsel review it thoroughly.

It's also a good idea to understand the essential elements of a contract yourself. Pay extra attention to the scope of services, fee structure and payment schedule, project timelines, and the process for handling changes or disputes.

If certain terms don't quite match your verbal agreements, don't be afraid to negotiate. This document will be the official roadmap for your project, so make sure it's right. Once it’s signed, you're ready to start building a successful collaboration.


At Sherer Architects, LLC, we guide clients through every stage of design and construction, transforming complex puzzles into enduring, profitable results. Whether you're planning a new commercial build, an adaptive reuse, or a historic preservation, we bring decades of experience to the table. Start the conversation about your project today.

Categories
Uncategorized

10 Sustainable Architecture Strategies for 2025 Projects

In today's commercial real estate landscape, sustainability is no longer a niche interest; it's a core driver of value, resilience, and profitability. For developers and building owners, adopting forward-thinking sustainable architecture strategies is critical for attracting top-tier tenants, reducing long-term operational costs, and future-proofing assets against regulatory shifts and climate-related risks. Integrating these approaches creates buildings that are not only environmentally responsible but also more desirable and economical to operate.

This is especially true for complex projects like commercial new builds, adaptive reuse, and historic preservation, where the right approach can turn challenges into significant opportunities. The financial upside is substantial. By carefully planning for energy efficiency and renewable generation from the outset, owners can drastically lower utility expenditures over the building's lifecycle. To help quantify the financial benefits of integrating renewable energy and contributing to a profitable future, you can understand the return on investment for solar panels and model long-term gains.

This guide moves beyond the abstract to provide a comprehensive roundup of 10 actionable strategies, detailing how to implement them effectively in your next project. From passive design and green roofs to material selection and smart building systems, you will gain practical insights for achieving both environmental and economic success. Each point is designed to be a clear, implementable step toward creating more valuable, efficient, and resilient properties.

1. Passive Design & Natural Ventilation

Passive design is one of the most fundamental sustainable architecture strategies, leveraging a building’s site, climate, and materials to maintain occupant comfort and reduce energy demand. This approach works with the environment, using natural sunlight for heating and daylighting, and airflow for cooling, rather than fighting against it with active mechanical systems. For developers and owners, integrating passive design from the project's inception translates to significant long-term operational savings and enhanced tenant well-being.

Modern room with open windows and green shutters demonstrating passive cooling ventilation strategy

This strategy hinges on smart, site-specific decisions. Building orientation is optimized to control solar gain, using south-facing windows (in the Northern Hemisphere) to capture winter sun while incorporating overhangs or louvers to block high summer sun. Natural ventilation relies on pressure differentials and the "stack effect," where cool air enters through low openings and warm air exits through high ones, creating a natural cooling cycle without air conditioning.

How to Implement Passive Design

Successfully integrating these principles requires a data-driven approach early in the design phase.

  • Analyze Climate Data: Begin with a thorough analysis of local climate patterns, including sun paths, prevailing wind directions, and temperature fluctuations. This data informs every subsequent design choice.
  • Utilize Building Simulation: Employ energy modeling software (like IES-VE or EnergyPlus) to simulate airflow, solar exposure, and thermal performance. This allows architects to test and refine design elements before construction.
  • Design for Cross-Ventilation: Strategically place operable windows and vents on opposite sides of a building to encourage natural airflow, a key component of passive cooling.
  • Integrate Thermal Mass: Use materials like concrete, brick, or stone that can absorb and store heat. In a passive solar design, this thermal mass absorbs heat during the day and slowly releases it at night, stabilizing interior temperatures.

The Eastgate Centre in Harare, Zimbabwe, famously mimicked the self-cooling mounds of termites, using less than 10% of the energy of a conventional building its size. By prioritizing passive design, you create a resilient and efficient structure that costs less to operate and provides a healthier indoor environment.

2. Green Roofs & Living Walls

Green roofs and living walls transform inert building surfaces into dynamic, living ecosystems. These vegetated systems, also known as living architecture, involve growing plants on a building’s roof or facades, providing a powerful tool for insulation, stormwater management, and biodiversity. For developers, this strategy not only boosts a building’s environmental performance but also adds significant aesthetic value and usable amenity space, attracting tenants and enhancing property value.

Worker maintaining vertical green roof garden with lush vegetation on modern sustainable building

This sustainable architecture strategy works by adding layers of vegetation, growing medium, a root barrier, and a drainage system to a standard roof or wall. This assembly absorbs rainwater, mitigates the urban heat island effect by reducing surface temperatures, and adds a layer of thermal insulation that lowers heating and cooling costs. Furthermore, these systems can double the lifespan of a roof membrane by protecting it from UV radiation and extreme temperature fluctuations.

How to Implement Green Roofs & Living Walls

Successful implementation requires careful planning around structural capacity, plant selection, and long-term maintenance.

  • Conduct a Structural Assessment: Before any design work, a structural engineer must confirm the building can support the additional weight of a green roof system (including soil, plants, and saturated water). This is especially critical in adaptive reuse projects.
  • Select Appropriate Plant Species: Choose native, drought-tolerant, and low-maintenance plants suited to the local climate and specific rooftop conditions (sun, wind exposure). Extensive systems often use sedums, while intensive systems can support a wider variety of plants.
  • Integrate with Stormwater Systems: Design the green roof to capture and slow rainwater runoff. Consider integrating it with a rainwater harvesting system to provide irrigation for the roof itself or for other non-potable uses in the building.
  • Plan for Ongoing Maintenance: While many systems are low-maintenance, they are not "no-maintenance." Develop a clear maintenance plan that includes regular inspections, weeding, and irrigation system checks to ensure the system's long-term health and performance.

Iconic projects like Chicago City Hall’s 20,000-square-foot green roof and Stefano Boeri’s Bosco Verticale in Milan showcase how living architecture can radically redefine the urban environment. By integrating these systems, you create resilient, high-performing buildings that actively contribute to ecological health.

3. Daylighting & Façade Optimization

Daylighting is a powerful sustainable architecture strategy that designs building façades and interior layouts to maximize the use of natural light. This approach significantly reduces the need for artificial lighting, which can account for 25-40% of the energy consumed in a commercial building. For developers, optimizing daylight creates more desirable, productive spaces for tenants and directly slashes operational energy costs, boosting the building's net operating income.

Modern building interior courtyard with skylights maximizing natural daylight and sustainable design features

The strategy goes beyond simply adding more windows. It involves a sophisticated optimization of the building envelope, using tools like light shelves, atria, clerestory windows, and advanced glazing technologies to harvest sunlight and distribute it deep into the building’s core. The goal is to create visually comfortable and stimulating environments that enhance occupant well-being while balancing heat gain and glare, ensuring the building remains energy-efficient year-round.

How to Implement Daylighting Strategies

Effective daylighting requires detailed analysis and a holistic design approach from the very beginning of a project.

  • Utilize Daylighting Simulation: Employ specialized software like DIVA for Rhino or Radiance to model daylight performance. These tools help predict illuminance levels, identify glare issues, and optimize façade elements like window size and shading devices before construction.
  • Integrate Advanced Glazing: Select high-performance glazing with appropriate Solar Heat Gain Coefficients (SHGC) and Visible Transmittance (VT) values based on climate and orientation. Consider dynamic glass that tints automatically to control glare and heat gain.
  • Design Reflective Interior Surfaces: Use light-colored finishes on ceilings, walls, and floors to help reflect and propagate natural light deeper into the space, reducing the contrast between perimeter zones and the building core.
  • Balance with Automated Controls: Combine daylighting with smart lighting systems that use photosensors to dim or switch off electric lights when sufficient natural light is available, maximizing energy savings automatically.

The Edge in Amsterdam, often called the world's most sustainable office building, uses a daylight-responsive LED lighting system and a carefully oriented glass façade to ensure 70% of its workspaces receive abundant natural light. By prioritizing daylighting, you can deliver a premium, energy-efficient building that actively supports the health and productivity of its occupants.

4. Renewable Energy Integration (Solar & Wind)

Integrating on-site renewable energy systems is a powerful sustainable architecture strategy that directly reduces a building's operational carbon footprint and reliance on the electrical grid. By generating clean electricity with technologies like photovoltaic (PV) panels or wind turbines, developers can transform a building from a passive energy consumer into an active energy producer. For property owners, this strategy offers long-term operational cost stability, protection against rising utility rates, and a highly visible commitment to sustainability that attracts premium tenants.

This approach involves installing systems that capture natural energy sources specific to the site. Solar PV panels convert sunlight directly into electricity, making them ideal for rooftops, parking canopies, or building facades with high solar exposure. In locations with consistent wind patterns, small-scale or building-integrated wind turbines can supplement energy production, further diversifying the on-site generation portfolio and enhancing energy resilience.

How to Implement Renewable Energy Systems

A strategic, phased approach ensures that renewable energy integration is both effective and financially sound. It's crucial to optimize the building first before generating power.

  • Prioritize Efficiency First: Before investing in generation, conduct a comprehensive energy audit to identify and implement efficiency upgrades. Reducing the building's overall energy demand is the most cost-effective first step and allows for a smaller, less expensive renewable system.
  • Assess Site Viability: Analyze the site's solar and wind resources. This includes evaluating roof orientation, shading from adjacent structures, and local wind speed data to determine the most suitable technology and optimal placement.
  • Size the System Strategically: Design the system to meet a significant portion, but not necessarily all, of the building's energy needs. Sizing for 50-75% of demand is often a sweet spot for maximizing return on investment, especially when paired with net metering agreements.
  • Integrate Battery Storage: Pair renewable systems with battery storage to capture excess energy generated during peak production times. This stored energy can be used during periods of low generation or high electricity costs, maximizing self-consumption and providing backup power.

Tesla's solar-powered Gigafactories and the Masdar City development in Abu Dhabi are large-scale examples of this strategy in action. To evaluate the economic viability for your specific project, consider using a solar return on investment calculator to project your potential savings and profits.

5. Water Management & Rainwater Harvesting

Effective water management is a cornerstone of sustainable architecture strategies, focusing on reducing potable water consumption and mitigating stormwater runoff. This approach involves capturing, treating, and reusing water on-site through systems like rainwater harvesting and greywater recycling. For developers, integrating these systems reduces reliance on strained municipal water supplies, lowers long-term utility costs, and enhances a property's resilience against drought and water restrictions.

The core principle is to treat water as a valuable, cyclical resource rather than a disposable commodity. Rainwater is collected from rooftops and other surfaces, filtered, and stored in cisterns for non-potable uses like landscape irrigation, toilet flushing, and cooling tower makeup. Similarly, greywater from sinks and showers can be treated and recycled for the same purposes, significantly cutting a building’s demand for fresh water.

How to Implement Water Management Systems

A successful water management strategy requires careful planning and integration from the earliest design stages to maximize efficiency and ROI.

  • Calculate Building Water Needs: Conduct a comprehensive water balance analysis to quantify the building's projected potable and non-potable water demands. This data is crucial for sizing collection, storage, and treatment systems appropriately.
  • Prioritize High Water-Use Areas: Target systems like toilets, urinals, and landscape irrigation for non-potable water use, as they represent the largest consumption points in most commercial buildings.
  • Integrate Greywater & Rainwater Systems: Design a cohesive system where rainwater harvesting provides the primary supply for non-potable needs, supplemented by greywater recycling to ensure a consistent, year-round water source.
  • Optimize Water Storage: Plan for water storage tanks (cisterns) in non-prime real estate areas like basements or underground to maximize usable floor space. Ensure easy access for filtration maintenance.

Singapore’s city-wide ABC (Active, Beautiful, Clean) Waters Program masterfully integrates water management into the urban landscape, turning canals and reservoirs into community assets. By adopting a holistic approach to water, you create a more self-sufficient and environmentally responsible property.

6. Biomimicry & Nature-Inspired Design

Biomimicry is a powerful sustainable architecture strategy that looks to nature for time-tested solutions to human design challenges. Instead of inventing new methods, this approach studies and emulates the strategies found in nature's forms, processes, and ecosystems to create efficient and resilient buildings. For developers, biomimicry offers a pathway to innovation, creating high-performance buildings that are inherently optimized, resource-efficient, and attuned to their environment.

This discipline operates on the principle that nature, through 3.8 billion years of evolution, has already solved many of the problems we face: energy management, temperature regulation, material efficiency, and water conservation. By applying these evolved principles, architects can move beyond simple green features to create deeply integrated, systems-based designs that function more like living organisms than static structures.

How to Implement Biomimicry

Integrating nature’s genius into a project requires a shift in perspective, moving from a human-centric to a nature-centric design process.

  • Consult Nature's Database: Start by translating your design challenge into a functional question, then explore how nature solves it using resources like AskNature.org. For example, "How does nature cool a structure in an arid climate?"
  • Observe Local Ecosystems: Look to local flora and fauna for inspiration. A building in a humid climate might emulate the moisture-wicking properties of a specific plant leaf, creating a culturally relevant and site-specific solution.
  • Form Interdisciplinary Teams: Collaborate with biologists and ecologists early in the design phase. Their expertise can help identify relevant natural models and validate the application of biological principles to architectural systems.
  • Test and Validate Principles: Abstract a natural strategy and then test its application through digital modeling and physical prototypes. The goal is to understand the underlying principle, not just copy the form.

The aforementioned Eastgate Centre in Zimbabwe, designed by architect Mick Pearce, famously uses a passive cooling system modeled after the self-regulating mounds of African termites. This approach allows the building to use less than 10% of the energy of a conventional building of its size, demonstrating the immense potential of biomimicry.

7. Modular & Prefabrication Construction

Modular and prefabrication construction is a sustainable architecture strategy that shifts a significant portion of the building process from the construction site to a controlled factory environment. This method involves manufacturing standardized components or entire volumetric modules off-site, which are then transported and assembled on location. For developers, this approach dramatically reduces material waste, accelerates project timelines, and enhances quality control, leading to more predictable outcomes and a smaller environmental footprint.

The core benefit lies in efficiency. In a factory setting, materials can be precision-cut and optimized, reducing waste by up to 90% compared to traditional site-built projects. This controlled process also minimizes weather-related delays and improves worker safety. Furthermore, this method supports circular economy principles, as components can be designed for disassembly and reuse (DfMA – Design for Manufacture and Assembly), extending the building's material lifecycle.

How to Implement Modular & Prefabrication

Adopting a modular approach requires a shift in project planning, with detailed design decisions made much earlier in the process.

  • Invest in Detailed BIM Modeling: Use Building Information Modeling (BIM) software to create a highly detailed digital twin of the building before any manufacturing begins. This resolves clashes and finalizes specifications, preventing costly changes later.
  • Standardize Components: Work with the design team to standardize dimensions and components as much as possible. This leverages the efficiencies of mass production and simplifies the assembly process on-site.
  • Plan Logistics Meticulously: Carefully plan the transportation of modules from the factory to the site, considering route limitations, delivery schedules, and crane access. Site logistics and assembly sequencing must be clearly established.
  • Choose Local Manufacturing: Whenever possible, partner with a local or regional manufacturer to reduce the carbon footprint associated with transportation and support the local economy.

Companies like Blokable have used this model to deliver hundreds of energy-efficient apartment units, while Skender has applied it to healthcare facilities, showcasing its versatility. By embracing prefabrication, you can build faster, cleaner, and with greater precision, making it a powerful tool for sustainable development.

8. Material Selection & Circular Economy

Moving beyond just operational energy, one of the most impactful sustainable architecture strategies involves the careful selection of building materials. This approach prioritizes resources that are recycled, renewable, non-toxic, and designed for disassembly and reuse. By integrating circular economy principles, developers can shift from the traditional linear "take-make-waste" model to a cyclical system where materials are continuously recaptured, reducing waste and minimizing embodied carbon.

The core idea is to treat building components as valuable assets that can be recovered at the end of a structure's life. This minimizes landfill waste, conserves natural resources, and often reduces the carbon footprint associated with manufacturing and transporting new materials. Pioneered by thinkers like William McDonough through the "Cradle to Cradle" concept, this strategy is now a cornerstone of leading green building certifications and a key focus for forward-thinking property owners.

How to Implement Circular Material Strategies

Effective material selection requires due diligence and clear communication throughout the supply chain.

  • Specify Materials with Transparency Labels: Use products with Environmental Product Declarations (EPDs), Health Product Declarations (HPDs), and Declare labels. These documents provide standardized data on a material's life cycle impact, ingredients, and recyclability.
  • Prioritize Recycled and Bio-Based Content: Mandate minimum recycled content percentages in project specifications for materials like steel, aluminum, insulation, and concrete. Explore innovative bio-based materials like mass timber, cork, and mycelium.
  • Design for Disassembly (DfD): Work with architects and engineers to design connections and assemblies that can be easily taken apart. Using mechanical fasteners like screws and bolts instead of permanent adhesives or welds allows for future material recovery.
  • Source Locally and Responsibly: Reduce transportation emissions by sourcing materials from regional suppliers whenever possible. Partner with manufacturers who demonstrate a commitment to sustainable harvesting, ethical labor, and transparent supply chains.

Microsoft's Silicon Valley Campus, for example, utilized CarbonCure concrete, which mineralizes captured CO2, and sourced 90% of its structural wood from a sustainably managed forest. By focusing on material life cycles, you not only create a healthier building but also build long-term asset value and resilience.

9. Smart Building Systems & IoT Integration

Smart building technology moves beyond static design elements, creating a dynamic and responsive structure that actively manages its own performance. By integrating a network of Internet of Things (IoT) sensors, controls, and advanced analytics platforms, these systems optimize energy, water, and occupant comfort in real-time. For developers and owners, this data-driven approach transforms a building from a passive asset into an intelligent, high-performance machine that continuously seeks efficiency.

At its core, this strategy uses real-time data to make automated, intelligent decisions. Sensors monitor everything from room occupancy and CO2 levels to HVAC performance and lighting usage. A central Building Management System (BMS) analyzes this information, adjusting systems to match actual demand rather than operating on a fixed schedule. This not only slashes operational costs but also provides unparalleled insight into how the building is truly being used.

How to Implement Smart Building Systems

Deploying an effective smart building strategy requires careful planning around data, interoperability, and security.

  • Prioritize with Sub-Metering: Start by installing sub-meters on the highest energy-consuming systems, like chillers and lighting circuits. This provides granular data to identify the biggest opportunities for savings first.
  • Ensure Open Data Standards: Specify systems that use open protocols like BACnet or Modbus. This prevents vendor lock-in and ensures different systems (HVAC, lighting, security) can communicate and work together seamlessly.
  • Integrate Occupant Feedback: Use apps or QR codes to allow tenants to provide real-time feedback on comfort levels. This data can be fed into the BMS to fine-tune temperature and lighting, improving satisfaction while optimizing energy use.
  • Plan Cybersecurity Architecture: From day one, design a robust cybersecurity plan to protect the building's operational technology (OT) network from potential threats.

The Edge in Amsterdam, often called the world's smartest building, uses over 28,000 sensors to manage its environment, resulting in a 70% reduction in electricity use compared to typical office buildings. This level of integration proves that smart systems are one of the most powerful sustainable architecture strategies for creating truly adaptive and efficient properties.

10. Biophilic Design & Human Connection to Nature

Biophilic design is a sustainable architecture strategy centered on connecting building occupants more closely to nature. This approach integrates natural light, vegetation, natural materials, and other experiences of the natural world into the modern built environment. For developers and owners, it moves beyond simple aesthetics to create spaces that measurably improve cognitive function, reduce stress, and enhance occupant well-being, leading to higher productivity and tenant satisfaction.

Popularized by E.O. Wilson's "biophilia hypothesis," this strategy posits that humans have an innate tendency to seek connections with nature. In architecture, this translates to incorporating living walls, indoor plants, water features, and views of nature. It also involves using natural materials like wood and stone and mimicking natural patterns and forms in the building's design, creating a restorative and engaging indoor environment.

How to Implement Biophilic Design

Successfully integrating biophilic design requires a holistic approach that balances aesthetics, human experience, and practical maintenance.

  • Prioritize Natural Views: Design floor plans to maximize views of outdoor green spaces, parks, or water. Studies have shown that even a simple view of nature can speed up patient recovery in hospitals and boost office productivity.
  • Incorporate Living Elements: Integrate features like green walls, indoor gardens, or potted plants throughout the building. Plan for their maintenance from the outset, including access to light, water, and care.
  • Use Natural Materials and Patterns: Select interior finishes like wood, stone, bamboo, and cork. Incorporate patterns, textures, and forms that mimic those found in nature to create a subtle, subconscious connection to the outdoors.
  • Engage Multiple Senses: Add a water feature for soothing ambient sound, ensure ample natural light, and design spaces that provide good airflow. The goal is to create a multisensory experience of nature.

Amazon's Spheres in Seattle serves as a landmark example, housing thousands of plants in a workplace to inspire creativity. By weaving biophilic design into a project, you create a high-value asset that supports human health, boosts morale, and provides a powerful differentiator in the commercial real estate market.

10-Point Comparison: Sustainable Architecture Strategies

Strategy Implementation Complexity 🔄 Resource Requirements & Cost ⚡ Expected Outcomes ⭐📊 Ideal Use Cases 💡 Key Advantages ⭐
Passive Design & Natural Ventilation Moderate–high: requires early-stage climate-driven design and simulations Low operational cost; modest upfront design investment; minimal mechanical systems High energy reduction in suitable climates; improved indoor air quality New builds and retrofits in temperate climates; naturally ventilated buildings Low operating energy; improved health and reduced HVAC reliance
Green Roofs & Living Walls High: structural, waterproofing and horticultural coordination High upfront installation; structural reinforcement; recurring maintenance Strong thermal insulation, stormwater reduction, extended roof life Urban rooftops, stormwater management, biodiversity and amenity projects Insulation, stormwater control, urban heat island mitigation
Daylighting & Façade Optimization Moderate–high: façade engineering, controls and simulation needed Higher upfront for advanced glazing and control systems; design tools required Large lighting energy savings; better occupant comfort and productivity Offices, atria, classrooms and high-occupancy zones Reduces artificial lighting; supports circadian health and productivity
Renewable Energy Integration (Solar & Wind) Moderate: electrical integration, permits, and siting considerations High capital cost; storage raises cost; dependent on roof/ site orientation Significant carbon reduction and long-term energy cost savings Buildings with good solar/wind resource; resilience and net‑zero goals Energy independence, incentives, increased asset value
Water Management & Rainwater Harvesting High: plumbing, treatment and regulatory coordination Moderate–high capital; storage space needed; ongoing maintenance Major potable water savings; reduced runoff and flood risk Drought-prone sites, large landscapes, campuses and high-use facilities Lowers water demand, mitigates stormwater, increases resilience
Biomimicry & Nature-Inspired Design High: multidisciplinary research, testing and translation to engineering Variable costs; R&D and specialist expertise often required Potentially very efficient, innovative solutions; performance varies by case Performance-driven or signature projects seeking innovation Optimized natural strategies, unique designs, regenerative alignment
Modular & Prefabrication Construction High: requires precise up‑front planning, BIM and logistics Moderate–high capital for factory production; transport and storage needs Reduced waste, faster schedules, consistent quality Housing, repeatable units, healthcare modules, fast timelines Speed of delivery, waste reduction, improved quality control
Material Selection & Circular Economy Moderate: procurement, verification and design-for-disassembly Potentially higher upfront material costs; supply-chain management Significant embodied carbon reduction; healthier indoor environments Projects prioritizing low-carbon and end‑of‑life recovery Lowers embodied carbon, enables reuse and supply transparency
Smart Building Systems & IoT Integration High: complex integration, cybersecurity and data strategies Significant tech investment; sensors, platforms and skilled operators 10–30% operational energy reductions; predictive maintenance and insights Large commercial portfolios, complex systems seeking optimization Real-time optimization, analytics-driven efficiency and fault detection
Biophilic Design & Human Connection to Nature Low–moderate: design integration and maintenance planning Moderate initial cost for materials and planting; ongoing care Improved well‑being, productivity (+15%+), reduced stress and absenteeism Offices, healthcare, education and interiors prioritizing occupant health Psychological and performance benefits; enhanced occupant retention

From Strategy to Structure: Implementing Your Sustainable Vision

We have journeyed through a comprehensive roundup of sustainable architecture strategies, moving from foundational passive design principles to the high-tech integration of smart building systems. The path forward is clear: sustainable design is no longer a niche specialty but the new benchmark for intelligent, future-proof development. It represents a paradigm shift from viewing buildings as static resource consumers to seeing them as dynamic, high-performance assets that generate value for occupants, owners, and the surrounding community.

The strategies detailed in this article, from daylighting and green roofs to material circularity and modular construction, are not isolated tactics to be cherry-picked. Instead, they are interdependent components of a holistic system. A well-designed building envelope, for instance, reduces the load on HVAC systems, making a smaller renewable energy array more effective. Similarly, biophilic design elements can improve occupant well-being, which in turn enhances the value proposition for tenants in a commercial space.

Synthesizing Strategy into a Cohesive Plan

The true art of sustainable architecture lies in the synthesis. It’s about understanding how these individual strategies can be layered and integrated to create a building that performs better than the sum of its parts. For commercial developers and property owners, especially those tackling the unique challenges of adaptive reuse, this integration is paramount.

An effective implementation plan must address three core pillars:

  • Performance: What are the specific energy, water, and carbon reduction targets? Using tools like energy modeling early in the design process provides the data needed to make informed decisions rather than relying on guesswork.
  • Profitability: How do these strategies align with the project's financial goals? This involves a long-term view that accounts for lower operating costs, increased tenant attraction and retention, and potential financial incentives like tax credits.
  • Practicality: Which strategies are most appropriate for the specific site, climate, and building typology? A rainwater harvesting system that is a game-changer in a wet climate might be less impactful than an advanced solar facade in an arid one.

Key Takeaway: The most impactful sustainable projects are not defined by a single "green" feature but by the thoughtful integration of multiple strategies that work in concert. This synergy creates a resilient, efficient, and valuable asset.

Navigating Complexity and Realizing Value

Mastering these sustainable architecture strategies is not merely an exercise in environmental stewardship; it is a critical business imperative. Buildings designed with these principles are more resilient to fluctuating energy costs, better aligned with evolving regulatory landscapes, and more appealing to a growing market of ESG-conscious tenants and investors. They command higher rents, enjoy lower vacancy rates, and hold their value over the long term.

For historic preservation and adaptive reuse projects, the stakes are even higher. The challenge is to weave modern performance standards into the irreplaceable fabric of a historic structure without compromising its character. This requires a nuanced approach and deep expertise in navigating the specific constraints and opportunities, such as leveraging historic tax credits to fund sustainable upgrades.

Ultimately, the journey from a list of strategies to a fully realized, high-performing building requires a clear vision and an expert guide. The most successful outcomes are born from a collaborative process that balances ambitious goals with the grounded realities of construction, budget, and schedule. By embracing this integrated approach, you can transform your next project from a simple structure into a lasting legacy of innovation, profitability, and positive environmental impact.


Ready to translate these sustainable architecture strategies into a tangible, profitable asset for your portfolio? The team at Sherer Architects, LLC specializes in guiding developers and owners through the complexities of sustainable design, adaptive reuse, and historic preservation. Contact us today to start a conversation about your project's potential.

Categories
Uncategorized

The Design Process Architecture Explained

The architectural design process is, at its heart, a detailed and collaborative roadmap. It’s the proven method architects use to take a client's initial spark of an idea and carefully shape it into a tangible, finished building. Think of it less as a rigid set of rules and more as a strategic framework for managing complexity, keeping an eye on costs, and making sure the project hits every one of its goals.

Your Blueprint for Project Success

Stepping into a major commercial, adaptive reuse, or historic preservation project can feel overwhelming. The sheer volume of decisions to be made, regulations to follow, and people to coordinate with is enough to make anyone’s head spin. This is exactly where the design process comes in—it brings order to the chaos.

It functions like your project’s operating system, breaking down thousands of individual tasks into a logical sequence of phases. Each stage has its own clear objectives, specific deliverables, and crucial decision points. This ensures every choice builds intelligently on the one before it, preventing expensive do-overs and keeping the entire team—from client to contractor—on the same page.

This simple workflow shows the high-level journey from an initial idea to the final built reality.

Three-stage workflow diagram showing vision lightbulb, design blueprint, and build crane icons in sequence

Here, the entire process is distilled into three core ideas: Vision, Design, and Build. It’s a powerful reminder of how each step logically flows into the next.

Why a Phased Approach Matters

Modern building projects are incredibly complex, and a disciplined process is no longer optional. The phased approach to architecture has evolved over decades into a global standard for a reason. A typical large-scale commercial project can easily require over 1,000 individual drawings and specifications, a number that demands a structured, methodical workflow. You can dive deeper into the evolution of these design phases to see how they became so essential.

This structured method delivers several critical benefits:

  • Financial Predictability: By staging decisions at the right moments, you gain a much firmer grip on the budget and help prevent "scope creep"—when small additions slowly inflate the final cost.
  • Risk Mitigation: The process front-loads all the important homework, like zoning research and site analysis, to uncover potential roadblocks before they become expensive problems.
  • Informed Decision-Making: You get the right information at the right time, empowering you to make confident choices on everything from the big-picture layout to the fine details of material finishes.
  • Quality Assurance: Every phase acts as a crucial quality-control checkpoint. The design is reviewed, refined, and vetted multiple times before a single shovel hits the ground.

To give you a clearer picture, here’s a quick overview of the stages we’ll be exploring.

The Architectural Design Process at a Glance

This table breaks down the entire journey into its core phases, showing what we aim to achieve at each step and the kinds of activities involved.

Phase Primary Goal Key Activities
Discovery & Programming Define project goals, constraints, and requirements. Client interviews, site analysis, zoning research, budget and schedule definition.
Schematic Design Explore broad concepts and establish the overall design direction. Sketches, massing models, basic floor plans, initial site layouts.
Design Development Refine the chosen design and select major building systems. Detailed floor plans, elevations, material selection, structural/MEP coordination.
Construction Documents Create detailed technical drawings and specifications for construction. Final construction drawings, technical specs, material schedules, quality standards.
Permitting & Bidding Secure building permits and select a contractor. Submit documents to the city, manage bid process, negotiate contracts.
Construction Admin Oversee construction to ensure it aligns with the design intent. Site visits, review contractor submittals, answer questions, approve payments.
Post-Occupancy Evaluate the building's performance and address any final issues. Final walkthrough, project closeout, performance evaluation.

This table provides a high-level map, but we'll be diving into the specifics of each phase throughout this guide.

Ultimately, the architectural design process is about the careful translation of abstract goals into a concrete, buildable reality. It provides the clarity and organization needed to guide your investment from a simple idea to an enduring, functional, and inspiring space.

Without this framework, a project can quickly spiral into a chaotic and reactive mess. But with it, you and your architect share a common language and a clear path forward, empowering you to navigate the complexities of design and construction with confidence.

Laying the Groundwork in Programming and Discovery

Every great building starts not with a sketch, but with a conversation. The programming and discovery phase is arguably the most critical stage in the entire design process architecture. It’s where we lay the foundation for everything that follows, translating your vision into a detailed, actionable brief. Think of it as mapping out the project's DNA—a unique code that will guide every single decision from here on out.

This isn't about jumping straight into floor plans. It's a deep dive into the core purpose of your project. We move beyond "what do you want to build?" to really get at the fundamental "why." Through a series of stakeholder interviews, careful site analysis, and digging into zoning regulations, your architect gets to the heart of your business goals, operational needs, and the specific ways the space needs to function.

Defining the Project Program

In the world of architecture, "programming" is simply the process of defining what the building needs to do. It's a methodical exercise where we outline every single requirement, from the exact square footage of each area to the intricate relationships between different departments or activities.

But this is much more than just making a list of rooms. It’s about understanding flow, efficiency, and human interaction. For an office redesign, for example, the program would map out things like:

  • How many workstations are needed for focused, heads-down work?
  • What kinds of collaborative spaces are required, and how big should they be?
  • Which teams need to be close to each other? Should the engineers be right next to the workshop?
  • How will people and materials move through the space without creating bottlenecks?

This strategic definition of needs is what separates a building that’s merely functional from one that actively boosts productivity and makes people’s day better. It ensures the final design is a solution built for your reality, not just a generic collection of spaces.

Of course, before a single wall goes up, the site itself must be ready. You can explore an in-depth guide to site preparation excavation to see just how much goes into the initial land clearing, grading, and compliance work. Getting this right ensures the physical ground is prepared for the vision we're establishing right now.

Your Role in the Discovery Phase

As the client, your active participation here is absolutely essential. This is your moment to get everything on the table—your vision, your worries, your budget, and your priorities. The more you share, the more closely the architectural solution will align with what you actually need.

To get the most out of these early meetings, try to pull together some key information:

  1. Business Objectives: Get specific about what this project needs to accomplish. Are you trying to improve efficiency, attract top-tier talent, or make a bold statement with your brand?
  2. Functional Needs: Show us how your team works. Bring organizational charts, walk us through a "day in the life," and point out the pain points in your current space.
  3. Budget and Schedule: Be upfront about your financial comfort zone and your ideal timeline. An honest conversation about money now saves a world of headaches and costly redesigns later.
  4. Aesthetic Vision: Feel free to bring inspiration images, but try to focus on the feeling you want the space to evoke, not just specific fixtures or colors.

This phase wraps up when we produce a key document: the architectural program. It summarizes everything we've learned—space requirements, project goals, site conditions, and budget—and becomes the official guidebook for the next stage. With this solid foundation in place, we can start exploring creative concepts with confidence, knowing we're solving the right problems from the very beginning.

Bringing Your Vision to Life with Design

With a solid program in hand, we move from investigation to creation. This is the exciting part where your project’s goals—things like efficiency, collaboration, and brand identity—start to take on a real, physical form. We’re essentially translating abstract ideas into tangible concepts, starting with broad sketches and methodically refining them into detailed plans.

This journey happens in two key phases: Schematic Design and Design Development. Think of them as the creative engine of the whole process, bridging the gap between your initial vision and the final construction-ready blueprints. It's a progressive refinement, moving from the big picture to the smallest, most crucial details.

Two architects reviewing construction blueprints and floor plans on desk with laptop and hard hat

From Big Ideas to Broad Concepts in Schematic Design

Schematic Design is all about exploring the possibilities. Your architect takes the approved program and begins sketching out broad design concepts. This is truly the "30,000-foot view," where the focus is on nailing down the overall form, flow, and character of the building without getting bogged down in the technical weeds.

During this phase, we test ideas quickly and efficiently. Your architect will generate a series of drawings to show the main design direction. It's important to remember these aren't final construction plans; they're tools for conversation and decision-making.

Here’s what you can expect to see during Schematic Design:

  • Conceptual Site Plans: These show how the building sits on the property, mapping out key elements like parking, landscaping, and the main entry points.
  • Basic Floor Plans: You’ll see the general arrangement of spaces, illustrating how different rooms and functions connect to one another.
  • Simple Elevations or Massing Models: These give you a first glimpse of the building's exterior shape, scale, and proportions, often as simple 3D computer models or hand sketches.

Your main job at this checkpoint is to confirm the overall direction feels right. Does the layout work? Does the building’s form capture the spirit of your vision? Now is the time to make big changes, because adjusting a conceptual sketch is far easier and much less expensive than altering a fully detailed design later on.

Refining the Details in Design Development

Once you’ve signed off on a schematic direction, the project moves into Design Development (DD). This is where that broad-stroke concept gets meticulously refined and layered with a much greater level of detail. The "what" and "where" from the schematic phase now get a "how" and "with what" attached to them.

The building really starts to feel real here. The initial sketches are transformed into precise, scaled drawings, and we start making critical decisions about materials, systems, and finishes. Your architect also begins coordinating with other key consultants, like structural and mechanical engineers, to make sure their systems integrate seamlessly into the design.

For example, a simple line on a floor plan that represented a wall now becomes a detailed assembly—we define the studs, insulation, drywall, and even a specific paint color. Modern technology has massively improved this phase; computer-aided design (CAD) and building information modeling (BIM) are now standard tools in over 90% of architectural firms. BIM, in particular, lets us create highly detailed 3D models that help everyone visualize and coordinate every single component of the building. You can learn more about the technological tools architects use and see how they’ve shaped the modern design process.

Key Decisions in Design Development

During this phase, you’ll be asked to make more specific and lasting decisions. Don't worry, your architect will guide you through these choices with material samples, detailed drawings, and 3D renderings to help you visualize the final outcome.

Expect to make decisions on things like:

  • Exterior Materials: Choosing the specific brick, stone, metal paneling, or siding.
  • Interior Finishes: Selecting flooring, wall coverings, ceiling types, and paint colors.
  • Building Systems: Finalizing the approach for HVAC, plumbing, and electrical systems.
  • Windows and Doors: Deciding on the exact style, material, and performance features.

By the time Design Development is complete, the project is largely set in stone. The result is a comprehensive set of drawings and outline specifications that describe the size, character, and key components of the entire project. This creates a solid foundation for the final construction documents that follow.

Creating the Blueprint for Construction

With the creative vision locked in during Design Development, our focus now shifts to pure technical execution. This is where the design process architecture gets incredibly detailed. We're essentially translating the approved design into an exhaustive, highly specific set of instructions that a contractor will follow to the letter. The main goal here is to produce the Construction Documents (CDs)—a package that's far more than just a few floor plans.

Architect drawing plans with pencil on paper beside house model and blueprints on wooden desk

Think of the CDs as the project’s official instruction manual. These documents aren’t just guidelines; they become a legally binding part of your agreement with the builder, defining the exact quality, quantity, and assembly of every single element. Any ambiguity here can lead directly to expensive change orders and frustrating delays on site, so getting these documents right is absolutely crucial.

The Anatomy of Construction Documents

The CDs are an incredibly dense, coordinated set of drawings and written text. They leave nothing to chance, spelling out everything from the precise size of a steel beam to the exact brand and color of paint for the walls.

At this point, your role as the client is less about big design moves and more about a final review. You'll be confirming that this technical translation perfectly matches the decisions we made together in the earlier phases.

A complete set of Construction Documents almost always includes:

  • Detailed Drawings: A comprehensive set of plans covering every discipline—architectural, structural, mechanical, electrical, and plumbing (MEP).
  • Specifications (Specs): A book of written requirements detailing material quality, installation methods, and performance standards for everything from concrete to doorknobs.
  • Schedules: These are organized tables that list every door, window, light fixture, and finish, ensuring total clarity and consistency across the project.

The details are the design. They show how every discipline, constraint, and regulation was reconciled into a coherent system. This is where abstract ambitions become physical agreements, ensuring the final build matches the intended vision.

Once you’ve signed off on these documents, they become the key that unlocks the next two steps: getting a building permit and finding the right contractor to bring your project to life.

As we move through the design journey, the deliverables from our team become progressively more detailed. Here's a quick look at what you can typically expect at each major milestone.

Key Deliverables Across Design Phases

Design Phase Typical Client Deliverables Purpose
Discovery & Programming Meeting notes, program document, existing conditions report, initial budget & schedule To define the project's goals, scope, constraints, and functional needs.
Schematic Design Conceptual sketches, simple floor plans, massing models, precedent imagery To explore the big ideas and establish the overall design direction and feel.
Design Development Detailed floor plans & elevations, 3D renderings, outline specifications, material samples To refine the design, make key material choices, and define building systems.
Construction Documents Complete set of drawings (all disciplines), detailed specifications book, final schedules To provide a complete, legally binding set of instructions for permitting and construction.
Construction Administration Site observation reports, responses to RFIs, submittal reviews, change order documentation To ensure the project is built according to the documents and handle issues as they arise.

This table provides a roadmap, so you always know what information you should have in hand to make informed decisions at every checkpoint.

Securing Permits and Navigating Approvals

Before a single shovel can hit the dirt, the Construction Documents have to be submitted to the local building department for review. This is the permitting process, and it’s a critical check to ensure the project meets all building codes, zoning laws, and life-safety requirements.

For historic preservation projects or buildings in special design districts, this step often includes another layer of review from a Design Review Board or Landmark Commission. It can be a winding road, but your architect manages the entire submission. We'll answer any questions from the plan reviewers and make any required tweaks to get that final, approved permit. A well-prepared set of CDs makes this process go much more smoothly.

Finding the Right Builder Through Bidding

With permitted documents in hand, it’s finally time to choose your builder. This usually happens through a bidding (or tendering) process where we send the CDs to a short list of qualified general contractors. They then use those documents to put together a proposal to build the project for a set price.

Your architect will guide you through this, step by step:

  1. Contractor Selection: We'll help you identify and vet builders who have proven experience with your specific type of project.
  2. Bid Distribution: The complete CDs are sent out to the chosen contractors.
  3. Answering Questions: We act as the single point of contact for all bidder questions, ensuring everyone is working from the same information.
  4. Bid Analysis: When the bids come in, we’ll help you analyze them to make sure they are complete and truly comparable, looking beyond just the bottom-line number.

Having a highly detailed set of Construction Documents is what makes this all work. It forces contractors to give you "apples-to-apples" bids, which is the only way to make a sound financial decision. This detailed blueprint removes the guesswork for the builder, dramatically lowers the risk of surprise costs, and sets the stage for a successful construction phase.

Guiding the Project Through Construction and Beyond

An architect’s role doesn't stop when the contractor breaks ground. In fact, some of their most critical work happens during construction and even after you’ve moved in.

With the detailed blueprints finalized, the project transitions into its last two major stages: Construction Administration and Post-Occupancy Evaluation. This is when your architect shifts from being a designer to your on-site advocate, making sure the vision you've spent months carefully crafting becomes a reality—exactly as planned.

Construction documents with blueprints, pencils, glasses, and ruler on wooden desk outdoors

This oversight is more important than ever. With global construction output projected to climb by 42% by 2030, projects are only getting more complex. Expert administration is essential to protect your investment in this growing market, a trend highlighted in this architectural industry report.

Acting as Your Eyes and Ears on Site

During the Construction Administration (CA) phase, your architect becomes your quality control expert and chief problem-solver on the job site. Construction is never a straight line; unexpected issues always pop up. Your architect is the one who navigates these challenges, protecting both the design’s integrity and your budget.

Think of them as the official translator between the paper plans and the physical structure. They're there to ensure the construction team doesn't just follow the drawings, but truly understands and correctly implements every detail.

Key responsibilities during this phase include:

  • Regular Site Visits: The architect is your boots on the ground, visiting the site to monitor progress and workmanship. They’re checking to make sure everything aligns with the construction documents.
  • Responding to RFIs: Contractors will have questions, formally known as Requests for Information (RFIs). The architect provides clear, timely answers to keep the project moving without delays.
  • Reviewing Submittals: They meticulously review material samples, shop drawings, and product data from the contractor to ensure every window, fixture, and finish meets the specified quality.
  • Approving Payment Applications: Before you release funds, the architect reviews the contractor's monthly payment requests, verifying that the work you’re paying for has been completed correctly.

This continuous oversight is your greatest defense against costly mistakes and shortcuts. It ensures that the quality you paid for is the quality you receive, transforming the detailed documents into a well-built, lasting structure.

Learning from the Finished Product

The final piece of a comprehensive design process is the Post-Occupancy Evaluation (POE). Once construction is wrapped up and you’ve had some time to use the space, the architect returns to see how the building is really performing. This isn't just a courtesy check-in; it’s an invaluable feedback loop.

This evaluation is all about answering practical questions:

  • Does the floor plan actually work for your day-to-day operations?
  • Are the building systems, like heating, cooling, and lighting, efficient and comfortable?
  • Are there any unforeseen quirks or "pain points" that need tweaking?

By gathering this real-world feedback directly from you and your team, the architect can help troubleshoot any lingering issues and gain priceless insights. This commitment to evaluating the final product shows a genuine focus on your long-term success, not just on finishing the job. It’s what closes the loop on the design process architecture, ensuring the building truly serves your needs for years to come.

Navigating Adaptive Reuse and Historic Projects

When we’re working with an existing building—especially one with a story to tell—the standard design process architecture gets a serious makeover. Adaptive reuse and historic preservation aren't about starting from a blank slate. Instead, it’s more like a careful conversation with the past, demanding a unique mix of forensic investigation, creative problem-solving, and a deep respect for a building's soul.

Breathing new life into an old structure kicks off with an even more intensive discovery phase. Forget analyzing an empty lot; here, the architect becomes a building detective. We carefully peel back layers from past renovations to find the original structure, hunt for hidden decay, and piece together the story of how the building has evolved. This detective work is absolutely essential for understanding the building's "bones" and figuring out what can be saved, what needs restoration, and what can be thoughtfully adapted for a new purpose.

This deep dive goes beyond the physical structure; it’s also about wading through a complex maze of regulations. When you’re dealing with projects like this, understanding the ins and outs of renovating a heritage home is a non-negotiable part of the process.

Balancing Preservation With Modern Needs

The real tightrope walk in these projects is balancing our duty to protect historic character with the very real need to meet modern building codes and performance standards. Think about an old warehouse being turned into modern offices. It has to keep that raw, industrial vibe but also seamlessly integrate high-efficiency HVAC, modern data cables, and meet today’s accessibility requirements. Pulling that off takes a ton of skill and creativity.

Architects who specialize in this niche have to be masters of a few key things:

  • Historic Materials: They need to know the right way to repair and bring back to life original materials like old-growth wood, historic brickwork, or original steel windows.
  • Regulatory Navigation: This means working hand-in-glove with State Historic Preservation Offices (SHPOs) and local landmark commissions to make sure every change follows their strict guidelines.
  • Sensitive Integration: It's about designing new systems and additions that feel like they belong, complementing the historic fabric of the building instead of clashing with it.

These projects are a masterclass in negotiation—a constant give-and-take between the building’s past and its future. The architect’s job is to find the elegant solution that honors both, creating a space that feels both timeless and perfectly suited for today.

The Powerful Sustainability of Reuse

Beyond saving a piece of history, adaptive reuse is one of the most powerful forms of sustainable design you can find. It’s true what they say: the greenest building is very often the one that’s already standing. Reusing an existing building has profound environmental benefits that new construction just can't touch.

The biggest win is the massive reduction in embodied carbon—that’s the sum of all the greenhouse gas emissions that come from making, shipping, and installing building materials. By keeping the original structure and shell, we dodge the huge carbon footprint that comes with producing new concrete, steel, and other materials from scratch.

Even better, adaptive reuse brings communities back to life by turning neglected or empty buildings into vibrant hubs, which helps prevent urban sprawl and encourages walkable neighborhoods. This approach doesn't just save buildings; it strengthens the very fabric of our cities, proving that thoughtful preservation is a forward-thinking investment in a more sustainable future.

Common Questions About the Design Process

Going through an architectural project for the first time can feel like learning a new language. You'll naturally have questions about how it all works. Getting a handle on the basics of timelines, costs, and your role will make you a much more confident and effective partner in the process.

Let's break down some of the most common questions we hear from clients.

How Long Does the Design Process Take?

This is the big one, and the honest answer is: it depends. A project’s timeline is a direct reflection of its size, complexity, and how fast the local permitting office moves. The design phase itself can vary dramatically.

For instance, a simple commercial interior refresh might get through the entire design process in just 3-6 months. But if you're building a new, medium-sized commercial building from the ground up, you should expect the design work alone to take anywhere from 9-18 months before a shovel ever hits the dirt.

Projects involving historic preservation or adaptive reuse almost always take longer. There’s a lot more detective work involved upfront to uncover what’s behind the walls, and these projects often face extra layers of review from historical commissions or design review boards. Your architect will map out a detailed, project-specific schedule early on so you know what to expect.

Think of your project schedule as a living document. Your architect sets the initial roadmap, but your ability to make timely decisions at key moments is the single biggest factor in keeping everything on track and avoiding expensive delays.

What Are the Biggest Project Cost Drivers?

It's crucial to understand where the money is really going. Architectural fees are part of the budget, of course—often calculated as a percentage of the total construction cost—but the real heavy hitters are the construction costs themselves.

A few key things tend to drive the budget up:

  • Site Conditions: A challenging site with steep slopes, bad soil, or a lack of utility connections can add significant costs right from the start.
  • Structural and MEP Systems: The building’s skeleton (structural system) and its nervous system (mechanical, electrical, and plumbing) are huge parts of the budget. The more complex they are, the more they cost.
  • Quality of Materials: The level of finish you choose has a massive impact. From the type of brick on the outside to the light fixtures inside, high-end materials and custom-made elements will naturally cost more.
  • Unforeseen Conditions: This is the wild card, especially in renovations. Tearing down a wall and discovering rotted framing or old, hazardous materials is the number one cause of unexpected costs.

How Can I Help the Process Go Smoothly?

The secret to being a great client boils down to two things: clear communication and decisive action. Your focused participation is the fuel that keeps the project moving forward successfully.

It all starts with being completely open about your goals, budget, and must-haves during the initial programming phase. The more your architect understands from the get-go, the more accurately they can design a space that truly works for you. Once design is rolling, your main job is to give clear feedback and make firm decisions when they're needed.

It's also incredibly helpful to name one person on your team as the official point of contact. This prevents your architect from getting mixed signals from different people, which is a classic recipe for confusion and delays. At the end of the day, trust the expertise you hired. Your architect’s guidance on building codes, materials, and construction methods is what will ultimately turn your vision into a real, functional building.


At Sherer Architects, LLC, we believe a transparent, collaborative design process is the foundation of every great project. We’re here to guide you through each stage, making sure your vision comes to life beautifully, on schedule, and within your budget. Learn more about our architectural design approach.

Categories
Uncategorized

Your Guide to an Office Building Layout Plan

An effective office building layout is far more than just a floor plan showing where desks go. It's the strategic DNA of the entire workplace, dictating workflow, shaping company culture, and either boosting or bottlenecking collaboration. The best plans are a thoughtful balance of private nooks for deep focus and open zones for teamwork, all while optimizing how people move through the space. This is the document that makes a building truly work for the people inside it.

The New Era of Office Layouts

Modern flexible workspace with individual wooden pod and blue sofa seating with laptop users

If you're still picturing a sea of identical cubicles, you're thinking of a bygone era. Today's office is a dynamic, agile ecosystem, and the layout is its foundation. We've moved on from the rigid, top-down floor plans of the past to embrace flexible, human-centric designs that cater to a whole spectrum of work styles. This wasn't a random shift; it was a direct response to some powerful forces reshaping how we work.

Technology is arguably the biggest driver. Teams are now scattered across time zones, relying on cloud tools to get things done. The physical office has to be a place that supports this new reality, making the jump between digital and in-person collaboration feel completely seamless. This has also put a new premium on real estate efficiency, forcing companies to be smarter about using every square foot.

The Rise of the Open Concept

Over the last two decades, this push for efficiency and teamwork gave birth to the open-office trend. The promise was huge: break down silos, spark those "water cooler" moments of genius, and slash real estate costs. It took hold so completely that today, around 70% of U.S. office spaces have some form of an open layout.

At the same time, the personal space bubble shrank dramatically. Companies shifted to an average of 100 to 150 square feet per employee, a steep drop from the 200-plus square feet that used to be the norm. You can find more data-driven insights on this topic over at OfficeSpaceSoftware.com.

The real challenge we face now isn't just about creating open space, but about creating the right kinds of spaces. A successful office layout plan provides a balanced ecosystem of environments, giving people the power to choose the setting that best fits the task at hand.

Balancing Collaboration and Concentration

As great as the open concept was for teamwork, it often came at a cost: deep, focused work became nearly impossible. The constant buzz of noise and visual distractions created a productivity problem, forcing a much-needed course correction. The conversation has thankfully matured beyond the simplistic "private office vs. open plan" debate.

We're now in the era of hybrid and activity-based models that finally strike that crucial balance between community and concentration. These smarter, more nuanced layouts almost always include a mix of the following:

  • Focus Zones: Think quiet "library" spaces where everyone knows it's heads-down time. No interruptions allowed.
  • Collaboration Hubs: These are the lively, informal areas with whiteboards and movable furniture, designed for brainstorming and group problem-solving.
  • Private Enclaves: Small, enclosed rooms or even phone booths are essential for confidential calls, one-on-ones, or just a moment of privacy.
  • Social Spaces: The office kitchen or a café-style lounge isn't just for coffee. It's where community is built and informal connections are made.

This approach recognizes a simple truth: a single person has different needs throughout their day. By providing a diverse palette of work settings, an office layout can create a workplace that’s not just efficient, but profoundly human.

Laying the Strategic Groundwork

Before you even think about sketching a floor plan, the real work begins. A truly effective office layout isn't just about arranging desks; it's born from a deep, strategic foundation. Skipping this critical groundwork is a recipe for a building that looks great on paper but fails in practice, creating daily friction for the people who work there.

This initial phase is all about translating your company's mission and operational needs into a concrete, buildable plan.

Getting to Know Your Site

First things first: you have to understand the canvas you're working on. Whether it's an empty lot or an existing building slated for a gut renovation, a thorough site analysis is absolutely essential. This goes way beyond just looking at the property lines. You're trying to uncover the site's hidden potential and its unavoidable limitations.

For instance, we always start by looking at the sun's path. Can we orient the building to capture southern light for common areas? Doing so can slash lighting bills and genuinely boost employee well-being. At the same time, we'd want to place heads-down, focus-intensive workstations on the northern side to avoid constant glare and overheating. We also meticulously map every existing structural column, utility hookup, and load-bearing wall, as these elements will fundamentally shape the building's flow.

Developing Your Architectural Program

With a solid grasp of the site, it's time to create the architectural program. This is your project's playbook. It’s a detailed document that moves far beyond a simple headcount to define exactly what your teams need to thrive.

A robust program digs into the nitty-gritty details:

  • Who Sits Where (and Why): Which departments feed off each other's energy? Putting sales and marketing side-by-side makes perfect sense for collaboration. Separating the high-energy call center from the quiet focus of the finance team is just as important for everyone's sanity and productivity.
  • Mapping the Workflow: We trace how work actually moves through the organization. A smart layout minimizes backtracking and wasted steps, making daily processes feel effortless.
  • Planning for Tomorrow: A great office is built for the future, not just for today. We always plan for 15-20% growth over a five-year horizon. This means designing flexible zones or "soft spaces" that can easily transform into new workstations as your company scales.
  • The Unseen Essentials: Don't forget the support spaces. Server rooms, storage closets, wellness areas, and printing stations are the lifeblood of an office. Underestimate these, and you’ll end up with clutter and operational chaos.

As you build this foundation, it's also a good time to think about long-term operations. Looking into facility management best practices now can help you design a space that's efficient and sustainable for years to come.

Mastering Codes and Zoning

The last piece of this foundational puzzle is navigating the maze of zoning laws and building codes. These aren't suggestions—they are legal requirements that dictate everything from how many exits you need to how wide your hallways must be. Getting this wrong can lead to devastating project delays, expensive redesigns, and serious legal headaches.

One of the biggest mistakes I see is when teams treat code compliance as a final checkbox. You have to weave it into the design from day one. This ensures your plan is viable from the start and saves you from having to butcher your vision later to fix a compliance issue you missed.

To help you get started, here's a quick checklist of the initial data points we gather during this phase. It's crucial for ensuring your design is both functional and fully compliant right out of the gate.

Core Programming and Code Compliance Checklist

Category Key Considerations Example Metric / Requirement
Site Analysis Sun orientation, prevailing winds, existing utilities Maximize southern exposure for passive solar gain
Zoning Setbacks, height limits, Floor Area Ratio (FAR) 30-foot front setback, max building height of 60 feet
Occupancy Business (Group B) occupancy type, occupant load calculation 1 person per 100 gross sq. ft.
Egress Number of exits, travel distance, corridor widths Max travel distance to an exit: 250 feet (sprinklered)
Accessibility (ADA) Accessible routes, turning radii, restroom compliance Min. 36-inch clear width for all accessible paths
Plumbing Required fixture count based on occupant load 1 water closet per 25 occupants (first 50)
Structural Column grid spacing, live/dead load capacity Typical 30' x 30' column bay
Growth Planning Projected 5-year headcount increase, flexible zones Plan for 15-20% future growth capacity

By meticulously working through these three areas—site analysis, programming, and code compliance—you're not just designing. You're building a resilient strategic foundation that ensures your final office layout is innovative, efficient, and ready for whatever comes next.

Designing for Agility and Future Growth

The one thing we can count on in modern business is change. Companies pivot, teams expand and contract, and the way we work is constantly evolving. A rigid office layout isn't just an inconvenience in this environment—it's a serious business liability that can stall growth and stifle innovation. The goal isn't to design a perfect, permanent space anymore. It's to create an agile one that can be easily reshaped as your organization’s needs shift.

This move toward adaptability is a fundamental change in how we think about the physical workplace. Instead of being locked into permanent walls and fixed functions, we’re now designing with modular components, multi-purpose furniture, and reconfigurable zones to create a fluid, responsive environment.

The Core Principles of Flexible Design

Think of a flexible office layout as a living ecosystem. It has to support all kinds of work modes at the same time, from deep, individual focus to high-energy group collaboration. This approach accepts a simple truth: no single type of space can meet every need.

So what does an agile layout actually look like?

  • Movable Partitions: Glass or acoustical walls on tracks are fantastic. They can transform a large open area into smaller, private meeting rooms in minutes, giving you acoustic control right when you need it.
  • Multi-Purpose Furniture: This is about getting creative. Think tables that raise for standing meetings, modular seating you can rearrange for a town hall, and mobile whiteboards that can follow the conversation wherever it goes.
  • Modular Infrastructure: Raised access flooring is a true game-changer here. It creates a space under the floor for all your power, data, and HVAC systems, which means you can move outlets or even reconfigure entire departments without launching a costly and disruptive rewiring project.

An agile office isn't just about preparing for the unknown; it's about empowering your teams right now. When people can choose the environment that best suits their task—a quiet pod for a report, a lounge for a brainstorm—they are more engaged and far more productive.

This isn't just a trend; the industry has fully embraced this model. A 2025 report shows that 55% of global occupiers are already using flexible office solutions, and that number is only going up. A smart flexible office might only dedicate 60-70% of its floor plate to fixed desks, saving the rest for a dynamic mix of shared spaces that can adapt on the fly. You can dig into the specifics in the complete Cushman & Wakefield flexible office report.

Laying this strategic foundation—from deep analysis to strict code compliance—is the critical first step.

Software development workflow diagram showing three stages: analysis with magnifying glass, program with blueprint, and codes with hammer

This workflow shows how a solid plan is built. It starts with a detailed analysis of the site and your needs, moves into a robust architectural program, and is grounded in strict code adherence. That's the bedrock of a successful and adaptable office layout.

Practical Steps for Implementation

Creating a future-ready office means planning for change from day one. It requires foresight and a strategic investment in the right systems.

A great way to start is by thinking about your space in "zones" instead of permanent rooms. A "collaboration zone" could be kitted out with movable furniture and tech carts, allowing it to serve as a project war room one week and an informal presentation space the next. A "focus zone" might be defined by acoustic panels and high-backed seating rather than permanent walls.

When you're choosing furniture, mobility and modularity should be your top priorities. Look for pieces on casters, lightweight components that one or two people can move easily, and systems designed for simple disassembly. This ensures that adapting the space for a new team is a weekend facilities project, not a major construction effort. For an office that also embraces sustainability, consider integrating passive solar design principles into the plan.

Ultimately, designing for agility is about building an asset that evolves with your business. It transforms the office from a static cost center into a dynamic tool that actively supports your company's journey, no matter what twists and turns lie ahead. This approach ensures your physical space remains a high-performing asset for years to come.

Integrating Wellness and Biophilic Design

Modern biophilic office space with green wall, plants, bean bags, and natural wood accents

A great office is more than just four walls and a roof; it’s an ecosystem that should actively boost well-being and performance. Forward-thinking companies have caught on. Weaving wellness and biophilic design into an office building layout plan isn't just a trendy perk anymore—it's a critical business strategy for keeping and attracting the best people. The goal is to create spaces where people feel their best, so they can do their best work.

Biophilic design is all about connecting people with nature inside the built environment. It taps into our inherent desire to be around natural elements, and the results are tangible, directly impacting the bottom line through happier, more productive teams.

The Business Case for Biophilic Design

The modern workforce has spoken. Sterile, soulless corporate cubes are out. Spaces that feel alive and restorative are in. This isn't just a fad; it’s a fundamental shift in what employees expect, and it has real financial consequences.

The numbers don't lie. A 2025 Gensler Global Workplace Survey found that a mere 14% of employees actually want a traditional "corporate" office. The overwhelming majority are looking for spaces with natural light, organic elements, and a connection to the outdoors. The same study showed that offices embracing biophilic features saw a 15% jump in employee well-being and a 6% boost in productivity. You can learn more about these workplace findings and see just how these preferences are shaping the future.

When you weave natural elements into the very fabric of the office architecture, you’re creating an environment that doesn't just house your team—it actively supports their health. In a competitive market, that’s a powerful advantage.

Practical Ways to Incorporate Nature

Bringing biophilic design to life doesn’t have to break the bank. You can make a huge impact with small, smart interventions in your office layout. It's all about finding ways to bring the textures, patterns, and feeling of the natural world indoors.

Here are a few actionable ideas I've seen work incredibly well:

  • Follow the Sun: Arrange workstations to maximize views and daylight. Swap out solid walls for glass partitions to let sunlight reach deeper into the building. It’s a simple change that makes a world of difference.
  • Bring in Living Elements: Nothing makes a statement like a living green wall in a reception area. On a smaller scale, thoughtfully placed planters can define different zones, dampen sound, and add visual calm.
  • Lean on Natural Materials: Choose materials like wood, stone, and natural fibers for floors, furniture, and finishes. These tactile elements create a warmer, more grounded feeling than cold, synthetic alternatives.
  • Think in Patterns: Biophilia isn't just about literal plants. You can use carpeting with patterns that mimic flowing water or wallpaper with subtle leaf motifs to forge that subconscious connection to nature.

Beyond Plants: Wellness-Focused Layouts

While greenery is a cornerstone, a truly healthy office layout goes deeper. You have to consider other critical wellness factors right from the start, because trying to fix them later is almost always a painful and expensive process.

Smart Acoustic Design

In any open or hybrid office, noise is the number one focus-killer. A good layout plan tackles this head-on by creating distinct acoustic zones. This is about more than just tacking up a few sound-absorbing panels.

It means intentionally placing quiet, high-focus "library zones" far from buzzing "collaboration hubs." It also means specifying materials with high Noise Reduction Coefficient (NRC) ratings—think acoustic ceiling tiles, fabric-wrapped panels, and even specialized carpeting that muffles the sound of footsteps.

Ergonomics and Movement

Sitting at a desk all day is a massive health drain. Your layout can either feed into this problem or help solve it. Design circulation paths that encourage people to get up and move, and offer different ways to work that don't involve being chained to one chair.

This could include:

  1. A Mix of Postures: Provide a blend of traditional desks, standing-height tables, and comfortable lounge areas for more casual work.
  2. Centralized Hubs: Put printers, coffee stations, and other shared resources in central spots that require a short walk. It gets people moving and interacting naturally.
  3. Active Spaces: If you have the room, a small, dedicated area for stretching or a wellness room offers a place to mentally and physically reset.

By making wellness and biophilic design central to your office building layout plan, you’re making a direct investment in your most valuable asset: your people.

Coordinating Systems for a Flawless Finish

https://www.youtube.com/embed/wSc4QmKBk6I

A great office layout plan is more than just a smart arrangement of rooms and furniture. It's a masterclass in technical coordination. The most sophisticated and functional designs are the ones where the building's core systems—its structural bones and mechanical circulatory network—are so perfectly integrated you don't even know they're there. This is where architectural vision and engineering reality have to meet, and getting it right is the secret to a building that just works.

Think of your building’s mechanical, electrical, and plumbing (MEP) systems as its central nervous system. These ducts, pipes, and wires need clear pathways to run through the entire structure. If you don't account for them from the very beginning, they will come back to bite you later, forcing clumsy, expensive fixes like dropped ceilings or bulky soffits that ruin your clean lines and steal precious ceiling height. A proactive approach is non-negotiable.

Weaving MEP Into Your Layout

The only way to handle MEP integration is to make it a core part of the layout plan from day one. Instead of viewing ductwork and wiring as problems to be hidden, we treat them as design parameters that shape the space.

For example, we might intentionally design wider circulation corridors or slightly thicker partition walls in strategic locations to act as dedicated utility chases. This tactic neatly contains the building's guts, leaving the primary work areas open, clean, and uncluttered.

Another go-to strategy, especially for clients who need flexibility, is a raised access floor system. This creates a cavity under the finished floor that can house all your power, data, and even some HVAC components. It's a fantastic solution for agility; you can reconfigure entire departments without the headache of trenching concrete or rewiring from the ceiling.

A classic mistake is when architects finalize a layout and then just toss it over the fence to the engineers to "make it work." The truly seamless results come from a collaborative process where architects and engineers are at the same table, solving these spatial puzzles together from the initial concept. This avoids painful compromises that hurt both aesthetics and performance.

Working with Structural Realities

Every building has a skeleton—columns, shear walls, and other load-bearing elements you can't just ignore. In new construction, you have the luxury of defining the structural grid to support your ideal layout. We find a 30' x 30' column bay is often the sweet spot, offering tremendous flexibility for a mix of open-plan spaces and enclosed rooms without awkward interruptions.

Adaptive reuse projects are a different beast. You inherit the building's existing structure, quirks and all. The key is to stop seeing these elements as obstacles and start treating them as design opportunities.

  • Make Columns a Feature: Don't just hide a column, celebrate it. Wrap it in a unique material, build a bench seat around its base, or use it to anchor a collaborative high-top table.
  • Define Natural Zones: A line of existing columns can become a soft boundary between a high-energy collaborative zone and a quieter, heads-down work area. It creates a psychological separation without putting up a solid wall.
  • Integrate Smart Storage: That otherwise awkward space between structural columns is perfect for built-in shelving or custom storage units. It’s an incredibly efficient use of what would otherwise be dead space.

Designing Intuitive Circulation and Safe Egress

The way people move through a building is absolutely critical. Poor circulation creates bottlenecks, disruptive foot traffic through work areas, and a general sense of friction that wears people down over time. The goal is to design clear, intuitive pathways that guide people effortlessly from the front door to wherever they're going.

These same circulation paths form the backbone of your emergency egress plan, and this is where building codes get very strict. The rules are non-negotiable, dictating everything from the minimum width of corridors (usually 36-44 inches) to the maximum distance anyone can be from a fire exit—typically around 250 feet in a sprinklered building.

We design these routes to be logical and safe for everyday use, which naturally makes them reliable in an emergency. This means ensuring clear lines of sight, avoiding dead-end corridors, and even using different flooring materials or lighting to subtly guide people along main pathways. When you plan for circulation and safety at the same time, you create a space that’s not just efficient, but fundamentally secure for everyone inside.

Common Questions We Hear About Office Layouts

When you get down to the brass tacks of designing an office, the same crucial questions always seem to surface. Over the years, I've found that having clear, experience-based answers to these common challenges is what separates a floor plan that just works from one that truly elevates a company's culture and productivity.

Let's dive into some of the questions we tackle every day.

What’s the Real Number for Square Footage Per Employee?

Forget the old rule of thumb that gave everyone a massive 200-250 square foot personal bubble. That’s a relic from a different era. Today, the sweet spot is typically between 125-175 square feet per person.

But this isn't about cramming people in. It's a strategic shift. By being more efficient with individual desk space, we free up valuable real estate for the things that really matter now: collaborative lounges, private phone booths for focused calls, and flexible project rooms. The goal is to create a dynamic work environment with a variety of settings, not just a sea of identical desks.

Some of the most successful layouts we've designed actually have fewer desks than employees. This "activity-based" model trusts that on any given day, people will be in meetings, working remotely, or collaborating away from their desks. The key is to honestly analyze how your teams operate and provide a palette of spaces that supports their actual workflow.

How Do I Keep My Office From Becoming Obsolete in 5 Years?

You future-proof an office by building in flexibility from day one. You have to assume that your needs will change—because they will. The goal is to create a space that can evolve with your business, not one that locks you into a rigid configuration.

Here are the three strategies we always recommend for baked-in adaptability:

  • Modular Infrastructure is a Game-Changer: Think raised access flooring. It’s a brilliant system that hides all your power and data cabling under the floor panels. Need to move a whole department? You just lift the panels and re-route the connections. No expensive and messy concrete core drilling required.
  • Use Demountable Partitions: Instead of building permanent drywall for every office and meeting room, opt for movable or demountable wall systems. This lets you resize, relocate, or even remove enclosed spaces with minimal disruption and cost down the road.
  • Furniture Should Be Agile: Invest in furniture that moves. Desks on casters, modular seating that can be reconfigured in minutes, and mobile whiteboards give teams the power to shape their own environment for different tasks. It’s amazing how this fosters a sense of ownership and creativity.

We also design what we call "soft zones"—unassigned areas like open lounges or casual meeting nooks. These multi-purpose spaces are incredibly easy to adapt as your company’s structure and priorities shift.

What Are the Biggest Mistakes People Make?

Even with the best intentions, a few common mistakes can derail an otherwise great office layout. One of the most frequent and frustrating is poor circulation planning. Nothing kills productivity faster than having constant foot traffic cutting through a quiet work zone because the path to the coffee machine is poorly thought out.

Another classic error, especially in open plans, is completely ignoring acoustics. Without carefully placed sound-absorbing materials and designated quiet zones, the office noise can become unbearable, and focus goes right out the window. We also see plans that just don't account for the nitty-gritty support spaces—IT closets, print stations, and actual storage—which leads to clutter and operational chaos almost immediately.

But if I had to name the single most critical error, it's designing in a vacuum. When you skip the step of getting honest, detailed input from the people who will live in the space every day, you risk creating a layout that is technically perfect but fails in its most basic human function.

How Can We Get the Best of Both Worlds: An Open Office With Real Privacy?

This is the million-dollar question in modern office design. The answer isn't to pick one or the other, but to create a "zoned" or "neighborhood" environment. Instead of one massive, noisy open floor, you intelligently divide the space into distinct areas for different kinds of work.

You can designate a "library" zone where everyone understands that quiet, focused work is the rule. Right alongside that, you provide a rich mix of enclosed spaces, from single-person phone booths for confidential calls to small "huddle rooms" for a couple of people to collaborate without disturbing others.

We also use non-structural elements like tall shelving, planters, or freestanding acoustic screens to create a sense of visual and psychological separation without the finality of building walls. This layered approach empowers people to choose the right setting for the task at hand, giving them both the collaborative energy of an open space and the quiet focus they need.


Answering these questions thoughtfully is the first step. The next is partnering with a team that can turn those answers into a built reality. Sherer Architects, LLC has decades of experience creating commercial spaces that are as functional as they are beautiful. Learn how we can bring your vision to life.

Categories
Uncategorized

Plot Plan Vs Site Plan A Complete Guide

It’s a common point of confusion, but telling a plot plan from a site plan is simpler than it seems. Here’s the key distinction: a plot plan is a zoomed-in drawing that shows exactly where a building sits on its specific piece of land. It's often all you need for basic zoning approvals. A site plan, on the other hand, is a much more detailed, engineering-grade document that shows how that entire property functions within its environment, detailing everything from utilities and drainage to traffic patterns.

Understanding The Core Differences

Before you get too far into your project, it's absolutely vital to know which document you actually need. While both are bird's-eye views of a property, their purpose, scope, and level of detail are worlds apart. I like to think of a plot plan as a close-up snapshot and a site plan as the full panoramic shot that includes all the surroundings.

This isn't just a matter of semantics; the distinction grew out of real-world necessity. Back in the early 20th century, a simple plot plan was usually enough for residential permits. But as cities grew, managing stormwater, traffic, and utilities became a massive challenge, forcing the need for more comprehensive site plans. The cost reflects this complexity. Today, a basic plot plan might run you $300–$500, but a full-blown site plan for a commercial project can easily cost $2,000 to $10,000. You can find more on the evolution of site planning if you're curious about the history.

Architectural blueprints and site plans with aerial plot layout displayed on outdoor drawing table

Plot Plan Vs Site Plan At a Glance

To quickly see the differences, this table breaks down the core characteristics of each document. It’s a great way to figure out which one fits your project's scale and what the local building department will be looking for.

Attribute Plot Plan Site Plan
Primary Focus A single property parcel and the placement of structures within its boundaries. The entire property and its relationship to adjacent properties, streets, and public infrastructure.
Typical Use Case Small residential additions, sheds, fences, or basic zoning permit applications. Commercial developments, subdivisions, new home construction, and major renovations.
Key Details Property lines, building footprint, setbacks, and major existing structures. Topography, grading, utility connections, drainage, landscaping, and parking layouts.
Prepared By Surveyor, architect, or sometimes the homeowner for very simple projects. Licensed civil engineer, surveyor, landscape architect, and/or architect.
Regulatory Purpose To verify compliance with local zoning ordinances like setbacks and lot coverage. To review a project’s impact on public infrastructure, safety, and the environment.

Ultimately, the table shows that a plot plan is about where something is, while a site plan is about how it all works together.

Defining The Property-Focused Plot Plan

Where a site plan gives you the sprawling, big-picture narrative, a plot plan zooms in for a close-up. Think of it as a detailed portrait of a single piece of property. Its main job is to answer one critical question for the local permit office: Does your proposed structure fit within the zoning rules?

The scope is deliberately tight, focusing only on what happens inside your property lines. This makes it the go-to document for smaller residential projects. It’s a simple bird's-eye view showing your land's dimensions, the footprint of your house, and exactly where a new deck, garage, or small addition will sit. A plot plan is all about demonstrating compliance, plain and simple.

Person holding plot plan blueprint with measuring tape in front of residential property

Core Components Of A Plot Plan

A plot plan is defined by what it shows—and what it leaves out. You won't find complex engineering data like topography, grading, or utility infrastructure here. Instead, it’s all about the spatial relationships on your specific lot.

Every good plot plan will clearly show these key elements:

  • Property Lines: The legally defined boundaries of your land.
  • Building Footprints: Outlines of all structures, both existing and proposed.
  • Setbacks: The required buffer zones between your structures and the front, side, and rear property lines.
  • Easements: Any parts of your property legally reserved for utility access or other purposes.
  • Lot Dimensions: The overall measurements of the parcel.

To get the most out of these documents, it helps to know the basics of how to read construction blueprints. Understanding the symbols and lines is key to seeing how your project stacks up against local rules.

The Role In Zoning And Permitting

At its heart, a plot plan is a tool for the local building or zoning department. It’s their cheat sheet. Officials use it to quickly check if a project follows local ordinances before they issue a permit. They aren't worried about how your new garage impacts city-wide infrastructure—that's what a site plan is for. They just need to see that your addition won't creep over a setback line or into a utility easement.

A plot plan is fundamentally a zoning compliance document. It provides just enough information to confirm a project meets local land-use regulations without requiring a full engineering review, making it ideal for streamlined approvals on smaller projects.

For instance, if you want to build a detached garage, the city needs to verify it’s the proper distance from your side and rear property lines. A plot plan shows this with clear, simple measurements. It also confirms that the new building doesn’t push you over the maximum lot coverage percentage allowed in your zoning district.

When A Plot Plan Is The Right Choice

A plot plan is the right call when your project’s impact is neatly contained within your own property lines. It’s the standard document for homeowners and contractors tackling straightforward improvements that don’t complicate the world outside their lot.

Here are a few classic scenarios where a plot plan is all you need:

  • Building a new deck or patio: The plan shows the deck’s size in relation to the house and property boundaries.
  • Constructing a shed or outbuilding: It proves the structure meets the setback rules for accessory buildings.
  • Installing a swimming pool: The plan confirms the pool's location respects easements and property lines.
  • Adding a small home addition: It demonstrates that the new footprint complies with all lot coverage and setback ordinances.

In all these cases, the project doesn't require new utility hookups, major earthmoving, or changes to public property. That limited scope is what makes the plot plan such an efficient and cost-effective tool for getting a permit for most common home projects.

Exploring The Comprehensive Site Plan

If a plot plan is a simple snapshot of a property, the site plan is the full-length documentary. It’s a detailed engineering document that tells the entire story of how a development connects with the world around it, from public utilities to traffic flow.

A site plan addresses the complex dance between a new project and the existing public infrastructure. Its scope is far broader, moving beyond basic property lines to show the big picture. This is why it’s non-negotiable for commercial buildings, new subdivisions, and major adaptive reuse projects where the ripple effects on the community are significant.

Three-dimensional site plan model showing football field, parking area, and buildings on wooden display bench

Unpacking The Technical Details

What truly sets a site plan apart is its incredible depth of technical information. This isn't something you can sketch out on your own; it demands the expertise of licensed professionals like civil engineers and landscape architects. Municipal reviewers rely on these details to confirm a project will function safely and seamlessly.

You’ll typically find elements like:

  • Topography and Grading: A clear map of existing and proposed ground elevations, showing exactly how the land will be shaped to manage water and support the new structures.
  • Stormwater Management: The complete strategy for handling rainwater runoff, often involving complex systems like retention ponds, bioswales, or underground drainage networks.
  • Utility Connections: Precise locations and specifications for tying into public water, sewer, gas, and electrical grids.
  • Landscaping and Lighting: A full plan for vegetation, tree preservation, and outdoor lighting designed to meet local environmental and safety codes.
  • Traffic and Circulation: The carefully planned layout of parking lots, access roads, sidewalks, and critical fire lanes to ensure vehicles and people can move safely.

This level of detail moves the conversation beyond a simple "plot plan vs. site plan" comparison. It’s the difference between a quick zoning check and a full-blown engineering review.

Why Site Plans Are Essential For Major Projects

For any significant development, the site plan is the master guide for construction and the primary tool for city planners. It gives them a clear window into the project's potential impact on public services and the local environment before a single shovel hits the dirt. A city engineer, for instance, will scrutinize the site plan to be certain the new development won't overload the sewer system or create a traffic nightmare.

A site plan is less about the building itself and more about how that building and its property integrate into the fabric of the community. It’s a holistic document that proves a project is a responsible and sustainable addition to the public realm.

Think about a new retail center. The site plan has to prove its parking lot can drain properly without flooding its neighbors, that fire trucks have unobstructed access, and that its entry points won't snarl traffic on the main road. Without this assurance, the project is a public safety risk, making the site plan absolutely indispensable for getting approvals.

The Role In Commercial And Adaptive Reuse

In commercial construction, the site plan is the foundational document that orchestrates the entire project. It's the common language that coordinates the work of everyone involved—from the architects designing the building to the civil engineers laying out the infrastructure. It’s what makes all the pieces of a very complex puzzle fit together.

This is just as true for adaptive reuse projects, a real passion of ours at Sherer Architects. When we give an old building new life, a site plan is essential for documenting—and often upgrading—its outdated infrastructure. We might be detailing a new parking layout to meet modern accessibility codes, revising the landscaping to comply with current water-use ordinances, or planning new utility connections to support the building’s new purpose.

The site plan bridges the gap between a structure's past and its future, ensuring it's ready to serve the community for another 50–75 years.

Comparing Critical Project Requirements

So, you've got the basic definitions down. But understanding the difference between a plot plan and a site plan is one thing; knowing which one your project actually needs is another entirely. This isn't just about picking from a list—it's about matching the document to your project's scope, the technical details involved, and, most importantly, what your local municipality demands.

The choice between a plot plan vs site plan is a direct reflection of your project's complexity. If you're putting up a simple backyard shed, you don't need a deep dive into civil engineering. But for a new commercial development, a basic boundary drawing would be completely inadequate and get rejected by city planners before the ink is dry.

Analyzing Scope and Scale

The first and most obvious dividing line is the project's footprint, both physically and functionally. A plot plan is a tightly focused document, zeroed in on a single piece of property. It’s the right tool when your project’s impact starts and ends right at your property line.

A site plan, on the other hand, comes into play when your project's influence spills over its borders. It’s a holistic view that examines how your property fits into the larger neighborhood—its relationship to public streets, the lots next door, and municipal infrastructure. This bigger picture is non-negotiable for any project that changes how a piece of land interacts with the community around it.

Let's look at a couple of real-world examples:

  • Small Residential Addition: A plot plan is usually all you need. It clearly shows the new structure in relation to your house and the property setback lines. This is typically enough to satisfy the zoning department's main concerns about lot coverage and boundary rules.
  • New Commercial Building: Here, a site plan is an absolute must. It has to detail everything from parking lot circulation and fire truck access to connections for public sewer and water. It also needs to address stormwater runoff—all critical factors that impact public safety and infrastructure.

The Nuance of Technical Detail

Another key difference is the sheer level of technical information required. A plot plan is essentially a map of dimensions and placement. It deals in static measurements: how long the property lines are, the exact setback distances, and the footprint of the buildings.

A site plan, however, is a dynamic engineering document. It’s not just about what’s there, but about how everything works. It answers the tough questions about how natural and man-made systems will function once construction is done. This kind of critical data requires a licensed professional—like an engineer or landscape architect—to design, stamp, and certify it.

A plot plan confirms you meet zoning rules; a site plan proves your project works with the surrounding infrastructure. The former is about compliance with static regulations, while the latter is about responsible integration into a dynamic environment.

For instance, a plot plan might just show the location of a big, old oak tree you want to save. A site plan would go much deeper, including a full tree preservation plan, details on how the grading will be managed to protect its roots, and a list of new plantings that comply with local environmental codes. That depth is what a site plan is all about.

Understanding Regulatory Triggers

At the end of the day, the decision isn't just up to you. It's dictated by your local planning and zoning department. Every city and county has its own set of rules and thresholds that trigger the need for a comprehensive site plan. Figuring these out early in the process can save you a world of headaches, time, and money.

These triggers often include:

  • New Construction: Pretty much all new homes and commercial buildings will require a full site plan.
  • Change of Use: Turning a historic single-family home into a commercial office space is a classic adaptive reuse project. This almost always requires a site plan to address new demands for parking, accessibility, and utilities.
  • Significant Land Disturbance: If your project involves major grading, moving a large amount of soil, or altering natural drainage, you can bet a site plan will be required.
  • Impact on Public Utilities: Any project that needs to tap into the city’s water, sewer, or storm drain systems will require a site plan for a thorough engineering review.

To really see the difference in action, it helps to break things down feature by feature. The table below gives a more granular look at how a simple element is treated differently in each plan, highlighting the vast gap in detail and purpose.

Detailed Feature Showdown: Plot Plan Vs. Site Plan

Feature Plot Plan Detail Level Site Plan Detail Level Primary Purpose
Topography Generally not shown, or indicates basic slope direction. Detailed existing and proposed contour lines (grading plan). To engineer proper drainage and foundation support.
Utilities May show surface-level features like manholes or utility poles. Shows precise location, depth, and specs of all utility lines. To design and approve safe connections to public infrastructure.
Landscaping Might indicate the location of major trees to be kept or removed. Full planting plan with species, sizes, and irrigation details. To meet local environmental codes and manage water use.
Parking Not typically required unless showing a new garage or driveway. Detailed layout with stall dimensions, traffic flow, and ADA compliance. To ensure safe vehicle circulation and meet zoning requirements.

By weighing your project against these three criteria—scope, technical detail, and regulatory triggers—you can confidently figure out whether a plot plan or a site plan is the right document to get your project across the finish line.

Navigating Permit and Construction Needs

Knowing the technical difference between a plot plan and a site plan is one thing. Figuring out which one you actually need for your project is where the real work begins. If you submit the wrong one, you’re looking at an immediate rejection from the permitting office, which means costly delays and a whole lot of backtracking.

The choice comes down to one simple factor: your project's scope and how it impacts the surrounding area. Municipalities rely on these documents to make sure new development is responsible, fits within zoning laws, and doesn’t put a strain on public infrastructure. Getting it right the first time is the secret to a smooth approval process.

When a Simple Plot Plan Is Sufficient

For a lot of common residential projects, a basic plot plan is all you'll need to get a permit. Because it's focused on just your property, it’s perfect for jobs where the impact is contained entirely within your lot lines. The zoning department just needs to see it to verify you’re following the basic land-use rules.

Think of it this way: if your project isn't fundamentally changing the land or tapping into new public utility lines, a plot plan is probably the right tool.

These scenarios almost always just need a plot plan:

  • Building a small accessory structure, like a shed, gazebo, or detached garage. The main concern here is simply its location relative to your property lines.
  • Putting up a fence or a retaining wall. The plan proves it won't encroach on your neighbor’s yard or any public easements.
  • Adding a deck, patio, or swimming pool. This demonstrates that the new feature respects all the local setback requirements.
  • A minor home addition that doesn't need new utility hookups or major changes to your property's grading.

In these situations, the plot plan vs site plan debate is pretty clear-cut. The project is self-contained, so the simpler document will get the job done.

When a Comprehensive Site Plan Is Mandatory

The moment your project's reach extends beyond your own property lines, a full-blown site plan becomes non-negotiable. This is the heavy-duty document needed when a development could affect public safety, infrastructure, or the local environment. It gives city planners the detailed engineering data they need to conduct a serious review.

You can bet a site plan is mandatory in these cases:

  • New commercial construction, from retail centers and office buildings to industrial facilities.
  • Residential subdivisions or any project that carves out new lots and builds new public roads.
  • Major renovations or adaptive reuse projects, especially if they involve a change of use (like turning an old house into a bed-and-breakfast).
  • Any construction that needs new connections to public water, sewer, or storm drainage systems.
  • Projects that involve significant land disturbance, like major grading work or rerouting a small stream.

This flowchart helps visualize how your project's scope determines whether you'll need a simple plot plan or a more complex site plan.

Flowchart showing project scope determining whether single lot or site plan is required

The key takeaway here is that as soon as your project becomes more complex than just placing a structure on an existing lot, you've crossed the line into needing a full site plan for regulatory approval.

Navigating the Gray Areas

Of course, some projects live in that murky middle ground where the requirements aren't so obvious. A large home addition, for instance, might seem like a simple plot plan job at first. But if you need to do extensive grading for a walk-out basement, that land disturbance could easily trigger the need for a site plan to show how you're handling drainage.

Another great example is building an Accessory Dwelling Unit (ADU). It's a residential structure, sure, but adding what is essentially a second home on your property often requires new utility connections. That alone can bump the documentation requirement up from a plot plan to a site plan.

When in doubt, call your local building or planning department before you do anything else. A five-minute phone call can save you weeks of headaches and thousands of dollars spent on the wrong kind of plan.

Understanding these triggers from the start is a huge part of good project planning. Consulting an Ultimate Building Permit Checklist can also help ensure you've covered all your bases. By correctly identifying whether you need a plot plan or a site plan upfront, you can hire the right professionals, set a realistic budget, and avoid preventable delays.

Avoiding Costly Mistakes In Your Plans

An inaccurate plan isn't just a document with a few typos; it's a direct threat to your project's timeline and budget. When you submit a drawing with mistakes—whether it’s a simple plot plan or a full-blown site plan—you're opening the door to a host of expensive problems. These can range from immediate permit denials to nightmarish construction rework and even legal spats with your neighbors.

The first step to protecting your investment is knowing what can go wrong. A seemingly tiny error, like miscalculating a setback by a few inches, can bring construction to a screeching halt and force a costly redesign. The real secret is to be obsessively thorough before your plans ever land on a reviewer's desk.

Common Errors and Their Consequences

Over the years, we've seen certain mistakes pop up again and again, almost always with a hefty price tag attached. If you know what to look for, you can double-check your documents and sidestep the most common traps that derail projects.

  • Using an Outdated Survey: Properties evolve. Relying on an old survey that fails to show a new utility line or a neighbor's new fence is a recipe for disaster. These conflicts often aren't discovered until excavation starts, leading to expensive, last-minute changes on site.
  • Misinterpreting Setback and Easement Rules: Zoning codes can be incredibly dense and complex. Incorrectly measuring a setback from the property line or, even worse, building over a utility easement you didn't know existed, is one of the quickest ways to earn a stop-work order. It can even lead to legal action from a utility company.
  • Ignoring Topography and Drainage: This one is a big deal, especially for site plans. If your plan doesn't accurately show how water moves across the property, you could be setting yourself up for flooding, erosion, and serious damage to your new foundation or your neighbor's yard. Fixing drainage problems after a build is a messy and expensive ordeal.

A rejected plan is almost always a sign of rushed preparation. Municipal data suggests that roughly 15-20% of initial permit applications get bounced back because of incomplete or inaccurate plans. The top culprits? Incorrect setback and easement notations.

Strategies for Ensuring Accuracy

Your best defense against these headaches is diligence during the planning stage. Investing a little extra time upfront can save you thousands of dollars and weeks of delays later. It’s all about starting your project on a solid foundation of accurate, reliable information.

Here’s how you can get ahead of potential issues:

  1. Always Commission a New Survey: For any project of significance, start with a fresh survey from a licensed professional. This is the most crucial step you can take to ensure your plot plan vs site plan is built on current, real-world data.
  2. Verify Measurements On-Site: Don’t just trust the paper. Walk the property with your designer or contractor. Physically verifying key dimensions helps you spot potential conflicts that are easy to miss on a 2D drawing.
  3. Consult the Planning Department Early: Before you even think about finalizing your plans, have a conversation with your local planning or building department. A pre-submission meeting can help clarify obscure local rules and catch red flags before you make a formal submission.

Frequently Asked Questions

When you're trying to get a project off the ground, the last thing you need is confusion over paperwork. Let's tackle some of the most common questions we hear about plot plans and site plans.

Can I Draw My Own Plot Plan For A Permit?

This is a classic "it depends" scenario. For something really straightforward—say, a small garden shed or a simple fence—some local building departments might be okay with a neat, hand-drawn plot plan. The key is that it still has to be accurate and drawn to scale.

But for anything more substantial, like a home addition, a new garage, or any kind of new construction, the answer is almost always no. In these cases, your local jurisdiction will demand a plan prepared by a licensed surveyor, architect, or engineer. This ensures everything is legally and technically sound from the get-go. Your best bet is to call your local building department first.

Does A Site Plan Always Require An Engineer's Stamp?

Yes, just about every time. A site plan is a serious engineering document. It's packed with critical information that affects public safety and infrastructure—things like grading, how rainwater will be managed, and where utilities will connect.

A licensed professional's stamp is their legal guarantee that the plan is compliant with all building codes, safety rules, and established engineering practices. Municipalities won't even look at a site plan for review and approval without that official certification.

Think of a professional's stamp as more than just a rubber stamp. It's a legal promise to the city that your project has been designed with responsibility and meets all the necessary safety and engineering benchmarks.

How Much Do Plot Plans And Site Plans Typically Cost?

Costs can be all over the map, really depending on your project's size, where it is, and how much detail is needed. Here's a general breakdown:

  • Plot Plans: For a simple residential project, you can expect to pay somewhere between $100 and $500.
  • Residential Site Plans: A professionally prepared site plan for a new house typically runs from $800 to over $2,500.
  • Commercial Site Plans: This is where it becomes a significant investment. For large commercial or multi-family projects, a detailed site plan can easily cost $5,000 to $15,000, and sometimes much more, based on the engineering complexity.

At Sherer Architects, we help our clients navigate all the documentation and approvals needed to bring a project to life. We make sure you have the right plans to build with confidence. Contact us to discuss your architectural needs.

Categories
Uncategorized

how to apply for historic preservation grants: quick guide

Before you ever type a single word of a grant application, there’s some critical homework to do. Think of this as the foundation work. A winning application isn’t just well-written; it’s built on a rock-solid understanding of your project’s story, its official standing, and the funding sources that actually make sense for it.

Laying the Groundwork for Your Grant Application

Too many grant applications get rejected right out of the gate, not because the project is bad, but because the prep work was flimsy. It’s easy to get excited about the restoration itself, but you have to move from a vague idea like "fix up this old place" to a specific, compelling, and—most importantly—fundable project.

The first thing you need to nail down is the "so what?" Why does this specific building matter? Grant reviewers see hundreds of applications. Yours needs to stand out by showing a real, tangible connection to your community's heritage. Was it designed by a well-known local architect? Does it represent the last vestige of a certain building style in your town? Maybe a significant historical event happened right on the front steps. Answering these questions is how you start building your case.

What’s Your Property’s Story? Defining its Historical Significance

Every single grant application you write will live or die by its Statement of Significance. This isn't a dry history report; it's the heart and soul of your pitch. You're telling the story of your property and explaining why it deserves to be saved.

For instance, saying a building was "built in 1890" is a fact, but it's not a story. A much stronger angle would be to frame it as "one of only three remaining examples of commercial Romanesque Revival architecture in the original downtown, built during the city’s post-railroad boom." See the difference? That context gives the project an undeniable sense of urgency and importance.

Check Your Property's Official Status

Next up, you need to figure out your property's official designation. This is a big one. For many state and federal grants, having a specific listing is non-negotiable.

  • National Register of Historic Places: This is the gold standard. Being on the official federal list opens up the most funding doors.
  • State or Local Register: Don't overlook these! Many states and even cities have their own historic registers that qualify you for specific local grant programs.
  • No Designation? If your property isn't listed anywhere, don't panic. Your first step might be to get it nominated. In fact, some smaller planning grants exist specifically to help fund that nomination process.

Knowing where you stand on these lists is key because it dictates which grants you can even consider applying for.

Three-step process workflow showing significance, assess, and research stages with scroll, checklist, and magnifying glass icons

This simple workflow—Significance, Assess, Research—is a tried-and-true method. Each step builds on the last, so by the time you're ready to write, you have a clear, defensible project.

Start Surveying the Grant Landscape

Finally, it’s time to start looking at what's out there. The world of preservation funding is incredibly varied, from massive federal programs to tiny foundations focused on a single county. It’s a competitive field. Just look at the U.S. Historic Preservation Fund (HPF), which recently had appropriations of nearly $189 million for a single fiscal year. Those funds, managed by the National Park Service, get distributed across all kinds of state, tribal, and local grant categories. You can dig into the specifics by checking out the HPF statistical reports and funding data on the NPS website.

One of the biggest mistakes I see people make is taking a shotgun approach—applying for every grant they can find. You’ll burn yourself out. Be a sniper. Focus your energy only on the opportunities that are a perfect match for your project’s scope, budget, and story. A targeted approach will always win.

Finding the Right Grant for Your Preservation Project

So you have a preservation project. The first question is always: where does the money come from? The world of grants can feel overwhelming, but the secret isn't applying for everything you see—it's about smart, targeted research.

A nonprofit saving an old downtown theater and a county trying to restore its historic courthouse are playing in different sandboxes. Your project's ownership, scale, and specific needs will point you toward the right funding streams. Don't waste time casting a wide net; a focused strategy is what wins grants.

Person researching historic preservation grants on laptop while reviewing archival documents and taking notes

Start with State and Federal Programs

For most people, the grant journey begins with public money. These are typically the largest grants available, but they also come with the most paperwork and the strictest rules. You have to play by their game.

Your first call should always be to your State Historic Preservation Office (SHPO). Every state has one, and they are the primary gatekeepers for federal dollars flowing from the Historic Preservation Fund (HPF). Think of them as your guide. They don't just administer grants; they offer invaluable technical advice that can make or break your application.

Beyond the SHPO, a number of federal agencies offer direct grants. In the U.S., more than 10 federal agencies, from the National Park Service to the National Endowment for the Arts, have preservation-related programs. Another well-known source is the Daughters of the American Revolution (DAR), which funds a wide range of projects. Just remember, these big players have rigid deadlines, so you need to plan months, sometimes even a year, in advance.

Here are the heavy hitters in government funding:

  • Historic Preservation Fund (HPF) Grants: This is the bedrock of public funding. The National Park Service funnels this money to the SHPOs, who then grant it out for state and local projects.
  • Certified Local Government (CLG) Grants: Is your town or county a designated CLG? If so, you've got access to a dedicated pot of money. Since 2001, just in Maryland, the CLG program has invested over $2.4 million in local projects.
  • Save America's Treasures Grants: These are the big leagues. We're talking highly competitive, high-dollar grants for nationally significant properties.

Exploring Private Foundations and Niche Grants

Don't overlook private money. Foundations often offer smaller grants, but they come with far more flexibility and can fill crucial funding gaps. These are the specialists.

You'll find foundations that only fund the restoration of rural churches, others that focus on historic theaters, and some dedicated to preserving sites related to a specific community's heritage. Digging into databases like Candid’s Foundation Directory Online is how you uncover these hidden gems that most people miss.

A targeted search is everything. I once worked on a project to restore a historic firehouse. We were struggling with a funding gap until we discovered a small, family foundation dedicated to honoring first responders. Our project fit their mission perfectly, and they became a key funder.

As you look for historic preservation grants, it’s a good idea to also explore various funding options. Sometimes a combination of grants, loans, and other financing is the most effective approach.

Matching Grant Sources to Your Project Needs

To build a smart search strategy, you have to know who funds what. The table below is a practical comparison to help you identify the best funding source for your specific preservation goals.

Matching Grant Sources to Your Project Needs

Grant Source Typical Recipient Project Focus Average Grant Size
Federal (NPS/HPF) SHPOs, CLGs, Nonprofits Large-scale restoration, surveys, planning $50,000 – $500,000+
State (SHPO) Nonprofits, Municipalities, Private Owners Brick-and-mortar repair, architectural plans $10,000 – $100,000
Local (CLG) Property Owners in CLG communities Facade improvements, roof repair, planning $5,000 – $25,000
Private Foundations Mostly Nonprofits Varies widely by foundation's mission $2,500 – $50,000

This table shows you the general landscape. A museum planning a multi-million dollar restoration should be looking at a Save America's Treasures grant. A homeowner needing to restore original wood windows in a historic district should start with their local CLG program.

By identifying the right category from the get-go, you instantly improve your chances of finding a funder who is genuinely excited about your project.

Pulling Together a Winning Grant Application

Think of your grant application as the ultimate sales pitch for your project. Reviewers are buried under a mountain of proposals, so yours has to do more than just check the boxes. It needs to be sharp, persuasive, and perfectly organized to tell a story that makes them want to fund you.

A rookie mistake is treating the application like a homework assignment. You're not just filling in blanks. You're building a case, piece by piece, that your project is vital, urgent, and—most importantly—achievable. Every single document, from the historical narrative to the budget spreadsheet, has to hammer home that same message.

Crafting a Powerful Statement of Significance

This is where you bring your building to life. The Statement of Significance is your chance to connect the bricks and mortar to a bigger, more meaningful story. Grantors aren't just paying for repairs; they're investing in the tangible history and identity of a community.

A weak statement just says, "This building is old." A strong one shows the reviewer why its age matters. Don't just say it was a general store. Explain how it served as the social and economic heart of a rural town for a century, using details from original ledgers or stories from locals to prove it.

Your statement absolutely must answer these questions:

  • What’s the historical context? Link the property to local, state, or even national events and trends.
  • What makes it architecturally special? Is it a rare example of a specific style? Was it designed by a well-known architect?
  • Who are the people connected to it? Did important figures or groups live, work, or meet here?
  • Why does it matter culturally? Does it hold a special meaning for a particular community or group?

Your Statement of Significance should be a story backed by hard evidence. It’s not just about what happened inside the walls, but how those events shaped the world outside. Make the reviewer feel the loss if that story were to disappear.

Laying Out a Professional Treatment Plan

Okay, you’ve convinced them the place is important. Now you have to show them you know how to fix it. A fuzzy or unprofessional treatment plan is a massive red flag for funders. They need to see a clear, well-defined scope of work that’s rooted in sound preservation practices.

The gold standard here is a Historic Structures Report (HSR). This is a deep-dive document that analyzes a building's history, details its current condition, and lays out a professional plan for its restoration. While a full HSR can be pricey, many grantors will accept a more focused "conditions assessment and treatment plan" from a qualified preservation architect or contractor.

Make your plan easy for a layperson to grasp. Use clear headings, annotated photos, and architectural drawings to show what you're planning. For example, don’t just write "repair roof." Get specific: "Replace 300 square feet of deteriorated slate shingles in-kind on the south-facing slope, using salvaged slate where possible, and install new copper flashing…" See the difference?

Getting the Project Budget Right

This is where so many good applications go to die. A sloppy budget screams "bad planning" and can sink your proposal before it even gets a serious read. Your numbers need to be detailed, realistic, and completely justified.

Get rid of round numbers. A line item for "$10,000 for masonry repair" looks like you pulled it out of thin air. But an entry for "$9,750 for repointing 650 square feet of the north facade using Type N mortar, based on a quote from Acme Preservation" proves you've done the legwork.

Break your budget down into logical chunks:

  1. Pre-Development Costs: This is for the planning work—architectural drawings, engineering studies, permit fees.
  2. Hard Costs (Construction): The actual hands-on work. List specific tasks like foundation repair, window restoration, or HVAC updates.
  3. Soft Costs (Administration): The overhead. Think project management, insurance, and legal fees.
  4. Contingency: This is non-negotiable. Always budget a contingency of 10-15% of your hard costs. Trust me, you’ll need it for the surprises that always pop up.

Finally, back everything up with strong supporting documents. You'll need high-quality photos (before, during, and after shots are fantastic if you have them), architectural plans, and, critically, letters of support. Getting letters from community leaders, elected officials, and partner organizations shows the grant committee that this isn't just your pet project—it's a valued community asset.

The Review Process and the All-Important Matching Funds

Once you’ve hit 'submit,' your grant application begins its journey. This isn’t the end; it's the start of a formal review process where your proposal will be judged by people who have seen it all before. Knowing what happens behind the scenes can help you manage expectations and prepare for what's next.

Grant package folder with pen and application documents on outdoor table for historic preservation funding

First, your application usually lands with the staff at the granting organization, like your State Historic Preservation Office (SHPO). They'll do an initial once-over to make sure it's complete and meets the basic eligibility rules. Think of it as a gatekeeper check.

From there, it goes to a review committee. This group is typically made up of seasoned architects, historians, and community leaders who will score your application against a very specific set of criteria.

Why Your Match is More Than Just Money

One of the most heavily weighted criteria? Your ability to come up with matching funds. It's rare for a preservation grant to cover 100% of your project cost. Funders want to see that you have skin in the game. A 1:1 match is standard, meaning you need to secure a dollar from another source for every dollar they give you.

Frankly, this is where many promising applications stumble. The competition is fierce. The National Trust for Historic Preservation, for instance, often gives grants around $25,000 (capping out at $50,000) for planning and educational projects. With so many applicants vying for limited funds, a solid plan for your match shows you're financially serious and gives your proposal a major boost. If you want a real sense of the competition, you should understand how to make your preservation funding application stand out.

Grant reviewers look at a strong matching funds plan as a sign of community buy-in and overall project health. If you can’t rally local support, they'll question if the project is as vital as you say it is. It's less about the cash itself and more about the momentum it proves you have.

Getting Creative with Your Match

Don't let the match requirement intimidate you—you don't necessarily need a pile of cash sitting in the bank. Grantors know that resources can be tight, which is why they usually allow a combination of cash and "in-kind" contributions. This opens up some really effective ways to build your match.

Here are a few strategies I've seen work time and again:

  • A "Buy-a-Brick" Campaign: Small, grassroots fundraising efforts are perfect. They not only bring in cash but also create a dedicated group of locals who are emotionally and financially invested in your success.
  • "Stacking" Smaller Grants: This is a smart move. Use a confirmed grant from one foundation as the matching funds to apply for another. It shows other funders that your project has already been vetted and approved elsewhere.
  • Documenting In-Kind Contributions: This is a powerful, yet often overlooked, tool. In-kind matches are simply non-cash contributions like professional services, volunteer labor, or donated materials.

Valuing and Documenting In-Kind Support

The trick with in-kind support is to value and document it properly. If a preservation architect donates 20 hours of their time to draft drawings, that's a legitimate contribution. You document it by calculating the value of their services at their standard hourly rate.

Here’s what that looks like in the real world:

  • Professional Services: An architect donates their time, a lawyer reviews contracts pro-bono, or a marketing expert helps with your fundraising campaign.
  • Volunteer Labor: If community members show up for a clean-up day or help with non-specialized painting, you can value their hours at the state's official volunteer labor rate.
  • Donated Materials: A local lumberyard gives you historically accurate wood, or a paint store provides the right kind of primer. These are counted at their fair market retail value.

By mixing cash fundraising with meticulously documented in-kind support, you can build a powerful matching funds package. It not only meets the grant requirements but also proves your project has the broad community backing it needs to truly succeed.

Avoiding Common Grant Application Mistakes

You've spent months pulling everything together. The research, the plans, the budget—it's all there. But after all that work, a simple, avoidable mistake can be the thing that lands your application in the "no" pile. It’s rarely the obvious stuff like missing a deadline; the most damaging errors are often far more subtle.

Two people exchanging cash at outdoor table with donation jar for matching funds program

Trust me, experienced grant reviewers can spot a half-baked application from a mile away. They’re looking for well-conceived projects with a clear path to success. Little inconsistencies or vague language can suggest a project isn’t fully thought out, making it seem like a risky investment for them. Let's walk through some of the classic trip-ups I've seen over the years so you can catch them before you hit "submit."

The Unfocused Project Scope

One of the fastest ways to lose a reviewer is with a project scope that’s either too vague or wildly ambitious. This usually comes from a place of passion—you want to fix everything!—but to a funder, it just looks like poor planning. It screams, "I haven't really thought through the nuts and bolts of this."

For example, don't just say your goal is to "restore the historic community hall." That's an idea, not a plan.

Get laser-focused instead. A much stronger proposal would define the scope as: "Phase 1 restoration of the community hall, focused on structural stabilization of the west wall, replacement of the cedar shake roof in-kind, and restoration of 12 original double-hung wood windows." Now that sounds like a concrete, actionable plan that can realistically be done on time and on budget.

I see this all the time: applicants try to do everything at once. Funders would much rather back a successful, well-defined Phase 1 than pour money into a sprawling, multi-year effort that might never see the finish line. Bite-sized, achievable phases are always more fundable.

Understanding common pitfalls and traps to avoid is crucial whether you're seeking grants or crowdfunding. The core principles of clear communication and realistic goals are universal.

A Budget That Raises Red Flags

Your budget isn’t just a spreadsheet; it’s the financial story of your project, and it absolutely must match your narrative. An unrealistic budget—whether it’s inflated or suspiciously low—is an immediate warning sign for any seasoned reviewer. It tells them you haven't done your homework.

Here are a few budget blunders that can sink an otherwise good application:

  • Using Round Numbers: A budget full of clean estimates like $20,000 for plumbing or $50,000 for masonry looks like guesswork. It signals you haven’t gotten actual quotes from qualified contractors.
  • Forgetting the Contingency: Old buildings are notorious for surprises. If you don't include a contingency line item of at least 10-15% of your construction costs, it shows a lack of real-world experience.
  • No Justification for Costs: Your numbers need a narrative. Why did you pick that contractor? How did you calculate the material costs? Explain the "why" behind the numbers.

Weak Arguments and Missing Support

Finally, a lot of applications fail because they don’t make a powerful case for why the project matters and who is behind it. Your passion for the building is essential, but you have to translate that feeling into a compelling argument backed by solid evidence.

A weak Statement of Significance is a killer. You have to connect your property to broader historical themes and clearly spell out its architectural or cultural value. Just saying it's old isn't nearly enough.

Just as damaging is a lack of community buy-in. An application that arrives without strong letters of support from local officials, community organizations, and neighborhood leaders feels like it exists in a vacuum. Grantmakers want to invest in projects the whole community values, not just one person. That collective backing proves your project is a shared priority with a much better shot at long-term success.

Your Questions About Preservation Grants Answered

Navigating the grant application process can feel like you're trying to solve a puzzle with a few pieces missing. It’s completely normal to have questions swirling around—about how long this will all take, what the money can really be used for, and what happens if you get a "no."

Let's clear the air on some of the most common questions I hear from property owners. Getting these answers straight from the start will save you a lot of headaches down the road.

How Long Does the Historic Preservation Grant Process Take?

The honest answer? Longer than you think. In the world of preservation funding, speed is not part of the equation. From the day you start your research to the moment funds actually hit your bank account, you should realistically budget for a 6 to 18-month timeline, and sometimes even up to two years.

Federal and state grant cycles have a predictable, albeit slow, rhythm:

  • The Application Window: You'll typically have a two- to three-month period to submit your proposal.
  • The Review Period: This is the long wait. After the deadline, it can take anywhere from four to six months for committees to review, score, and rank all the applications.
  • The Announcement: Finally, notifications go out, and grant agreements are drawn up.

The big takeaway here is that you have to plan way ahead. Grants are a strategic tool for a future project, not a quick fix for an immediate cash-flow problem.

Can I Use Grant Money to Buy a Historic Property?

This question comes up all the time, and the answer is almost always a firm no.

The vast majority of preservation grants are earmarked for the physical work of saving a building you already own or have legal control over. Think of it as funding for restoration, rehabilitation, or stabilization—the "doing" part of preservation.

Funders want to see their money go directly into the bricks and mortar: fixing a leaking roof, restoring original wood windows, or shoring up a failing foundation. The funds to actually purchase a historic property come from entirely different pots of money, like:

  • Specialized loan programs from preservation nonprofits
  • Land trusts or conservancies
  • Traditional bank financing or private investment

Grants are for implementing the preservation plan, not for acquiring the property itself.

Rejection is not a dead end; it's a detour with a map. The feedback from a rejected application is often the very thing you need to succeed the next time around. If reviewer comments are available, treat them like gold—they are your roadmap to a stronger proposal.

What Should I Do If My Grant Application Is Rejected?

First, take a deep breath and don't take it personally. The grant world is incredibly competitive. There are always more fantastic projects than there is money to go around, and sometimes a rejection is simply a matter of a slight mismatch with that year's specific priorities.

The most critical thing you can do is turn it into a learning experience.

If the funding agency offers feedback, ask for the reviewer's comments immediately. This is, without a doubt, the most valuable tool you have. Those notes will pinpoint exactly where your application fell short. Was the budget unclear? Was the scope of work too ambitious? Was the statement of significance not compelling enough? Use that direct, honest feedback to rework your proposal and come back stronger in the next cycle.

Is Hiring a Professional Grant Writer Worth It?

For large, complex federal grants like Save America's Treasures, it can absolutely be a game-changer. An experienced grant writer understands the nuances and speaks the specific language that reviewers are looking for. They know how to frame a project to align perfectly with a funder's mission and can help you avoid common but critical mistakes.

That said, you don't always need a pro. For many smaller state or local grants, a well-organized person with strong writing skills and a passion for the project can definitely pull off a winning application. The secret is meticulous attention to detail. Follow every single instruction, answer every question completely, and let your genuine enthusiasm for saving your building shine through.


At Sherer Architects, LLC, we've spent decades helping property owners navigate the intricate world of historic preservation, from the initial building assessment all the way through the grant and tax credit process. We know how to build a compelling case for your project to give you the best possible shot at securing funding. Learn more about how we can help you reach your preservation goals at https://shererarch.com.

Categories
Uncategorized

how to apply for historic preservation grants: Quick guide

Finding the money to bring a historic property back to life is often the biggest hurdle. It’s a process that demands a smart strategy, rock-solid documentation proving your building's worth, and an application that tells a compelling story. It all starts with knowing where to look—and making sure your project is exactly what a funder wants to support.

Navigating the World of Preservation Funding

Before you even think about filling out an application, you need to get a lay of the land. The world of preservation grants can feel like a maze, but most funding flows from three main sources: federal agencies, state programs, and private nonprofits. Each operates differently, with its own mission, funding cycles, and pet projects. Not understanding this is probably the single biggest mistake applicants make, leading to a lot of time spent on applications that were doomed from the start.

Federal grants, often coming from big players like the National Park Service (NPS), can offer the largest awards. But they're also the most competitive. State-level funding, which you'll typically find through your State Historic Preservation Office (SHPO), is usually a bit easier to get and is focused on what matters locally. Then you have influential nonprofits, like the National Trust for Historic Preservation, which often fund very specific things like project planning, educational programs, or advocacy work.

Finding the Right Funder for Your Project

The secret is simple: match what you need with what a funder wants to accomplish. A grant program dedicated to architectural surveys isn't going to pay for your new roof, no matter how badly you need one.

  • Federal Grants: These are the heavy hitters, often fueled by the Historic Preservation Fund (HPF). Think big—projects with national significance or major rehabilitation efforts.
  • State Grants: Your SHPO is your best friend here. They manage funds that help with everything from restoring a Main Street storefront to documenting a local historic district. They're your go-to for most hands-on projects.
  • Nonprofit and Local Grants: Don't overlook these. They're often the perfect fit for smaller, community-centered work. A local foundation could be the ideal partner for restoring the windows on a neighborhood landmark or creating new interpretive signs.

This flowchart breaks down how these different funding streams typically operate and interact.

Horizontal grant sources flowchart showing federal grants, state grants, and nonprofit grants with directional arrows

As you can see, the pathways often connect. Federal money frequently trickles down to state agencies, which then fund the on-the-ground work in your community.

Understanding the Financial Landscape

The grant process in the U.S. is well-established but fiercely competitive. Annually, more than $1 billion in grant funding is directed toward historic preservation efforts across the country. To put that in perspective, the Historic Preservation Fund (HPF), administered by the NPS, allocated nearly $189 million in fiscal year 2024 alone to support everything from documentation and planning to the actual "bricks and mortar" restoration work.

Key Takeaway: Success isn't just about having a worthy project; it's about presenting that project to the right audience. Researching a funder's past awards is one of the best ways to gauge if your proposal is a good fit.

To give you a clearer picture, here’s a quick rundown of the major players and what they typically look for.

Key Grant Sources and Their Primary Focus

Funding Source Type Primary Administrator(s) Typical Project Focus Common Applicant Type
Federal National Park Service (NPS) Large-scale restoration, surveys, disaster relief, major national landmarks SHPOs, Tribal Historic Preservation Offices (THPOs), Certified Local Governments (CLGs)
State State Historic Preservation Office (SHPO) Building rehabilitation, historic structure reports, local district nominations, community planning Nonprofits, municipalities, private property owners, CLGs
Nonprofit/Private National Trust for Historic Preservation, local foundations, community trusts Planning grants, feasibility studies, educational programs, smaller "bricks-and-mortar" projects 501(c)(3) organizations, community groups, municipalities

This table shows why it's so crucial to target your application. A private owner restoring a historic home will have more luck with their SHPO, while a city government trying to survey a large historic district might look to federal pass-through funds.

Finally, remember that preservation grants rarely cover 100% of a project's cost. It's wise to get familiar with the broader financial world by exploring various funding options, including grants that can help you pull together the required matching funds or cover expenses that your preservation grant won't.

Laying the Groundwork for a Winning Application

Two people reviewing historic preservation grant eligibility documents outdoors with laptop and paperwork

The secret to a successful grant application isn't just in the final submission—it’s in the meticulous preparation you do months before a deadline is even announced. This is where the real work happens, separating the projects that get funded from those that end up in the "no" pile.

Think of this as setting the stage. Getting your ducks in a row now means you're not scrambling later. It’s all about confirming your eligibility, building the right relationships, and nailing down the specifics of your project.

Step Zero: The Eligibility Check

Before you pour dozens of hours into writing, you have to be absolutely certain your project is eligible. This sounds basic, but you’d be surprised how many people trip up here. For most state and federal grants, everything hinges on one thing: official historic designation.

Typically, this means your property must be listed on the National Register of Historic Places. It can be listed individually or as a contributing building within a larger historic district. If it’s not, your first call should be to your State Historic Preservation Office (SHPO) to figure out the nomination process. Be warned: this can take a while, so don't wait.

The property is only half the equation; who you are also matters. Many grants are specifically for:

  • Nonprofit 501(c)(3) organizations
  • Government agencies like municipalities, especially those designated as a Certified Local Government (CLG)
  • Tribal Historic Preservation Offices (THPOs)

Private homeowners and developers do have options, particularly at the state level, but they are generally more limited. The takeaway? Read the funder’s guidelines with a fine-tooth comb to confirm exactly who can apply.

Make Friends with Your SHPO

Your State Historic Preservation Office (SHPO) is your single most valuable ally in this process. So many applicants treat the SHPO like a bureaucratic obstacle or a gatekeeper to get past. That’s a huge mistake. These are the experts who live and breathe preservation in your state, and they genuinely want to see good projects come to life.

Get in touch with them long before you plan to apply. Introduce yourself, your property, and what you’re hoping to accomplish. Ask for their initial take and see if they know of any programs that might be a good fit. This early conversation can steer you away from a dead end and give you priceless insight into what grant reviewers are really looking for.

One of the best pieces of advice I ever received was to treat the SHPO staff like partners. They see hundreds of applications and know what works. A ten-minute phone call with them can provide more clarity than ten hours of reading guidelines alone.

This kind of outreach does more than just give you information; it shows you're serious and professional. When your application eventually lands on their desk, a familiar name is always better than a complete unknown.

Define Your Project and Get Real Numbers

Grant reviewers don't fund vague ideas. "Fix the old theater" is a wish, not a project. You need to present a concrete, well-defined plan that has a clear beginning, middle, and end.

Start by getting professional cost estimates. This isn't the time for a back-of-the-napkin guess. You'll need to bring in architects, engineers, or preservation consultants who know their way around historic buildings. Their detailed estimates become the backbone of your budget and prove to funders that you’ve done your homework.

A solid project scope needs to be broken down into specific, actionable pieces:

  1. Condition Assessment: A thorough report on what’s wrong and why it failed.
  2. Proposed Treatment: A detailed plan for the repairs that follows established preservation standards.
  3. Project Timeline: A realistic schedule, from mobilization to final inspection.
  4. Detailed Budget: An itemized list of every single cost, from labor and materials to scaffolding and permit fees.

Putting in this level of detail up front demonstrates that you’re a capable manager of their money and that their investment will lead to a tangible, lasting preservation outcome.

Crafting a Compelling Grant Proposal

Statement of significance document for historic preservation grant application on wooden desk with plants

Alright, this is where all your legwork comes together to tell a persuasive story. Think of your grant proposal less like a stack of forms and more like a pitch. You need to convince a review committee, who sees dozens of these, that your project is not just important but a sound investment of their very limited funds.

The three main pillars—the Statement of Significance, the Preservation Plan, and the Budget—can't exist in silos. They have to weave together, each part reinforcing the others to build an undeniable case for your project.

Telling Your Story in the Statement of Significance

This is the heart and soul of your application. The Statement of Significance needs to answer one critical question: "So what? Why does this place matter?" The most common mistake I see is people just listing historical dates or architectural jargon. That's a fact sheet, not a story. It won't move anyone.

Your real job here is to connect the bricks and mortar to a living, breathing community need. How did this building anchor the neighborhood? What pivotal events took place within its walls? Who are the people whose stories are tied to this place?

To really make an impact, your statement should hit these points:

  • Architectural Value: Explain what makes the building special. Is it a rare example of a certain style? Does it feature unique construction techniques?
  • Historical Association: Draw clear lines connecting the property to important people, events, or movements in your town, state, or even national history.
  • Community Impact: This is crucial. Describe the building's role in your community's identity and, more importantly, how bringing it back to life will benefit the public today.

A great proposal tells a story that sticks with the funders. Brushing up on powerful storytelling strategies for nonprofits can make a huge difference in how your application is received.

Detailing Your Methods in the Preservation Plan

If your Statement of Significance is the "why," then the Preservation Plan is the "how." This is the technical document that proves you know what you’re doing. It’s where you show the review board you have a professional, well-reasoned approach for the hands-on work.

Your plan needs to be specific, methodical, and—this is non-negotiable—it must align with the Secretary of the Interior’s Standards for the Treatment of Historic Properties. These standards are the bible of preservation work. Referencing them signals that you're committed to doing the job correctly.

A solid plan will always include:

  • A clear description of the property's current condition, supported by high-quality, well-labeled photos.
  • A step-by-step breakdown of the proposed work for each part of the building (e.g., roof, windows, masonry).
  • A solid justification for why you chose these specific treatments.
  • An outline of the materials and methods you intend to use.

Pro Tip: Don’t try to write this in a vacuum. A preservation architect or a qualified historic contractor is your greatest asset here. Their input not only makes the plan technically sound but also gives it immediate credibility with the review committee. It shows you're taking a professional approach right from the start.

Building a Transparent and Trustworthy Budget

Your budget is where the rubber meets the road. It has to be detailed, easy to understand, and perfectly in sync with your Preservation Plan. A vague or poorly researched budget is one of the quickest tickets to the rejection pile.

Every single line item needs to make sense. Don't just put "Window Repair – $50,000." Break it down into something like, "Scrape, prime, and reglaze 25 historic wood windows at $1,800/window" and "Install historically appropriate storm windows at $200/unit." That level of detail shows you’ve done your homework and builds trust.

And don't forget to clearly document your matching funds. Almost every grant requires you to have some skin in the game. This can be:

  • Cash Match: Money from your own reserves, a loan, or even another grant.
  • In-Kind Contributions: The documented dollar value of donated professional services (like an architect's time), materials, or skilled volunteer labor.

Showcasing both types of matching funds proves your project has broad support and isn't entirely dependent on this one grant.

Knowing your funder helps, too. For instance, the National Trust for Historic Preservation often funds nonprofits and public agencies for planning and educational projects. In the 2023-2024 cycle alone, the National Trust awarded over $1 million to 196 projects, often favoring those that could show how their work would get the community involved.

When you're finished, these three documents should tell one cohesive story: The building is significant, the plan to save it is sound, and the budget proves you can pull it off responsibly.

Assembling a Flawless Submission Package

Person organizing manila folders with documents preparing submission materials for grant application on white desk

You’ve poured everything into the narrative and meticulously crunched the budget numbers. Now it’s time for the final push: pulling it all together into a professional package that makes a reviewer's job as easy as possible. This is where the little details really matter—they signal that you’re competent and respect the funder’s process.

Don't let all your hard work get derailed by a simple technicality. A sloppy or incomplete submission can get your brilliant proposal tossed before anyone even reads it. Think of this stage as the final quality check, ensuring your application gets judged on its merits.

Gathering Your Essential Supporting Documents

Beyond your core proposal, you need a solid collection of supporting documents to back up your claims. These materials aren't just filler; they add layers of credibility and paint a complete picture of your project’s importance and viability.

One of the most persuasive things you can include is a strong set of letters of support. These letters prove your project isn't just an idea floating in a vacuum—it has real backing from key people in your community.

  • Who to ask? Think strategically. Reach out to your mayor, state representatives, the president of the local historical society, or even leaders of influential neighborhood associations.
  • What should they say? A good letter is specific. It needs to move beyond generic praise and clearly state why the project matters to that person or their constituents.

These endorsements show a grant committee that their investment will be valued by the entire community.

The Power of Visual Storytelling

Words can only do so much. High-quality photographs and clear architectural drawings are essential storytelling tools, not just optional attachments. They provide undeniable visual proof of your property’s condition, its historic significance, and why the work is so urgent.

Your visual documentation should be:

  • High-resolution: Grainy, poorly lit photos look unprofessional and can obscure important details.
  • Well-labeled: Every file needs a descriptive name (e.g., "North_Facade_Water_Damage.jpg") and should be referenced directly in your narrative.
  • Comprehensive: Include shots of the entire building in its setting, plus detailed close-ups of the specific areas you plan to work on.

This evidence helps a reviewer who has never laid eyes on your property understand exactly what you’re talking about. A sharp photo of crumbling mortar joints is infinitely more compelling than a paragraph trying to describe it.

Expert Insight: Never underestimate the power of a well-annotated "before" photo. Clearly marking areas of deterioration or specific architectural features helps the review committee quickly grasp the scope and necessity of your proposed interventions, connecting your budget directly to the visual evidence.

The Final Checklist Before You Submit

Before you hit that "submit" button or seal the envelope, one last methodical review is your best defense against common—and costly—errors. Every grant program has its own quirks and rules. For instance, many state and Certified Local Government (CLG) programs, which get their money from the federal Historic Preservation Fund (HPF), are notoriously strict on formatting. Since 2020, SHPOs have received an average of $57.7 million annually from the HPF, and they manage those funds with intense oversight.

Run through this practical checklist before you send anything:

  1. Read the Guidelines (Again): Match your final package against the funder’s instructions, item by item. Seriously.
  2. Check File Names and Formats: If you’re submitting online, stick to their exact naming conventions (e.g., "ProjectName_Budget.pdf") and required file types.
  3. Confirm All Signatures: A missing signature on a required form is an instant red flag and an easy reason for disqualification.
  4. Proofread Everything: Typos and grammar mistakes undermine your credibility. Get a fresh pair of eyes to look over the entire package.
  5. Verify Page Limits and Margins: Don’t let a simple formatting error knock you out of the running.

This final, careful pass is what separates the pros from the amateurs. It ensures your proposal is judged on its strength, not dismissed because of a preventable oversight. You’re showing the funder you are a thorough, reliable partner for their investment.

What Happens After You Click Submit

You’ve done it. Hours of research, writing, and painstaking budget calculations have all led to this moment. But hitting that "submit" button isn't the finish line—it's the starting pistol for the review phase. Let's walk through what actually happens behind the scenes so you know what to expect.

https://www.youtube.com/embed/Q_A22ukipwM

The first gate you have to pass is purely administrative. A program officer or staff member will give your application a quick once-over to make sure it’s actually complete. Did you sign everything? Are all the required attachments there? This is a simple pass/fail check, and it’s where a good checklist can save you from getting knocked out on a technicality before your project is even reviewed.

Navigating the Review Timeline

Once you've cleared the administrative check, your application moves into the real substance of the review. This is where a committee—usually a mix of preservation professionals, board members, and maybe even community stakeholders—gets to work. They'll score your proposal against the funder's specific criteria.

This part of the process can feel like a black box and requires a good dose of patience. The timeline can be anywhere from a few weeks to several months, depending entirely on the agency’s funding cycle and how many other applications they’re juggling.

The grant guidelines almost always publish a decision date. Mark it on your calendar and then try to put it out of your mind. Calling or emailing for constant updates before that date won’t do you any favors. However, if a program officer reaches out to you with a specific question, that's a great sign. It means they're digging into your proposal. Answer them promptly and clearly.

Understanding the Three Possible Outcomes

Eventually, the email or letter will arrive. It’s going to fall into one of three categories, and it helps to be mentally prepared for each one.

  • Awarded: The best news! You’ll get an official award letter spelling out the grant amount and what comes next. This isn't just free money; it's the beginning of a formal partnership.

  • Waitlisted: This is a good-but-frustrating outcome. It means your project was deemed worthy, but they ran out of funds before they got to you on the list. If another project doesn't move forward, you could get bumped up.

  • Rejected: No one likes seeing this, but don't take it personally. The competition for these grants is fierce, and fantastic projects get turned down all the time simply because there isn't enough money to go around.

Key Takeaway: A rejection is not a final judgment on your project's merit. Think of it as valuable data. The most persistent applicants I know have often applied two or three times, refining their proposal with feedback from each cycle before finally securing funding.

Your Next Steps After the Decision

How you respond matters, regardless of the news.

If you got the grant, your immediate focus shifts to the grant agreement. This is a binding contract. Read it carefully with your team before signing, as it will detail everything from the project scope and reporting deadlines to how you'll get paid. Now is also the time to get your financial tracking in order.

Grant programs, especially major federal ones, require meticulous documentation. For example, the U.S. State Department’s Ambassadors Fund for Cultural Preservation awards grants from $70,000 to over $400,000 for projects around the globe and is known for its stringent reporting. You can read the complete findings on these global preservation grant requirements to get a sense of the high standards you'll need to meet.

If you’re waitlisted, send a brief, polite note thanking the program officer and confirming that your project is still ready to go.

If you were rejected, your single most important next step is to ask for feedback. See if the program officer can share the reviewers' comments. That feedback is pure gold—it’s your roadmap for strengthening your application for the next round.

Common Questions About Historic Preservation Grants

Even with the best roadmap, the path to securing funding can feel a bit murky. As you get into the weeds of how to apply for historic preservation grants, you're bound to have questions. Let's tackle some of the most common ones we hear from property owners and developers.

Think of this as your final briefing before diving in. Getting these details straight now can save you a world of headaches down the line.

What Are the Most Common Reasons Preservation Grant Applications Are Rejected?

Getting a rejection letter is tough, but understanding why it happened is the key to improving your next shot. Most rejections, I've found, boil down to a handful of issues that are almost always preventable.

The most straightforward reason is simple ineligibility. This could mean your property isn’t officially listed on the National Register, or maybe you, as a private owner, don't qualify for a grant that’s only open to nonprofits or government agencies. Another classic mistake is an incomplete application. Missing a signature or a single required document is the quickest way to land in the "no" pile before anyone even reads about your project's merits.

Beyond those technical knockouts, a weak "Statement of Significance" is a common stumbling block. If you can't build a strong, persuasive case for why your building matters and how its restoration serves the public good, your application just won't stand out. Finally, grant reviewers are pros at spotting financial wobbles—unrealistic budgets, vague timelines, or a poorly explained plan for your matching funds all signal a project that isn't fully baked.

Can I Use a Grant to Pay for Work I Have Already Completed?

This is a big one, and it trips up a lot of enthusiastic owners. The answer is almost always a hard no. Preservation grants are meant to fund future work, not to reimburse you for projects you've already paid for or even started.

The logic here is all about oversight and compliance. Grant agreements are legal contracts. They're put in place before work begins to ensure every single step—from mortar repair to window restoration—meets strict guidelines like the Secretary of the Interior’s Standards for the Treatment of Historic Properties.

A Word of Warning: Kicking off any construction before a grant is officially awarded and you have a signed contract in hand can make those expenses completely ineligible for funding. In some situations, it could even put your entire award at risk. Always, always wait for the official green light.

How Important Are Letters of Support and Who Should I Ask for Them?

Don't mistake letters of support for a simple formality. They're powerful proof that your project has real, widespread community backing. They act as a third-party endorsement, showing funders that their investment will be valued and celebrated by the people it’s meant to serve.

You’ll want to gather support from a diverse and influential group. Think strategically.

  • Elected Officials: Your mayor, city council members, and state representatives carry a lot of weight.
  • Community Leaders: The heads of the local historical society, a neighborhood association, or a downtown business district.
  • Relevant Experts: A school principal if your project has an educational component, or a prominent local business owner if it ties into economic revitalization.

The key to a great letter is specificity. A generic template is useless. The best letters are personal and clearly explain why the project matters to that individual and the community they represent.

What Is the Difference Between In-Kind and Cash Match Funds?

Most grants require you to have some "skin in the game," which they call a match. This shows the funder you’re just as invested in the project's success as they are. This match can come in two different flavors.

A "cash match" is exactly what it sounds like—real money you're putting toward the project. This can be cash from your organization's reserves, a bank loan, or funds from another donor earmarked for this purpose.

"In-kind match," on the other hand, is the documented value of non-cash contributions. This is a fantastic way to demonstrate community buy-in and resourcefulness. Common examples include:

  • Donated professional services (like an architect or engineer waiving a portion of their fees).
  • The market value of donated construction materials from a local supplier.
  • The value of volunteer labor, which many grant programs allow you to calculate at a specific hourly rate.

In my experience, a strong application often shows a healthy mix of both cash and in-kind support. It paints a complete picture of a project that is both financially sound and passionately supported by its community.


Navigating the world of historic preservation grants takes more than just filling out forms; it requires a deep understanding of what funders are truly looking for. At Sherer Architects, LLC, we have decades of experience guiding clients through this exact process. We help craft compelling narratives, secure approvals, and get the funding needed to bring historic properties back to life. Learn how our preservation expertise can help you succeed.