SHERER ARCHITECTS

Categories
Uncategorized

How to Apply for Historic Preservation Grants

Applying for a historic preservation grant isn't just about filling out forms. It's about matching your project's soul with a funder's mission. Success comes from a well-researched, targeted approach that shows you understand what they care about and how your building fits into that picture.

Decoding the Historic Preservation Grant Landscape

Laptop displaying grant application with funding map interface and geographic planning materials on desk

Before you even think about writing the application, you need to map out where the money is. The world of preservation funding is a web of federal, state, and private players, and each one operates on its own schedule with its own set of rules. Think of this early research as your strategic planning phase—get this right, and everything else falls into place.

The big player at the federal level is the Historic Preservation Fund (HPF), which is run by the National Park Service. It's the primary source of preservation funding in the U.S. In a recent fiscal year, Congress set aside nearly $189 million for the HPF, which then gets funneled out to various programs. You can dive deeper into the numbers and see exactly where that money went on the NPS website.

A big chunk of that federal money goes directly to State Historic Preservation Offices (SHPOs), which then run their own grant programs. These are often your best bet for local projects, but be warned: they are fiercely competitive. And don't forget about the vast network of private foundations and nonprofits, each with its own niche focus, from saving old theaters to preserving rural farmsteads.

The Three Main Types of Preservation Grants

Knowing the different buckets of money is crucial. Applying for the wrong type of grant is the fastest way to get a rejection letter. Funders are incredibly specific about how their dollars can be spent.

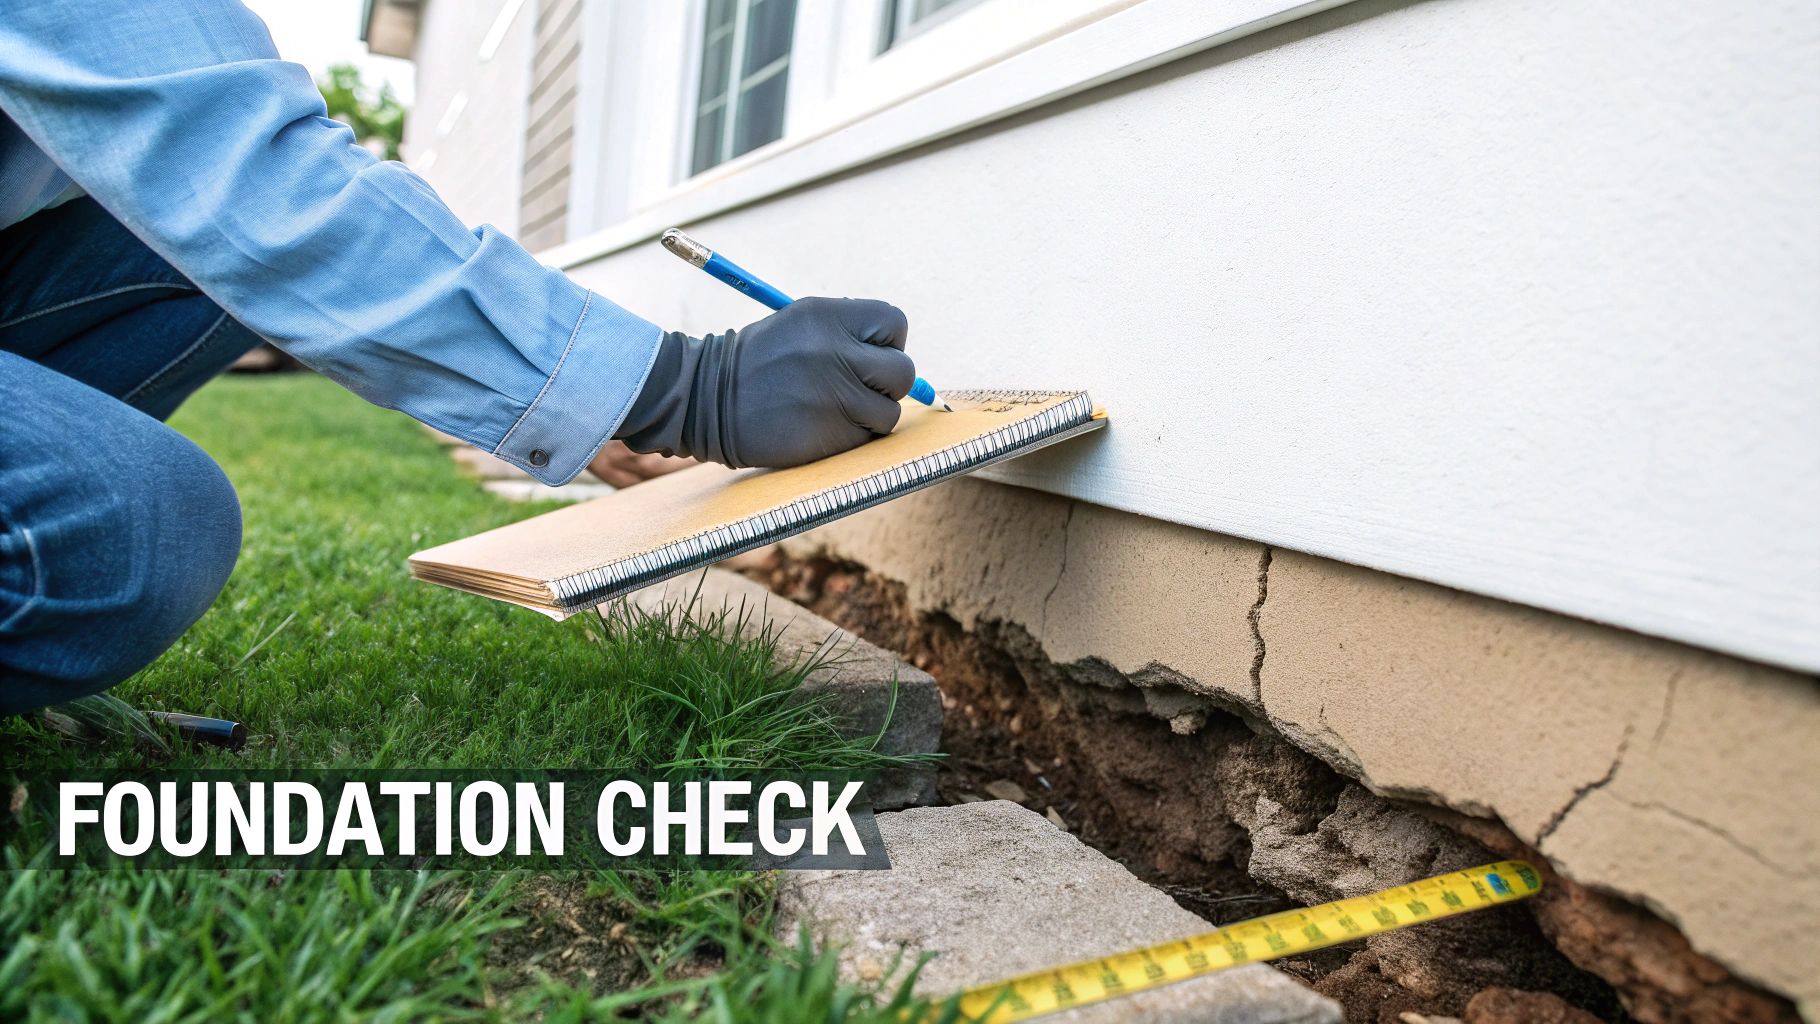
  • Capital Grants: This is the money for the actual "bricks-and-mortar" work. Think roof repairs, window restoration, or foundation stabilization. If you're physically touching the building, you're likely looking for a capital grant.
  • Planning Grants: This funding covers all the critical prep work that comes before a single hammer is swung. It pays for things like architectural drawings, engineering studies, historic structure reports, and archaeological surveys.
  • Educational or Interpretive Grants: These grants are all about telling the building's story. The funds might be used to create a museum exhibit, develop a walking tour app, publish a local history book, or run workshops for the community.

I’ve seen it happen countless times: someone applies for a major capital grant when their project is still just an idea. Funders need to see a well-developed, "shovel-ready" plan before they'll commit to construction costs.

For a great overview of how public funding works, which is a major component of preservation efforts, this Federal Grants for Nonprofits Funding Guide is a fantastic resource. Zeroing in on the right grant type from the start shows funders you’ve done your homework and respect their process.

Finding the Right Grant for Your Project

Person examining grant application documents with magnifying glass on white desk workspace

Securing a grant isn't a numbers game—it's a matching game. The most successful applicants I’ve seen are the ones who stop shotgunning applications and start doing their homework. The goal is to find a funder whose mission and priorities genuinely align with your project’s needs.

Your search should really have two parallel tracks running at the same time: national and state.

On the national level, the National Trust for Historic Preservation is an essential first stop. While many of their grants focus on planning and education, they are a major player. It's a big ecosystem, too; annually, over $1 billion in grant money is available from a variety of sources, including more than 10 federal agencies. You can get a sense of this landscape by exploring compilations of historical preservation grants.

At the same time, you need to be exploring your State Historic Preservation Office (SHPO) website. Frankly, for many local projects, this is where you’ll find the best fit. These grants are specifically designed to address preservation challenges within your state, making them a much more practical target.

Reading Between the Lines of Eligibility

The eligibility requirements are your filter. This is where you separate the real opportunities from the time-wasters. Before you ever write a single word of a proposal, you need to dissect the fine print. I can't tell you how many hours I've seen people waste on applications they were never qualified for.

Here’s what to look for immediately:

  • Property Designation: Does your building need to be on the National Register of Historic Places? Some funders won't look at anything else. Others are more flexible, accepting properties that are eligible for listing or have a local landmark designation.
  • Applicant Type: Who can actually apply? Many of the biggest grants are only open to 501(c)(3) nonprofits or government bodies. If you’re a private owner, don't despair—your options are just more specific.
  • Project Scope: Is the funder interested in "bricks-and-mortar" capital work, or do they stick to planning, research, and education? Applying for a new roof from a grant that only funds interpretive signage is an automatic "no."

A classic rookie mistake is getting distracted by the largest dollar amounts. I’d much rather see a project go after a smaller, perfectly aligned grant than a huge one where the eligibility is a stretch. Alignment is what gets you funded.

Aligning Your Project with a Funder's Mission

With a shortlist of potential grants in hand, your next job is to put on your grant reviewer hat. Every single funder has a mission—a reason they exist. One foundation might be dedicated to saving rural churches, while a federal program may be laser-focused on revitalizing downtowns in economically distressed areas.

Let's look at how this plays out in the real world:

  1. Scenario A: The Small Town Museum: A local historical society wants to digitize its photo archive and build a new exhibit. This project is small, educational, and deeply rooted in the community. Their best shot is a private foundation that cares about local history or a modest educational grant from their SHPO. Chasing a massive federal grant for building restoration would be a total mismatch.
  2. Scenario B: The Landmark Bridge Restoration: A city needs millions for the structural rehabilitation of a nationally registered bridge. This is a big-ticket infrastructure project. They should be looking at large-scale federal transportation grants, probably supplemented by significant state funding. A small private grant for educational programming just isn't relevant to their core need.

By digging into each grant's purpose and looking at what they've funded in the past, you can frame your project in a way that speaks directly to their passions. That shift in perspective can make all the difference.

Comparing Historic Preservation Grant Sources

Navigating the grant landscape requires understanding the key differences between federal, state, and private funding streams. Each has its own priorities, requirements, and typical award sizes. The table below breaks down these distinctions to help you zero in on the best source for your specific preservation project.

Funding Source Typical Project Focus Average Grant Size Matching Funds Requirement Common Eligibility
Federal Agencies Large-scale capital projects, infrastructure, disaster recovery, national significance $100k – $1M+ Often 50% (1:1 match) or more; can be complex National Register listing, government agencies, 501(c)(3)s
State (SHPO) "Bricks-and-mortar" restoration, planning, surveys, local historic districts $10k – $100k Typically 50%; sometimes lower for planning grants National or State Register listing, nonprofits, local governments
Private Foundations Niche areas (e.g., sacred places, rural preservation), planning, education, seed money $5k – $50k Varies widely; some require no match, others 1:1 Often 501(c)(3) status; may have specific geographic or thematic focus

Choosing the right source is the first and most critical step. A large federal grant might seem appealing, but the compliance and matching fund requirements can be overwhelming. In contrast, a smaller foundation grant might be the perfect catalyst to get a community-based project off the ground.

Crafting an Unforgettable Grant Proposal

A great grant application does more than just ask for money—it tells a compelling story backed by cold, hard facts. This is where you prove your project isn't just historically important, but that it's also meticulously planned and primed for success. Your job is to make the review committee feel as passionate about your building’s future as you do.

Think of your grant application as a high-stakes business plan for a non-renewable cultural asset. The same principles that make for successful strategies for writing winning business proposals apply here. You have to lay out a clear problem (a historic building at risk), present a well-researched solution (your preservation plan), and show a clear return on their investment (the public good).

Writing a Powerful Statement of Significance

The Statement of Significance is the soul of your proposal. This is where you make your case for why this building, right here, actually matters. Vague descriptions won't cut it. You need to build your argument with concrete evidence that ties your property to bigger historical themes.

To pull this off, you have to dig deeper than just listing the construction date. You need to answer these questions with documented proof:

  • Architectural Importance: Is the building a rare or exceptional example of a specific architectural style? Maybe it was designed by a well-known architect?
  • Historical Association: Can you link the property to significant people or pivotal events in your town's history? You’ll need names, dates, and the real-world context of their impact.
  • Cultural Context: Does the building tell a story about how your community grew? For example, was it the first general store in town, a key meeting spot for a social movement, or a symbol of an immigrant community’s success?

I see this all the time: applicants assume the reviewer knows their local history. You absolutely have to write as if they’ve never even heard of your town. Connect the dots for them. Don't just explain what happened, explain why it was important.

For instance, don’t just say, "The Miller Building is an old commercial building downtown." That's a missed opportunity.

Instead, try something like this: "The Miller Building (1922) is the city's only surviving example of commercial Art Deco architecture and was home to the first female-owned law practice in the county from 1925 to 1950." See the difference? The second statement is packed with specific, verifiable details that anchor the building in history.

Developing a Professional Preservation Plan

Once you've established why the building is important, you have to detail exactly what you're going to do to save it. A professional Preservation Plan (sometimes called a Treatment Plan) shows the grant committee you're following established best practices, not just patching things up as you go.

Your plan needs to lay out the proposed work in detail, and it must follow the Secretary of the Interior's Standards for the Treatment of Historic Properties. It's critical to be clear about which of the four official treatment approaches you're taking:

  1. Preservation: The focus here is on maintenance and repairing existing historic materials. It's about keeping what's there in good shape.
  2. Rehabilitation: This approach accepts that you might need to alter or add to a building for a new use, but you do it while protecting its historic character.
  3. Restoration: This is about taking the property back to a specific period in its history, which often means removing changes made in other eras.
  4. Reconstruction: You're essentially re-creating a lost part of a property, usually for interpretive purposes.

Break the project down into logical phases. If you're tackling a roof replacement, for example, your plan would detail the careful removal of non-historic shingles, the repair of the original underlying structure using period-appropriate methods, and the installation of new materials that match the original in both look and composition.

Creating a Realistic Budget and Compelling Visuals

An unrealistic budget is the quickest way to land your application in the rejection pile. Grant reviewers have seen it all; they can spot inflated costs or underfunded line items from a mile away. You need to get at least two, and ideally three, detailed cost estimates from contractors who actually have experience with historic preservation work.

Your budget has to be transparent and dead simple to understand. Break everything down into clear categories:

  • Pre-construction: permits, architectural drawings, engineering fees
  • Materials: specialty lumber, historic window glazing, custom millwork
  • Labor: masonry, carpentry, plastering, etc.
  • Contingency: This is non-negotiable. Always include a 10-15% contingency for the inevitable surprises you'll find behind the walls.

Finally, never forget that a picture is worth a thousand words—especially in a grant proposal. High-quality, clearly labeled photos are a must. You need sharp "before" shots that document the existing problems. Then, use diagrams, historical photos, or even architectural renderings to show your proposed "after" vision. Help the reviewers see the incredible, successful project you’re asking them to fund.

Mastering the Grant Submission Calendar

https://www.youtube.com/embed/bw7IgeMHtGY

Let me be blunt: even the most compelling, perfectly written grant proposal is worthless if it arrives a day late. I’ve seen it happen. Understanding and respecting the grant submission calendar isn't just a final step—it’s the backbone of your entire strategy. The whole grant game, from the first announcement to the final award, runs on a strict timeline. You have to master it.

Grant cycles are all over the map, and it really depends on who holds the purse strings. Federal grants, for instance, often have these long, drawn-out timelines tied to the government's fiscal year. You might find yourself submitting an application in the spring for a project that won’t see a dime until the following year. For big, multi-phase restorations, you absolutely have to plan for that kind of long game.

On the other hand, many private foundations move a lot faster and on a more predictable schedule. You’ll often see a flurry of grant deadlines in the fall, with application windows opening up in late summer and slamming shut before the holidays. This rhythm means you have to be ready to move when the opportunity appears.

Mapping Your Submission Timeline

Here’s a rookie mistake I see all the time: waiting for a grant to be announced before starting the proposal. The folks who consistently win grants are working months ahead. They treat the grant calendar as a year-round strategic tool, identifying potential funders and drafting their core documents long before any application portal goes live.

Take the Daughters of the American Revolution (DAR), a major source of private funding. They typically open their historic preservation grant program from August 1 to October 31 each year, with the winners announced the following May. Knowing that pattern, you can spend June and July polishing your proposal and getting your ducks in a row, ready to submit on day one. You can get a feel for their process on the DAR website.

My best advice is to create a master calendar for your top three to five target grants. Mark down the expected announcement dates, submission windows, and decision timelines. Working backward from those deadlines is the only sane way to manage this process without descending into last-minute chaos.

Grant proposal writing process infographic showing four steps: story, plan, budget, and photos with icons

As you can see, a winning application really boils down to four key pillars: telling a compelling story, laying out a detailed plan, nailing down an accurate budget, and backing it all up with great photos.

The Final Push: Submission and Follow-Up

Once all your documents are assembled and polished, you’re in the home stretch. This is where meticulous, eagle-eyed review comes in. You’ll be navigating the specific mechanics of submission, whether it’s a modern online portal or an old-school physical package. Seriously, do not underestimate how long this can take. Wrestling with a clunky online system at 11 p.m. on deadline day is a special kind of hell you can easily avoid with a little planning.

Before you dare hit "submit," run through one last checklist:

  • All Fields Complete: Have you double-checked every single required field? Yes, every single one.
  • Signatures Secured: Are all the necessary signatures from your board members or partners actually on the document?
  • Attachments Correct: Did you upload the final versions of your budget, photos, and plans? Not the draft from last Tuesday.
  • File Names Clear: Make the reviewer's life easier. Use a clear naming convention like "ProjectName_Budget_2024.pdf".

After you've submitted, the waiting game begins. This is the perfect time to send a brief, professional email to the program officer. A simple note thanking them for the opportunity and confirming they received your materials does two things: it keeps your project on their radar and reinforces your professionalism. It’s a small touch, but it can make a real difference.

Managing Your Grant After You Win

Grant management workspace with laptop displaying calendar, notebook with financial charts, and green signage

Winning the grant is a huge victory. It's a moment of validation for your project and a real testament to your team's hard work. But once the celebration is over, the real work begins. How you manage the grant is every bit as important as how you won it, setting the stage for a successful project and building the credibility you'll need for future funding.

The first thing you’ll get is the grant agreement. This isn't just a congratulatory letter; it's a binding legal contract. Read every single word before you sign. Pay special attention to the reporting deadlines, what records you need to keep, and the specific rules for hiring contractors or buying materials. I’ve seen projects get into hot water by misunderstanding these terms right from the start.

For instance, many state and federal grants come with strict procurement guidelines. You might be required to get three competitive bids for any work exceeding a certain threshold, say $10,000. If you can't show you followed that process, those expenses could be deemed ineligible for reimbursement, forcing you to cover the costs yourself.

Setting Up for Financial Success

Your first move should be to open a separate bank account just for the grant funds and your matching share. Mixing grant money with your general operating funds is an accounting nightmare waiting to happen and a major red flag for auditors. A dedicated account gives you a clean, transparent financial trail from day one.

Next, get your tracking system in order. This doesn't require fancy software; a well-organized spreadsheet is often all you need.

Make sure your system tracks:

  • Detailed Expenses: Log every single cost and tie it directly to a line item in your approved grant budget.
  • Matching Funds: Carefully document all your contributions, whether it’s cash, donated materials, or volunteer labor hours. You have to prove you met your match.
  • Invoices and Receipts: Scan and file everything. Keep digital and physical copies. If you don't have a receipt, you can't get reimbursed. Simple as that.

The golden rule of grant management is simple: If you can't document it, it didn't happen. From a funder's perspective, a detailed paper trail is the only proof of your progress and compliance.

The Art of Reporting and Communication

Think of reporting as more than just a requirement—it's your best tool for building trust with the funder. Most grants require periodic progress reports, usually quarterly or semi-annually, which have both a narrative and a financial component.

The narrative report is where you tell the story of your project's progress. Use good, clear photos to show the work in action. Be upfront about any roadblocks you've hit and, most importantly, explain your plan to overcome them. Funders appreciate transparency far more than being blindsided by a problem down the road.

The financial report needs to be a straightforward summary of your expenses that matches your internal spreadsheet perfectly. It shows the funder exactly how their investment is being used and how you’re tracking against the budget you all agreed on.

Beyond the formal reports, your secret weapon is an open line of communication with your grant program officer. Treat them like a partner, not an auditor. If a supply chain issue is delaying materials or bad weather is pushing back the schedule, call them. A proactive heads-up is always better than a panicked email after a minor issue has snowballed. They’ve seen it all and can often provide guidance or approve budget adjustments, but only if you keep them in the loop. This rapport is what turns a successfully completed project into a powerful foundation for your next grant application.

Your Top Questions About Historic Preservation Grants, Answered

When you're wading into the world of preservation funding, questions pop up at every turn. It’s completely normal. From deciphering eligibility rules to figuring out what on earth "matching funds" are, the process can feel a bit overwhelming. Let's tackle some of the most common questions I hear from property owners, so you can move forward with confidence.

Think of this as your field guide for those moments of doubt. Getting these fundamentals right from the start can be the difference between a successful application and a frustrating rejection letter.

Do I Really Need to Be on the National Register to Get a Grant?

This is the big one, and here’s the straight answer: it’s not always a requirement, but it helps immensely. For the major federal and state grants—the ones with the biggest dollar amounts—being listed on the National Register of Historic Places is often a prerequisite. That listing is a seal of approval; it tells reviewers that your property's significance has already been officially vetted.

But don't lose hope if you're not listed yet. Some private foundations or local grant programs are more flexible. They might fund a property that's been formally determined eligible for the Register, or one that holds a strong local landmark designation. The single most important thing you can do is read the eligibility criteria for each grant, line by line.

If you find that a National Register listing is holding you back, consider looking for a smaller planning grant. Many programs are designed specifically to help fund the research and documentation needed to complete the nomination process itself.

What Exactly Are "Matching Funds" and Where Do I Get Them?

You’ll almost never find a grant that covers 100% of your project costs. Grantors want to see that you're just as invested in the project as they are, which is where matching funds come into play. This is simply your share of the project's cost.

A 1:1 match is pretty standard, meaning you have to bring one dollar to the table for every dollar the grant provides. The good news is that your "match" doesn't have to be a pile of cash. It can be assembled from several sources:

  • Cash on Hand: Your organization’s own reserves or capital funds.
  • Other Grants: Sometimes you can use funds from one grant as the match for another, but you have to check the rules for both programs to make sure this is allowed.
  • Bank Loans: A committed line of credit or a loan secured for the project counts.
  • In-Kind Contributions: This is a game-changer. It’s the documented value of donated professional services (like an architect or engineer’s time) or donated materials.

The key is to start securing these commitments early. You can’t just say you’ll find the money; you'll need letters of commitment and other documentation to prove your match is ready to go.

Most rejections happen for avoidable reasons. A thorough self-review or asking a colleague to read your application with fresh eyes can help you catch common mistakes before you hit submit. A simple typo or a missing signature can disqualify an otherwise brilliant proposal.

What Are the Top Reasons Grant Applications Get Rejected?

Having sat on review panels, I can tell you that the same mistakes sink applications time and time again. Surprisingly, it’s rarely about the project's merit. More often, it's about the application itself.

Here are the most common reasons a proposal ends up in the "no" pile:

  1. Missed the Mark on Eligibility: The project or property simply doesn't fit the grant's rules. This is the #1 reason for rejection, and it's 100% preventable.
  2. An Incomplete Package: A missing signature, a budget that doesn't add up, or a forgotten attachment can get an otherwise perfect application tossed out before it's even read.
  3. A Fuzzy Project Scope: Reviewers are left wondering what work will actually be done. The proposal needs to clearly explain the what, why, and how, all while adhering to preservation standards.
  4. A Weak Case for Significance: The application fails to make a compelling argument for why the property is important and why it deserves this public or private investment.
  5. An Unrealistic Plan: The budget seems pulled out of thin air, the costs aren't backed by professional estimates, or the timeline feels completely unachievable.

Navigating the complexities of historic preservation—from securing grants to executing a faithful restoration—requires specialized expertise. At Sherer Architects, LLC, we guide property owners through every stage of the process, helping you honor your building's character while maximizing its value.

Learn more about our historic preservation services and how we can bring structure to your vision.

Categories
Uncategorized

How to Value Commercial Property: A Quick Guide

When you're trying to figure out what a commercial property is worth, it all comes down to three classic approaches: the Income Approach, the Sales Comparison Approach, and the Cost Approach. Think of these as different lenses to look through. Each one gives you a unique perspective on the property's value, and the one you lean on most heavily really depends on the building itself and what the market is doing.

This isn't just theory—it's the professional framework we use every day to build a solid financial case for a property's value.

Decoding the Three Core Valuation Methods

Before you even touch a calculator, it’s crucial to get the strategy right. Valuing commercial real estate isn’t like pricing a house where curb appeal and emotion can sway the number. Here, it’s almost entirely a financial equation. Your job is to pin down a value based on how much money the asset can make, what similar properties have recently sold for, or what it would cost to just build a new one from the ground up.

A seasoned appraiser or investor rarely bets the farm on a single method. The smart play is to use at least two, and often all three, to arrive at a more defensible and well-rounded valuation. The real skill is knowing which approach should carry the most weight.

Selecting the Right Valuation Tool

The property itself is your best guide. If you're looking at an office building or a shopping center with a roster of paying tenants, the Income Approach is your go-to. Its value is fundamentally tied to the cash it spins off month after month.

But what about a unique, owner-occupied warehouse with no rental income? In that case, you'd pivot to the Sales Comparison or Cost Approach. Since there's no income stream to analyze, your best bet is to look at what comparable industrial buildings have sold for or to calculate the cost to replace it.

To help you choose the best valuation path, we've summarized the core methods in this table.

Quick Guide to Commercial Property Valuation Methods

Valuation Method Best For Key Metric or Principle
Income Approach Income-producing properties (offices, retail, multifamily) with predictable cash flow. Net Operating Income (NOI) and Capitalization Rate (Cap Rate) or Discounted Cash Flow (DCF).
Sales Comparison Approach Most property types, especially owner-occupied or unique assets where good "comp" data is available. Price per square foot or unit of recently sold, similar properties, adjusted for differences.
Cost Approach New construction, unique-use properties (e.g., a school or church), or when checking insurance values. The cost to build a replacement property from scratch, minus depreciation.

Each method provides a distinct pathway to determining value, and understanding when to use each is the first step toward a reliable assessment.

This workflow is a great starting point for figuring out which method fits your situation.

Infographic about how to value commercial property

As the infographic shows, you follow a different path depending on the property's characteristics. For a deeper dive into the nuts and bolts of each method, this guide on how to value commercial property is an excellent resource.

Key Takeaway: The most reliable valuations don't just pick one method; they triangulate a final value by considering the results from multiple approaches, giving more weight to the one that best fits the property type and available market data.

Finding Value with the Sales Comparison Approach

While running the numbers with the Income Approach gives you a solid look at a property's financial engine, sometimes the clearest picture of value comes from a much simpler question: what are similar properties actually selling for? This is the heart of the Sales Comparison Approach.

Think of it as grounding your valuation in reality. It's an intuitive method that mirrors how we price homes, but with a lot more nuance for commercial assets. We’re looking at real, closed transactions to see what buyers in the current market are willing to pay. It’s no wonder this is one of the most trusted methods out there; it directly reflects the pulse of the market. You can read more about the best commercial real estate valuation methods and see why this one is so popular with the pros.

Sourcing Reliable Comparable Sales Data

The whole process lives or dies by the quality of your "comps." Without solid, truly comparable sales data, your valuation is just a shot in the dark. The goal is to find properties that mirror yours in terms of use, size, location, and age.

So, where do you get this intel?

  • Commercial Real Estate Databases: This is your first stop. Heavy-hitters like CoStar, LoopNet, and Crexi are the industry standard for a reason. They offer deep dives into closed deals, giving you the sale price, date, property specs, and sometimes even the players involved.
  • Public Records: Don't overlook the county assessor's office. It’s a goldmine of raw data on recent sales. The information might not be as neatly packaged, but it's authoritative.
  • Broker Networks: This is the "insider" source. Commercial brokers live and breathe this market. They hear about off-market deals and understand the story behind a sale—context you'll never find in a database. Building these relationships is one of the smartest things you can do.

As a rule of thumb, stick to sales from the last six to twelve months. A deal from two years ago is ancient history in a fast-moving market.

The Art of Making Adjustments

Here's the thing: you'll almost never find a perfect, identical comp. That's where the real skill comes in. You have to systematically adjust the sales price of each comparable property to account for its differences from your own. It's about creating a true apples-to-apples comparison.

The logic is simple. Your property is the baseline. If a comp is better in some way—say, a prime corner location or a brand-new roof—you make a negative adjustment to its sale price to bring it down to your property's level. If the comp is inferior—maybe it’s smaller or has a ton of deferred maintenance—you make a positive adjustment, bringing its value up.

Pro Tip: Document every single adjustment and your reasoning behind it. If you adjust for condition, note the specific issues. If you adjust for location, explain why. This paper trail is what makes your final valuation defensible, not just an opinion.

Key Factors for Adjustment

Adjustments aren't pulled from thin air. They’re calculated based on specific characteristics that drive value. These are the big ones you'll always be looking at:

  1. Location: Is the comp on a main thoroughfare while yours is on a side street? That's a huge factor. A retail spot on King Street in Charleston might easily warrant a 15-20% premium over a similar building just a few blocks off the beaten path.
  2. Physical Condition: A building that’s been recently updated is worth more than a fixer-upper. A great way to quantify this is to get real contractor bids for the work needed on the inferior property and add that cost back to its sale price.
  3. Size: You'll almost always need to adjust for square footage. It's a common market dynamic that larger properties tend to sell for a lower price per square foot. You need to analyze the data to figure out that curve for your specific market.
  4. Amenities and Features: Does one property have a 20-car dedicated parking lot while the other relies on the street? Does it have a modern loading dock, high ceilings, or unique historic features? Each of these differences has a tangible value.
  5. Market Conditions: If a comp sold six months ago when interest rates were lower and demand was higher, you'll likely need to apply a negative "time" adjustment to its price to reflect today's cooler market.

By zeroing in on the right comps and carefully thinking through each adjustment, the Sales Comparison Approach helps you build a powerful, market-driven case for a property’s true worth.

Mastering the Income Approach with NOI and Cap Rates

When you’re looking at a commercial property that generates rent—whether it’s a retail strip, an office building, or an apartment complex—its value really comes down to its financial performance. This is where the Income Approach comes in. It’s the method that translates a property's profitability directly into a market value. Frankly, it's the language investors speak because it cuts through the fluff and answers the most important question: how much money does this asset actually make?

This approach isn't about curb appeal; it's about what the financial statements tell you. It treats the property as a business, and its value is a direct reflection of its operational health.

A calculator and financial documents on a desk, representing NOI and Cap Rate calculations.

Calculating Net Operating Income The Right Way

The entire Income Approach hinges on one critical number: Net Operating Income (NOI). This figure shows you the property's annual income after you've paid all the necessary operating bills but before you factor in mortgage payments or income taxes. Think of NOI as the pure, unadulterated profit the property itself generates.

Getting this number right is non-negotiable. Here's how we build it from the ground up.

First, you start with the Gross Potential Rent (GPR). This is the absolute maximum rent you could collect if the property were 100% occupied for the whole year, with every single tenant paying the full market rate.

Of course, no property stays full all the time. You have to account for reality by subtracting an allowance for vacancies and for tenants who don't pay. A market-standard vacancy rate is often between 5-10%, but this can swing wildly depending on the local market and the type of property you're dealing with.

Finally, you add in any other income. Don't forget the money from laundry machines, parking fees, or even billboard rentals. Tallying all this up gives you the Effective Gross Income (EGI). From there, you subtract your operating expenses.

What Counts as an Operating Expense?

This is where a lot of new investors get tripped up. Operating expenses are the day-to-day costs of keeping the lights on and the property running smoothly. They do not include your financing costs or major capital improvements.

Here’s a clear breakdown of what goes in and what stays out:

Include in Operating Expenses Exclude from Operating Expenses
Property Taxes Debt Service (Mortgage Payments)
Property Insurance Capital Expenditures (e.g., new roof)
Utilities (if owner-paid) Tenant Improvements
Repairs & Maintenance Depreciation
Property Management Fees Income Taxes
Landscaping & Janitorial Leasing Commissions

Forgetting to exclude debt service is the single most common mistake I see. Your mortgage is unique to your financing deal, not a reflection of the property's intrinsic performance. If you include it, you’ll artificially tank the NOI and, as a result, the property's calculated value.

Expert Insight: Always, and I mean always, scrutinize the seller's expense list. Some owners might conveniently "forget" to include a line item for management fees if they manage it themselves, or they might understate repair costs. A proper due diligence process means verifying these numbers against market averages and, ideally, actual invoices.

Translating NOI into Value with the Capitalization Rate

Once you have a solid, defensible NOI, you need a way to turn that annual income stream into a total property value. This is where the capitalization rate (cap rate) comes into play. The cap rate is a simple but incredibly powerful ratio that reflects the expected rate of return on a real estate investment.

The formula is straightforward:

Property Value = Net Operating Income (NOI) / Capitalization Rate (Cap Rate)

A lower cap rate means a higher property value and is usually tied to lower-risk, stable assets in prime locations. On the flip side, a higher cap rate suggests higher risk but a potentially better return, often seen with older properties or those in up-and-coming neighborhoods.

So, where do you find the right cap rate?

  • Recent Sales Data: Look at the NOI and sale prices of comparable properties that just sold in your market.
  • Broker Reports: Commercial real estate brokers and big firms publish market reports all the time with average cap rates broken down by property type and area.
  • Appraisal Data: Professional appraisers have access to proprietary databases that track these metrics with precision.

When you're weighing the potential returns, mastering the income approach is absolutely critical, especially if you're looking into an investment in an apartment complex. A tiny shift in the cap rate can have a massive impact on the final valuation, so getting this number right is the key to making a smart investment.

A Deeper Dive into Discounted Cash Flow Analysis

While a cap rate gives you a fantastic snapshot of a property's value based on a single year's income, it has its limits. The real world isn't static. Cap rates assume a property's income will cruise along without any changes, which we all know rarely happens.

For properties with a more complex financial future—think an office building with staggered lease renewals or a retail center planning a major expansion—you need a tool that can see around the corners. This is where Discounted Cash Flow (DCF) analysis really shines.

Think of DCF as building a multi-year financial movie of the property's life under your ownership, instead of just taking a single snapshot. It forces you to account for future rent hikes, planned capital projects, and changing operating expenses over a typical 5 to 10-year holding period.

This forward-looking approach is precisely why sophisticated investors lean on it for major decisions. The DCF method is widely considered the most detailed valuation approach because it directly incorporates the time value of money and captures a property's entire projected performance. You're not just looking at today; you're projecting future cash flows and then discounting them back to what they're worth in your pocket right now. For more on how this fits into the bigger picture, you can explore detailed insights on major methods for commercial real estate valuation.

A chart showing a financial forecast, representing Discounted Cash Flow (DCF) analysis.

Building Your Financial Projections

The heart of a DCF analysis is your proforma—a detailed forecast of the property’s Net Operating Income (NOI) for each year you plan to own it. This isn't just a copy-and-paste job of the current rent roll. You need to roll up your sleeves and make educated assumptions grounded in market data and the property's unique situation.

A solid projection model has to account for several key moving parts:

  • Scheduled Rent Increases: Dig into the existing leases. Are there built-in rent escalations? Make sure you factor those bumps into the correct years.
  • Market Rent Growth: What happens when leases expire? You'll need to project the new rents you can realistically achieve based on market trends. A 3% annual growth is a common starting point, but you must tailor this to your specific submarket.
  • Vacancy Fluctuations: If a major tenant's lease is up in year three, you'd better model a temporary spike in vacancy and the costs to release that space.
  • Operating Expense Inflation: Property taxes, insurance, and maintenance costs never seem to go down. It's standard practice to project these to increase annually, often by 2-3%.

Forecasting the Reversion Value

After projecting your annual cash flows, the next big piece is estimating what you'll sell the property for at the end of your holding period. In valuation lingo, this future sale price is called the reversion value or terminal value.

The most common way to pin this down is by applying a "terminal cap rate" to a future year's income. You take the NOI you've projected for the year after your holding period ends (so, Year 11 in a 10-year model) and divide it by an estimated future cap rate. This terminal cap rate is usually a bit higher than today's market rate to account for the building being older and other potential future risks.

Pro Tip: Your terminal cap rate assumption is one of the most powerful levers in a DCF model. A tiny tweak here can dramatically swing the final valuation. Always be prepared to defend why you chose a specific rate, often by pointing to historical cap rate trends for similar assets in the area.

Selecting the Right Discount Rate

Okay, so now you have a series of future cash flows: the annual NOI for each year plus that big reversion value at the end. But a dollar in ten years is worth less than a dollar today. The next crucial step is to bring all that future money back to its present-day value.

We do this using a discount rate. The discount rate is simply the annual return an investor would demand to take on the risk of this particular investment. It's a reflection of opportunity cost—if you didn't buy this property, what return could you get on another investment with a similar risk profile?

Choosing this rate is part art, part science. It’s influenced by a few key things:

  • The interest rates on any loans you're getting.
  • The perceived risk of the property itself and its market.
  • The investor's own required rate of return, or "hurdle rate."

Once you've landed on a discount rate, you apply it to each year's projected cash flow. The sum of all those discounted cash flows is the property’s present value, according to your DCF model. It's a lot more work than a simple cap rate, but this granular approach gives you a much richer and more defensible understanding of what an asset is truly worth.

DCF vs Direct Capitalization: A Comparison

Both DCF and the direct capitalization (cap rate) method fall under the Income Approach, but they serve different purposes. Here's a quick breakdown to help you decide which tool is right for the job.

Feature Direct Capitalization (Cap Rate) Discounted Cash Flow (DCF)
Time Horizon A single point in time (based on one year's NOI). Multi-year period (typically 5-10 years).
Income Assumption Assumes stable, consistent income and expenses. Accounts for variable cash flows over time.
Complexity Simple and fast. Easy to calculate and understand. Complex and time-consuming. Requires many assumptions.
Best For Stabilized properties with predictable income streams (e.g., a fully leased NNN retail building). Properties with irregular cash flows, planned capital improvements, or multiple lease expirations (e.g., a value-add office building).
Key Output A single value based on current market sentiment. A detailed valuation based on the property's entire projected financial life.

Ultimately, using a simple cap rate is perfect for a quick analysis of a stable, straightforward property. But when you're dealing with a more complex asset or making a major investment decision, the detailed story that a DCF analysis tells you is indispensable.

Tying It All Together: Reconciliation and Final Due Diligence

You’ve run the numbers using the income, sales, and cost approaches. Now you have three different potential values. So, which one is right? The answer isn't to just average them out. The final step, what we call reconciliation, is more of an art than a science.

Think of yourself as a judge weighing evidence. Each valuation method is a key witness, but not all testimony is equally credible for every case. Your job is to decide which "witness" tells the most compelling and relevant story for the specific property you're analyzing.

Weighing the Evidence from Each Approach

So, how do you decide which method gets the most weight? It all comes down to the property itself and the quality of your data.

If you're looking at a bustling retail center with a long history of stable, long-term tenants, the Income Approach is your star witness. The property's value is fundamentally tied to the cash it generates, making this the most reliable indicator. You'd lean heavily on your cap rate or DCF analysis.

But what if the property is a unique, owner-occupied industrial building? Finding truly comparable sales might be next to impossible, making the Sales Comparison Approach less reliable. Here, you might give more weight to the Cost Approach, especially if the building isn't too old.

The Final Argument: Reconciliation is where you build your case for a final value. You need a clear, logical reason for your conclusion. For example, you might state: "The Income Approach gave us a value of $2.5 million, while the comps suggested $2.35 million. Given the property's rock-solid rent roll and the lack of truly apples-to-apples sales in the market, we are placing 80% of our confidence in the income-based value."

Shifting Gears to Due Diligence: From Spreadsheet to Reality

Getting to a reconciled number is a huge milestone, but don't pop the champagne just yet. A valuation is only as good as the assumptions it's built on. The final due diligence phase is where you get your hands dirty and verify everything.

This is your chance to confirm that the reality on the ground matches the numbers on your screen. It’s where you uncover the skeletons in the closet—the leaky roof the seller forgot to mention, or the anchor tenant who’s secretly planning to leave. Skipping this step is, without a doubt, one of the most expensive mistakes you can make in commercial real estate.

Your Must-Have Due Diligence Checklist

A thorough, systematic checklist is your best friend here. This isn’t a quick walkthrough; it’s a forensic audit of the property's physical, financial, and legal health.

Financial and Legal Deep Dive

  • Verify the Rent Roll: Don't just glance at it. Compare every line item against the actual signed leases. Are there any hidden rent concessions or unusual clauses?
  • Abstract Every Lease: Yes, every single one. You're hunting for key details: renewal options, expiration dates, specific expense reimbursement terms (NNN, for example), and any co-tenancy clauses that could spell disaster if a major tenant leaves.
  • Audit the Financials: Get at least three years of operating statements. You're looking for red flags and trends. Did the seller suddenly slash the repair budget in the year leading up to the sale to make the NOI look better?
  • Review Service Contracts: Look at every contract for landscaping, security, cleaning, and more. Can they be transferred to a new owner? Are the costs reasonable for the market?

Physical and Environmental Inspection

  • Property Condition Assessment (PCA): This is non-negotiable. Hire a commercial building inspector or engineer to do a top-to-bottom review. Their report will be your roadmap for immediate repairs and future capital expenses, covering everything from the HVAC systems to the parking lot pavement.
  • Environmental Site Assessment (ESA): A Phase I ESA is your first line of defense against environmental liabilities from past uses. Lenders will almost always require this to check for potential contamination.
  • Zoning and Code Compliance: Head down to the local planning department or check their online portal. Confirm the current use is permitted under local zoning. Are there any proposed zoning changes that could help or hurt the property? Make sure the building is up to snuff on all fire, safety, and ADA codes.

Once you’ve completed this rigorous process, your valuation is no longer just a theoretical number. It's a battle-tested assessment you can stand behind, giving you the confidence to move forward knowing you’ve uncovered the real story behind the asset.

Answering Your Top Valuation Questions

A person pointing at a whiteboard with charts and graphs, answering questions in a meeting.

Even with a solid grasp of the core methods, the valuation process always throws a few curveballs. Knowing how to handle these tricky situations is what really sets a professional analysis apart. I get asked a lot of questions, but a few come up time and time again from investors and owners.

Let's dive into some of the most common ones.

How Much Does a Professional Commercial Appraisal Cost?

There's no simple, flat fee for a formal appraisal. The cost is all over the map, driven mostly by the property’s size, type, and complexity.

A straightforward, single-tenant warehouse might run you $2,500 to $5,000. But for something much more complex—say, a historic downtown hotel or a sprawling regional shopping center—you're looking at a bill that could easily climb past $10,000. The appraiser's own experience and the level of detail you need in the final report also play a big role in the final price tag.

What Is the Difference Between Value and Price?

This is a big one. It's a fundamental concept that trips up a lot of people, but getting it right is crucial. "Value" and "price" are related, but they are definitely not the same thing.

  • Value is what your analysis says a property should be worth. It’s the number you get after digging into the comps, running the numbers on the NOI, or building out a full DCF model. It's an educated, data-backed opinion.
  • Price is what the property actually sells for. It’s the final, negotiated number that a buyer and seller shake hands on. It’s a fact.

A great valuation gets you close, but things happen. Market psychology, aggressive negotiations, or a seller in a tight spot can push the final price well above or below the calculated value.

A property’s value is an opinion based on facts and analysis; its price is a historical fact established by a transaction. Understanding both is key to making smart investment decisions.

How Do You Value a Vacant Commercial Property?

This is one of the toughest valuation puzzles out there. When a building is empty, there’s no income stream, which makes the Income Approach feel like pure guesswork. So, what do you do? You have to rely heavily on the other two methods.

The Sales Comparison Approach usually carries the most weight here. You’ll need to hunt down recent sales of similar vacant properties and make some sharp adjustments for things like location, condition, and marketability.

The Cost Approach also becomes surprisingly relevant, especially if the building is relatively new and hasn't depreciated much. You’re essentially asking, "What would it cost to build this today?"

You can still bring in the Income Approach, but you have to build a "pro forma" analysis. This means you project what the rental income and operating expenses would be if the property were leased up at today’s market rates. This gives you a stabilized, albeit hypothetical, NOI to work with.

How Often Should a Commercial Property Be Valued?

Honestly, it depends entirely on your goals. For your own internal books and performance tracking, most portfolio managers I know will run an informal valuation once a year. It's a good way to keep a pulse on how your assets are stacking up against the market.

However, you’ll absolutely need a formal, third-party appraisal for certain events:

  • Financing or Refinancing: Lenders won't lend a dime without one.
  • Buying or Selling: It establishes the baseline for any serious negotiation.
  • Property Tax Appeals: A fresh appraisal is your best weapon to contest an assessment.
  • Partnership Changes or Estate Planning: You need a concrete number for legal and financial filings.

In a market that’s moving quickly, checking in more often is never a bad idea.


At Sherer Architects, LLC, we believe that a building's true value lies not just in its numbers but in its potential. Whether you're considering a new commercial project, an adaptive reuse, or preserving a historic gem in South Carolina, our team provides the architectural expertise to maximize your investment's enduring worth. Let us help you bring structure to life by visiting https://shererarch.com.

Categories
Uncategorized

Site Plan vs Plot Plan A Developer’s Guide

Think of it this way: a plot plan is a close-up, and a site plan is the wide-angle shot. A plot plan is all about a single piece of property, showing exactly where a building will sit in relation to its boundaries. A site plan, on the other hand, zooms out to show the entire project—how it connects to roads, utilities, and the surrounding environment.

Which one you need really boils down to the scale of your project. Are you putting up a single building, or are you developing an entire commercial complex?

Plot Plan vs. Site Plan: Key Distinctions

Getting these two documents straight is one of the first hurdles for any developer or property owner. It's a common mistake, but mixing them up can cause serious headaches with permitting offices, leading to delays and unexpected costs. While both are technical drawings, they answer very different questions depending on your project's size and complexity.

A detailed architectural drawing showing a site plan for a development project

A plot plan puts a single lot under the microscope. Its main job is to prove that what you want to build—be it a small retail store, a new fence, or an expanded garage—fits within the legal lines. It’s a document that confirms you’re following the rules on setbacks, easements, and property boundaries. It's a compliance tool, pure and simple.

A site plan, conversely, is the big picture. It maps out how your entire project works as a whole and interacts with everything around it. This is the go-to document for larger developments like shopping centers, apartment complexes, or industrial parks, where things like traffic flow, drainage, and utility connections are just as important as the buildings themselves.

At-a-Glance Comparison: Site Plan vs. Plot Plan

To make the core differences crystal clear, here’s a quick breakdown of their main attributes. Keep this handy when you're figuring out what your project demands.

Attribute Plot Plan Site Plan
Scope A single parcel or lot of land. The entire project area, often multiple lots.
Focus Building placement, boundaries, and setbacks. Overall project layout, including infrastructure.
Primary Use Zoning permits for minor construction. Major development approvals and site engineering.
Key Details Property lines, structure footprint, easements. Topography, utilities, drainage, parking, access.

Ultimately, both plans are critical in land development, but they play separate parts. A plot plan is tightly focused on one piece of land and its structures, while a site plan tackles the broader infrastructure—roads, drainage, landscaping, and utilities. You can dig into more details about their distinct roles in development projects to see how they apply in different scenarios.

Key Takeaway: A plot plan proves a building fits on its lot according to local rules. A site plan demonstrates how an entire development functions within its environment and connects to public infrastructure. The first is about legal placement; the second is about functional design and integration. Getting this right from the start makes every conversation with your architect and the city planning department ten times smoother.

When to Use a Plot Plan

Think of a plot plan as the official, legally binding blueprint for a single piece of property. It’s a tightly focused, scaled drawing that lives and breathes one thing: the relationship between a specific lot's boundaries and the buildings on it, both existing and planned. In many ways, it’s a visual compliance checklist, designed to prove to local authorities that your project fits neatly within all the zoning rules before you even think about breaking ground.

This is your go-to document when your project is contained entirely within one lot and the main objective is getting a permit for smaller-scale work. For commercial property owners, this usually means projects that don't involve a major site overhaul but still need a stamp of approval from the city or county.

A detailed drawing showing a plot plan for a single property

Securing Permits for Minor Construction

The most frequent reason you'll need a plot plan is to get a building or zoning permit for anything that changes your property's layout. It offers a clear, indisputable record of your legal boundaries and where everything sits, which is exactly what a municipal reviewer needs to see.

Here are a few common scenarios where a plot plan is non-negotiable:

  • Adding an Accessory Structure: Building a detached garage, a storage shed, or another small outbuilding.
  • Constructing a Fence or Retaining Wall: This proves the new structure won’t cross onto neighboring properties or interfere with public easements.
  • Applying for a Mortgage or Refinancing: Lenders often want a plot plan to confirm the property's legal description and make sure there are no brewing boundary fights.
  • Planning a Small Building Addition: For instance, extending an existing commercial building where the new footprint is small enough that it doesn't require new parking lots or drainage systems.

A plot plan is your key to unlocking straightforward permits. It demonstrates compliance with setbacks, easements, and property lines, answering the critical question for zoning officials: "Does this project fit legally within its designated space?"

Preventing and Resolving Property Disputes

Because it's rooted in legal precision, a plot plan is an incredibly valuable tool for heading off conflicts over property lines. It’s the authoritative map that shows exactly where your property ends and your neighbor's begins. That kind of clarity is crucial when you're putting up a fence, planting a thick row of trees near the boundary, or building anything that gets close to another lot.

The plot plan's role today actually grew out of centuries-old cadastral mapping. Back in the early 19th century, these maps were the foundation for defining property lines and figuring out how cities were laid out. Now, with powerful tools like Geographic Information Systems (GIS), these documents are more accurate than ever. This technology allows modern planners to reconstruct urban development and manage land with an incredible degree of precision, as detailed in some fascinating in-depth urban analysis research.

This history really underscores why the plot plan remains a cornerstone of property law. It’s your best defense against any potential encroachment claims.

Key Elements of a Plot Plan

To do its job for permitting and legal verification, a plot plan has to include some very specific, non-negotiable details. While a site plan gives you the bird's-eye view of an entire development, the plot plan zooms way in, focusing only on the core legal and physical facts of one lot.

Every compliant plot plan must show:

  1. Legal Property Boundaries: The exact dimensions and orientation of the lot lines, pulled directly from the property’s legal description.
  2. Location of Existing Structures: The footprint of all current buildings, driveways, and other major features.
  3. Proposed Structure Placement: A clear outline showing precisely where the new construction will sit on the property.
  4. Setbacks: The mandatory buffer zones from the property lines where no construction is permitted.
  5. Easements: Any parts of the property that utility companies or the public have a legal right to access.

When to Use a Site Plan

A plot plan is a simple, legal snapshot of a property. A site plan, on the other hand, is the master blueprint for any serious development. It goes way beyond basic property lines to become the central strategic tool for commercial, industrial, and large-scale residential projects. You need a site plan when the complexity of your project demands a complete picture of how it will actually function and fit into its surroundings.

Think of the site plan as the project's command center. It connects every critical piece—from the buildings and parking lots down to the underground utilities and stormwater drainage—into a single, working system. This is the document you’ll need for major building permits, zoning approvals, and any serious meeting with stakeholders.

Coordinating Complex Development Projects

At its core, a site plan is a coordination document. It’s the common language that gets civil engineers, architects, landscape designers, and city planners all on the same page. Without it, trying to juggle the intricate layers of a development would be a recipe for disaster, full of expensive conflicts and frustrating delays.

This comprehensive overview is non-negotiable for:

  • Commercial Developments: Think shopping centers, office parks, and retail spaces where things like traffic flow, parking, and pedestrian safety are absolutely critical.
  • Industrial Facilities: Warehouses and manufacturing plants have unique needs, such as loading docks, truck turning radii, and heavy-duty utility connections, which must be mapped out.
  • Multi-Unit Residential Projects: For apartment complexes or subdivisions, the plan must carefully lay out shared amenities, green spaces, and public access points.

A site plan is the strategic roadmap for a project. It’s not just about what you’re building; it’s about how every component—from the topography of the land to the flow of traffic—works together to create a viable, sustainable, and compliant development.

Integrating Infrastructure and Environmental Systems

Unlike a plot plan, a site plan digs deep into the infrastructure and environmental details that will make or break a project. This level of detail is essential for getting a green light from municipal authorities. They need to see that your development won't strain public systems or harm the local environment, and a solid site plan gives them that proof.

Key integrated systems on a site plan include:

  • Topography and Grading: It shows existing and proposed land contours, which is fundamental for managing earthwork and ensuring water drains correctly.
  • Stormwater Management: This details everything from retention ponds and bioswales to the underground pipes needed to handle runoff and prevent flooding.
  • Utility Infrastructure: It maps the exact location and specs for water mains, sewer lines, gas, and electrical conduits.
  • Traffic Circulation: The plan designs access points, internal roads, and parking layouts to keep vehicle and pedestrian movement safe and efficient.

This integration is where a site plan really proves its worth. For instance, it connects the dots, showing how the grading plan funnels water into a stormwater system that's been specifically designed to handle the runoff from all the new asphalt and rooftops.

Securing Major Building Permits and Approvals

For any project bigger than a simple home addition, the site plan is the absolute cornerstone of the permitting process. Planning departments and review boards depend on this document to check your project's compliance with a whole host of regulations—zoning ordinances, building codes, environmental laws, and public safety standards.

A well-drafted site plan offers verifiable proof that you’ve done your homework and met all regulatory requirements. It shows you have a sound plan for everything from fire truck access to landscaping and lighting. Honestly, showing up with a thorough, professional site plan is the best way to smooth out the approval process and convince city officials that your project is a well-thought-out addition to their community. Without this master blueprint, a large-scale project is dead in the water.

Comparing Critical Project Requirements

When you move from simple definitions to real-world application, a head-to-head comparison is essential. The choice between a plot plan and a site plan isn't just about paperwork; it directly shapes your project's budget, schedule, and path to getting that all-important permit. Let's break down the comparison into the five core areas every developer needs to get right.

We'll look at the big picture (scope and scale), the nitty-gritty details, the primary purpose of each document, the impact on your wallet and timeline, and the experts you'll need to hire. This isn't just about spotting differences—it's about making a smart, cost-effective decision from day one.

Scope And Scale

The most glaring difference between a site plan and a plot plan is the sheer amount of ground they cover. A plot plan keeps its focus tight, zeroing in on a single, legally defined piece of land. Think of it as a close-up shot, concerned only with how one building fits within its specific property lines and setback requirements.

It’s the go-to document for a standalone retail building, a minor commercial addition, or even a single-family home. Its world begins and ends at the lot boundaries.

A site plan, on the other hand, is the wide-angle shot. It takes a much broader, macroscopic view of the entire project area, which could span multiple lots, include public roads, and cover huge tracts of land. This is the blueprint for a sprawling commercial campus, a new residential subdivision, or a large industrial park where the interplay between all the different pieces is absolutely critical.

Required Detail And Information

The level of detail flows directly from the scope. A plot plan is all about minimalism. It shows just enough information to prove to a building department that you're following local zoning rules. Its job is to confirm that a proposed structure fits legally within its designated box.

Key elements of a plot plan typically include:

  • The exact legal boundaries of the single lot
  • The footprint and precise location of all existing and proposed structures
  • Distances from buildings to property lines (the setbacks)
  • The location of any legal easements crossing the property

A site plan is a different beast altogether—it’s a comprehensive master document. It weaves together complex layers of engineering, architectural, and environmental data to show not just what you're building, but how it will all work together in its environment.

Crucial Differentiator: A plot plan answers the question, "Does it fit?" A site plan answers the far more complex question, "How does it work?" This fundamental shift from simple placement to integrated functionality is the core difference.

The information packed into a site plan is far more extensive. While both plans show where underground infrastructure is, a site plan details the entire system. For complex projects, this might even involve using precise utility location methods like potholing to ensure nothing is left to chance before excavation begins.

Expect a site plan to include:

  • Topographical data showing the natural slope and elevation of the land
  • Grading and drainage plans, including complex stormwater management systems
  • Detailed layouts for all utilities: water, sewer, gas, and electrical lines
  • Vehicle circulation patterns, parking lot designs, and pedestrian walkways
  • Landscaping plans, exterior lighting grids, and any required environmental mitigation features

This infographic highlights the kind of large-scale projects where a site plan is non-negotiable.

Infographic about site plan vs plot plan

As you can see, site plans are essential for complex, multi-faceted developments that have a real impact on the surrounding community and environment.

Primary Use Case And Professional Expertise

A document's main purpose dictates who creates it and why. A plot plan is, at its core, a permitting tool for smaller-scale work. You'll submit one with your application to build a fence, put on a small addition, or construct an accessory building. A licensed land surveyor or an architect can typically knock one out, with the main goal being legal accuracy.

A site plan serves a much bigger, more strategic purpose. It's the master document you'll use to gain major development approvals from planning commissions, city councils, and other regulatory bodies. Because it's so complex, creating a site plan is a team sport. It requires a collaborative effort from licensed professionals like civil engineers, architects, and landscape architects—and sometimes environmental consultants, too.

This team approach reflects the site plan’s true role as a detailed engineering and design document, not just a simple boundary map. As you'd expect, the cost and timeline are significantly higher, often reflecting hundreds of hours of expert work.

To make these distinctions crystal clear, here’s a detailed breakdown of what to expect from each document.

Detailed Breakdown Plot Plan vs Site Plan Requirements

Feature Plot Plan (Single-Lot Focus) Site Plan (Development-Wide Context)
Primary Goal Verify zoning compliance for a single lot. Gain full development approval for a project.
Scope One individual, legally-defined parcel of land. Entire project site, often spanning multiple lots.
Key Information Property lines, setbacks, building footprints, easements. Topography, grading, utilities, traffic flow, landscaping.
Typical Use Minor additions, fences, sheds, single-structure permits. Subdivisions, commercial centers, industrial parks, public works.
Who Prepares It? Land Surveyor, Architect, or sometimes the property owner. A team: Civil Engineer, Architect, Landscape Architect.
Regulatory Body Local Building or Zoning Department. Planning Commission, City Council, Environmental Agencies.
Cost & Timeline Relatively low cost and quick turnaround (days to weeks). Significant investment and long lead time (weeks to months).
Level of Detail Minimalist; shows only what's needed for compliance. Comprehensive; a detailed engineering and design document.

This table neatly summarizes the operational differences. A plot plan is a tactical tool for a simple job, while a site plan is a strategic blueprint for a complex vision.

Navigating Permitting and Regulatory Hurdles

Getting a project from a great idea to a physical structure comes down to one thing: securing approval from the local authorities. This is where the whole site plan vs. plot plan discussion gets real. It stops being about definitions and starts being about compliance. Your local planning department and its zoning code are the final word, and they will tell you exactly what level of detail they need to see before you can break ground.

For a smaller project with a limited scope—think a simple addition or a new fence—a detailed plot plan is often all you need. It gives officials a quick and clear way to verify that what you’re planning to build respects the basic rules like property line setbacks and easements. It's a simple compliance check.

But the moment your project gains any real complexity, the paperwork demands grow right along with it. A full-blown site plan becomes non-negotiable once your development hits certain regulatory triggers. Knowing what these triggers are is absolutely critical to avoiding the kind of delays and rejections that can sink a project timeline.

Common Triggers for Site Plan Requirements

While every town has its own rulebook, some project features almost always push you from needing a plot plan to requiring a comprehensive site plan. If your project involves any of the following, you should prepare for a much more thorough review.

  • Change in Land Use: If you're turning a residential lot into a commercial one, or converting a retail shop into a restaurant, you're fundamentally changing its impact. A site plan is needed to analyze everything from parking and traffic flow to infrastructure demands.
  • Significant Square Footage: Most jurisdictions set a size limit. For instance, any new build or addition over 5,000 square feet will almost certainly trigger an automatic site plan review.
  • Impact on Public Infrastructure: Any work that requires new tie-ins to city water and sewer mains, or that will dump significant new traffic onto public streets, needs a site plan. You have to prove your project won’t overwhelm the existing systems.
  • Environmental Sensitivity: Building on or near protected zones like wetlands, steep slopes, or coastal areas means you'll have to produce a detailed site plan that shows how you'll mitigate environmental impact and develop the land responsibly.

A common pitfall is underestimating a project's impact. A seemingly minor change can trigger a full site plan review if it affects traffic patterns, drainage, or public utilities. Always consult the local planning office before finalizing your documentation strategy.

Understanding the specific commercial building permit requirements is crucial, as both site and plot plans play a vital role in the approval process.

Demystifying the Approvals Process

Wading through the permitting process can feel like a nightmare, but getting out in front of it makes a world of difference. Your goal is to figure out what the reviewers need to see and give it to them in a format that's impossible to poke holes in. In my experience, an incomplete or incorrect submission is the number one cause of project delays.

First things first: get your hands on a copy of the local zoning ordinance and the planning department’s development review checklist. These documents are your roadmap—they spell out every single requirement. Look closely at the details, like required drawing scales, whether you need a professional seal from an engineer or architect, and all the submission deadlines.

Another strategy that pays off is talking to the planning staff early. Schedule a pre-application meeting to walk them through your project. This is your chance to uncover potential red flags and get a straight answer on whether a plot plan will cut it or if a full site plan is your only option. That one conversation can save you weeks, if not months, of painful revisions later on.

Choosing the Right Plan for Your Project Scenario

Knowing the difference between a site plan and a plot plan is one thing, but applying that knowledge to a live project is where the rubber really meets the road. Getting this choice right saves you time, money, and headaches with the planning department. The wrong document can lead to frustrating delays and costly rejections.

Let's walk through a few common development scenarios. This isn't just about definitions; it's about matching the right tool to the job to keep your project on track.

Scenario 1: Building a Custom Home

If you're building a new single-family home on an established lot, a plot plan is almost always what you'll need. Your main objective here is to demonstrate to the local building department that the house, driveway, and any other structures (like a shed or garage) fit within the legal property boundaries and respect all setback rules.

The city's checklist is usually pretty straightforward:

  • Does the building footprint honor the front, side, and rear setbacks?
  • Will the construction obstruct any easements on the property?
  • Is the house oriented correctly on the lot as proposed?

A plot plan gives them exactly what they need to see—no more, no less. It’s the most direct and cost-effective way to provide the compliance details for a standard residential building permit.

Scenario 2: Developing a Retail Center

For a large-scale project like a shopping plaza or retail strip, a comprehensive site plan is non-negotiable. This kind of development goes way beyond just placing a building on a piece of land. You're essentially designing a small-scale public ecosystem, and regulators need to understand every moving part.

A simple plot plan would be instantly rejected because it can't possibly answer the planning commission's critical questions. Your site plan must show detailed traffic flow patterns, parking calculations, pedestrian walkways and safety features, stormwater management systems, utility tie-ins, and landscaping plans. It becomes the master document that proves your development is functional, safe, and properly integrated with the surrounding public infrastructure.

Key Insight: For any multi-tenant commercial project, the site plan isn't just a compliance document—it's your core strategic blueprint. It's what proves the project's real-world viability to investors, potential tenants, and city officials.

Scenario 3: Adding a Warehouse Extension

The right plan here really hinges on the scale of the addition and its ripple effects. For a small, 5,000-square-foot bump-out on an existing warehouse that doesn't mess with parking, drainage, or site access, a plot plan might just do the trick. It would clearly show the new footprint in relation to the property lines, and that might be all the city needs.

But if you're planning a massive 50,000-square-foot expansion, you're firmly in site plan territory. An addition that large will almost certainly demand new loading docks, wider truck aprons, more employee parking, and a beefier stormwater system to manage all that new roof runoff. These aren't minor tweaks; they fundamentally change how the site operates, and that requires a full site plan review.

Scenario 4: Applying for a Zoning Variance

When you're going to the city to ask for a zoning variance—say, to build a little closer to the property line than is normally allowed—the plot plan is your go-to document. The whole point of a variance application is to argue for a specific, targeted exception on a single lot.

For this, you need a highly accurate plot plan, prepared by a licensed surveyor, that clearly shows the current state of the property and the precise change you're requesting. This drawing is the star witness in your case. It gives the zoning board a crystal-clear visual of what you're asking for and why it's necessary. Bringing a full site plan would just muddy the waters with irrelevant information.

Frequently Asked Questions

When you're deep in the weeds of a development project, a few practical questions always seem to pop up about the required documentation. Let's tackle some of the most common ones developers and property owners ask about site plans and plot plans.

Can I Prepare a Plot Plan Myself?

For your own personal brainstorming, sure. But for any official purpose, like a permit application, the answer is a firm no.

Jurisdictions are sticklers about this for a good reason. They need assurance that what's on paper is accurate and meets all legal standards. That's why they require any submitted plan to be prepared and stamped by a licensed professional—typically a land surveyor, civil engineer, or architect. Their seal is a guarantee of accuracy, and it’s non-negotiable for the folks in the permitting office.

What Is the Cost Difference Between a Plot Plan and a Site Plan?

The price gap between these two documents is huge, and it perfectly mirrors the difference in their complexity.

  • Plot Plan Cost: A standard plot plan is a relatively small line item, usually running just a few hundred dollars. This fee covers a professional's time to verify property lines and show exactly where a single structure sits on its lot.
  • Site Plan Cost: A full-blown site plan for a commercial project is a serious investment. The cost can easily soar into the tens of thousands of dollars, reflecting the immense amount of detailed engineering, surveying, and design work involved.

The cost difference really gets to the heart of the site plan vs. plot plan comparison. A plot plan is a simple verification, while a site plan is a comprehensive design and engineering effort that often requires a whole team of experts.

Does a Site Plan Replace a Plot Plan?

In almost every case, yes. A site plan is the more sophisticated, all-encompassing document. It naturally includes all the information you'd find on a plot plan, but then goes much, much further.

Think of the site plan as the master blueprint for the entire project area. It lays out the big picture. Within that master plan, the specific details for each individual parcel are defined with the same precision as a standalone plot plan. It essentially absorbs the plot plan's function and builds upon it.


Navigating the maze of site development, from early concepts to final permits, requires a seasoned guide. The team at Sherer Architects, LLC has spent decades helping commercial developers master the challenges of zoning, design review, and construction. We make sure every project starts on solid ground. Learn more about our commercial architecture services.

Categories
Uncategorized

Zoning In Architecture Complete Guide

Zoning In Architecture

Zoning acts as a city’s playbook for land use and building form from day one. It carves parcels into defined areas—residential here, commercial there—and dictates how big or small structures can be. At the heart of every site plan, zoning steers massing, density, and even sustainability targets before we put pencil to paper.

How Zoning Shapes Site Planning

In practice, zoning is both guide and gatekeeper. Early on, architects map out setbacks and buildable footprints to see how a design will actually sit on the lot. It’s like sketching a puzzle where each piece must fit within the rules set by local ordinances.

Take a zoning code and you’ll find it reads like a rulebook for neighborhoods:

  • Land Use Separation: Keeps retail shops away from factories and apartments away from noisy warehouses.
  • Density Control: Caps the square footage or number of units, preserving the neighborhood’s human scale.
  • Sustainability Incentives: Rewards green roofs, generous open space, or energy-efficient systems with bonuses or tax breaks.
  • Form And Massing: Regulates height, bulk, and street alignment so your building feels at home.
  • Community Character: Ensures façades, setbacks, and streetscapes honor the local vibe.

Key Concept Zoning defines setbacks, floor area ratio, and use categories that architects must weave into their earliest design moves.

Below is a quick look at Key Zoning Objectives in architecture.

Key Zoning Objectives

Objective Description
Land Use Separation Prevents conflicting activities by carving the city into residential, commercial, and industrial districts.
Density Control Limits building bulk and unit counts to keep neighborhoods human-scaled.
Sustainability Incentives Offers credits or relaxed rules for incorporating green elements and public space.
Form And Massing Shapes street corridors and skylines by setting rules on height, area, and orientation.

By reviewing these objectives, design teams can align their early concepts with the zoning framework and avoid costly revisions down the road.

Why Zoning Matters

Beyond just numbers and lines on a plan, zoning safeguards public health and safety—think adequate fire lanes, daylight on sidewalks, and proper emergency access. It also weaves together the social fabric of a place by defining where people live, work, and gather. In other words, zoning is as much about community feel as it is about controlling square footage.

This snapshot sets the stage for exploring specific zoning categories, compliance strategies, and practical tips on working with municipalities—topics we’ll cover in the sections ahead.

Understanding Zoning Concepts And Terms

Zoning framework diagram

Think of zoning as your city’s playbook—every rule tells you where buildings belong and how they behave. It slices the map into districts, each spelling out acceptable uses from homes to factories.

  • Setbacks set the minimum distance between structures and property lines.
  • Floor Area Ratio (FAR) caps the buildable square footage relative to the lot.
  • Lot Coverage limits how much of the land a building can cover.

These core metrics guide every site plan. For instance, even if you shrink a porch to fit your footprint envelope, you might still clash with a setback line.

Beyond the basics, zoning injects concepts like density, use categories, overlays, variances, and conditional uses to fine-tune those starting rules.

Exploring Land Use Categories

Land use categories feel like chapters in a book—each comes with its own narrative. Residential zones might permit a single-family bungalow or a multiunit block, with density thresholds keeping things in balance. Commercial areas welcome shops and offices but often insist on parking minimums or strict FAR numbers.

Key Insight Zoning overlays can layer on historic preservation requirements or environmental safeguards on top of base rules.

Visualizing Setbacks And FAR

Setbacks create breathing room around a building. Picture a playground fence: you need a clear space between the fence and the play area. That gap is your setback.

Similarly, Floor Area Ratio measures the building’s bulk against the lot size. A 2.0 FAR on a 5,000 ft² parcel means you could build up to 10,000 ft² of floor space.

Term Purpose Example
Setbacks Space buffer 15 ft front yard
FAR Density control 2.0 on a 5,000 ft² lot

Grasping these figures early gives your design team clarity—and keeps approval hiccups to a minimum.

Navigating Overlays And Variances

Overlays and variances are your toolbox for exceptions:

  1. Identify any overlay zones on your site (floodplain, historic, etc.).
  2. List the rules you can’t meet—maybe a height or setback issue.
  3. Craft a narrative showing your unique hardship for a variance.
  4. Assemble community-focused material if you need a conditional use permit.

Sherer Architects brings deep experience in Columbia, South Carolina, guiding each client through hearings and code reviews. Their local insight turns zoning from an obstacle into a design advantage.

By mastering these terms, architects can balance form, function, and context with confidence. Think of zoning as an artist’s palette—each rule is a color, unlocking creative site solutions and smoother approvals.

Comparing Zoning Types And Their Effects

Zoning types in urban area

Zoning regimes set the stage for how buildings meet the street—and each other. When you choose a zone, you’re also choosing a balance of scale, use and community character.

Different districts shape the rhythm of city life. From quiet single-family streets to heavy-use factory blocks, every regime pairs development goals with local context.

  • Residential zones prioritize setbacks, lot coverage limits and a human scale to preserve that neighborhood feel.
  • Commercial areas push for a higher Floor Area Ratio and active ground floors to spark street life.
  • Industrial districts build in buffers for noise and pollutants, often allowing nearly full lot coverage.
  • Mixed-use zones weave together housing and offices, keeping an area busy day and night.
  • Special overlays layer on historic, floodplain or design-review rules to protect sensitive areas.

Key Insight Understanding zoning types is like choosing the right lens; each reveals different building opportunities and constraints.

How Zoning Shapes Scale

In residential zones, generous front-yard setbacks and low density foster leafy, private streets. Fewer units keep noise down and greenery up.

Flip to a commercial district and those front yards disappear. Buildings rise higher, ground floors stay animated, and sidewalks hum with activity.

Zone Type Scale Focus Impact on Street Life
Residential Low heights, wide yards Quiet, green, community-oriented
Commercial High-rise, dense Vibrant sidewalks, retail hubs
Industrial Expansive footprint Buffer zones, minimal frontage

Flexible Versus Restrictive Zones

Some cities lean into zoning that bends. Houston, lacking a traditional code, is on track for 14 times more new housing units by 2025 than many of its peers. Read more in this ThesisDriven analysis of Houston’s growth.

When you’re gearing up a project:

  1. Clarify your goals and the zone you need.
  2. Compare setbacks, FAR, and allowable uses.
  3. Investigate overlays and design-review triggers.
  4. Align scale, style and community expectations.

Sherer Architects often guides this process in South Carolina. By pairing mixed-use regulations with creative design, they deliver buildings that meet both zoning requirements and owner aspirations.

Sherer Architects thrives by blending zoning codes with imaginative design, turning constraints into assets.

Choosing the right zoning regime boils down to grasping how each district molds urban form and feasibility. A side-by-side comparison reveals the zone that best matches your development goals.

  • Industrial districts can fuel local employment but may require visual screening and noise attenuation to fit into a neighborhood.

How Zoning Guides Architectural Design

Think of zoning codes as a city’s rulebook and north star, steering how a building sits, scales, and connects to its neighbors. They set out everything from height limits to side-yard buffers.

Setbacks do more than spell out distances—they sculpt the public realm. A 20-foot front setback, for example, can transform into a plaza edge with benches, planters, or a shaded pedestrian path.

Orientation requirements tie directly into comfort and efficiency. In South Carolina’s sun-soaked climate, placing living spaces toward the south not only floods interiors with daylight but also slashes heating bills in cooler months.

Meanwhile, Floor Area Ratio (FAR) works like a volumetric cap. On a 10,000 ft² lot, a 2.0 FAR translates into 20,000 ft² of buildable floor area—whether you stack up or spread out is up to your design strategy.

Site Optimization And Density

Density rules ripple through every design decision. They shape parking, footprints, materials—and even the building’s silhouette.

  • Maximum parking ratios might push you toward multi-level garages instead of endless surface lots.
  • Lot coverage limits force slimmer ground-floor plans or split-wing layouts to preserve open space.

By shifting mass or stacking units, architects hit density targets and inject character into façades. Plus, creative layouts can unlock tax breaks and grants tucked away in green zoning provisions.

Key Insight Zoning is evolving to bake in renewable energy and life cycle assessment standards right alongside setbacks and height limits.

Globally, 85 countries have adopted residential building codes, and 80% now mandate renewable energy integration, life cycle assessments, or energy-efficient designs. Dive into the full story in the Global Status Report 2024 2025.

Green Building Incentives

Many municipalities reward green features with bonus density or extra height. Solar panels, green roofs, and stormwater capture systems can earn you an added 0.5 FAR or a relax on height limits.

Sherer Architects taps into these incentives across Columbia and beyond, pairing sustainable choices with cost-effective results.

To ensure designs align with all local and international zoning lessons, architects should consult practical tips for builders and contractors under Dutch Construction Law.

Landscape Layout And Materials

Zoning doesn’t stop at the building line—it extends into landscaping. Buffer strips, rain gardens, and swales all stem from runoff and open-space rules.

  • Rain gardens convert stormwater mandates into inviting green pockets.
  • Native plantings satisfy water-use limits while enriching neighborhood biodiversity.

Material palettes often follow character-zone guidelines. Brick, wood, or metal panels help new structures blend in and win over design review boards.

Integrating Municipal Feedback

Early engagement is key. A pre-application code review can flag zoning hiccups before they snag your timeline.

Sherer Architects’ longstanding rapport with South Carolina’s planning staff often turns a two-week review into a fast-track approval.

Zoning Element Design Impact Incentive Bonus
Setback Public realm buffers Façade articulation bonus
FAR Height envelope Extra 0.5 FAR for green roofs
Parking Ratio Land use balance Pay-in-lieu option for open-space fund

By reading zoning lines as design prompts, architects can craft buildings that satisfy regulations and enrich community life.

Next, we’ll walk through the step-by-step municipal approval process—from conditional use permits to variance requests.

Navigating Approval With Municipal Bodies

When you dive into a zoning project, the permit application is your foundation. Treat it like assembling a toolkit—everything from site plans to code analyses needs to be in place before you start.

A well-crafted submission package typically brings together architectural drawings, engineering reports, and concise code summaries. This approach gives planning staff a clear picture and speeds up their review.

  • Architectural Drawings showing floor plans and elevations
  • Engineering Reports confirming structural integrity
  • Code Summaries outlining setbacks, lot coverage, and FAR data

Preparing Submission Packages

Begin by pulling together every required document before you lock in a pre-application meeting. A simple checklist cuts down on back-and-forth emails and helps you stay on schedule.

Next, outline any variances or conditional use permits you’ll need. Attach a brief narrative that explains why each exception makes sense—for both the project and the neighborhood.

  • Illustrate site challenges that call for a variance
  • Draft an impact statement for conditional use requests
  • Include letters of support from local groups

Infographic about zoning in architecture

Building Consensus With Staff And Community

Strong visuals can win over both staff and residents before a formal hearing. Think 3D models, photo-realistic renderings or even a physical massing model on a tabletop.

Here are a few tactics to bring more people on board early:

  • Schedule stakeholder workshops during design kickoff
  • Host open-house events to capture community feedback
  • Summarize input in a one-page report for planning commissioners

“Clear visuals and honest dialogue often move projects through reviews faster,” notes a municipal planner.

When you’re detailing exterior elements like building signs, check local sign permit requirements to avoid surprises.

Anticipate review roadblocks by:

  • Checking floodplain or historic overlays before finalizing design
  • Confirming parking ratios and landscaping rules
  • Tracking application deadlines and public hearing dates

Use this table to compare common variance types and review timelines:

Variance Type Typical Review Time
Minor Setback Variance 2–4 Weeks
Major Use Variance 6–8 Weeks
Conditional Use Permit 4–6 Weeks

Managing Local Approvals

With decades of South Carolina experience, Sherer Architects knows how to navigate design review boards and municipal codes. Their proactive coordination with planning staff and early code research often cuts review times by half.

  • Hold pre-application meetings to clarify historic district requirements
  • Liaise with the fire marshal to ensure building code compliance
  • Coordinate landscape ordinance reviews with planning departments

By weaving local insights into every phase, you reduce delays and align your design with community priorities. In the end, approvals become not just hurdles—but opportunities to refine and strengthen your project.

Practical Strategies For Adaptive Reuse And Development

Adaptive reuse project example

Breathing new life into underused structures often starts with a zoning playbook. Adaptive reuse can reclaim spaces that standard regulations might overlook.

Imagine an old warehouse. By tapping into industrial overlays, it becomes modern loft apartments. Yet, setbacks and strict floor area ratios can quietly eat into your buildable footprint.

  • Weave in mezzanines or split-level layouts to stay within FAR limits
  • Carve out shared patios or roof terraces to meet lot coverage rules
  • Tap Historic and Low Income Housing tax credits to offset costs

In Columbia, Sherer Architects decodes local zoning quirks by stacking uses and phasing entitlements. A shuttered school, for instance, gains residential floors above street-level retail, activating every corner of the site.

Local Incentives And Credits

South Carolina sweetens the deal with 20% tax credits on certified historic projects. Energy-efficient upgrades? They may qualify for grants or extra floor area bonuses.

  • Research overlay maps to pinpoint eligible zones
  • Sequence permit submissions to secure entitlements early
  • Partner with preservation boards for smoother design approvals

Mix and match these tactics to stretch your zoning envelope. When the work is phased, you can keep rentals open and spread out capital expenses.

With 200+ renovations under their belt, Sherer Architects show how minor design tweaks translate into 50–75-year building life extensions.

Tip Phased adaptive reuse reduces financing hurdles and aligns with municipal timelines.

By turning density limits and incentives into design drivers, you keep projects on track and budgets intact.

Case Study Example

A Charleston textile mill found new purpose as a mixed-use hub with a rooftop farm under a historic overlay. Developers claimed 20% federal and 10% state credits, boosting ROI and community goodwill.

Sherer Architects replicated this model in Greenville, extending a building’s life by over 60 years and strengthening neighborhood support.

FAQ

Zoning breaks land into distinct areas, each with its own rules about what can be built and where. It’s how planners decide where a quiet neighborhood ends and a busy shopping district begins—and how big or tall each structure can be.

Real-world examples reveal how fine-tuning these regulations often unlocks extra buildable space and sparks fresh design ideas. You’ll discover common workarounds that inject flexibility into even the strictest frameworks.

Common categories are Residential, Commercial, Industrial, Mixed-Use, plus special Overlay districts. You’ll want to review the specific rules for each—setbacks, lot coverage and permitted uses—before drafting your initial plans.

How Variances And Overlays Work

  • Variances let you request relief when a strict rule would cause real hardship.
  • Overlays layer on extra regulations—think historic preservation, environmental buffers, or design guidelines.
  • Conditional Use Permits spell out precisely what conditions must be met for a particular use.

Key Insight Properly documented variances can cut review time by up to 30%.

Technical Terms To Know

  • Setbacks: the minimum distance you must keep between your building and the property line.
  • Floor Area Ratio (FAR): the relationship between a building’s total floor space and the size of its lot.
  • Density: the number of units or square feet allowed per acre.

Speeding Up Municipal Approval

  • Meet with planning staff during pre-application to gather early feedback.
  • Present clear diagrams paired with concise code summaries.
  • Engage local stakeholders ahead of public hearings to smooth out concerns.
  • Rely on checklists for each submission and watch review deadlines closely.

Taking time up front to do this can make a huge difference in your timeline. This proactive approach builds consensus and can often cut approval times in half.


Ready to streamline your next project? Contact Sherer Architects, LLC

Categories
Uncategorized

The commercial building inspection checklist: 2025 tips

A thorough commercial building inspection is the bedrock of any successful real estate transaction, development project, or long-term ownership strategy. More than a simple walkthrough, it's a deep-dive analysis that uncovers a property's hidden strengths, potential liabilities, and future operational costs. This comprehensive commercial building inspection checklist is designed to empower owners, developers, contractors, and architects with a systematic approach to evaluating every critical component of a property.

From the structural integrity of the foundation to the condition of the roof, and from complex mechanical, electrical, and plumbing (MEP) systems to crucial life-safety features, each point on this list represents a vital piece of the puzzle. Overlooking even a single area can lead to unforeseen capital expenditures, disruptive operational failures, and significant compliance risks that can derail a project or devalue an asset.

By following this structured guide, you gain the clarity needed to mitigate risk, negotiate with confidence, and make informed decisions that protect your investment. This isn't just a list; it is a strategic roadmap for ensuring the long-term value, safety, and performance of your commercial asset. This detailed checklist will guide you through the essential checkpoints, including structural integrity, building envelope, core systems like HVAC and electrical, and critical compliance standards such as ADA requirements.

1. Structural Integrity and Foundation

The structural integrity and foundation are the literal backbone of any commercial property. This crucial part of a commercial building inspection checklist involves a thorough assessment of all components that support the building's load and ensure its stability. Inspectors meticulously examine concrete slabs, footings, load-bearing walls, columns, beams, and the overall structural framework for any signs of distress or potential failure.

Structural Integrity and Foundation

The primary goal is to identify issues like significant cracking, uneven settlement, water intrusion, or material degradation (like spalling concrete or rusted steel) that could compromise the building's safety and long-term viability. Ignoring these foundational elements can lead to catastrophic failures, costly repairs, and significant liability. This is why a detailed structural review is non-negotiable during due diligence for property acquisition or before undertaking major renovations.

Practical Implementation and Actionable Tips

A comprehensive structural assessment goes beyond a simple visual walkthrough. It requires a systematic approach to identify both visible and hidden issues.

  • Document and Monitor Cracks: Not all cracks are critical, but every crack should be documented. Use a crack gauge to measure width and take high-resolution photos with a scale reference. For existing buildings, establish monitoring points to track if cracks are growing over time, which indicates active movement.
  • Utilize Advanced Technology: For complex or concealed foundation elements, ground-penetrating radar (GPR) can be used to analyze subsurface conditions without destructive testing. GPR helps identify voids, rebar placement, and slab thickness.
  • Engage a Structural Engineer: While a general inspector can identify red flags, a licensed structural engineer should be engaged for any complex or concerning findings. They can perform a deeper analysis, conduct material testing, and design necessary remediation plans. This is especially critical for post-earthquake assessments or when evaluating aging warehouses with known settlement issues.

2. Roof Systems and Coverings

The roof is a commercial building's primary shield against the elements, making its condition a top priority in any commercial building inspection checklist. This inspection involves a comprehensive evaluation of the roof's membrane, flashing systems, drainage components, and all penetrations like vents and HVAC units. The integrity of these systems is crucial for preventing water intrusion, which can lead to catastrophic structural damage, mold growth, and operational disruptions.

Roof Systems and Coverings

Inspectors focus on identifying signs of aging, wear and tear, and deferred maintenance. The goal is to assess the roof's overall condition, estimate its remaining service life, and pinpoint potential failure points before they escalate. From TPO membrane replacement programs in retail centers to metal roof restoration on industrial facilities, understanding a roof's lifecycle is essential for budget forecasting and risk management, making it a non-negotiable part of property due diligence.

Practical Implementation and Actionable Tips

A thorough roof assessment requires a multi-faceted approach, combining visual inspection with modern technology and a review of historical data. This ensures a complete picture of the roof's health and potential liabilities.

  • Check for Ponding Water: Any standing water 48 hours after a rain event is a significant red flag. It indicates improper drainage, which can accelerate membrane degradation and increase the risk of leaks. Document these areas and investigate the cause, whether it's clogged drains or structural sagging.
  • Utilize Drone Technology: Safely and efficiently inspect large or difficult-to-access roof areas. For detailed evaluations of roof systems and coverings, leveraging advanced specialized drone roofing inspection software can provide unparalleled accuracy and efficiency. This technology captures high-resolution imagery to identify defects that might be missed from the ground.
  • Review Maintenance and Warranty Documents: Request all available records, including the original installation warranty, repair invoices, and routine maintenance logs. This history provides critical context about the roof's age, past issues, and the quality of previous workmanship, helping to predict future performance.

3. HVAC Systems (Heating, Ventilation, and Air Conditioning)

The HVAC system is the heart of a commercial building's operational environment, directly impacting occupant comfort, health, and energy consumption. This component of the commercial building inspection checklist involves a detailed evaluation of all heating, ventilation, and air conditioning equipment. Inspectors scrutinize boilers, chillers, air handling units, rooftop units, ductwork, and control systems to assess their condition, performance, and compliance with modern standards.

The inspection aims to uncover issues like aging equipment near the end of its service life, inefficient performance, poor indoor air quality, or deferred maintenance. An underperforming HVAC system not only leads to high utility bills but can also violate ventilation codes and create an uncomfortable environment for tenants or employees. Evaluating these systems is crucial for forecasting future capital expenditures and understanding the building's true operational costs.

Practical Implementation and Actionable Tips

A thorough HVAC assessment requires more than just checking if the heat or air conditioning turns on. It involves a systematic review of performance, maintenance history, and control functionality.

  • Review All Maintenance Logs: Request and meticulously review all service records, maintenance logs, and repair invoices for the HVAC equipment. This documentation provides a clear history of the system's health, recurring problems, and the frequency of professional servicing. A lack of records is a significant red flag indicating potential neglect.
  • Test and Measure Performance: Go beyond a simple operational check. Use an infrared thermometer to test temperature distribution at various supply diffusers throughout the building, ensuring consistent and adequate conditioning. For larger or more critical facilities, an HVAC technician can measure airflow, test refrigerant levels, and check amperage draws on motors to verify equipment is operating to a high standard.
  • Engage an HVAC Specialist: For properties with complex systems like variable air volume (VAV) setups, large central plants, or specialized ventilation for healthcare or lab use, a general inspector's review is insufficient. Engage a licensed mechanical engineer or a commercial HVAC contractor to perform a full system analysis. They can identify inefficiencies and recommend targeted upgrades, such as an energy recovery ventilation (ERV) system retrofit to improve air quality and reduce costs.

4. Electrical Systems and Distribution

The electrical system is the nerve center of a modern commercial property, powering everything from critical operations to basic lighting. This part of the commercial building inspection checklist involves a detailed assessment of the main service entrance, distribution panels, wiring, outlets, and emergency power systems. Inspectors evaluate the system's age, condition, load capacity, and overall safety to ensure it meets both current operational demands and stringent code requirements.

The primary goal is to identify safety hazards like outdated aluminum wiring, overloaded circuits, improper grounding, or signs of overheating in electrical panels. An inadequate or unsafe electrical system poses a significant fire risk and can lead to costly operational downtime. A thorough electrical review is therefore indispensable for assessing a building's functional capacity, safety, and potential for future expansion, such as an electrical panel upgrade from 200A to 400A service to support new equipment.

Practical Implementation and Actionable Tips

A comprehensive electrical assessment requires more than just flipping switches; it demands a systematic and technically informed approach to identify potential failures and non-compliance issues.

  • Perform a Panel and Circuit Audit: Open and visually inspect every electrical panel for signs of scorching, corrosion, or improperly sized breakers. Test a representative sample of circuits and outlets to confirm proper voltage, polarity, and grounding. Document all panel schedules and trace critical circuits to ensure they are accurately labeled.
  • Utilize Infrared Thermography: Thermal imaging is a powerful non-invasive tool used to detect hidden electrical faults. A thermographic scan of panels, switchgear, and connections can identify "hot spots" caused by loose connections or overloading, which are leading causes of electrical fires. This allows for proactive maintenance before a catastrophic failure occurs.
  • Engage a Licensed Electrical Engineer: For properties with complex systems, high-demand operations like data centers, or outdated infrastructure, a licensed electrical engineer or master electrician is essential. They can conduct detailed load calculations to assess capacity for future needs, verify compliance with the National Electrical Code (NEC), and design necessary upgrades or safety remediations.

5. Plumbing Systems and Water Infrastructure

The plumbing and water infrastructure of a commercial property are vital to its daily operations, occupant health, and long-term asset value. This part of a commercial building inspection checklist involves a detailed evaluation of all systems that supply, distribute, and remove water. Inspectors scrutinize supply lines, drainage pipes, fixtures, water heaters, backflow prevention devices, and sewage disposal systems for functionality, compliance, and signs of potential failure.

The primary goal is to uncover issues like hidden leaks, widespread corrosion, inadequate water pressure, or non-compliant drainage that could lead to extensive water damage, business interruptions, and serious health hazards. For instance, a failing grease trap in a restaurant or an undetected cross-connection in a medical facility can have severe operational and regulatory consequences. A thorough plumbing assessment is therefore essential before acquisition, leasing, or major tenant fit-outs.

Practical Implementation and Actionable Tips

A comprehensive plumbing inspection requires more than just turning on faucets; it demands a systematic evaluation using both visual checks and specialized diagnostic tools.

  • Utilize Video Pipe Inspection: For main drain and sewer lines, a video camera inspection is invaluable. This technology allows inspectors to navigate the pipes and visually identify blockages, cracks, root intrusion, or pipe collapses that are otherwise impossible to detect. This is standard practice when evaluating older properties or buildings with a history of drainage problems.
  • Test Water Pressure and Flow: Check static and dynamic water pressure at multiple fixtures throughout the building, especially on the highest floors. Low pressure can indicate systemic issues like pipe corrosion, blockages, or an undersized supply line. Documenting these readings provides a clear baseline for performance.
  • Verify Backflow Prevention: Confirm that all required backflow prevention devices are installed, have been recently tested, and are properly certified. This is a critical life safety item to prevent contamination of the potable water supply, and health departments often require annual certification records.
  • Inspect Water Heaters and Boilers: Assess the age, condition, and capacity of all commercial water heaters or boilers. Look for signs of leakage, corrosion on the tank or connections, and ensure the temperature and pressure relief (TPR) valve is functional and correctly piped. For a multi-tenant office building, this ensures consistent hot water for all occupants.

6. Fire Safety and Life Safety Systems

Fire safety and life safety systems are a non-negotiable component of any commercial building inspection checklist, designed to protect occupants and minimize property damage. This critical inspection evaluates the building's active and passive fire protection measures, including sprinkler systems, fire alarms, emergency lighting, and clearly marked evacuation routes. Inspectors ensure these systems are not only present but also fully functional, properly maintained, and compliant with current codes.

Fire Safety and Life Safety Systems

The primary goal is to verify that the building provides a safe environment for tenants, employees, and visitors in an emergency. A failure in any part of this integrated system can have catastrophic consequences, from loss of life to total property loss and significant legal liability. Adherence to standards set by bodies like the National Fire Protection Association (NFPA) and localized codes, such as the comprehensive British Standards for Fire Safety, is a key inspection point that ensures a building meets its legal and moral obligations for occupant safety.

Practical Implementation and Actionable Tips

A thorough fire and life safety assessment combines documentation review with physical testing and visual verification. This ensures all systems work together as intended.

  • Review All Service Records and Tags: Request and scrutinize all maintenance, testing, and inspection records for fire alarms, sprinkler systems, and fire extinguishers. Check the physical tags on extinguishers and risers to confirm they are current. Any gaps in service history are a major red flag that requires immediate investigation.
  • Physically Test Emergency Systems: During the inspection, perform a "walk test" of the emergency and exit lighting to ensure all units activate when primary power is cut. Open emergency exit doors to confirm they are not blocked, are easy to open, and that any associated alarms function correctly.
  • Verify Clearances and Accessibility: Ensure that all fire safety equipment is unobstructed. This includes maintaining at least 18 inches of clearance below sprinkler heads and keeping fire alarm pull stations and fire extinguishers easily accessible. Walk all evacuation routes to confirm they are free of storage, equipment, or other impediments.

7. Interior and Exterior Walls and Finishes

The condition of a building's walls and finishes directly impacts its aesthetic appeal, occupant health, and long-term structural soundness. This part of the commercial building inspection checklist involves a detailed evaluation of both interior and exterior surfaces, looking beyond simple cosmetic issues to identify underlying problems like moisture intrusion, structural stress, or material failure. Inspectors assess everything from drywall and paint to exterior cladding and paneling.

The main objective is to detect signs of water damage, mold growth, cracking, and deterioration that could signal more significant defects. For example, peeling exterior paint could indicate failed weatherproofing, while interior water stains might point to a roof leak or plumbing issue. Addressing these finish-related problems is crucial for maintaining property value, ensuring a safe indoor environment, and preventing minor issues from escalating into expensive structural repairs.

Practical Implementation and Actionable Tips

A thorough wall and finish assessment combines visual inspection with diagnostic tools to uncover hidden issues affecting the property. This systematic process is vital for any comprehensive commercial building inspection checklist.

  • Use a Moisture Meter: Don't rely solely on visual cues. Use a non-invasive moisture meter to scan drywall, plaster, and paneling, especially around windows, in basements, and below plumbing fixtures. High readings can pinpoint active leaks or trapped moisture that isn't yet visible, allowing for proactive mold remediation and water damage restoration.
  • Analyze Crack Patterns: Document all significant cracks with photos and measurements. Diagonal cracks originating from window or door corners often indicate structural settlement, whereas a network of fine, spiderweb-like cracks may just be a paint or plaster issue. Tracking these patterns over time helps differentiate between cosmetic flaws and active structural problems.
  • Inspect Key Junctions and Penetrations: Pay close attention to where different materials meet, such as wall-to-floor junctions, expansion joints, and areas around pipes or vents. Inspect the integrity of exterior caulking and sealant around windows and doors, as these are common points of water entry that can lead to significant interior damage if neglected.

8. Windows, Doors, and Building Envelope

The building envelope, encompassing all windows, doors, and exterior walls, acts as the primary barrier between the indoor and outdoor environments. This part of the commercial building inspection checklist is dedicated to assessing the performance and condition of these critical components. Inspectors scrutinize windows, doors, frames, glazing, caulking, and weatherstripping to ensure the building is properly sealed, secure, and energy-efficient.

The primary goal is to identify failures in the envelope that lead to air and water infiltration, which can cause significant issues like increased utility costs, moisture damage, mold growth, and compromised occupant comfort. A poorly maintained envelope can negate the benefits of an efficient HVAC system and expose the property to long-term structural risks. Organizations like the National Fenestration Rating Council (NFRC) provide performance ratings that help guide selections for high-performance window and door systems.

Practical Implementation and Actionable Tips

A thorough evaluation of the building envelope combines visual inspection with diagnostic testing to uncover hidden performance gaps. This proactive approach helps prioritize repairs and capital improvements.

  • Conduct Diagnostic Testing: Go beyond a simple visual check by performing a blower door test to quantify the building’s overall air leakage rate. This provides a baseline for air-sealing efforts. Thermal imaging cameras can then be used to pinpoint specific locations of air infiltration and insulation voids around windows and door frames.
  • Inspect Sealing Components: Meticulously examine all caulking and weatherstripping for signs of drying, cracking, or pulling away from surfaces. Check that weatherstripping provides adequate compression when doors and operable windows are closed. These materials have a limited lifespan and are often the first line of defense to fail.
  • Verify Proper Drainage and Function: For windows, confirm that weep holes and drainage paths within the frame assembly are clear of debris to prevent water from becoming trapped. Check the operational function of all doors and windows, ensuring they open, close, and lock correctly without binding. This is crucial for both security and egress.

9. Parking Structures and Pavement

Often considered a secondary asset, the condition of parking structures and pavement is a critical component of a property's value, safety, and operational efficiency. This element of a commercial building inspection checklist covers a detailed evaluation of surface lots, multi-level garages, access roads, and pedestrian walkways. Inspectors assess everything from the sub-base integrity to the surface condition, looking for signs of wear, structural compromise, and safety hazards.

The primary focus is to identify issues like alligator cracking, potholes, sub-grade failures, poor drainage, and faded markings that detract from curb appeal and create liabilities. In multi-level structures, inspectors scrutinize concrete for spalling, rebar corrosion, and expansion joint failure. Proactive maintenance, guided by a thorough inspection, prevents minor issues from escalating into extensive, capital-intensive reconstruction projects and ensures a safe environment for tenants and visitors.

Practical Implementation and Actionable Tips

A systematic approach to pavement and parking structure assessment helps prioritize repairs and budget for long-term maintenance, maximizing the asset's lifespan.

  • Establish a Preventive Maintenance Schedule: Don't wait for problems to appear. Implement a proactive plan that includes regular inspections and scheduled maintenance. For asphalt, this means applying a high-quality seal coat every 2-3 years to protect it from oxidation and water penetration. For concrete structures, sealing surfaces can prevent water and salt intrusion.
  • Prioritize Drainage and Swift Repairs: Water is the primary enemy of pavement and concrete. Ensure all drainage systems, including catch basins and swales, are clear of debris. Repair any identified cracks and potholes immediately to prevent water from penetrating the sub-base, which leads to much larger, more expensive failures.
  • Conduct Advanced Diagnostics: For significant issues or to assess subsurface conditions without excavation, consider using advanced technology. Thermal imaging can help identify areas with subsurface moisture, indicating potential drainage problems or voids beneath the pavement. This allows for targeted repairs rather than widespread, costly excavation. Organizations like the American Concrete Pavement Association (ACPA) provide extensive resources on best practices for pavement longevity.

10. Accessibility Compliance and ADA Requirements

Ensuring a commercial property is accessible to all individuals is not just a matter of good practice; it is a legal imperative. This part of the commercial building inspection checklist focuses on verifying compliance with the Americans with Disabilities Act (ADA) Standards for Accessible Design and other local accessibility codes. Inspectors assess every public-facing element of a property, from the parking lot to the restrooms, to ensure it provides equal access for people with disabilities.

The inspection covers features like accessible parking spaces, ramp slopes, doorway widths, elevator functionality, restroom layouts, and proper signage. Neglecting these requirements can result in significant legal penalties, costly retrofits mandated by the U.S. Department of Justice (DOJ), and reputational damage. A thorough ADA compliance check is therefore a critical risk management step for property owners, developers, and tenants, safeguarding their investment against potential discrimination complaints and ensuring the building serves the entire community.

Practical Implementation and Actionable Tips

A proactive and systematic approach is essential for maintaining ADA compliance. This goes beyond a one-time check and requires ongoing attention to detail.

  • Conduct a Comprehensive ADA Audit: Use a detailed checklist that covers all aspects of the ADA Standards. Measure everything from the force required to open a door to the height of restroom soap dispensers. This audit should document all compliant and non-compliant features with photos and precise measurements, forming the basis of a remediation plan.
  • Prioritize a Barrier Removal Plan: For existing buildings, it is crucial to identify physical barriers and create a documented plan for their removal. This plan should prioritize changes that can be made readily and affordably, such as restriping parking lots or adjusting door hardware, while scheduling more significant upgrades like ramp installations or elevator modernizations.
  • Maintain Clear and Accessible Routes: Compliance is an ongoing effort. Regularly inspect accessible routes, including sidewalks, hallways, and aisles, to ensure they are free of obstructions like furniture, equipment, or temporary displays. Staff training is key to preventing these common and easily-fixable violations.

10-Point Commercial Building Inspection Comparison

Component Implementation Complexity 🔄 Resource Requirements ⚡ Expected Outcomes ⭐ Ideal Use Cases 📊 Key Advantages 💡
Structural Integrity and Foundation High — specialized engineering, possible invasive testing High — structural engineers, GPR, lab tests, heavy equipment Safety assurance, code compliance, long-term stability Pre-purchase surveys, post-earthquake assessments, aging warehouses Prevents catastrophic failure; identifies major repairs early
Roof Systems and Coverings Medium — access and weather-dependent inspections Medium — roof access, drones, thermal imaging Reduced water intrusion, extended roof life, energy savings Preventive maintenance, replacement planning, retail/industrial roofs Prevents leaks and mold; improves energy efficiency
HVAC Systems (Heating, Ventilation, AC) Medium–High — complex system testing and balancing High — HVAC technicians, testing instruments, possible downtime Improved comfort, IAQ, energy efficiency, fewer breakdowns Office buildings, LEED projects, healthcare facilities Improves occupant health; reduces operational energy costs
Electrical Systems and Distribution High — safety-critical, licensed assessments required High — electricians, testing gear, potential major upgrades Enhanced safety, adequate capacity, code compliance Data centers, older buildings, capacity-upgrade projects Prevents fire hazards; supports future load needs
Plumbing Systems and Water Infrastructure Medium — some hidden components require inspection Medium — plumbers, video inspection, leak detection tools Leak prevention, health safety, uninterrupted operations Restaurants, aging piping systems, high-occupancy sites Detects leaks early; supports water conservation efforts
Fire Safety and Life Safety Systems Medium — systematic testing and coordination Medium — certified testers, alarm/sprinkler service providers Life safety, regulatory compliance, reduced liability High-occupancy buildings, data centers, healthcare Saves lives; may lower insurance and legal risk
Interior and Exterior Walls and Finishes Low–Medium — mostly visual with targeted testing Low–Medium — moisture meters, remediation contractors Preserved aesthetics, moisture control, mold prevention Tenant fit-outs, facade maintenance, post-water-damage repair Protects envelope; prevents occupant health issues
Windows, Doors, and Building Envelope Medium — air/water infiltration testing and repairs Medium–High — blower door, thermal imaging, replacement cost Improved energy efficiency, security, weather protection Energy retrofits, aging fenestration upgrades, entryways Reduces energy loss; enhances comfort and security
Parking Structures and Pavement Medium — surface and structural inspections needed Medium — pavement testing, traffic control, resurfacing crews Extended pavement life, improved safety, better appearance Retail centers, parking garages, high-traffic lots Lowers long-term repair costs; reduces liability
Accessibility Compliance and ADA Requirements Medium — regulatory audit with potential retrofit design Medium–High — architectural changes, signage, construction Legal compliance, improved access, reduced discrimination risk Public buildings, tenant renovations, new occupancies Prevents lawsuits; expands access and customer base

From Checklist to Action: Partnering for a Resilient Future

Navigating the extensive commercial building inspection checklist we've detailed is a monumental but essential undertaking. From the foundational integrity and the weather-tightness of the roof system to the intricate networks of HVAC, electrical, and plumbing, each checkpoint represents a critical component of your property's overall health and value. A meticulous inspection is not just about identifying flaws; it's about creating a comprehensive, data-driven roadmap for your asset's future.

This process moves beyond a simple pass-or-fail exercise. It’s a strategic deep dive that uncovers the hidden stories within a building’s walls. The findings from your inspection report offer a clear narrative about immediate repair needs, potential safety hazards like outdated fire suppression systems, and long-term capital expenditure requirements. Understanding these elements is the first step toward transforming a property from a collection of systems into a high-performing, resilient, and profitable investment.

Translating Inspection Data into Strategic Advantage

The true power of a comprehensive inspection lies in the action that follows. The data you've gathered is the foundation for strategic decision-making. This is the point where a detailed checklist evolves into a living document that guides maintenance schedules, informs renovation budgets, and secures a building’s long-term viability.

For developers, owners, and contractors, the next steps are crucial. How do you prioritize repairs? How can you phase system upgrades to align with your budget and operational needs? What opportunities for value-add improvements, such as enhanced energy efficiency or accessibility upgrades, did the inspection reveal? Answering these questions effectively requires not just technical knowledge but also a creative and strategic vision.

Key Takeaway: An inspection checklist is a diagnostic tool. The real value is unlocked when you use that diagnosis to craft a strategic treatment plan that enhances asset value, mitigates risk, and ensures future growth.

The Architect's Role: Your Partner in Implementation

This is precisely where partnering with a skilled architecture firm becomes a game-changer. An experienced architect acts as a translator and a strategist, converting the raw data from a commercial building inspection checklist into an actionable, cohesive plan. They see beyond the immediate deficiencies to envision the building's full potential.

An architect can help you:

  • Prioritize Investments: Analyze the inspection report to identify which repairs and upgrades will deliver the highest return on investment, balancing immediate needs with long-term goals.
  • Navigate Complex Codes: Ensure that all proposed work, from accessibility modifications to structural repairs, meets or exceeds current building codes and ADA requirements, preventing costly rework and future liabilities.
  • Design for Longevity and Efficiency: Develop solutions that not only fix existing problems but also improve the building's overall performance. This could involve specifying modern, energy-efficient HVAC systems, designing a more durable roofing solution, or reconfiguring interior spaces for better functionality.
  • Unlock Hidden Potential: For adaptive reuse or historic preservation projects, an architect can identify opportunities to leverage historic tax credits and design innovative solutions that honor a building’s heritage while equipping it for modern commercial use.

Ultimately, completing the checklist is the beginning of the journey. The destination is a safe, compliant, and valuable asset that serves its occupants and delivers on your financial objectives. By leveraging the insights gained from your inspection and partnering with the right experts, you can ensure your property is not just maintained, but truly optimized for a successful and resilient future. Your commitment to this thorough process protects your investment and lays the groundwork for enduring success.


Ready to transform your inspection findings into a successful project? The team at Sherer Architects, LLC specializes in translating complex building assessments into beautiful, functional, and profitable designs for commercial, adaptive reuse, and historic properties. Let us help you navigate the next steps and bring your vision to life by visiting Sherer Architects, LLC to learn more.

Categories
Uncategorized

commercial building renovation checklist: Your 2025 guide

Embarking on a commercial building renovation is a significant investment of time, capital, and vision. Whether you're revitalizing a historic landmark, adapting a warehouse for a new purpose, or modernizing an office tower, a successful outcome hinges on meticulous planning and foresight. Without a structured approach, projects can quickly derail due to unforeseen structural issues, regulatory hurdles, or budget overruns. This definitive commercial building renovation checklist is designed to guide property owners, developers, and facility managers through every critical phase, transforming a complex endeavor into a manageable process.

This guide provides more than just a simple to-do list; it offers a strategic framework. We will break down the entire renovation journey into actionable steps, organized by project phase: from initial due diligence and design to procurement, construction, and final closeout. You will gain a clear understanding of the essential inspections, compliance checks, and planning tasks required to mitigate risk and maximize your return on investment. The checklist covers crucial areas such as structural assessments, environmental testing, MEP (Mechanical, Electrical, and Plumbing) system upgrades, and ADA compliance, ensuring no critical detail is overlooked.

For specialized projects, such as adaptive reuse or historic preservation, this level of detailed planning is not just beneficial, it is absolutely essential. By following this comprehensive blueprint, you can navigate the intricacies of your project with confidence, ensuring the final result not only meets but exceeds expectations. This checklist is your tool for turning a building's potential into a profitable, sustainable, and enduring asset.

1. Structural Assessment and Engineering Inspection

Before a single wall is moved or a new floor plan is drafted, a comprehensive structural assessment is the non-negotiable first step in any commercial building renovation checklist. This process involves a meticulous evaluation by licensed professional engineers to determine the integrity of the building’s core components, including its foundation, load-bearing walls, columns, beams, and roof system. The assessment identifies existing weaknesses, potential safety hazards, and determines if the structure can safely support proposed changes, such as adding a floor, removing walls, or installing heavy new equipment.

Structural Assessment and Engineering Inspection

This foundational step dictates the entire scope, timeline, and budget of a renovation. Ignoring it can lead to catastrophic failures, costly project delays, and significant unforeseen expenses. The primary goal is to establish a baseline of structural health, ensuring the building is safe, code-compliant, and capable of handling its intended future use.

Why This Step Is Critical

A structural inspection isn't just a formality; it's a critical risk management tool. For example, a developer renovating a historic downtown Chicago building discovered significant foundation settling during their initial assessment, requiring a $2 million stabilization project before any aesthetic work could begin. In another case, an inspection of a San Francisco commercial property revealed that its seismic bracing was dangerously outdated, necessitating a full-scale retrofit to meet current safety standards. These findings, while expensive, prevented potential disasters and ensured the long-term viability of the assets.

Actionable Implementation Tips

To ensure a thorough and effective assessment, follow these specific steps:

  • Engage a Specialist: Hire a licensed structural engineer with documented experience in commercial renovations, especially with buildings of a similar age and construction type as your project.
  • Document Everything: Insist on a detailed report that includes photographic evidence, floor plan markups, and clear descriptions of any identified issues, from minor cracks to significant deficiencies.
  • Plan Proactively: Schedule the structural work to be completed before any other major renovation tasks. Addressing foundational or framing issues after interior work has started can lead to rework and exponentially higher costs.
  • Seek a Second Opinion: If the initial inspection reveals major structural concerns with high-cost remedies, consider getting a second assessment from another qualified engineering firm to verify the findings and explore alternative solutions.

2. Environmental and Hazardous Materials Testing

Parallel to the structural assessment, identifying and evaluating hazardous materials is a critical due diligence step in any commercial building renovation checklist. This process involves certified environmental professionals conducting thorough inspections to detect substances like asbestos, lead paint, mold, PCBs in older electrical equipment, and other toxic materials. These hidden dangers, common in buildings constructed before modern regulations, pose significant health risks to workers and future occupants if disturbed during renovation. The assessment ensures regulatory compliance and protects all stakeholders from exposure.

Neglecting this phase can lead to immediate work stoppages, steep fines from agencies like the EPA and OSHA, and costly remediation projects that derail budgets and timelines. The primary objective is to identify, quantify, and plan for the safe removal or encapsulation of all hazardous substances before demolition or construction begins, ensuring a safe environment and a predictable project path.

Why This Step Is Critical

Environmental testing is a crucial risk mitigation strategy that prevents health crises and financial disasters. For instance, a firm renovating a Manhattan office tower discovered widespread asbestos-containing insulation during its assessment, triggering a complex $1.2 million abatement plan that had to be completed before interior fit-out could start. Similarly, a developer converting a Boston warehouse found legacy PCBs in old electrical transformers, requiring specialized, high-cost removal and disposal. Before any demolition or intrusive work, professional asbestos testing is an absolute necessity, especially in older commercial buildings, to ensure safety and compliance.

Actionable Implementation Tips

To manage environmental risks effectively, incorporate these steps into your pre-renovation process:

  • Hire Certified Assessors: Engage a qualified environmental consulting firm to perform a Phase I Environmental Site Assessment (ESA) and, if necessary, a more intrusive Phase II ESA for material sampling and testing.
  • Budget a Contingency: Allocate a contingency of 10-15% of the total construction budget specifically for the discovery and remediation of unknown hazardous materials. This foresight prevents budget overruns.
  • Use Licensed Contractors: If hazardous materials are found, only work with licensed and insured abatement contractors who follow strict safety protocols and provide documentation of proper disposal.
  • Document All Certificates: Maintain a comprehensive file of all testing results, remediation plans, and clearance certificates. These documents are essential for regulatory compliance and future property transactions.

3. Permits, Zoning, and Code Compliance Review

Navigating the labyrinth of municipal regulations is a fundamental component of any commercial building renovation checklist. This step involves a comprehensive review to ensure the project strictly adheres to all local building codes, zoning ordinances, and planning requirements. It’s a meticulous process of securing the necessary permits, understanding land-use restrictions, and confirming that all proposed designs meet current standards for safety, accessibility (ADA), and energy efficiency. Failure to manage this stage proactively can result in significant financial penalties, stop-work orders, or even mandated demolition of non-compliant work.

This regulatory due diligence is not a box to be checked at the end but an integral part of the initial planning phase. It defines the legal boundaries of what can be built, influencing everything from the building’s layout and materials to its intended use. Properly managing permits and compliance from the outset protects the project from costly surprises and ensures a smooth path from design to occupancy.

Why This Step Is Critical

Regulatory compliance is a critical gatekeeper for project viability. For instance, a Denver office tower renovation faced an 18-month review process simply to ensure its exterior modifications complied with strict historic district guidelines. In another scenario, a Seattle retail space renovation required the unexpected installation of a new ADA-compliant elevator, adding nearly $500,000 to the budget to meet modern accessibility codes. These examples highlight how early engagement with regulatory bodies can uncover mandatory requirements that profoundly impact project timelines and costs.

Actionable Implementation Tips

To effectively navigate the complex regulatory landscape, implement the following strategies:

  • Engage a Local Expert: Hire an experienced permitting consultant or architect who has a deep understanding of and strong relationships within the local jurisdiction's building and planning departments.
  • Start the Process Early: Begin permit applications and code reviews long before final construction documents are complete. This proactive approach allows time for feedback and revisions without delaying the project start.
  • Maintain Meticulous Records: Keep organized digital and physical copies of all submissions, correspondence, and approvals from regulatory agencies. This documentation is crucial for tracking progress and resolving any disputes.
  • Plan for Multiple Reviews: Budget time and resources for potential inspector comments and multiple submission rounds. It is rare for a complex commercial project to be approved on the first submission without requests for clarification or changes.

4. HVAC System Evaluation and Upgrade Planning

A building's heating, ventilation, and air conditioning (HVAC) system is its respiratory system, directly impacting occupant comfort, operational costs, and indoor air quality. As part of a comprehensive commercial building renovation checklist, a thorough HVAC evaluation is essential to determine if existing equipment can meet the demands of the renovated space. This process assesses the system's capacity, efficiency, and compliance with modern standards, such as those set by ASHRAE, to decide whether a retrofit, upgrade, or complete replacement is necessary.

This evaluation goes beyond a simple check-up; it aligns the building’s climate control with its future use, occupancy levels, and energy goals. An outdated or improperly sized system can lead to exorbitant utility bills, poor air circulation, and tenant dissatisfaction, undermining the entire value proposition of a renovation project.

Why This Step Is Critical

Neglecting the HVAC system during a renovation is a recipe for long-term financial and operational headaches. For instance, a Los Angeles corporate headquarters that upgraded to a modern Variable Refrigerant Flow (VRF) system during its renovation saw a 35% reduction in energy consumption and significantly improved zoned temperature control. In another case, a Chicago medical office building upgraded to a high-efficiency system with demand-controlled ventilation, ensuring it met stringent healthcare air quality standards while lowering operating costs. These upgrades are not just about comfort; they are strategic investments in the building's performance and marketability.

Actionable Implementation Tips

To ensure your HVAC strategy aligns with your renovation goals, follow these targeted steps:

  • Conduct a Detailed Energy Audit: Before committing to any new equipment, perform a professional energy audit to identify inefficiencies in the current system and building envelope. This data provides a crucial baseline for planning effective upgrades.
  • Consider Modern Technologies: Evaluate advanced options like Variable Refrigerant Flow (VRF) systems for their superior zoning flexibility and energy efficiency, especially in buildings with diverse occupancy needs.
  • Integrate Building Automation: Plan for the integration of a Building Automation System (BAS) to provide centralized, intelligent control over the HVAC system, optimizing performance and simplifying management.
  • Research Financial Incentives: Proactively investigate available utility rebates, federal tax credits, and local green building incentives for installing high-efficiency systems. These can significantly offset the initial capital investment.

5. Electrical System Upgrade and Panel Capacity Assessment

Modern commercial operations place immense power demands on buildings, often far exceeding what their original electrical systems were designed for. An electrical system upgrade and panel capacity assessment is a critical evaluation of the existing infrastructure, including service panels, wiring, circuits, and overall capacity. This process determines if the system can safely and efficiently power modern equipment, technology loads, and future operational needs while complying with current safety codes.

This assessment is a cornerstone of any effective commercial building renovation checklist because it prevents power-related failures, ensures tenant safety, and future-proofs the property. Neglecting this step can result in overloaded circuits, frequent outages, fire hazards, and the inability to support essential business technology, from high-density server rooms to electric vehicle (EV) charging stations.

Why This Step Is Critical

An insufficient electrical system can cripple a modern business. For instance, a San Francisco tech office undergoing a renovation discovered its existing panels could not handle the projected server load, requiring a complete electrical overhaul before tenant fit-out could begin. Similarly, an Austin retail center invested in upgrading its service panels and distribution specifically to accommodate 40 new EV charging spaces, a move that significantly increased its marketability and tenant appeal. These upgrades are not just about maintenance; they are strategic investments in the building’s functionality and value.

Actionable Implementation Tips

To ensure your building’s electrical system is robust and ready for the future, follow these implementation steps:

  • Conduct a Professional Load Study: Hire a licensed commercial electrician to perform a detailed load calculation. This study analyzes your current and projected power needs to accurately determine the required panel and service capacity.
  • Plan for a Surplus: Don't just build for today's needs. Size your new electrical service and panels to handle at least a 20-30% surplus capacity to accommodate future growth, new technologies, or changes in tenancy.
  • Coordinate with Utilities Early: If a service upgrade is needed, contact the local utility company at the very beginning of your project. Lead times for new transformers or service drops can be several months long and can significantly impact your renovation timeline.
  • Consider Smart Technology: Install smart panels that offer real-time energy monitoring and management. This technology can help optimize consumption, identify potential issues proactively, and provide valuable data for sustainability reporting.

6. Plumbing, Water, and Sewage System Inspection

Often hidden behind walls and beneath floors, a building’s plumbing and sewage systems are critical infrastructure that can harbor expensive, project-derailing problems. A thorough inspection evaluates the entire network, including water supply lines, drain-waste-vent (DWV) systems, fixtures, water heaters, and the building's connection to municipal services. This assessment is essential for identifying leaks, corrosion, blockages, inadequate capacity, and serious code compliance issues that must be addressed in any commercial building renovation checklist.

This evaluation goes beyond simply checking for drips; it safeguards against catastrophic water damage, ensures occupant health and safety, and identifies opportunities for significant long-term operational savings. Ignoring the condition of aged plumbing is a high-stakes gamble that can lead to slab leaks, sewage backups, and the costly destruction of newly finished interiors.

Why This Step Is Critical

A comprehensive plumbing inspection is a crucial risk mitigation step. For instance, the renovators of a historic Philadelphia building discovered severe corrosion in its underground cast iron drain lines only after a video inspection, a finding that prompted a full replacement to prevent an inevitable system failure. In a different project, a Miami commercial building proactively upgraded to low-flow fixtures during its renovation, a move that reduced its overall water consumption by an impressive 45% and generated substantial utility savings. These examples highlight how a detailed assessment can prevent disaster and unlock value.

Actionable Implementation Tips

To ensure a comprehensive and effective plumbing system evaluation, follow these specific steps:

  • Utilize Modern Diagnostics: Insist on a video camera inspection (CCTV) to assess the internal condition of main sewer and drain lines, which is the only way to identify hidden cracks, root intrusion, or significant corrosion.
  • Prioritize Modern Materials: When replacing old galvanized or cast-iron pipes, plan the transition to modern, durable materials like PEX for supply lines and PVC for drain lines to improve longevity and performance.
  • Install Water-Efficient Fixtures: Mandate the installation of WaterSense-labeled low-flow fixtures, such as 1.28 gallons per flush (GPF) toilets and 1.5 gallons per minute (GPM) faucets, to reduce operational costs.
  • Research Local Rebates: Investigate municipal or utility-sponsored rebate programs for installing water-efficient fixtures or systems, which can help offset the initial investment costs.

7. Roof Condition Assessment and Replacement Planning

An often-overlooked yet vital component of any commercial building renovation checklist is a thorough roof condition assessment. This process involves a detailed inspection of the entire roofing system, including its structure, membrane, drainage, flashings, and penetrations. Conducted by certified professionals, this evaluation determines the roof's remaining useful life, identifies existing or potential failure points, and assesses its capacity to support new elements like HVAC units or solar panels. The integrity of the roof is directly tied to the building's overall health, energy efficiency, and operational continuity.

Roof Condition Assessment and Replacement Planning

A proactive assessment prevents minor issues from escalating into catastrophic failures. A failing roof can lead to extensive interior water damage, structural rot, mold proliferation, and business interruption, turning a manageable repair into a multi-million-dollar remediation project. Therefore, this step is essential for protecting the building asset, managing long-term capital expenditures, and ensuring a watertight, energy-efficient building envelope.

Why This Step Is Critical

The roof is a building's first line of defense against the elements, and its condition has significant financial implications. For instance, a Boston office tower invested in a reflective "cool roof" and subsequently reduced its annual cooling costs by over $80,000. In Denver, a routine inspection of a commercial property uncovered severe substrate rot hidden beneath the membrane, a critical finding that necessitated a complete replacement but averted a potential roof collapse. These examples highlight how a professional assessment can reveal opportunities for massive energy savings or prevent disastrous structural failures.

Actionable Implementation Tips

To execute a comprehensive and effective roof assessment, consider the following actions:

  • Hire Certified Inspectors: Engage roofing professionals who follow established standards, such as those from the National Roofing Contractors Association (NRCA) or ASTM International, to perform the inspection.
  • Budget for Longevity: When planning a replacement, budget for a high-performance system with a 20-year or longer lifespan rather than opting for short-term, less durable patches that will require frequent attention.
  • Evaluate Energy-Efficient Options: Consider modern solutions like reflective TPO/PVC membranes or green roofs. These can significantly lower HVAC energy consumption and help with stormwater management, offering a strong return on investment.
  • Plan for Future Loads: If you anticipate adding solar panels or new rooftop mechanical units in the future, ensure the assessment and any subsequent replacement plan account for the additional structural load requirements.

8. Interior Layout and Space Planning Optimization

Strategic redesign of interior spaces is a critical component of any modern commercial building renovation checklist, moving beyond simple aesthetics to maximize efficiency, functionality, and tenant appeal. This process involves a thoughtful reconfiguration of offices, common areas, restrooms, and circulation patterns to align with contemporary workplace standards. It focuses on creating environments that support open floor plans, foster collaboration, and offer the flexibility to adapt to future business needs.

Interior Layout and Space Planning Optimization

Effective space planning directly impacts operational efficiency, employee productivity, and the building's overall rental value. Today's most successful designs often incorporate wellness features, diverse work settings, and multi-purpose spaces that cater to a dynamic workforce. This step transforms an outdated building into a competitive asset that attracts and retains high-value tenants.

Why This Step Is Critical

Poor layout can stifle productivity and create a negative perception of a commercial space, regardless of its location or other amenities. For example, a Seattle tech company reconfigured its office layout to introduce "neighborhoods" of varied workspaces, resulting in a 40% increase in collaborative seating and improved cross-departmental innovation. Similarly, a New York professional services firm that redesigned its floor plan to include dedicated wellness rooms and quiet focus zones saw a measurable increase in employee satisfaction and retention. These case studies prove that investing in intelligent space planning yields tangible business returns.

Actionable Implementation Tips

To ensure your space planning efforts deliver maximum value, follow these specific strategies:

  • Conduct User Surveys: Before designing, engage with current or potential tenants to understand their specific needs, pain points, and desires for the space. This data is invaluable for creating a user-centric design.
  • Leverage 3D Visualization: Work with commercial interior designers who use 3D modeling and virtual tours. These tools help stakeholders visualize the final layout, make informed decisions, and approve designs with confidence before construction begins.
  • Plan for Future Flexibility: Incorporate adaptable systems like modular walls, mobile furniture, and integrated technology infrastructure. This allows tenants to easily reconfigure the space as their teams and operational needs evolve.
  • Prioritize Diverse Work Settings: Design a variety of environments to support different tasks, including private "focus pods" for deep work, open collaborative zones for teamwork, and social areas that encourage community.

9. Accessibility and ADA Compliance Retrofitting

Ensuring full compliance with the Americans with Disabilities Act (ADA) is a legal necessity and a fundamental component of any modern commercial building renovation checklist. This process involves a comprehensive audit and subsequent retrofitting to guarantee that individuals with disabilities can access and use the facility safely and comfortably. Modifications often include adding accessible parking, installing ramps or elevators, reconfiguring restrooms, updating signage with tactile and Braille characters, and ensuring clear, unobstructed paths of travel.

Beyond mere legal obligation, prioritizing accessibility enhances the building's value by expanding its appeal to a broader market of tenants and customers. Inclusive design is not an afterthought but a core principle that demonstrates social responsibility and improves the overall user experience, making the property more competitive and desirable.

Why This Step Is Critical

Failing to address ADA compliance can result in significant legal and financial consequences, including federal lawsuits, steep fines, and mandated, costly retrofits under tight deadlines. For instance, a historic San Francisco building successfully integrated a modern accessible elevator that met ADA guidelines while preserving the property's unique architectural character. In another project, a Chicago office tower had to add 15 fully compliant accessible parking spaces, complete with proper signage and surface treatments, to avoid ongoing litigation. These proactive retrofits not only ensure legal safety but also create a welcoming environment for all.

Actionable Implementation Tips

To effectively integrate accessibility and ensure full compliance, follow these specific steps:

  • Engage an ADA Consultant: Hire a specialist consultant to conduct a detailed accessibility audit of the entire property before design work begins. Their expertise is invaluable in identifying non-compliant elements.
  • Plan Holistically: Instead of addressing issues in a piecemeal fashion, develop a comprehensive accessibility plan that ensures a consistent and seamless accessible route throughout the building.
  • Prioritize Key Areas: Focus first on primary entrances, parking, and accessible routes to essential services like restrooms and main tenant spaces. First impressions of accessibility are crucial.
  • Document Meticulously: Keep detailed records of all compliance efforts, including audit reports, design modifications, permits, and final inspection certifications. This documentation is vital for demonstrating due diligence.

10. Budget Allocation, Contingency Planning, and Cost Management

Effective financial management is the backbone of any successful commercial building renovation checklist, moving beyond a simple cost estimate to a dynamic strategy for control and foresight. This process involves creating a comprehensive budget that meticulously separates hard costs (labor, materials, construction) from soft costs (design fees, permits, legal counsel). Crucially, it incorporates a robust contingency fund and implements rigorous cost control mechanisms from start to finish. This financial framework ensures that every dollar is accounted for, preventing the common budget overruns that can derail a project.

The goal is not just to set a budget but to actively manage it. This proactive approach anticipates unforeseen issues, provides a financial cushion for surprises common in renovations, and uses tools like value engineering to optimize spending. According to the Project Management Institute (PMI), failing to manage costs is one of the primary reasons projects fail, making this step indispensable for protecting your investment.

Why This Step Is Critical

Without disciplined budgeting and contingency planning, a renovation is vulnerable to financial instability. For instance, a Portland mixed-use building developer allocated a 15% contingency fund, which proved essential when asbestos was discovered behind drywall, requiring a $300,000 remediation that was not in the original scope. Similarly, a Denver office building renovation kept its $50 million total budget on track by successfully phasing the project, allowing tenant operations to continue and generate revenue during construction. These examples highlight how strategic financial planning directly mitigates risk and ensures project viability.

Actionable Implementation Tips

To establish a resilient financial plan for your renovation, implement these strategies:

  • Secure Professional Estimates: Hire a quantity surveyor or professional cost estimator to develop a detailed, data-driven budget early in the design phase.
  • Fund a Realistic Contingency: Allocate a contingency reserve of 15-25% of total hard costs, especially for older buildings where unknown conditions are more likely.
  • Implement Cost Tracking: Use project management software to track all expenses in real-time. Conduct regular "budget vs. actual" analyses to identify and address variances immediately.
  • Establish a Change Order Protocol: Institute a formal approval process for all change orders. No additional work or cost should be incurred without written sign-off from key stakeholders, preventing scope creep and unauthorized spending.

10-Point Commercial Renovation Checklist Comparison

Service Implementation Complexity 🔄 Resource & Speed ⚡ Expected Outcomes 📊 Ideal Use Cases 💡 Key Advantages ⭐
Structural Assessment and Engineering Inspection High – detailed analysis, possible invasive tests 🔄🔄🔄 Licensed structural engineers, testing equipment; moderate–high time/cost ⚡ Clear scope, safety verification, repair prioritization 📊 Major renovations, historic buildings, suspected settlement/seismic issues 💡 Prevents major failures; ensures code compliance; accurate budgeting ⭐⭐⭐⭐
Environmental and Hazardous Materials Testing Moderate–High – staged sampling and lab analysis 🔄🔄🔄 Certified environmental consultants, lab fees, possible remediation; can delay schedule ⚡ Identification of hazards, regulatory compliance, disposal plan 📊 Older buildings, prior industrial use, pre-demolition surveys 💡 Protects health & liability; avoids regulatory fines; informs remediation scope ⭐⭐⭐⭐
Permits, Zoning, and Code Compliance Review High – iterative approvals and design revisions 🔄🔄🔄 Permit expediting, legal/planning consultants; time‑intensive bureaucracy ⚡ Legal compliance, permit acquisition, reduced stop-work risk 📊 Projects with zoning changes, historic districts, ADA/energy updates 💡 Prevents work stoppage/fines; ensures long‑term marketability ⭐⭐⭐
HVAC System Evaluation and Upgrade Planning Moderate – technical assessment + retrofit planning 🔄🔄 Mechanical engineers, contractors, possible phased installs; moderate–high cost ⚡ Improved IAQ, energy savings, automation readiness 📊 Energy retrofits, increased occupancy, pandemic-era IAQ upgrades 💡 Lowers operating costs; enhances comfort; rebate eligibility ⭐⭐⭐⭐
Electrical System Upgrade and Panel Capacity Assessment Moderate–High – code-driven upgrades and coordination 🔄🔄🔄 Licensed electricians, utility coordination, new equipment; potential outages ⚡ Adequate power capacity, safety improvements, future-proofing 📊 Tech-heavy tenants, EV infrastructure, increased load demands 💡 Reduces fire risk; enables expansion; supports renewables ⭐⭐⭐⭐
Plumbing, Water, and Sewage System Inspection Moderate – camera inspections and possible excavations 🔄🔄 Plumbers, video inspection tools, potential disruptive replacements; variable cost ⚡ Leak detection, improved water efficiency, reduced damage risk 📊 Older piping systems, high water use facilities, slab concerns 💡 Prevents major water damage; reduces utilities; improves health/safety ⭐⭐⭐
Roof Condition Assessment and Replacement Planning Moderate – seasonal constraints and structural checks 🔄🔄 Roofing inspectors, material costs, weather-dependent scheduling; can be high cost ⚡ Extended envelope life, energy savings (cool/green roofs), leak prevention 📊 Buildings with aging membranes, solar installation plans, drainage issues 💡 Prevents water damage; enables solar/green solutions; improves efficiency ⭐⭐⭐⭐
Interior Layout and Space Planning Optimization Moderate – design coordination and phased implementation 🔄🔄 Interior designers, FF&E, possible structural work; moderate disruption ⚡ Increased usable space, tenant satisfaction, higher rentability 📊 Tenant relocations, flexible workspace needs, coworking conversions 💡 Boosts productivity and revenue; adaptable layouts; improves tenant retention ⭐⭐⭐
Accessibility and ADA Compliance Retrofitting High – may require structural changes and detailed specs 🔄🔄🔄 ADA consultants, construction (ramps/elevators), possible high capital cost ⚡ Legal compliance, broader market access, improved inclusivity 📊 Public buildings, medical offices, jurisdictions enforcing ADA upgrades 💡 Reduces legal risk; expands tenant pool; social responsibility benefits ⭐⭐⭐
Budget Allocation, Contingency Planning, and Cost Management Moderate – ongoing oversight and change control 🔄🔄 Cost estimators, PM software, contingency funds; time for monitoring ⚡ Predictable finances, minimized overruns, phased affordability 📊 Complex renovations, older buildings with unknowns, multi‑phase projects 💡 Controls costs; enables phased delivery; improves stakeholder transparency ⭐⭐⭐⭐

Bringing Your Vision to Life with an Expert Partner

Navigating the complexities of a commercial building renovation requires more than just a list of tasks. It demands a strategic, integrated approach where every decision, from the initial due diligence to the final post-occupancy review, builds upon the last. Throughout this comprehensive commercial building renovation checklist, we have explored the critical pillars that underpin a successful project. We’ve seen that a thorough structural assessment is not just about safety, but about unlocking a building’s potential. We’ve detailed how proactive code compliance and ADA retrofitting are not burdens, but opportunities to create inclusive, future-proofed spaces.

The true takeaway is that these elements are not isolated silos. An HVAC upgrade plan directly impacts your electrical capacity assessment. Your interior space planning is fundamentally constrained or enabled by the initial structural and MEP evaluations. Overlooking the interconnectedness of these domains is the single most common source of budget overruns, schedule delays, and compromised final outcomes. A checklist provides the "what," but a seasoned expert provides the "how" and "why," ensuring each piece fits together seamlessly.

The Power of Integrated Project Management

The most significant value of this commercial building renovation checklist lies in its ability to highlight the sheer scope and technical expertise required. It underscores the critical need for a central, guiding partner who can oversee and integrate these disparate disciplines.

  • Financial Foresight: Effective budget allocation and contingency planning are not static activities. They must be dynamically managed as new information from environmental testing or engineering inspections comes to light. An expert partner anticipates these shifts and helps you make informed financial decisions.
  • Regulatory Navigation: Zoning laws, historic preservation guidelines, and building codes are a complex, ever-changing web. An architect specializing in commercial renovations acts as your advocate and navigator, securing approvals and ensuring every aspect of the design meets or exceeds legal requirements.
  • Specialized Execution: While an architect orchestrates the overall vision, specialized tasks require dedicated experts. For intricate electrical system upgrades, for example, it is crucial to find a reliable commercial electrical contractor who can execute the design plan safely and efficiently. An experienced lead partner will have a network of these trusted specialists to bring onto the project.

Ultimately, a successful renovation is a story of transformation. It’s about taking a structure with history, limitations, and potential and reimagining it for a new purpose. It’s about creating value where none was apparent, revitalizing a community asset, and building a physical space that powers your business or investment goals for decades. Mastering the items on this checklist is the first step, but partnering with a team that has lived and breathed these projects is what turns a good plan into an exceptional reality. The right partner transforms a daunting list of requirements into a clear, manageable roadmap to success.


Ready to turn your renovation plans into a tangible, high-value asset? The team at Sherer Architects, LLC specializes in guiding property owners and developers through every phase of the commercial renovation process. Contact us today to discuss how our expertise can bring clarity and confidence to your next project. Sherer Architects, LLC

Categories
Uncategorized

Design Process in Architecture: A Practical Guide

Embarking on a new building project—especially a commercial renovation or an adaptive reuse of a historic property—can feel like stepping into the unknown. It’s natural to have questions swirling around: How long will this take? What will it really cost? What exactly is my role in all of this?

But here’s the thing: the architectural design process isn't some mystical, unpredictable journey. It’s a structured, collaborative system designed to turn your big ideas into a tangible, buildable reality.

The Architect’s Blueprint: A Phased Approach to Design

Think of the design process as a master recipe. Each phase builds logically on the one before it, ensuring every crucial ingredient—from your initial goals to the most minute construction details—is added at just the right moment. This methodical approach is the key to keeping budgets in check, managing risks, and guaranteeing the final building is everything you envisioned.

This infographic gives a great high-level view of how a project flows from an initial idea to a finished building.

Infographic about design process in architecture

As you can see, it's a linear journey. Each step creates a solid foundation for the next, which is vital for preventing the kind of costly backtracking that can derail a project.

Understanding the Roadmap

For our clients, getting familiar with this framework is incredibly empowering. It provides a clear roadmap of what to expect and when. It also clarifies your role at each critical juncture, demystifying how your vision becomes a functional, code-compliant, and inspiring space.

A well-defined architectural process transforms ambiguity into action. It provides a reliable framework that protects the client's investment by ensuring that decisions are made logically, sequentially, and with a full understanding of their impact on cost, schedule, and quality.

To give you a clearer picture, here's a quick breakdown of what happens in each stage.

Quick Guide to Architectural Design Phases

Phase Primary Goal Key Activities
Scripting / Programming Define project vision, goals, budget, and functional needs. Client interviews, site analysis, feasibility studies, defining the project brief.
Schematic Design Explore broad design concepts and establish the overall look and feel. Initial floor plans, sketches, massing studies, conceptual site plans.
Design Development Refine the chosen concept and develop detailed building systems. Selecting materials, finalizing layouts, coordinating with engineers (structural, MEP).
Construction Documents Create the comprehensive set of drawings and specifications for bidding and permits. Detailed architectural drawings, technical specs, final engineering plans.
Bidding / Negotiation Select a contractor to build the project. Issuing documents to bidders, reviewing proposals, negotiating contracts.
Construction Admin Oversee construction to ensure it aligns with the design documents. Site visits, reviewing contractor payments, problem-solving, punch lists.

Each of these phases serves as a crucial checkpoint, ensuring the project stays on track before moving on to more detailed—and more expensive—work.

The Real-World Benefits of a Phased Process

Sticking to this time-tested workflow isn't just about ticking boxes; it delivers powerful advantages that protect your investment and drive success.

  • Serious Risk Management: We tackle the big-picture concepts first and get progressively more detailed. This approach drastically reduces the risk of making expensive changes late in the game when they cost the most.
  • Airtight Budgetary Control: At the end of each phase, we pause to review and approve. This gives us natural checkpoints to confirm costs and make any needed adjustments, stopping "scope creep" in its tracks.
  • Crystal-Clear Communication: The phased structure creates dedicated moments for your feedback and key decisions. It keeps everyone—client, architect, engineers—on the same page, which is the best way to avoid misunderstandings down the road.
  • Built-in Quality Assurance: This process allows us to systematically layer in all the technical requirements, from structural engineering to complex building codes. The result is a design that’s not just beautiful but also safe, functional, and fully compliant.

Defining Your Vision: From Scripting to Schematic Design

Architects sketching out initial design concepts on a large table

Every great building starts not with a sketch, but with a conversation. The earliest stages of any architectural project are all about translating your core mission—the real "why" behind it all—into a clear, buildable direction. This foundational work is broken into two distinct, but tightly connected, parts: Scripting and Schematic Design.

Think of it like creating a recipe for your building. Before we can even start thinking about what the final dish will look like, we have to meticulously list and understand every single ingredient. That's the essence of the first phase, which we call Scripting (sometimes known as Programming). It's a period of deep listening and intensive research.

The Scripting Phase: Uncovering the Project's DNA

The scripting phase isn't about how the building looks; it's about what the building does. Our main goal here is to craft a comprehensive project brief that will become our North Star for every decision that follows. This crucial document is the result of some serious investigative work.

We start by talking to everyone—conducting in-depth stakeholder interviews to grasp the needs, goals, and day-to-day realities of the people who will actually use the space. We walk the site, analyzing every opportunity and constraint, from sun angles to prevailing winds. This is also when we dive into the nitty-gritty of local zoning ordinances and building codes, which often define the boundaries of what’s possible right from the start.

To get an incredibly accurate picture of the site and its context, we often bring in modern tools. Integrating data from drones and GIS gives us precise topographical information that informs everything from building placement to infrastructure planning, making sure our first ideas are firmly grounded in reality. The final output of all this effort is a detailed "script" that outlines every functional requirement, from square footage needs to how different spaces should relate to one another.

You could say the Scripting phase is 90% investigation and 10% documentation. It’s the critical, non-visual work that prevents expensive changes down the road and ensures the final building genuinely serves its purpose. A project built on a weak script is a project destined for compromise.

Once we have that script, we have our "ingredient list." Now, and only now, can we move on to the more visual and conceptual stage: Schematic Design.

The Schematic Design Phase: Giving Ideas Their First Form

If scripting is the recipe, Schematic Design is the first rough sketch of the dish. This is where abstract requirements begin to take physical shape. We're thinking in broad strokes here, exploring the big-picture possibilities rather than getting lost in the details.

During this phase, we use a few key tools to explore and communicate these early concepts:

  • Bubble Diagrams: These aren't formal plans but simple diagrams that map out the relationships and relative sizes of different spaces. They're a quick way to confirm that the functional flow of the building makes sense.
  • Massing Models: We'll create simple physical or digital models to study the building's overall size, shape, and scale on its site. This helps everyone understand its visual impact and how it fits into the neighborhood.
  • Basic Floor Plans and Elevations: These are the very first architectural drawings. They show the general room layouts and give a sense of the building's exterior appearance, but they are kept simple on purpose to convey the core idea for your review.

Your feedback during these initial stages is the most powerful tool you have to shape the project. The decisions made here create a ripple effect through the entire process, directly influencing the budget, schedule, and ultimate success of your building. This back-and-forth ensures the foundational concept is perfectly aligned with your vision before we move into more detailed and technical work.

Bringing the Details Into Focus

Architectural blueprints and material samples laid out on a table

With the schematic design approved, we have the project's big-picture vision locked in. Now it's time to shift gears from broad strokes to fine lines. The process moves from conceptual exploration into the realm of technical precision in a phase we call Design Development (DD).

Think of it this way: schematic design gave us the building's overall shape and flow. Design development is where we give it substance. We zoom in on the sketch, making the critical decisions that will define the building’s performance, its final look and feel, and its cost.

Refining the Blueprint in Design Development

During DD, we start layering in the complex systems that make a building work. This is a period of intense coordination, bringing our engineering consultants—structural, mechanical, electrical, and plumbing—deep into the fold. It’s like designing the sleek body of a car first, and now figuring out exactly how the engine, transmission, and wiring will all fit and work together under the hood.

This is a hands-on, highly collaborative phase where key decisions are made:

  • Material Selection: We go from "a brick facade" to specifying the exact brick from a particular manufacturer, its color, its texture, and even the style of the mortar joints. Every single finish, from the flooring underfoot to the roofing overhead, gets pinned down.
  • Structural System Definition: The structural engineer moves beyond concepts to finalize the steel or concrete skeleton of the building, calculating and specifying exact column sizes, beam depths, and foundation details.
  • MEP Integration: This is a major puzzle. The engineers for the Mechanical, Electrical, and Plumbing (MEP) systems design their networks in detail. Our job is to make sure every duct, pipe, and conduit has a clear path that doesn't conflict with the structure or the architecture.
  • Detailed Plans and Elevations: The simple schematic drawings evolve into something much more sophisticated. We add window and door specifications, illustrate how walls are assembled, and draw key construction connections.

The DD phase culminates in a comprehensive set of drawings that are worlds away from the initial sketches. This set is detailed enough for a contractor to provide a reliable cost estimate and serves as the rock-solid foundation for the next, most intensive part of the process.

The Design Development phase is the critical bridge between an idea and its execution. It’s where beautiful concepts are tested against hard engineering realities and budget constraints, ensuring the final building is not just inspiring, but practical and buildable.

Creating the Instruction Manual: Construction Documents

Once you approve the Design Development set, we move into the Construction Documents (CD) phase. Honestly, this is the most demanding part of the entire journey. Our team creates an exhaustive set of drawings and specifications that will become the contractor's exact instructions for building your project.

There is absolutely no room for ambiguity here. These documents are the legal core of the construction contract and are what we submit to the city to get your building permit. Every connection, every material, and every finish must be clearly and precisely documented. Getting this right is the single best way to prevent expensive mistakes and arguments on the job site.

It's amazing how much technology has changed this part of our work. Before Computer-Aided Design (CAD) appeared in the 1960s, everything was drawn by hand—a tedious process where changes were a nightmare. Digital drafting brought a new level of precision and made coordination between disciplines vastly easier, helping to slash the kind of rework that historically ate up 5-10% of a project's total cost. You can explore more about the journey of architectural design and see how technology continues to shape our field.

A full set of Construction Documents has two main parts that work together:

  1. The Drawings: This is the visual instruction manual. It’s a thick set of plans, elevations, sections, and countless specific detail drawings that show exactly how every piece of the building fits together.
  2. The Specifications Book: Often called the "Project Manual," this is a detailed written document that goes hand-in-hand with the drawings. It describes the technical requirements, quality standards, and installation methods for materials and equipment—things that can't be shown in a drawing alone.

When combined, these documents tell the complete story. They define the scope of work, the quality of materials, and the level of craftsmanship you expect. A thorough, well-coordinated set of CDs is the ultimate tool for making sure your project gets built on time, on budget, and exactly the way you envisioned it.

Navigating Approvals and Selecting Your Builder

A builder reviewing architectural plans on a construction site.

With a complete set of construction documents, your vision is no longer just an idea; it's a precise, buildable blueprint. But before a single nail is hammered, we have to clear two major hurdles: getting the official green light to build and picking the right team to do the work.

This is where all the painstaking detail from the previous phases really shines. A rock-solid set of drawings is your best tool for navigating the often-tricky waters of Permitting and Bidding.

Securing Your Permit to Build

No one can start construction without a permit. It's the official blessing from your local city or county, sometimes called the Authority Having Jurisdiction (AHJ). We submit our detailed documents, and their reviewers comb through them to ensure everything is up to code—from zoning and fire safety to structural integrity and accessibility.

Think of it as the city’s final safety check. They’re making sure the building will be safe for everyone who uses it. The timeline for this can be a real wild card. A simple interior fit-out might get a permit in a few weeks, while a complex new building could take months. The cleaner and more complete our submission, the faster we get through.

If your project involves a historic building or sits within a special design district, things get a bit more interesting.

  • Design Review Boards (DRB): These committees are the aesthetic guardians of a neighborhood. They want to see that your project fits in and respects the local character. Our job is to tell the story of the design and show them how it enhances, rather than detracts from, the area.
  • State Historic Preservation Offices (SHPO): When working with a designated landmark, the SHPO gets involved. They need to sign off on any changes to make sure the building's historic soul isn't lost. This requires a deep knowledge of preservation standards and incredibly detailed documentation.

The key to getting through these reviews smoothly is to be proactive. We talk to the board staff early and often, anticipating their questions and building a compelling case for the project from day one. It makes a world of difference.

Finding the Right Contractor Through Bidding

While we’re waiting on the permit, or right after it’s issued, it’s time to find the builder. This is the bidding phase, and the goal is straightforward: get clear, apples-to-apples pricing from a handful of qualified contractors.

This is exactly why the construction documents have to be so detailed. When every material, fixture, and finish is spelled out, builders aren't left guessing. They’re all bidding on the exact same project, which ensures you get fair, competitive pricing.

During the bidding process, the architect acts as the central hub of information. We field all the questions from the contractors and send out clarifications to everyone at once. This keeps the process fair and transparent, protecting you from surprises and ensuring the bid you choose is the right one.

When it comes to picking a builder, you generally have two options:

  1. Competitive Bidding: This is the classic approach. You invite several qualified contractors to the table, they submit their best price in a sealed bid, and you typically award the job to the lowest qualified bidder. It’s a great way to let the market set the price.
  2. Negotiated Contract: Alternatively, you can select a contractor you trust early in the process, sometimes even during design development. They join the team as a consultant, providing real-time cost feedback as the design takes shape. The final price is then negotiated directly.

Which path is best really depends on your project’s priorities—whether cost certainty, a fast-tracked schedule, or a specific team dynamic is most important. No matter which route you take, our goal is to help you find a skilled, reliable partner to carry the project over the finish line.

Keeping the Vision Intact: From Blueprint to Building

Once the city gives its blessing and you’ve chosen your builder, the project shifts from paper to the real world. This is the Construction Administration (CA) phase, and it’s where all the careful planning finally takes shape. Your architect’s job changes dramatically here. We step back from the drawing board and become your on-site advocate—your expert eyes and ears, making sure the vision we all worked on is executed flawlessly.

It's a common misunderstanding that architects "supervise" construction. That’s not quite right. The contractor is the master of the job site; they’re responsible for the crew, the schedule, safety, and all the day-to-day building activities. Our role is to observe the work as it progresses to ensure it matches the design documents.

Think of us as the conductor of an orchestra. The construction documents are the musical score, and all the skilled trades—plumbers, electricians, masons—are the musicians. The conductor doesn’t play every instrument, but they make sure everyone is playing from the same sheet music, in tempo, and creating a beautiful, cohesive symphony. That oversight is what protects your investment and turns a great design into a great building.

The Architect’s Role on the Job Site

Active, hands-on involvement during construction is the last line of defense for design integrity. It’s a dynamic, fast-paced process of site visits, detailed reviews, and quick thinking. A lot can happen between breaking ground and handing over the keys.

Here’s what our team is typically doing:

  • Walking the Site: We’re on-site regularly to see the work firsthand. These visits are crucial for spotting small issues before they snowball into expensive problems.
  • Reviewing Submittals: Before a single brick is ordered or a window is fabricated, the contractor sends us product data and samples for approval. We check everything to make sure it’s exactly what was specified in the plans.
  • Answering Questions (RFIs): No set of drawings can anticipate every single question that comes up on a job site. When the contractor sends a Request for Information (RFI), we provide clear answers and sketches to keep the work moving forward.

Protecting Your Bottom Line

This phase is where we guard your budget and schedule. A huge part of our job is reviewing the contractor's monthly applications for payment. We walk the site to verify how much work has been done and what materials have been delivered, ensuring the bill you receive is fair and accurate. This simple step prevents you from paying for work that hasn't been completed.

And let’s be honest—surprises happen. This is especially true in adaptive-reuse and historic preservation projects. When a crew uncovers a hidden structural problem or an unexpected site condition, we jump in. We work side-by-side with the contractor to come up with a solution that honors the design, respects the budget, and keeps the project on track. This kind of on-the-fly problem-solving is at the heart of good construction administration.

Change Orders are a formal part of any project, but they shouldn't be a constant source of anxiety. Proactive architects anticipate potential issues and solve them collaboratively in the field, which minimizes the need for costly official changes and keeps the project humming along.

This hands-on approach has deep historical roots. The “master builder” of the 19th century became a thing of the past as buildings grew more complex, leading architects to focus more on design. In the early 1900s, architects stayed involved through construction on about 60-70% of projects. But by 2000, that number had plummeted to just 25-35% as builders took on more project management. Today, the industry is rediscovering just how vital it is to have the architect involved until the very end. You can learn more about this in the historical evolution of the architect's role.

From Punch List to Grand Opening

As construction nears the finish line, our attention turns to the fine details. We’ll do a thorough walkthrough with you and the contractor to create a punch list—a final to-do list of every last item that needs to be fixed or finished. It could be anything from a tiny paint scuff to a misaligned cabinet door.

Once every item on that list is checked off, we manage the project closeout. This means collecting all the warranties, instruction manuals for new equipment, and final lien waivers from the contractor. Finally, we issue a Certificate of Substantial Completion. This document officially marks the end of construction and the start of the building's new life.

This is the moment it all comes together. The keys are handed over, and the building that started as just a conversation is now a real, functional space, ready to serve its purpose for years to come.

Common Questions About the Architectural Design Process

https://www.youtube.com/embed/DdoRp_TMtg4

Even with a detailed map of the design phases, it’s completely normal to have questions before starting a major building project. Getting these details sorted out early on helps everyone plan better and gives you the confidence you need as we get started. Here are some of the most common questions we hear from clients.

How Long Does the Architectural Design Process Typically Take?

There’s really no one-size-fits-all answer here. The real timeline depends on the project's size, how complicated its systems are, and, frankly, how quickly the local building department can review the plans.

For a gut-check, a straightforward commercial interior refresh might take 3 to 6 months to get from our first conversation to having permit-ready documents in hand. A brand new, mid-sized commercial building? You’re probably looking at 9 to 18 months of design work before a shovel ever hits the ground.

Projects with extra layers, like a historic preservation or a complex adaptive reuse, will naturally take longer. The two biggest wild cards are always how quickly you, the client, can make key decisions and how backed up the local permitting office is. We’ll always work with you to map out a realistic schedule right at the beginning.

What Is the Client’s Role During the Design Process?

You are, without a doubt, the most important person on the team. Your vision is the fuel for this entire engine, and your decisions keep it moving forward. Your involvement is especially crucial at specific moments when the project could go in several different directions.

Your main responsibilities will be:

  • Sharing Your Vision: In the very beginning, your understanding of your business needs and long-term goals is what we build everything on.
  • Making Timely Decisions: When we present you with design options, clear and decisive feedback is what keeps the project from getting bogged down.
  • Giving the Final Go-Ahead: At the end of the day, you’re the one who signs off on the final design, the budget, and the key materials before we move into construction.

The best projects always come from a real partnership between an engaged client and their architect. Think of us as your expert guide and advocate—we’re here to translate your vision into reality, but you’re the one steering the ship.

How Are Architectural Fees Usually Structured?

While there are a few ways to structure fees, the industry standard for most commercial projects is a fixed fee, which we break down by project phase. This gives you cost certainty right from the start and ties our payments directly to tangible progress. You'll typically get an invoice from us as each major design phase wraps up.

A common payment schedule often looks something like this:

  • Schematic Design: 15% of the total fee
  • Design Development: 20% of the total fee
  • Construction Documents: 40% of the total fee
  • Bidding & Construction Administration: The remaining 25%

This is all spelled out clearly in the professional services agreement we sign before any work begins. No surprises, no guesswork—just total transparency.

What Are the Biggest Risks and How Can We Manage Them?

A huge part of our job is spotting and managing risks before they become real problems. The big ones usually fall into three buckets: budget, schedule, and unforeseen site conditions.

The most common budget-killer is "scope creep"—that’s when little additions and changes start piling up, pushing the project beyond its original plan. We fight this by constantly referring back to the clear goals we set together at the very beginning. Schedule delays are often tied to waiting on decisions or getting stuck in the permitting process.

With renovation and adaptive-reuse projects, the biggest risk is always what’s hiding behind the walls. We get ahead of this by doing intensive site investigations upfront and, most importantly, building a solid contingency fund into the budget. This is typically 10-20% of the construction cost, set aside specifically to handle those inevitable surprises. For more great insights into architectural practices, you can check out resources like Timbercloud's Blog.


At Sherer Architects, LLC, we’re here to guide you through every step of this journey, turning complex challenges into buildings that are beautiful, functional, and built to last. If you’re thinking about a commercial, adaptive reuse, or historic preservation project, let’s start a conversation about your vision.

Contact Us Today

Categories
Uncategorized

Your Guide to Build To Suit Real Estate Projects

A build-to-suit (BTS) development is a bit like getting a custom-tailored suit instead of buying one off the rack. It’s a commercial real estate deal where a developer agrees to finance and construct a brand-new building to a tenant's exact specifications.

The company gets a facility designed purely for its needs, and in return, it commits to a long-term lease. This setup is a game-changer for businesses that require specialized spaces but don't want to sink a massive amount of capital into buying land and managing construction themselves.

Understanding The Core Build To Suit Concept

An architectural blueprint of a commercial building being reviewed on a wooden desk.

At its heart, a build-to-suit is a partnership. It connects a company with very specific operational needs to a real estate developer who has the funding and know-how to bring that vision to life. The tenant walks away with a perfectly suited building, while the developer secures a steady, long-term income stream from the lease.

This approach is becoming increasingly vital in sectors like industrial real estate. We're seeing a decline in the construction of generic, "speculative" buildings built without a tenant already lined up. For instance, speculative industrial deliveries hit a high of 481 million square feet in 2023 but are forecasted to fall sharply to just 150.2 million square feet in 2025.

As the supply of cookie-cutter space tightens, the build-to-suit model becomes a far more appealing option for companies whose operations are anything but standard.

Key Players in a Build To Suit Project

A successful build-to-suit project isn't a one-person show; it's a carefully coordinated effort between several key players. Each party has a distinct role and objective, and clear communication among them is what keeps the project on track from blueprint to ribbon-cutting.

Here’s a quick rundown of who’s involved and what they’re trying to achieve.

Player Primary Role Key Objective
The Tenant The future occupant of the building. To secure a custom facility that maximizes operational efficiency without tying up capital in real estate.
The Developer The project manager and financier. To construct a high-quality asset that meets tenant needs and generates a stable return on investment through a long-term lease.
The Investor The long-term owner (often the developer). To acquire a property with a creditworthy tenant and predictable cash flow, minimizing vacancy risk.

Understanding these roles is the first step in seeing why this model has become so popular for complex projects.

Why This Model Works

The build-to-suit model truly shines when standard, one-size-fits-all buildings just won't cut it. It’s the go-to solution for industries with highly specific operational demands.

Think about sectors like:

  • Logistics and Distribution: These companies often need precise ceiling heights for vertical storage, complex conveyor systems, and a particular layout of dock doors to keep goods moving.
  • Manufacturing: A factory might require specialized high-voltage power, reinforced flooring to support heavy machinery, or a custom layout for its production lines.
  • Life Sciences and Healthcare: Cleanrooms, labs, and medical centers depend on exacting climate control, specialized ventilation, and other highly technical features that you can't find in a generic building.
  • Retail Chains: Even well-known brands like Wendy's use build-to-suit programs to roll out new locations with their standardized, hyper-efficient restaurant designs.

Ultimately, the process requires deep collaboration and meticulous planning. You can see this in action in substantial commercial development projects, where every detail, from the structural engineering down to the specific type of commercial doors, has to be perfectly aligned with the tenant's operational goals.

The Strategic Payoff of Building to Suit

Choosing to go the build-to-suit route is a serious undertaking. We're often talking about a 12 to 36-month journey from the first sketch to moving day. So, why would anyone commit to this long game instead of just signing a lease on an existing building?

The answer is simple: control. A build-to-suit project lets a company create a facility that's more than just real estate—it becomes a high-performance business tool, perfectly molded to its operations.

A Space Engineered for Your Workflow

Think about it. An existing building is always a compromise. You end up bending your processes to fit the space you have, not the space you need. Build-to-suit flips that script completely.

It’s about designing a facility around your unique workflow. You get to create an environment that's built for maximum efficiency and productivity right from the start.

Designing for Peak Performance

Imagine a distribution company getting to decide the exact number and placement of its loading docks to shave minutes off every truck's turnaround time. Or a biotech firm designing a lab with the specific ventilation and power grids it needs for sensitive research. This is the kind of granular control that defines the build-to-suit model.

And this isn't just about solving today's problems. A custom build is your chance to future-proof your operations. You can lay the groundwork for tomorrow's technology, design modular walls that can be reconfigured as teams grow, or even plot out a seamless future expansion on the property.

Key areas where this customization really shines include:

  • Workflow Optimization: Laying out a floor plan that creates a natural, efficient flow for people, inventory, and equipment.
  • Specialized Infrastructure: Building in the non-negotiables, like reinforced flooring for heavy machinery, clean rooms, or complex climate control systems.
  • Technological Integration: Pre-wiring the facility for robotics, automation, and the data infrastructure you'll need in the years ahead.

A custom-built facility is more than just a building; it's a strategic tool engineered to enhance a company's core operations. It turns real estate from a fixed cost into a competitive advantage by directly supporting efficiency and growth.

Ultimately, this level of control ensures the building is an asset that actively works for the business, rather than a liability the business has to work around.

A Savvy Financial and Branding Move

Beyond the day-to-day operations, the build-to-suit model presents some pretty compelling financial and branding upsides.

One of the biggest wins is capital preservation. Instead of sinking millions into buying land and funding construction, a company can keep that cash free for what it does best—investing in R&D, marketing, or hiring top talent.

The developer handles the heavy financial lifting of the real estate project. The tenant’s main obligation is the long-term lease, which translates into predictable operating expenses instead of a massive, upfront capital hit. This structure makes a custom-built facility surprisingly accessible.

A build-to-suit facility also becomes a powerful, three-dimensional representation of a company's brand. The architecture, the materials, the location—all of it can be curated to reflect your corporate identity and values. A sleek, glass-and-steel headquarters can scream innovation, while a building using sustainable materials and green space can broadcast a commitment to corporate responsibility.

This is more than just looks. It’s about making a tangible statement to your employees, your customers, and the community. You get a landmark building in a prime location, all without the risks of ownership, turning your real estate into a powerful symbol of your brand.

A Step-by-Step Guide to the Build-to-Suit Process

Kicking off a build-to-suit project can feel massive, but like any complex endeavor, it becomes much more approachable when you break it down into a clear, step-by-step process. Think of it as a detailed roadmap where each stage builds on the one before it. Following these steps helps ensure every decision is aligned with your ultimate goal: creating a facility that’s a true operational asset.

The entire journey, from the first conversation to opening the doors, typically takes anywhere from 12 to 36 months. The exact timeline will hinge on things like the project's complexity, how ready the site is, and the local permitting landscape. Successfully navigating this requires a solid plan and a strong, collaborative team from day one.

This simple visualization shows how the core advantages of a build-to-suit—customization, capital, and brand—are all intertwined.

Infographic showing the three-step advantages of build-to-suit Customization, Capital, and Brand.

The flow from a custom design to smart capital use and a strong brand presence really highlights how each phase contributes to the project's strategic value.

Phase 1: Assembling Your Team and Defining Your Vision

Long before a single shovel hits the dirt, the most important work happens. This is the foundational stage where you define what you truly need and assemble your expert team. You absolutely cannot over-invest in getting this part right.

Your first job is to translate your business operations into a detailed list of building specifications. This goes way beyond just square footage.

  • Operational Must-Haves: What are the non-negotiables? Think specific ceiling heights, floor load capacities, power requirements, or the number and type of docking bays.
  • Workflow Essentials: How do people and materials need to move through the space? The layout should make your workflow seamless, not fight against it.
  • Future Growth: Where might you need to expand in five or ten years? It’s far cheaper to plan for that possibility now than to try and add it on later.

Once you have your needs outlined, you’ll bring together a team of specialists. This is usually led by a commercial real estate broker with deep experience in build-to-suit deals. Your team will also include architects, engineers, and legal counsel who can protect your interests through what can be a very complex negotiation process.

Phase 2: Site Selection and Due Diligence

With a clear vision and your team in place, the hunt for the perfect location begins. Finding a site for a build-to-suit project is about much more than just finding an empty plot of land. It’s a strategic decision that will impact your logistics, access to labor, and long-term costs for years to come.

Your broker and developer will scout potential sites that check all your boxes for accessibility, zoning, and proximity to suppliers or customers. After you have a shortlist, the due diligence phase kicks in. This is a meticulous investigation designed to uncover any potential red flags.

Due diligence is the project's insurance policy. It involves a thorough review of zoning regulations, environmental assessments, soil testing, and utility access to ensure the site is viable and free of costly surprises.

This stage confirms that the land you’ve chosen can legally and physically support your custom facility, preventing the kind of unforeseen issues that can derail a project's timeline and budget.

Phase 3: Design Finalization and Lease Negotiation

With a viable site locked in, your architect gets to work turning your operational needs into detailed construction blueprints. This is a deeply collaborative phase where your feedback is crucial to ensure the final design is a perfect match for your vision. Every last detail, from the HVAC systems down to the location of data ports, is finalized here.

At the same time, your legal team will be hammering out the details of the build-to-suit lease agreement with the developer. This is a complex document that’s worlds away from a standard rental contract. It clearly outlines who is responsible for what—construction costs, timelines, change orders, and potential delays.

Key negotiation points will include:

  • Rent Structure: How the lease rate is calculated based on the total project costs.
  • Construction Milestones: Defining key deadlines the developer is contractually obligated to meet.
  • Contingency Plans: Agreeing on how cost overruns or schedule delays will be handled.
  • Tenant Improvement Allowances: Clarifying what the developer pays for in the base build versus what you’ll cover.

Phase 4: Construction and Final Handover

Once the lease is signed and the developer has secured financing, construction can finally begin. During this phase, your role shifts to monitoring and communication. You’ll be a regular at project meetings to stay updated on progress and help address any issues that pop up.

Demand for build-to-suit facilities, especially in the industrial sector, has exploded. The trend went into overdrive with the e-commerce boom and supply chain disruptions, which pushed companies to hold more inventory and demand more sophisticated warehouses. Just look at Amazon—the company leaned heavily on this strategy, spending an estimated $5.8 billion in 2021 on build-to-suit fulfillment centers. You can learn more about the market drivers behind the build-to-suit surge at Matthews.com.

As construction wraps up, you’ll conduct a final walkthrough of the facility with the developer. This is where you create a "punch list" of any remaining items that need to be fixed or finished. Once those are resolved and the building gets its certificate of occupancy, the developer officially hands over the keys, and your lease term begins. Your custom-built facility is now ready for business.

How Build To Suit Projects Are Financed

Figuring out how a build-to-suit project gets funded is the key to understanding why it's such a game-changer for so many companies. The financing structure is what dictates who holds the risk, who ultimately owns the property, and where all the money comes from. While the fine print can get complicated, nearly all deals boil down to one of two main approaches.

Each path offers a different blend of control, financial obligation, and long-term ownership. Let’s pull back the curtain on these two common financing models to see how an idea on a blueprint becomes a fully operational facility.

https://www.youtube.com/embed/opu6nzPBjbg

The Traditional Developer-Led Model

By far, the most common route is developer-led financing. In this scenario, you can think of the developer as both the project captain and its banker. The developer shoulders the full responsibility—and the risk—of buying the land, securing the hefty construction loans, and managing the entire build-out from day one.

The tenant’s job is to provide the detailed specs for their dream building and, crucially, to sign a long-term lease before any dirt is moved. That lease agreement is the financial linchpin for the entire deal.

The tenant's signed lease is what gives the developer's lenders the confidence to fund the project. It proves there’s a guaranteed, long-term revenue stream ready to flow the moment the doors open.

Basically, the developer puts up all the initial cash and uses the tenant’s strong credit and lease commitment to secure the financing needed to build. Once construction is finished, the developer owns the building and collects rent, while the tenant gets a brand-new, custom facility without tying up a dime of their own capital in real estate.

The Sale-Leaseback Structure

Another popular method is the sale-leaseback, which is sometimes called a reverse build-to-suit. This approach flips the script on who takes the initial lead. Here, the company that will become the tenant manages its own development. They might already own a piece of land or go out and buy the perfect site, then oversee the design and construction of their own facility.

So, why is it called a "sale-leaseback"? Because as soon as the building is complete, the company sells the property to an investor, often a real estate investment trust (REIT). At the very same time, they sign a long-term lease to become the tenant in the building they just built and sold.

This move allows the company to immediately get back 100% of the capital it spent on the project. That cash is now free to be pumped back into the core business—hiring more people, buying new equipment, or funding R&D—instead of being stuck on the balance sheet as a real estate asset.

Comparing Build To Suit Financing Models

So, which one is better? It really depends on a company's financial situation, its appetite for risk, and how much control it wants over the development process. Each model comes with its own set of pros and cons.

To make the differences crystal clear, here’s a simple side-by-side comparison.

Feature Developer-Led Financing Sale-Leaseback Structure
Initial Capital Outlay None for the tenant. The developer covers all upfront costs. Significant for the tenant. They fund the entire construction.
Development Risk Held by the developer. They manage construction risks and costs. Held by the tenant. They are responsible for project execution.
Process Control Shared. Tenant controls design, but the developer manages the build. Full control for the tenant. They manage the entire process.
Final Ownership The developer/investor owns the property. The investor owns the property after the sale is complete.
Key Benefit Preserves tenant capital and outsources development complexity. Maximizes tenant control and unlocks capital post-construction.

At the end of the day, both paths lead to the same great outcome: a tenant moving into a facility built exactly for their needs. The real difference is who’s in the driver's seat during construction and how the capital and risk are handled along the way.

Understanding the Risks and How to Mitigate Them

Let's be realistic: while getting a custom-built facility sounds perfect, a build-to-suit project is a massive undertaking. It comes with its own unique set of challenges, and ignoring them is a recipe for disaster. Knowing the potential pitfalls from the very beginning is the best way to steer clear of them and keep your project on track.

The first thing you’ll notice is the significant time commitment. We're not talking about a few months here. A typical build-to-suit project can take anywhere from 12 to 36 months from the first sketch to the day you move in. That timeline demands serious patience and a solid long-term vision, because a lot can change—in the market and in your own business—over two or three years.

Managing Costs and Long-Term Commitments

Every tenant's biggest fear? Cost overruns. It's a classic construction problem. Maybe the crew discovers unexpected issues with the land, material prices suddenly spike, or you decide on a last-minute design change. Any of these can blow up the budget. And since your lease rate is tied directly to the final project cost, a bigger price tag means a higher rent payment for the next decade or two.

This is where a rock-solid lease agreement becomes your best friend.

  • Guaranteed Maximum Price (GMP): This is non-negotiable. A GMP clause puts a cap on the total project cost that the developer can use to calculate your rent. It shifts the financial risk of most overruns from your shoulders to theirs.
  • Clear Change Order Process: Things change, but how you handle them matters. Your agreement needs a formal process for any deviation from the original plan. This forces everyone to agree in writing on the cost and schedule implications before any new work starts.

The sheer inflexibility of a long-term lease—often 15 to 20 years or more—is another major risk. Committing to a space for that long means you need to be incredibly confident in your company's future growth and operational plans.

Before you put ink on paper, really stress-test your financial forecasts. What if your business pivots in year seven and you need a completely different kind of space? A savvy negotiator will push for clauses that offer an exit ramp, like rights to sublet, options for future expansion, or even early termination penalties under specific circumstances. A little flexibility now can save you a world of hurt later.

The Importance of Your Development Partner

When it comes down to it, the single best way to sidestep almost every potential problem is to choose the right development partner. This isn't just a contractor you're hiring. They are your guide, your financier, and your project manager all rolled into one. Their experience, financial health, and track record are the bedrock of your project's success.

A developer who has been around the block has seen it all—zoning battles, supply chain nightmares, and permitting delays. That hard-won expertise means they can see problems coming a mile away and solve them before they derail the timeline or the budget.

When you're vetting potential partners, dig deep and look for:

  • A Strong Track Record: Don't just take their word for it. Ask to see a portfolio of similar build-to-suit projects they’ve completed.
  • Financial Stability: Make sure they have the capital and banking relationships to finish a project of this scale, even when things get bumpy.
  • Transparent Communication: The best partners are an open book. They should provide regular, honest updates and keep the lines of communication open from day one to the ribbon-cutting.

A great partnership doesn't eliminate risks, but it turns them into manageable challenges. It transforms a complex, high-stakes construction project into a predictable and successful investment in your company's future.

The Future of Custom Commercial Real Estate

A modern, sustainable commercial building with large windows and green landscaping under a clear blue sky.

The days of one-size-fits-all commercial real estate are numbered. We're seeing a clear shift in the market, where the build-to-suit model is moving from a niche alternative to a core strategy for ambitious, forward-looking companies. This isn't just a trend; it's a response to powerful forces in technology, sustainability, and specialized industries that need facilities as unique as their operations.

Simply put, a generic warehouse or a standard office park just can't keep up with the complex demands of today's most dynamic businesses. The result? A surge in demand for highly specialized properties that have to be designed and built from scratch.

The Rise of Specialized Facilities

The future of build-to-suit is really being written by industries with very specific, often technical, needs. You just can't retrofit a standard building to become a cutting-edge facility for sectors like these:

  • Data Centers: These digital fortresses require massive power loads, advanced cooling systems, and layouts designed for security and airflow—features you'll never find on the open market.
  • Life Science Labs: For R&D, non-negotiable elements like clean rooms, specialized HVAC, and precisely controlled environments are the price of entry.
  • Advanced Manufacturing: As robotics and automation become the norm, facilities need custom floor plans, heavily reinforced foundations, and specific power grids to support them.

For businesses in these fields, build-to-suit isn't just an option; it's the only practical way to get the job done. It allows them to engineer an environment built for pure innovation and peak performance.

As businesses become more specialized, their real estate must follow suit. The build-to-suit model is evolving from a real estate transaction into a core strategic decision that directly enables a company’s long-term growth and resilience.

Sustainability and Technology as Standard

Not too long ago, Environmental, Social, and Governance (ESG) criteria were a nice-to-have. Now, they are a fundamental driver of real estate decisions. A build-to-suit project is the perfect opportunity to weave sustainability into a building's DNA right from the initial blueprints.

This means creating green-certified, highly energy-efficient buildings that not only slash operational costs but also bolster a company's reputation. Looking ahead, integrating the principles of sustainable real estate development isn't just good practice—it's essential for creating assets that will hold their value.

The global market is already reacting. Data centers, for instance, are in such high demand that 100% of new constructions across nine major markets were pre-leased before they were even finished. With the commercial real estate market projected to hit an incredible $120 trillion by 2025, it’s clear that properties designed for customization and sustainability are becoming the most valuable assets out there.

Got Questions? Let's Talk Build-to-Suit Realities

Even with a solid grasp of the build-to-suit process, a few practical questions almost always come up. It's one thing to understand the theory, but it's another to know how it all plays out in the real world. Let's tackle some of the most common "what ifs" that pop up.

How Long Does This Actually Take?

There’s no one-size-fits-all answer here, as the timeline really depends on what you’re building. For a relatively straightforward industrial warehouse, you could be looking at 12-18 months from start to finish. But for a highly specialized facility, like a life science lab with complex systems, that timeline can easily stretch to 24-36 months or even longer.

Several big variables will shape your project’s schedule:

  • Permitting and Zoning: Honestly, navigating the local government approval process can be the most unpredictable and time-consuming part of the whole deal.
  • Site Conditions: Starting with a raw piece of land that needs significant groundwork will add months compared to a site that’s already prepped and ready for construction.
  • Design Complexity: The more unique your architectural plans and the more specialized your internal infrastructure, the more time you'll need to build it right.

Who's on the Hook If Construction Goes Over Budget?

This is the million-dollar question, isn't it? The answer should be clearly spelled out in your lease agreement. In a properly structured deal where the developer is leading the charge, the tenant is typically protected by a Guaranteed Maximum Price (GMP).

This clause is your safety net. It means the developer takes on the financial risk for most cost overruns. The key exception is when the tenant makes changes after the plans are locked and construction is underway. These "change orders" will almost always add costs, which are then passed back to the tenant, usually by adjusting the final lease rate.

What Happens When the Lease Is Up?

A build-to-suit lease is a marathon, not a sprint. We're talking long-term commitments, often 15 to 20 years. When that initial term finally comes to an end, the tenant typically has a few paths forward, all of which should have been negotiated right at the start.

You have to plan for the end at the very beginning. Getting renewal terms, purchase options, or fair market value adjustments locked in upfront is crucial. It gives you long-term flexibility and saves you from major headaches down the road.

Here are the most common scenarios when the lease ends:

  1. Renew the Lease: You can choose to extend your stay for another set period. The new rate is often based on the property's current fair market value.
  2. Buy the Building: Many agreements include a purchase option, allowing you to buy the property at a price that was either predetermined or is based on its market value at the time.
  3. Move On: You can simply pack up and move out. The developer then takes back the property and finds a new tenant.

At Sherer Architects, LLC, we live and breathe this stuff. We're experts at steering clients through every stage of commercial design and construction, transforming even the most complex ideas into buildings that are efficient, lasting, and beautiful. If a custom facility is on your radar, let our decades of experience help shape your vision. See how we can make it happen by visiting https://shererarch.com.

Categories
Uncategorized

A Guide to Sustainable Design Architecture

Sustainable design is a term that gets thrown around a lot these days, but it’s so much more than just a buzzword. At its core, it’s a design philosophy—a way of creating buildings that are in conversation with their environment, rather than in conflict with it.

This approach is all about thinking ahead, focusing on long-term ecological health, smart resource use, and the well-being of the people inside, right from the very first sketch.

Why Sustainable Design Is a Necessity, Not a Trend

To really get a feel for what this means, let's try a simple comparison. Imagine a typical, conventional building is like a gas-guzzling car. It gets you from A to B, but it constantly consumes fuel, spits out exhaust, and requires a ton of maintenance just to keep running.

A sustainably designed building, on the other hand, is more like a well-tended garden. It’s part of a living ecosystem. It gives back, provides shelter, and works with the natural elements around it—the sun, the wind, the rain—to thrive.

This "living garden" approach isn't just a nice idea anymore; it's an urgent necessity. Buildings are one of the world's biggest resource hogs. In 2023 alone, the building sector was responsible for a staggering 32% of global energy demand and 34% of CO₂ emissions. The hard truth is, despite some good intentions, we’re falling behind on our climate goals, which makes this shift in thinking more critical than ever. You can dig into the numbers in the Global Status Report for Buildings and Construction 2024/25.

The Core Philosophy of Sustainable Architecture

When you strip it all down, sustainable architecture is about asking the right questions before you even break ground. How can this building use sunlight to cut down on electricity bills? Can we collect rainwater to irrigate the landscape? What materials can we find nearby that are both beautiful and responsibly sourced, cutting down on the carbon footprint from transportation?

Sustainable design isn't just about bolting solar panels onto a roof. It’s about creating a completely integrated system where the building, its inhabitants, and the natural world can coexist in a healthy, balanced way.

This kind of proactive thinking pays off in some incredibly powerful ways, and the benefits go far beyond just being "green." It's a complete strategy for building better spaces for everyone. The main advantages really boil down to three things:

  • Minimizing Environmental Harm: This is the most obvious one. It means a smaller carbon footprint, less strain on natural resources, and better protection for local ecosystems.
  • Boosting Human Health: We're talking about better indoor air quality and more natural light, which have been proven time and again to make people feel better, think clearer, and be more productive.
  • Delivering Long-Term Financial Value: This is where it really clicks for many owners. Lower utility bills, higher property values, and a building that's better prepared for a future where energy and water are more expensive.

At the end of the day, sustainable design isn't just a passing phase. It's the natural and necessary evolution of architecture, paving the way for a smarter, healthier, and more resilient future.

The Foundational Principles of Green Architecture

To move sustainable design from a lofty concept to a brick-and-mortar reality, architects lean on a set of core principles. These aren't just boxes to tick on a checklist; they're a series of interconnected strategies that create buildings that are better for us and for the planet. Think of them as the pillars holding up the entire structure of a green building.

Each principle tackles a different part of a building's life—from where it sits on the land to how it runs every day. The end game is a holistic system where every choice is made to boost efficiency, improve health, and leave the smallest possible environmental footprint. Let's dig into what these ideas look like in practice.

Optimizing Site Potential

Some of the smartest design decisions are made before a single shovel hits the dirt. True sustainable architecture starts with a profound respect for the land itself. It's about analyzing a site's unique character to work with nature, not against it.

This means studying the sun's path across the sky to capture natural light and warmth in the winter while creating shade in the summer. It also means mapping the prevailing winds to design for natural airflow, cutting down the need for power-hungry air conditioning. By carefully considering the existing landscape, topography, and local ecology, we can place a building to minimize disruption and make the most of what nature already provides.

Minimizing Energy Consumption

A massive goal of any green building is to slash its energy use. We achieve this largely through passive design strategies—clever, low-tech approaches that let the building’s very form and materials do the heavy lifting in maintaining a comfortable temperature.

This includes things like:

  • High-Performance Insulation: Essentially wrapping the building in a tight, thermal blanket to keep heat from escaping in winter or creeping in during summer.
  • Energy-Efficient Windows: Using double- or even triple-paned glass with special coatings to manage heat transfer.
  • Strategic Shading: Designing overhangs, awnings, or even planting trees to block the harsh sun during the hottest parts of the day.

This infographic helps show how the key pillars of sustainable design—Environment, Health, and Economy—all feed into one another.

Infographic about sustainable design architecture

As you can see, a genuinely sustainable building pays dividends in all three areas. It’s about creating structures that are both balanced and built to last.

Conserving Water Resources

Water is a precious and finite resource, and sustainable buildings are designed to treat it that way. This goes far beyond just installing a few low-flow faucets; it means creating smart, integrated systems for managing every drop.

A key strategy is rainwater harvesting, where we collect precipitation from rooftops and store it in cisterns. This water can then be used for things that don't require treated drinking water, like irrigating the landscape or flushing toilets. This simple but incredibly effective technique can cut a building's reliance on municipal water by up to 50% or more.

Using Environmentally Preferable Materials

The materials we choose have a huge say in a building's final environmental toll. A cornerstone of green architecture is the thoughtful selection of sustainable materials for construction. We need to prioritize materials that are:

  • Renewable: Think sustainably harvested wood, cork, or fast-growing bamboo.
  • Recycled: Incorporating materials like reclaimed steel, recycled-content insulation, or crushed concrete.
  • Locally Sourced: This cuts down on the carbon emissions that come from trucking materials across the country.

Enhancing Indoor Environmental Quality

Finally, sustainable design turns its focus inward to create spaces that are genuinely healthy for the people inside them. This principle, known as Indoor Environmental Quality (IEQ), is all about making sure the air we breathe and the light we work in actually contribute to our well-being.

We get there by maximizing natural daylight, ensuring plenty of fresh air circulation, and using non-toxic, low-emission paints, sealants, and furnishings to keep indoor air clean. After all, a building that’s good for the environment should also be good for people.

The Tangible Benefits of Building Sustainably

When we talk about sustainable design, it’s easy to get lost in the ideals. But the truth is, the decision to build green isn't just about ethics—it’s about delivering clear, measurable advantages that you can see and feel.

These aren't abstract concepts. They are real-world gains that show up in your bank account, in the health of your family or employees, and in the resilience of your community. From conserving precious resources to creating spaces that just feel better to be in, the case for sustainable building is incredibly compelling.

And the market agrees. The green building sector is on track to become a $1.37 trillion industry by 2034, and that’s not by accident. This growth is fueled by proven results: buildings with 35% lower emissions and 16.9% reduced operational costs. With 84% of consumers now saying they prefer sustainable homes, it’s clear this is no longer a niche interest but a mainstream expectation. You can explore more of the data behind these green building statistics and market trends.

Environmental and Economic Advantages

The most obvious win for sustainable design is its gentle touch on the environment. When you intentionally design for energy efficiency, water conservation, and responsible material use, you automatically shrink the building’s ecological footprint. That means less pollution, lower carbon emissions, and less strain on local resources.

But here’s where it gets really interesting: those environmental victories translate directly into powerful economic ones. The smart design choices that lower energy and water use also slash your monthly utility bills. Over the life of a building, those savings can be massive.

Green buildings are also just better investments. They often command higher property values and attract discerning tenants willing to pay a premium for a healthier, more efficient space. On top of that, governments frequently offer tax credits and other incentives to encourage green construction, sweetening the deal for developers and owners alike.

Sustainable design turns a building into a high-performing asset. It’s not about spending more; it’s about investing wisely in a structure that costs less to operate, holds its value better, and contributes positively to its environment.

Thinking about the long game is crucial. A conventional building might seem cheaper upfront, but its true cost emerges over decades of high utility bills, maintenance, and lower eventual resale value. A sustainable building, on the other hand, is designed from day one to deliver value throughout its lifespan.

Green Building vs Conventional Building Long-Term Value

Metric Conventional Building Sustainable Building
Energy Costs Higher, subject to price volatility. 25-30% lower on average.
Water Usage High, inefficient fixtures. Up to 40% less water consumed.
Maintenance Frequent, often costly repairs. Lower due to durable materials.
Occupant Health Risk of "sick building syndrome." Improved air quality, better health.
Productivity Standard performance levels. Up to 11% productivity gains.
Resale Value Standard market appreciation. 7-10% higher on average.
Market Appeal Decreasing as standards shift. High and growing demand.

As the table shows, the initial investment in sustainable design pays dividends again and again, creating a building that is not only better for the planet but also a far superior financial asset.

Social and Health Benefits

Beyond the numbers, green architecture has a profound impact on the people who live and work inside. By insisting on non-toxic materials and high-performance ventilation systems, we create spaces with excellent indoor air quality. This simple change can dramatically reduce the risk of respiratory issues and allergies.

Sustainable design also prioritizes a connection to the natural world. Ample daylight isn't just a nice feature—it’s been proven to boost mood, reduce stress, and improve focus.

For a business, this translates into a real competitive edge. Employees in a well-designed green office are often healthier, more engaged, and more productive. In a home, it means creating a sanctuary that truly supports your family’s well-being. These buildings remind us that what’s good for the planet is also great for people.

Practical Strategies in Sustainable Design

Modern sustainable building with large windows and wooden accents

It’s one thing to talk about the principles of sustainable design, but it’s another to see how they come to life. These aren’t just abstract ideas; they are practical, hands-on techniques that architects use every day to create buildings that simply perform better. Let's look at a few of the most impactful strategies that turn green theory into architectural reality.

Think of each strategy as a tool in an architect's toolkit. When used together, they create a building that works with its environment, not against it.

Working with the Sun: Passive Solar Design

One of the most elegant and cost-effective strategies is passive solar design. At its core, this is simply the art of orienting and designing a building to make the most of the sun's free energy—soaking up heat in the winter and deflecting it in the summer. It's an ancient, common-sense approach, now supercharged with modern building science.

Here’s how it works in practice:

  • Strategic Window Placement: Large, south-facing windows are a must. They act like solar collectors, capturing maximum sunlight during colder months when the sun hangs low in the sky.
  • Smart Overhangs: Roof overhangs, awnings, or brise-soleils are precisely calculated to block the high, intense summer sun, preventing the building from overheating.
  • Thermal Mass: This is the building's internal battery. Materials like concrete, stone, or brick are used for floors and walls to absorb the sun's heat during the day and then slowly release it back into the space at night as temperatures drop.

This simple, thoughtful approach can dramatically slash the need for mechanical heating and cooling, which are typically the biggest energy hogs in any building.

The Building Envelope: A High-Performance Shell

Think of a building's envelope—its roof, walls, windows, and foundation—as its skin. A high-performance envelope is like wearing a top-of-the-line technical jacket; it keeps the inside comfortable no matter what the weather is doing outside. It's the building's first and most important line of defense against energy waste.

Creating one involves using advanced insulation to stop heat from moving in or out, and installing high-efficiency windows that insulate just as well as walls while still flooding rooms with natural light. The real goal is to create an airtight seal, eliminating drafts and uncontrolled air leaks. When you achieve that, the building's heating and cooling systems can finally relax.

A well-sealed building envelope is the bedrock of energy efficiency. It ensures the air you've paid to heat or cool actually stays inside, leading to significant and predictable savings on your utility bills, year after year.

Living Architecture: The Power of Green Roofs

A green roof is so much more than a pretty rooftop garden. It's a living, breathing system that delivers a whole host of benefits, both for the building and the environment around it. By covering a roof with vegetation, architects can fundamentally change how a building interacts with its surroundings.

A green roof system can:

  • Boost Insulation: The layers of soil and plants act as a natural insulator, cutting down on heating and cooling costs.
  • Manage Stormwater: Like a giant sponge, a green roof absorbs huge amounts of rainwater, which reduces runoff and eases the strain on city sewer systems.
  • Double a Roof's Lifespan: By shielding the underlying waterproof membrane from harsh UV radiation and extreme temperatures, a green roof can make it last two or even three times longer.

Smart technology is also pushing sustainable design forward. Buildings integrated with IoT and AI can cut energy bills by an incredible 30–50%. At the same time, circular construction methods can reduce on-site waste by up to 90%, leading to cleaner, faster projects. You can learn more about these top trends in sustainable architecture.

When applying these strategies to a home, even the interior details matter. For instance, selecting eco-friendly kitchen cabinets ensures that every part of the design contributes to the home's overall environmental performance.

Let's Talk About the Hurdles in Green Building

It's easy to get excited about the benefits, but let's have an honest conversation. Shifting to sustainable design isn't always a walk in the park. Architects, developers, and building owners run into real-world hurdles that are important to acknowledge.

The good news? These challenges are getting smaller and more manageable every year as the industry catches up.

That Big Question: What About the Upfront Cost?

This is usually the first thing people bring up. It’s true that some specialized materials and high-performance systems can carry a higher price tag than their conventional counterparts. That initial sticker shock can be enough to make anyone think twice and fall back on old, familiar methods.

But focusing only on the initial build cost is like judging a car's value by its down payment alone. You're missing the most important part of the story.

The smart way to look at it is through a life-cycle cost analysis. This just means we zoom out and look at the total cost of a building over its entire life, not just the day it's finished.

Think about it: when you add up decades of lower energy bills, fewer maintenance calls, and even higher property values down the road, that initial investment starts to look incredibly smart. It’s a classic case of spending a little more now to save a whole lot later.

Plus, the market is on our side. The more people demand green products, the more affordable they become. We're seeing the costs of sustainable materials and tech drop year after year. On top of that, there are tons of government incentives, tax credits, and grants out there designed to make the sustainable choice the easy choice.

Finding the Right Materials and People for the Job

Another real-world challenge is just getting your hands on the right stuff. Sourcing truly sustainable materials often takes more homework than just calling up your usual supplier. You have to verify where a product came from, what it’s made of, and make sure you can get it on site when you need it.

It's not just about materials, either. Green building often demands specific skills. Finding a crew that has real experience installing an airtight building envelope or a complex green roof system can be tough, depending on where your project is.

But here too, the tide is turning. These challenges are getting easier to overcome every day.

  • Better Supply Chains: The network of suppliers for certified green materials is growing fast. Online databases and improved logistics make it much simpler to find and order exactly what you need.
  • A More Skilled Workforce: Professional organizations and trade schools are stepping up with new training and certification programs. This is creating a much deeper pool of skilled green-building professionals.
  • Working Together from Day One: Smarter project management approaches, like Integrated Project Delivery (IPD), are becoming more common. This gets the architects, engineers, and builders in the same room from the very beginning, making sure the team has the right expertise to bring a sustainable vision to life.

Getting past these hurdles really comes down to planning ahead and working collaboratively. With the right strategy, these aren't roadblocks—they're just steps on the path to creating better, stronger, and more responsible buildings.

The Future of Sustainable Architecture

Futuristic sustainable building seamlessly integrated with nature

When we look at the horizon for sustainable design, we’re not just talking about fine-tuning what we already do. The real shift is in completely rethinking how our buildings relate to the world around them. The next wave of innovation is pushing past simple efficiency, aiming for structures that actively heal, adapt, and give back to their environment.

This forward-thinking mindset is already producing some game-changing ideas. Each one gives us a peek into a future where buildings act less like static objects and more like living, breathing parts of an ecosystem.

Key Innovations Shaping Tomorrow

Here are a few of the concepts that are truly pointing the way forward:

  • Net-Zero Buildings: Picture this: a building that generates as much energy as it uses over the course of a year. That’s the core idea behind net-zero design. By pairing hyper-efficient systems with on-site renewable energy, like solar panels, we can create structures that are completely self-sufficient.

  • Biophilic Design: This is about more than just scattering a few potted plants around. It’s a deep, meaningful integration of nature into the very fabric of a building. We're talking about living walls that clean the air, light wells that flood spaces with natural sunlight, and organic shapes that instinctively calm us and boost our well-being.

The ultimate goal is to erase the line between indoors and outdoors, fostering a constant, restorative connection to the natural world.

  • Circular Economy Principles: The old model was "build, use, demolish." The new way of thinking is to design for disassembly. Materials are no longer seen as disposable but as valuable assets to be recovered, reused, or repurposed. This turns buildings into "material banks" for the future and practically eliminates the idea of construction waste.

Pushing this evolution even faster are breakthroughs like smart materials that can adapt to changing temperatures or light, and AI-driven building management systems that optimize energy use second by second. The future of architecture isn't just green—it's resilient, restorative, and profoundly connected to nature.

Frequently Asked Questions

It’s completely normal to have questions when you first dive into sustainable design. There’s a lot of information out there, and it can be tough to sort through the buzzwords to find what really matters for your project.

We get it. To help clear things up, here are a few straightforward answers to the questions we hear most often.

How Is Sustainable Architecture Different from Regular Architecture?

Think about it like this: traditional architecture has always focused on two main things—how a building looks (aesthetics) and how it works (function). Sustainable architecture doesn't ignore those, but it adds a critical third dimension: long-term impact.

It’s about designing with a much wider lens. Instead of just solving for today, we're looking at the building's entire life, from where the materials come from all the way to how it might one day be repurposed. The goal is to create spaces that are not only beautiful and functional but also healthier for people and lighter on the planet.

Do Green Buildings Always Cost More to Build?

That’s probably the biggest myth we have to bust. While some high-tech green features can add to the upfront budget, smart sustainable design doesn't have to cost more. In fact, clever passive design strategies—like orienting a building to capture natural light and warmth—can actually reduce the need for expensive mechanical systems from day one.

The key is to think about the total cost of ownership, not just the initial price tag.

A sustainably designed building is an asset that pays you back over time. With lower utility bills, fewer maintenance needs, and higher property values, the long-term savings almost always make it the smarter financial choice.

Can Any Building Be Made Sustainable?

Yes, absolutely. While starting from scratch with a new build makes it simpler to integrate sustainable features, existing buildings represent a huge opportunity. We can take an older structure and thoughtfully retrofit it with modern, efficient systems and healthier materials.

This approach, known as adaptive reuse, is incredibly sustainable in its own right. It saves all the energy and carbon—the embodied carbon—that was spent to construct the building in the first place. With the right expertise, even a historic landmark can become a model of modern performance without losing an ounce of its character. It's a brilliant way to breathe new life into our communities while cutting down on waste.


At Sherer Architects, LLC, we're here to help you navigate the complexities of sustainable design, whether it's a new commercial building, an adaptive reuse project, or a historic preservation effort. We blend enduring design with future-focused performance.

Ready to start the conversation? Contact us today to bring your vision to life.

Categories
news

architects design process: From Concept to Construction

When you’re developing a commercial property, the architect's design process isn't just about drawing up plans. It’s a strategic, six-phase roadmap that systematically turns a concept into a tangible, profitable asset. For anyone with a stake in commercial real estate—developers, investors, or future tenants—getting a handle on this journey is crucial for managing risk and making sure the final building hits its financial and operational targets.

Demystifying the Architectural Roadmap

Think of the architects design process as the project's central nervous system. It’s far more than just sketching; it's a disciplined framework that ensures every single decision, from the initial site analysis to the final doorknob, is intentional and directly supports the project's business goals. This structured approach coordinates everyone involved—engineers, contractors, and investors—and provides clear checkpoints for approvals, budget reviews, and strategic adjustments along the way.

The infographic below lays out this journey, showing how a simple idea progresses through distinct stages to become a valuable property.

Infographic about architects design process

As you can see, each phase logically builds on the one before it. This step-by-step progression is designed to eliminate guesswork and give stakeholders a firm grip on the project's direction.

The Value of a Structured Process

Following a well-defined process isn't just about good project management—it’s about profitability. The global architectural services market was valued at a massive $360.8 billion in 2022 and is expected to climb to $549.6 billion by 2032. What's really telling is that roughly 70% of an architectural firm's revenue is generated in the early design and planning stages. This highlights just how critical these initial phases are to the financial success of the entire construction lifecycle.

A structured design process is your best defense against the classic project killers: scope creep, budget overruns, and mismatched expectations. It breaks down the immense complexity of construction into a predictable and manageable series of steps.

Before we dive into the details of each stage, here's a quick overview of what to expect.

The Six Phases of the Architectural Design Process

Phase Primary Goal Key Outcome for Stakeholders
1. Programming Define what the building needs to do and be. A clear project scope, budget, and list of requirements.
2. Schematic Design Explore initial design concepts and spatial relationships. Basic floor plans, sketches, and a general sense of the building's look and feel.
3. Design Development Refine the design and specify major systems and materials. Detailed drawings and specifications for stakeholder review and cost analysis.
4. Construction Documents Create the detailed technical "instruction manual" for construction. A complete set of drawings and specs for bidding, permitting, and building.
5. Bidding & Approvals Select a contractor and obtain necessary permits. A signed construction contract and official permission to start building.
6. Construction Administration Oversee the construction to ensure it matches the design. A completed, quality-checked building ready for occupancy.

This table provides a high-level roadmap of the journey from an idea to a finished building, highlighting the critical decision points for stakeholders at each step.

A Roadmap for All Building Types

This six-phase framework is incredibly versatile and applies to nearly any commercial project you can imagine. Whether you’re developing a sleek new office tower, retrofitting a historic warehouse, or planning a sprawling industrial park, the fundamental principles hold true. The process can also be adapted for specific construction methods, like understanding the nuances of a custom steel building design process.

Ultimately, this roadmap provides three essential benefits:

  • Clarity: It forces everyone to agree on the project's goals and requirements right from the start.
  • Accountability: Roles and responsibilities are clearly defined for every person involved.
  • Risk Mitigation: Potential problems with the design, budget, or regulations are spotted early, when they're easiest to fix.

By understanding and embracing this process, you can steer your next commercial real estate project with confidence, knowing you have a proven system for turning architectural vision into measurable financial value.

Building the Strategic Foundation with Programming

Before a single line is drawn, every great building starts with a conversation. This foundational phase is called Programming, or sometimes Pre-Design, and it’s where we essentially write the business plan for the building itself. It's a critical deep-dive where the architect and key stakeholders get together to figure out the project's "why" long before we get to the "what."

Think of it like developing a recipe before you even touch a mixing bowl. You wouldn't start baking without knowing the ingredients (who will use the space and how), the measurements (how much space they need), and the instructions (the budget and timeline). Programming is all about getting that recipe perfect to eliminate the guesswork.

During this phase, the architect acts more like an investigator, gathering and analyzing all the crucial data needed to create a comprehensive project brief—the official architectural program.

Key Discovery Areas in Programming

To build this solid foundation, architects dig into a few key areas:

  • Stakeholder Interviews: We sit down with everyone who has a stake in the project—developers, investors, department heads, and even potential future tenants—to truly understand their goals, day-to-day operational needs, and what success looks like to them.
  • Site Analysis: This involves getting to know the property inside and out. We look at the topography, where the access points are, how the sun moves across the site, and what existing infrastructure is in place. This helps us spot both big opportunities and potential roadblocks.
  • Zoning and Code Research: Here, we dive headfirst into the maze of local regulations, land-use laws, and building codes. The goal is to get a crystal-clear picture of what's legally possible to build on that specific piece of land.
  • Budget and Schedule Alignment: It’s all about a reality check. We work to establish financial parameters and a project timeline that actually make sense for the owner’s business goals and the current market.

You could argue this is the single most important part of the entire architectural design process. Why? Because it ensures every single design decision made later on is directly tied to clear, measurable business objectives.

For commercial real estate developers and investors, the Programming phase is your point of maximum leverage. The decisions made here have the biggest impact on project ROI and long-term operational efficiency for the lowest relative cost.

The Final Deliverable: An Architectural Program

The outcome of all this work isn't a drawing; it's a document. The architectural program is a detailed report that spells out the entire scope of the project. It usually includes a list of all required spaces, their approximate sizes, how they need to relate to each other functionally, and, of course, the overall project goals and budget.

This document becomes the strategic roadmap for the rest of the design journey. Getting it right from the start is the best way to prevent expensive changes down the road and ensures the architectural vision is perfectly aligned with the business vision from day one.

Turning Ideas into Concepts in Schematic Design

Once the programming phase has laid the strategic groundwork, the real fun begins. We move from the 'what' and 'why' to the 'how'—this is the Schematic Design phase, where abstract needs start to take on a physical form. It's easily the most creative and visually exciting part of the whole process.

Architect sketching schematic designs on a tablet

Think of the program as a detailed recipe. Schematic design is like making the first rough draft of the dish. The architect starts sketching, building simple 3D "massing" models (which often look like digital blocks), and drawing up basic floor plans. The goal isn't to get bogged down in details but to get the big-picture relationships right.

Exploring the Core Design Questions

During this phase, the design team is wrestling with the fundamental questions that will define the entire project. It's all about establishing a clear direction by exploring:

  • Spatial Relationships: How do the different spaces connect? Where are the main hallways and stairwells that people will use to move through the building?
  • Site Integration: How does the building actually sit on the property? We're looking at its orientation to the sun, the best views, and where people will enter and exit.
  • Scale and Form: What will be the building's overall size and shape? What will it generally look like from the outside?

This stage is all about iteration. The architect will likely sketch out several different concepts and present them to you and other stakeholders. This back-and-forth is critical; it ensures the design is heading in a direction everyone agrees with before a ton of time is spent fleshing it out.

The Role of Technology in Creative Exploration

New technology is making this creative loop faster than ever. The tools of the trade, especially architecture design software, are evolving constantly. For instance, new AI-powered tools are popping up that can take a single hand sketch and generate multiple detailed renderings almost instantly. This kind of tech, like the toolkit developed by SRI International, lets architects test more ideas in less time, helping them navigate complex projects and stay focused on the creative solutions.

Schematic Design is the first major go/no-go moment for stakeholders. This is your chance to validate the project's core direction and make high-impact choices before committing serious money to the next phases.

Key Deliverables and Stakeholder Decisions

The Schematic Design phase wraps up with a package of drawings that gives everyone a clear picture of the proposed design. It’s not the final blueprint by any means, but it’s more than enough to get stakeholder buy-in.

This package usually includes:

  • A Site Plan: Shows exactly where the building will be placed on the property.
  • Basic Floor Plans: Outlines the general layout and flow of the rooms inside.
  • Key Elevations: Drawings of the main exterior walls to show the building's look and feel.
  • Preliminary Building Sections: A few cross-section views to show things like floor-to-ceiling heights.

For anyone involved in the commercial real estate side, this is your moment. You'll confirm the concept fits market needs, aligns with the financial projections, and properly reflects the intended brand. Giving the green light on the schematic design means you're ready to start digging into the details.

Refining the Details During Design Development

Once the schematic design gets the green light, we move into what's known as Design Development, or DD. If the schematic was the broad-stroke sketch of the building, DD is where we start adding the color, texture, and real-world details. This is the critical stage where abstract ideas get hammered into a tangible, buildable reality.

Architects and engineers collaborating over detailed building plans

This whole phase is an exercise in intense coordination. The architectural team now works hand-in-glove with the engineers to weave the building’s essential systems into the design. Think of it like giving the building its vital organs—the structural frame is the skeleton, the plumbing is its circulatory system, the electrical wiring its nervous system, and the HVAC its respiratory system. They all have to fit and function together perfectly.

For commercial real estate stakeholders, the decisions made during Design Development have a direct and significant impact on three key areas: initial construction costs, long-term operational expenses, and the overall quality and marketability of the final asset.

From Concepts to Concrete Specifications

During DD, the level of detail skyrockets. Those general ideas about materials and systems from the last phase? They now become specific, researched selections. We stop talking in generalities and start defining exactly how this building will be constructed and what it will be made of.

Here’s a look at what’s happening on the ground:

  • Material Selection: We go from "a brick exterior" to choosing a specific brick from a particular manufacturer, right down to its color, texture, and the mortar that will hold it together.
  • System Integration: The engineers are finalizing their layouts. They’re figuring out where every structural beam, every foot of ductwork, and every plumbing line goes, running clash detection to make sure they don’t all try to occupy the same space.
  • Detailed Drawings: Floor plans are sharpened with precise dimensions. The building elevations are updated to show the exact models of windows and doors we've selected.
  • Interior Finishes: This is where we lock in the final choices for flooring, wall coverings, lighting fixtures, and all the other interior elements that shape the user experience.

The Stakeholder's Role in DD

As the owner or developer, your input here is crucial. The decisions get more technical, but they are all fundamentally tied to your budget and the building's future performance.

For example, the architect might present two HVAC options. One has a lower initial cost, but the other, more expensive system could deliver substantial energy savings over the building’s life, directly boosting your net operating income. That's a classic DD-phase decision.

The same goes for the exterior. Choosing a more durable, low-maintenance cladding might cost more upfront but will slash long-term repair and upkeep costs, protecting the asset's value. The architect’s job is to present these options clearly, often with cost-benefit analyses, to help you make the best investment decisions.

The goal is to walk away from the Design Development phase with a comprehensive set of drawings and specifications so detailed that a contractor can put a firm budget to it. This package represents a clear, coordinated vision of the final building, ensuring everything is aligned before we dive into the massive effort of creating construction documents.

4. Crafting the Blueprint: The Construction Documents Phase

After the whirlwind of decisions and coordination in Design Development, the process gets laser-focused. This is the Construction Documents (CD) phase, where every single choice we’ve made is translated into a precise, legally-binding set of instructions for the builder.

If the last phase was about refining the vision, this one is all about creating the instruction manual.

Think of it this way: DD gave us a detailed recipe, but the CDs are the full-scale culinary textbook. There’s absolutely no room left for guesswork. This final package consists of dozens—sometimes hundreds—of drawings, all paired with a massive specification book that details every last material, product, and installation method.

This isn't just about making a guide; it’s one of the most important risk management steps in the entire project. These documents become the backbone of the construction contract, giving contractors the exact information they need to provide solid, apples-to-apples bids. Getting this right prevents a world of hurt—and a lot of expensive change orders—down the road.

The Complete Instruction Manual

The ultimate goal here is creating construction drawings and specifications that are so clear, anyone can build from them. The final CD set is a masterclass in coordination, weaving together the work of the architects and every engineering consultant into a single, seamless package.

This comprehensive set typically breaks down into a few key parts:

  • Architectural Drawings: These are the nitty-gritty plans, elevations, sections, and schedules. They specify everything from the exact construction of a wall to the model number of the door handles.
  • Structural Drawings: This is the complete plan for the building’s skeleton. It includes every foundation detail, beam size, and steel connection point.
  • MEP Drawings: The full schematic for the building’s circulatory and nervous systems—Mechanical, Electrical, and Plumbing. This shows all the ductwork, wiring conduits, and pipe runs.
  • Project Specifications: Often called the "spec book," this is a detailed written document that goes hand-in-hand with the drawings. It outlines quality standards, installation requirements, and performance criteria for every single component in the building.

The level of detail in these documents evolves significantly from the early sketches. What starts as a simple outline becomes a fully articulated set of instructions.

Document Evolution Through Design Phases

Document Type Schematic Design (SD) Design Development (DD) Construction Documents (CD)
Floor Plan Shows basic room layout and overall dimensions. Adds wall thicknesses, door/window locations, and key fixture placements. Includes precise dimensions, wall type tags, and detailed notes for construction.
Building Section A simple cut-through showing floor heights and overall massing. Details structural elements, ceiling heights, and major MEP systems. Fully detailed with material callouts, insulation, and assembly connections.
Specifications A brief outline of major materials and systems. A more detailed spec book defining key products and quality standards. A comprehensive, legally binding volume for every material and installation.

As you can see, each phase layers on more information, moving from broad strokes to microscopic detail, ensuring the final set of documents is ready for the real world of construction.

How Modern Teams Get It Done

Pulling this all together is a monumental task, often requiring large teams of specialists working in perfect sync. The way architects work has changed, too. A 2020 industry survey showed just how much, with 39.1% of architects in a hybrid model and 34.8% working fully remote. This has only pushed the industry to get better at using technology to manage these complex workflows and keep everyone on the same page.

A complete and thoroughly coordinated set of Construction Documents is a project's best insurance policy. It ensures that the final asset delivered by the contractor perfectly matches the vision approved by the stakeholders, both on time and on budget.

Once this exhaustive set is complete, it goes through a final round of intense internal review. After it’s been checked and double-checked for accuracy and coordination, it’s ready for the next big milestone: submission to the local building department to secure the permits needed to finally break ground.

From Blueprint to Reality: Bidding, Approvals, and Construction

With the exhaustive construction documents finally in hand, the architect’s role shifts gears. We move from the world of pure design into the physical reality of building. This final leg of the journey is all about execution, and it’s where your architect becomes your chief advocate and quality enforcer on the ground.

This is where the rubber meets the road—transforming stacks of paper into a tangible, valuable asset.

Architects reviewing construction progress on a build site

First up is the Bidding and Approvals stage. The architect will guide you through the maze of selecting a contractor, making sure you get competitive bids that are actually comparable—an apples-to-apples review based on the detailed plans. At the same time, they'll be quarterbacking the submission of these documents to local authorities to secure all the necessary building permits. This is a non-negotiable legal step before a single shovel can hit the dirt.

Keeping the Project on Track with Construction Administration

Once you’ve hired a contractor and have the permits, the architect’s job transitions into Construction Administration. Don't mistake this for micromanaging the builder. Think of it as having your expert representative right there on the site, protecting your interests.

The architect’s focus now is to:

  • Guard the Design Intent: They make regular site visits to see the work firsthand and make sure it’s being built exactly as specified in the drawings.
  • Solve Problems on the Fly: Construction is unpredictable. When unexpected issues pop up, the architect is there to find solutions that won't compromise the design or blow the budget.
  • Vet Materials and Methods: They review "submittals"—the specific materials, fixtures, and shop drawings the contractor proposes to use—to confirm everything meets the project's quality standards.
  • Approve Payments: Before you cut a check, the architect reviews the contractor’s payment applications to verify that the work you’re paying for has actually been completed to spec.

This phase is arguably your most important quality control mechanism. It’s the safety net that protects your investment and ensures the final building is what you signed up for.

An architect's presence during construction isn't just another line item on the budget; it's an investment in risk management. Their job is to catch mistakes before they become expensive, solve problems, and champion quality, making sure the final asset is delivered exactly as envisioned.

By serving as the central hub for communication and clarification, the architect smooths out the construction process, heads off costly errors, and defends the project's vision from groundbreaking to the final walkthrough. This is what brings the entire architectural journey to a successful, tangible, and profitable conclusion.

Common Questions About the Architect's Design Process

Even with a solid roadmap, you're bound to have questions, especially if you're new to the architect's design process. Let's walk through some of the most common things we hear from commercial real estate stakeholders to give you a clearer picture of the journey ahead.

How Long Does the Design Process Take?

There’s no single answer to this one—it all comes down to the project's scale and complexity.

For a straightforward commercial interior fit-out, you might be looking at 2-4 months for the design phases. If you're planning a medium-sized new build, it’s more realistic to expect 6-12 months of design work before a shovel ever hits the ground.

Large, intricate projects can easily stretch into several years. The biggest variables are the speed of client approvals, how quickly the local jurisdiction moves on permits, and the sheer level of detail required. The best way to keep a project on schedule is to establish a rock-solid program upfront and make firm decisions during the early phases.

What Is the Owner’s Most Important Role?

Your most critical role is to be an active, decisive partner, especially in the early stages of Programming and Schematic Design. Kicking things off with a clear vision, a realistic budget, and a well-defined list of needs is what sets the entire project up for success. When we get into schematic design, your timely feedback is what prevents us from going down paths that lead to expensive changes later on.

As the owner, you are the ultimate decision-maker. Your ability to provide clear, consolidated direction is the single biggest factor in moving a project forward efficiently and ensuring we hit the target.

Simply put, your clarity and decisiveness are what fuel the project's momentum and protect your budget.

How Does BIM Improve the Design Process?

Think of Building Information Modeling (BIM) as creating a single, intelligent 3D digital twin of the project. This isn't just a pretty picture; it’s a game-changer for coordination.

BIM allows the entire team—architects, engineers, and consultants—to work within the same model. We can spot and resolve clashes digitally, like a plumbing line running through a structural beam, long before they become costly rework orders on the construction site.

For you, the owner, this means you get a much better feel for the space through realistic renderings and virtual walkthroughs. This clarity makes decision-making easier and more confident. It also leads to more accurate cost estimates from the get-go and gives you a valuable digital asset for managing the facility long after the doors open.


Navigating the architectural design process is a complex undertaking, but the right partner makes all the difference. At Sherer Architects, LLC, we guide clients through every stage with rigorous research and decades of experience, turning your vision into an enduring, valuable asset. Learn more about our collaborative approach.