SHERER ARCHITECTS

Categories
Uncategorized

Unlocking the Design Processes in Architecture From Vision to Reality

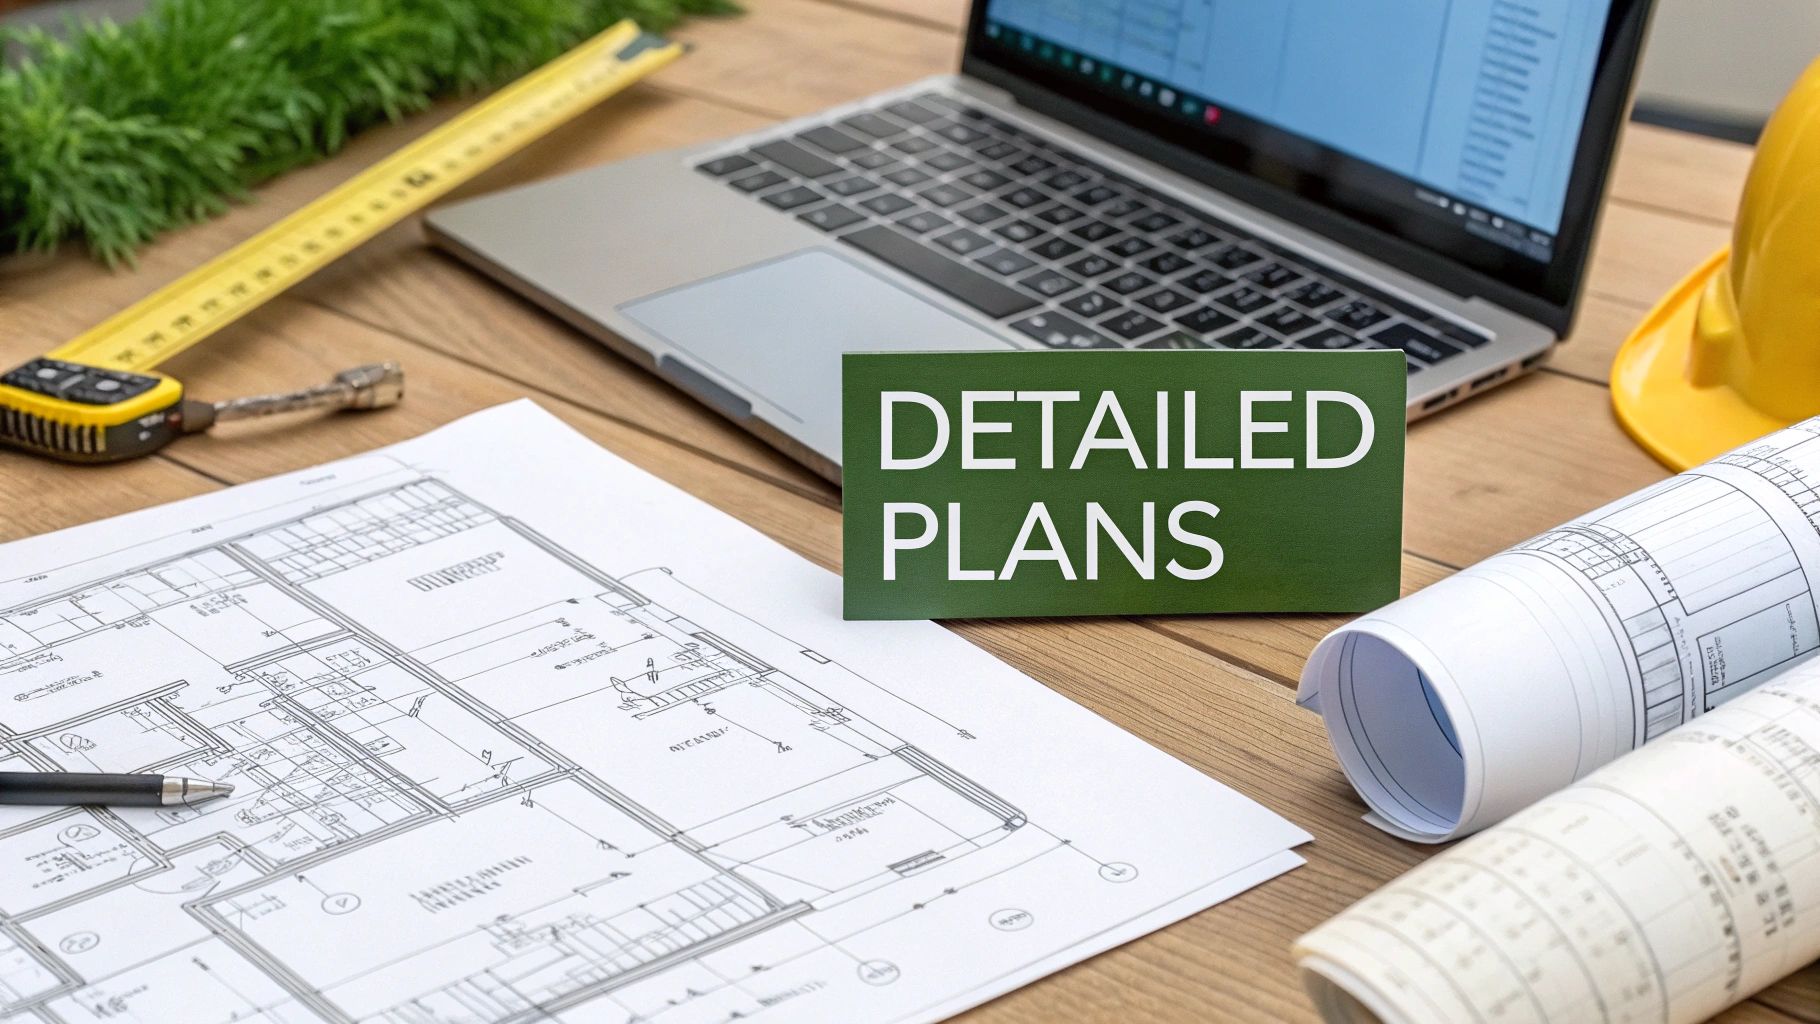
Bringing a building to life is a journey, not a single leap. The design processes in architecture provide a structured, proven path that takes a project from a simple idea all the way to a finished structure. Think of it less as a rigid set of rules and more as a collaborative roadmap, ensuring your vision, budget, and goals are carefully translated into a functional, safe, and beautiful building.

Your Architectural Journey From First Sketch to Final Build

Starting an architectural project without a clear process is a bit like setting off on a cross-country road trip without a map. You know where you want to go, but the route is a mystery, full of wrong turns and unexpected delays. The architectural journey is a deliberate, multi-stage partnership between you and your architect, designed to turn your concept into a physical reality.

Each phase logically builds on the one before it. This ensures every decision is thoughtful, every detail is considered, and the final result is exactly what you hoped for. When you understand these stages, you’re no longer just a passenger; you become an informed co-pilot, ready to make smart decisions, manage your budget, and know what’s coming next. This professional, methodical approach is why the global architectural services market was valued at around $383.65 billion and is expected to climb to $557.29 billion by 2032. The value is in the guidance. If you're curious, you can explore more architecture industry statistics to get a sense of the industry's scale.

A Map of the Design Process

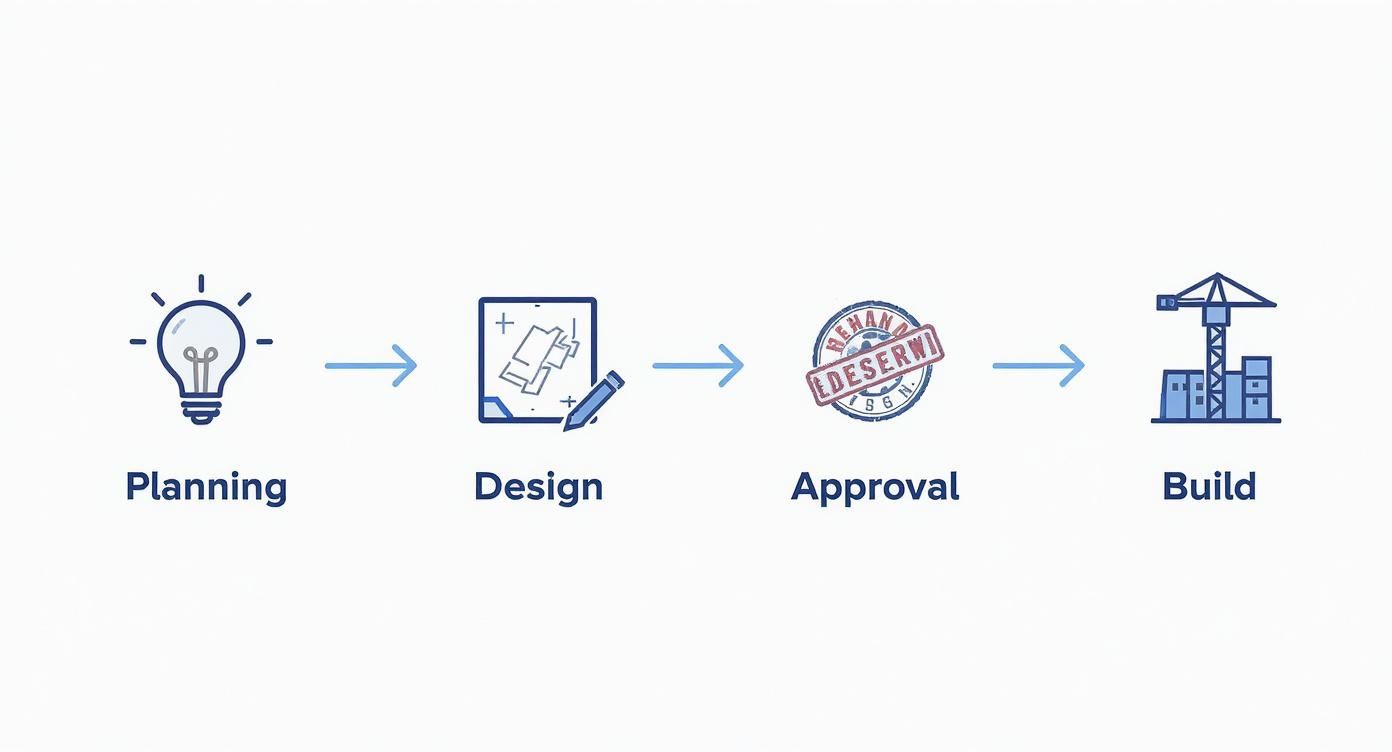
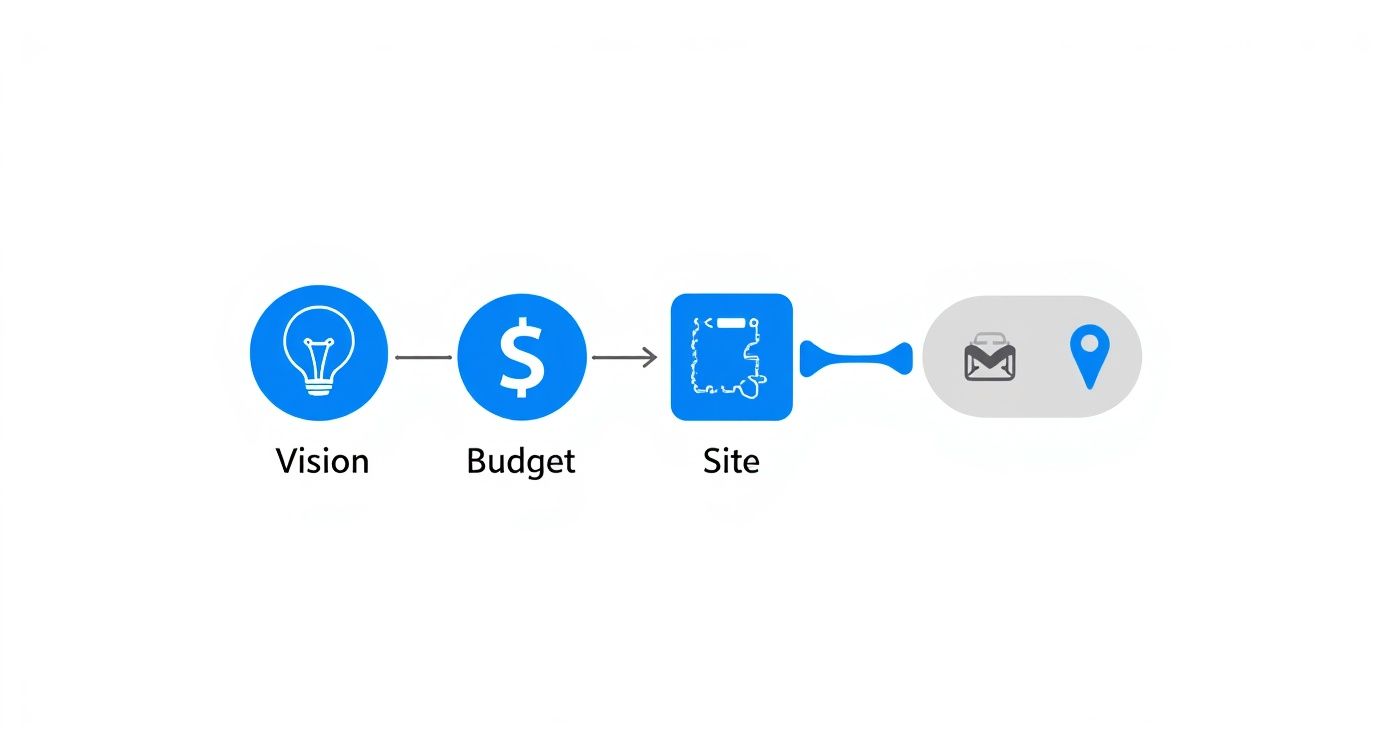
To get our bearings, let's visualize the entire journey as a timeline with six key destinations. Each stop is a critical phase where specific tasks are completed before we can move on to the next.

This flowchart lays out the six core stages of the architectural process, from the initial brainstorming sessions of pre-design to the final oversight during construction.

A comprehensive flowchart outlining the 6 stages of architecture, from pre-design to construction, with associated timelines.

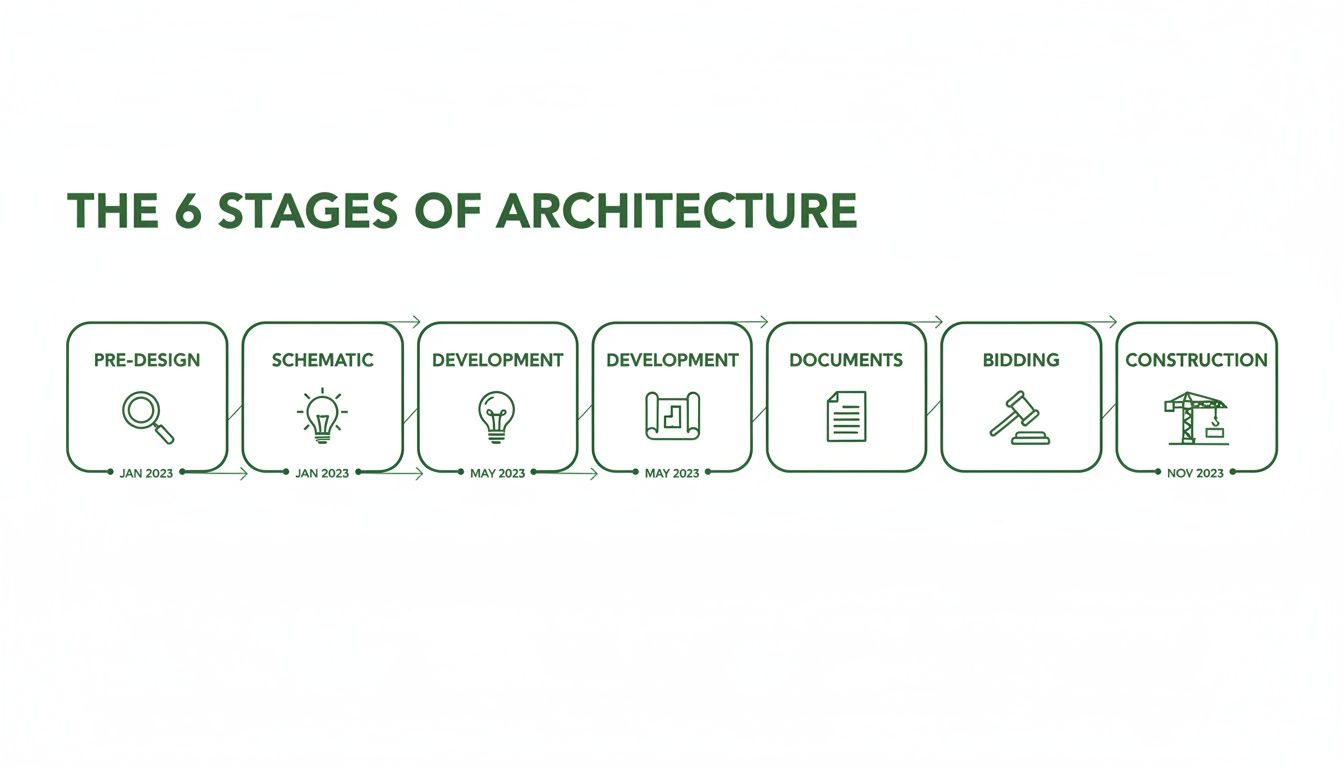
As you can see, the process flows from big-picture ideas to incredibly fine-tuned technical details. This progression makes sure we get the foundation right before we start creating the final, detailed instructions for the builders.

Understanding Each Phase's Purpose

Every stage has a unique purpose, demanding different levels of input from you and producing specific documents and drawings. Knowing what’s happening at each step demystifies the whole experience and helps build a stronger, more effective partnership with your design team.

Great architecture is not born from a single moment of inspiration. It is the result of a rigorous, phased process that carefully balances vision with practicality, creativity with regulation, and budget with ambition.

To give you a quick reference, here's a look at the key stages in the architectural design process, their main goals, and how much of the project timeline they typically occupy.

The 6 Key Stages of Architectural Design

Phase Primary Goal Typical Timeline %
1. Pre-Design Define the project's goals, scope, and budget. 2–5%
2. Schematic Design Translate the program into broad design concepts. 10–15%
3. Design Development Refine the design, selecting materials and systems. 15–20%
4. Construction Docs Create detailed drawings for permitting and building. 35–40%
5. Bidding/Negotiation Select a contractor to build the project. 3–5%
6. Construction Admin Oversee construction to ensure it matches the design. 20–25%

This table provides a high-level snapshot. We'll dive much deeper into each of these phases throughout this guide, exploring what happens, who’s involved, and what it means for you.

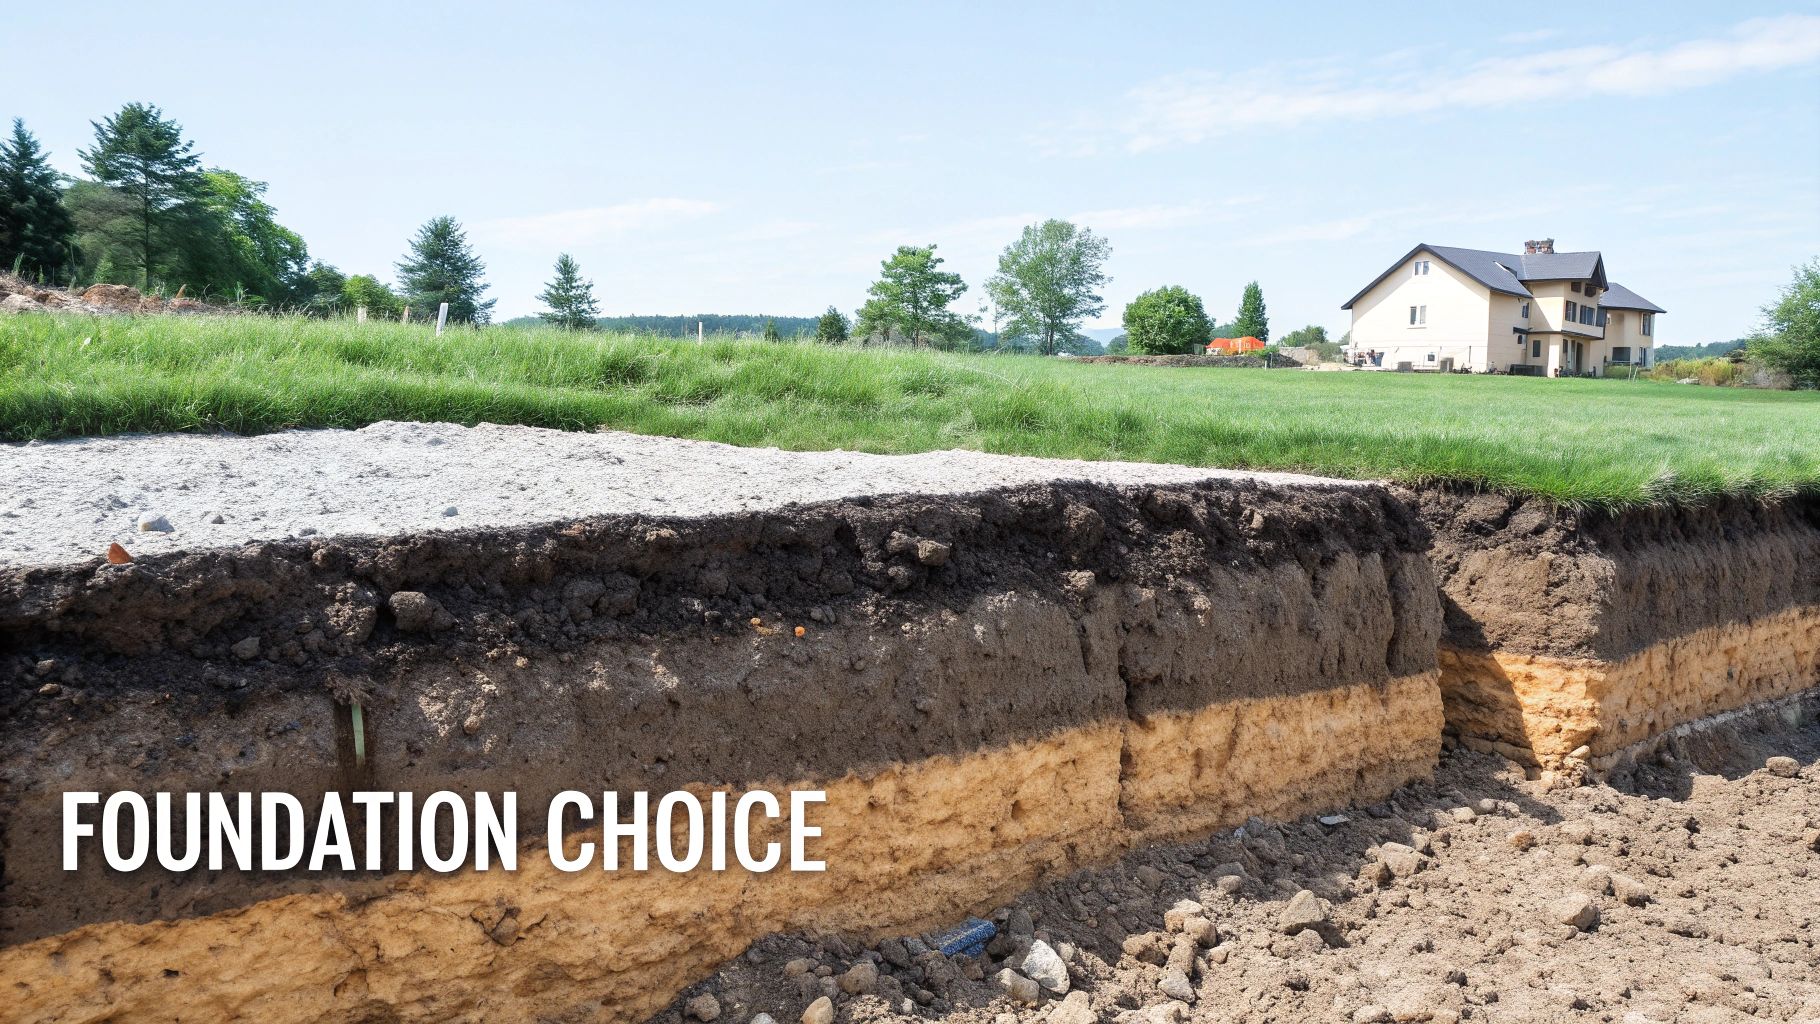
Establishing the Foundation of Your Project

Architectural design workspace with house plans, a model, and a "DESIGN JOURNEY" notebook on a wooden desk.

This is the moment your vision starts its journey into the real world. The beginning of any architectural project is where the most critical decisions are made—the ones that ripple through every subsequent phase, impacting everything from your budget to your final move-in date. It's like laying the foundation for a skyscraper; if the base isn't meticulously planned and flawlessly executed, the entire structure is compromised.

We're going to walk through the first two key phases in the design processes in architecture: Pre-Design and Schematic Design. Think of them as the strategic heart of your project, turning abstract goals into something you can actually see and discuss. Honestly, this is where your input as a client matters most.

Pre-Design: The Discovery Phase

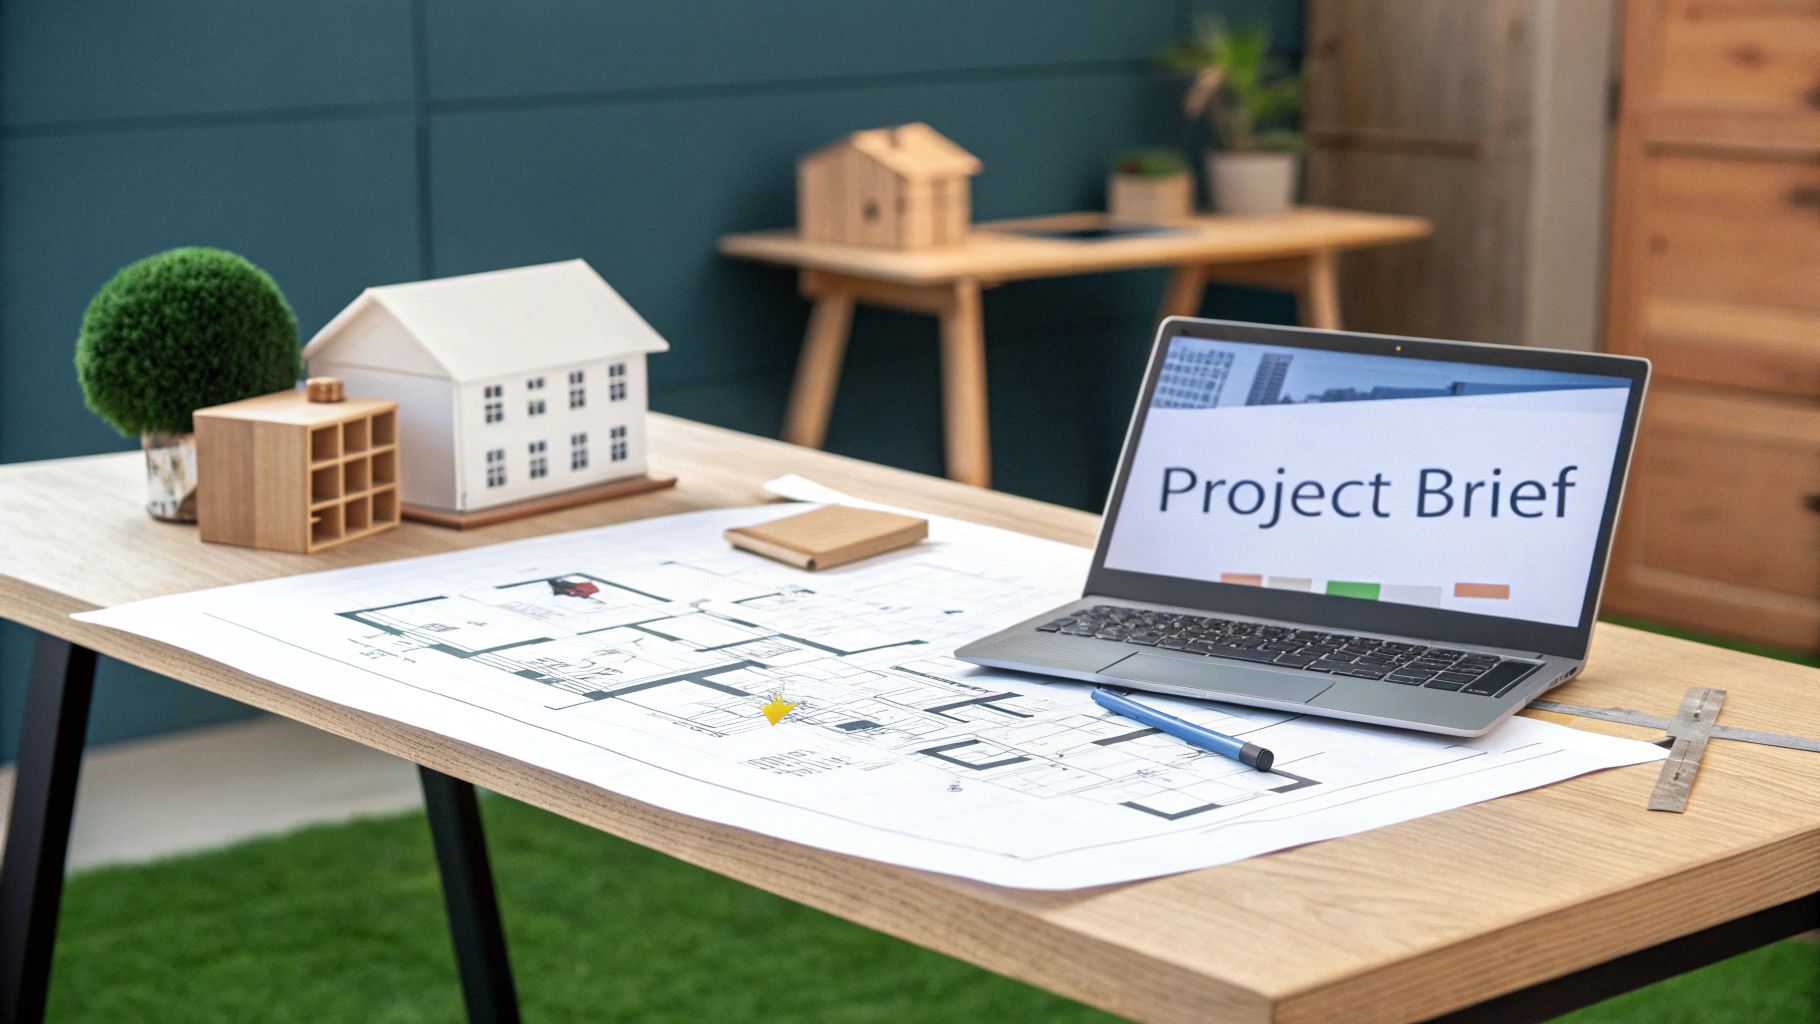
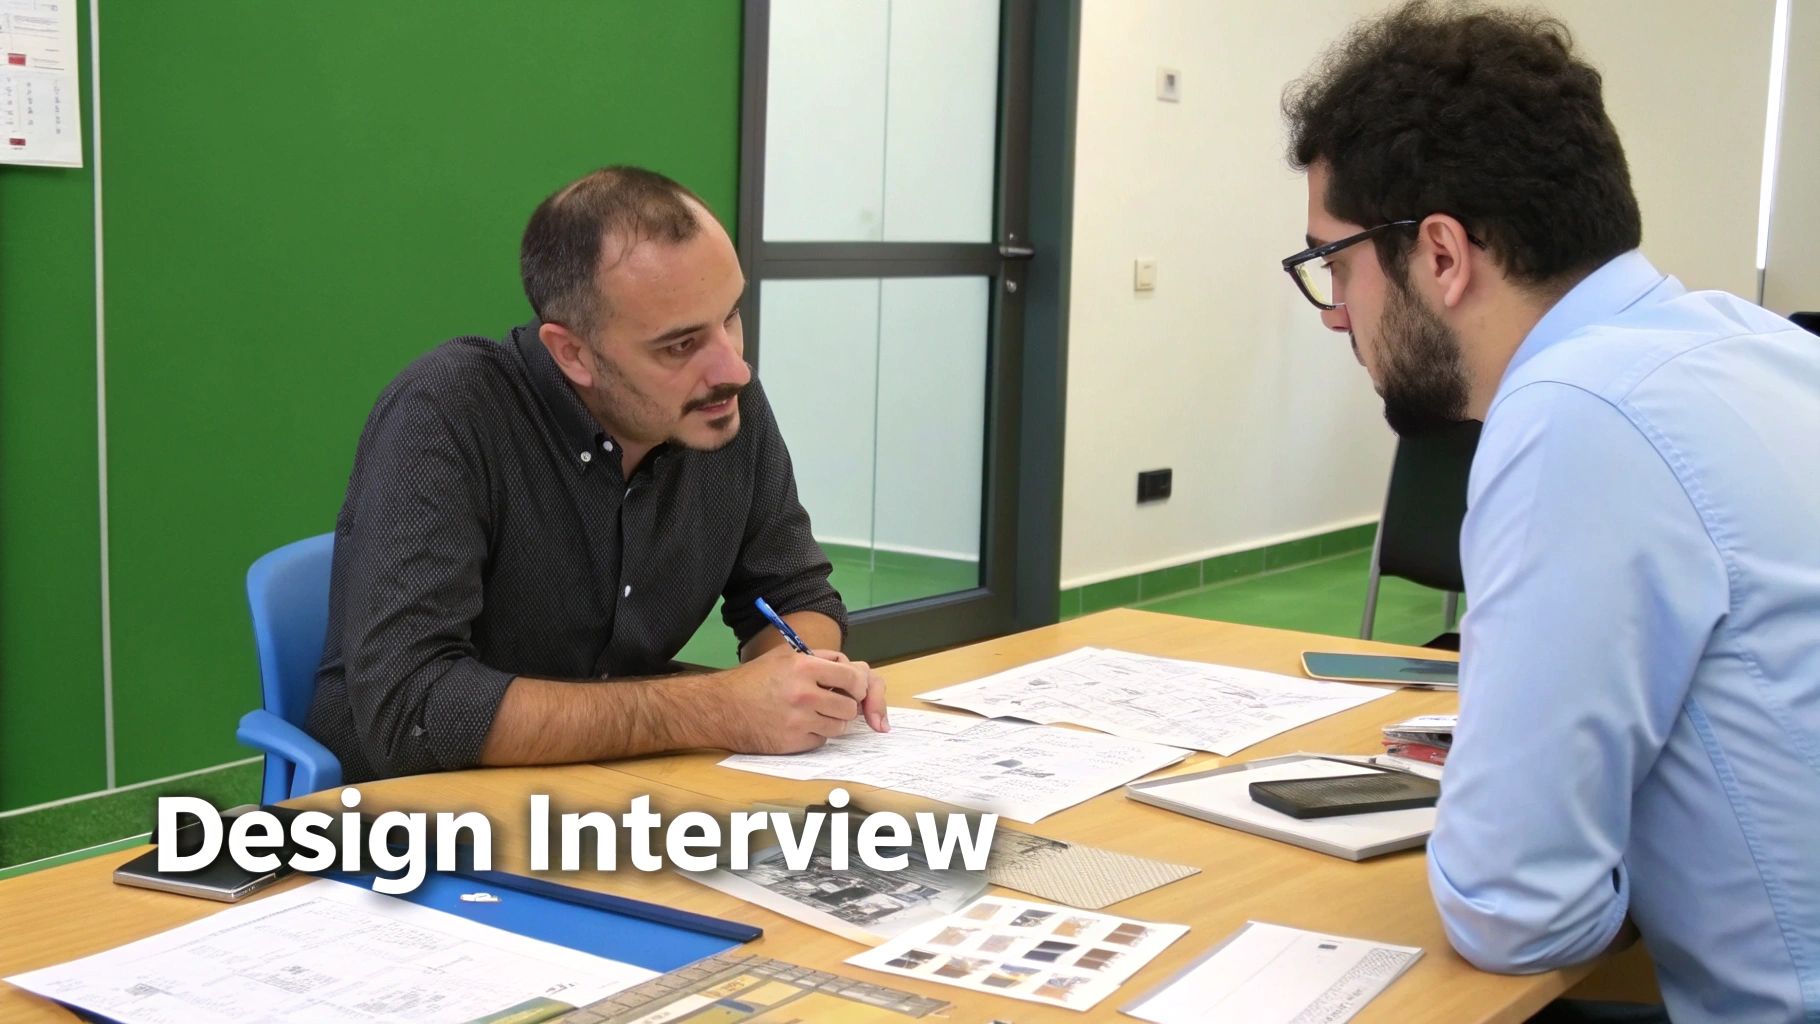
Before anyone even thinks about drawing a line, a great project begins with a conversation. In fact, it starts with a whole series of conversations. This is the Pre-Design phase, a deep-dive investigation where you and your architect collaborate to define the soul of the project. It's all about asking the right questions to make sure everyone is on the same page.

The main goal here is to develop a detailed architectural program. And no, that's not a piece of software. It’s a comprehensive document—a project playbook, really—that spells out exactly what this new building needs to be and do.

A solid program will cover:

  • Project Goals: What is the core purpose of this building? What problems is it meant to solve for you?
  • Functional Needs: How many rooms do you need? Just as important, how do people need to move between them? What specific activities will happen here?
  • Budgetary Constraints: This means having a frank, realistic discussion about the total project cost, from construction and materials to professional fees.
  • Site Analysis: We’ll study the property itself—zoning codes, the lay of the land, how the sun hits it, and any other environmental factors that will shape the design.

This phase is pure strategy. By nailing down the scope with this level of detail, we head off expensive changes and frustrating miscommunications down the line.

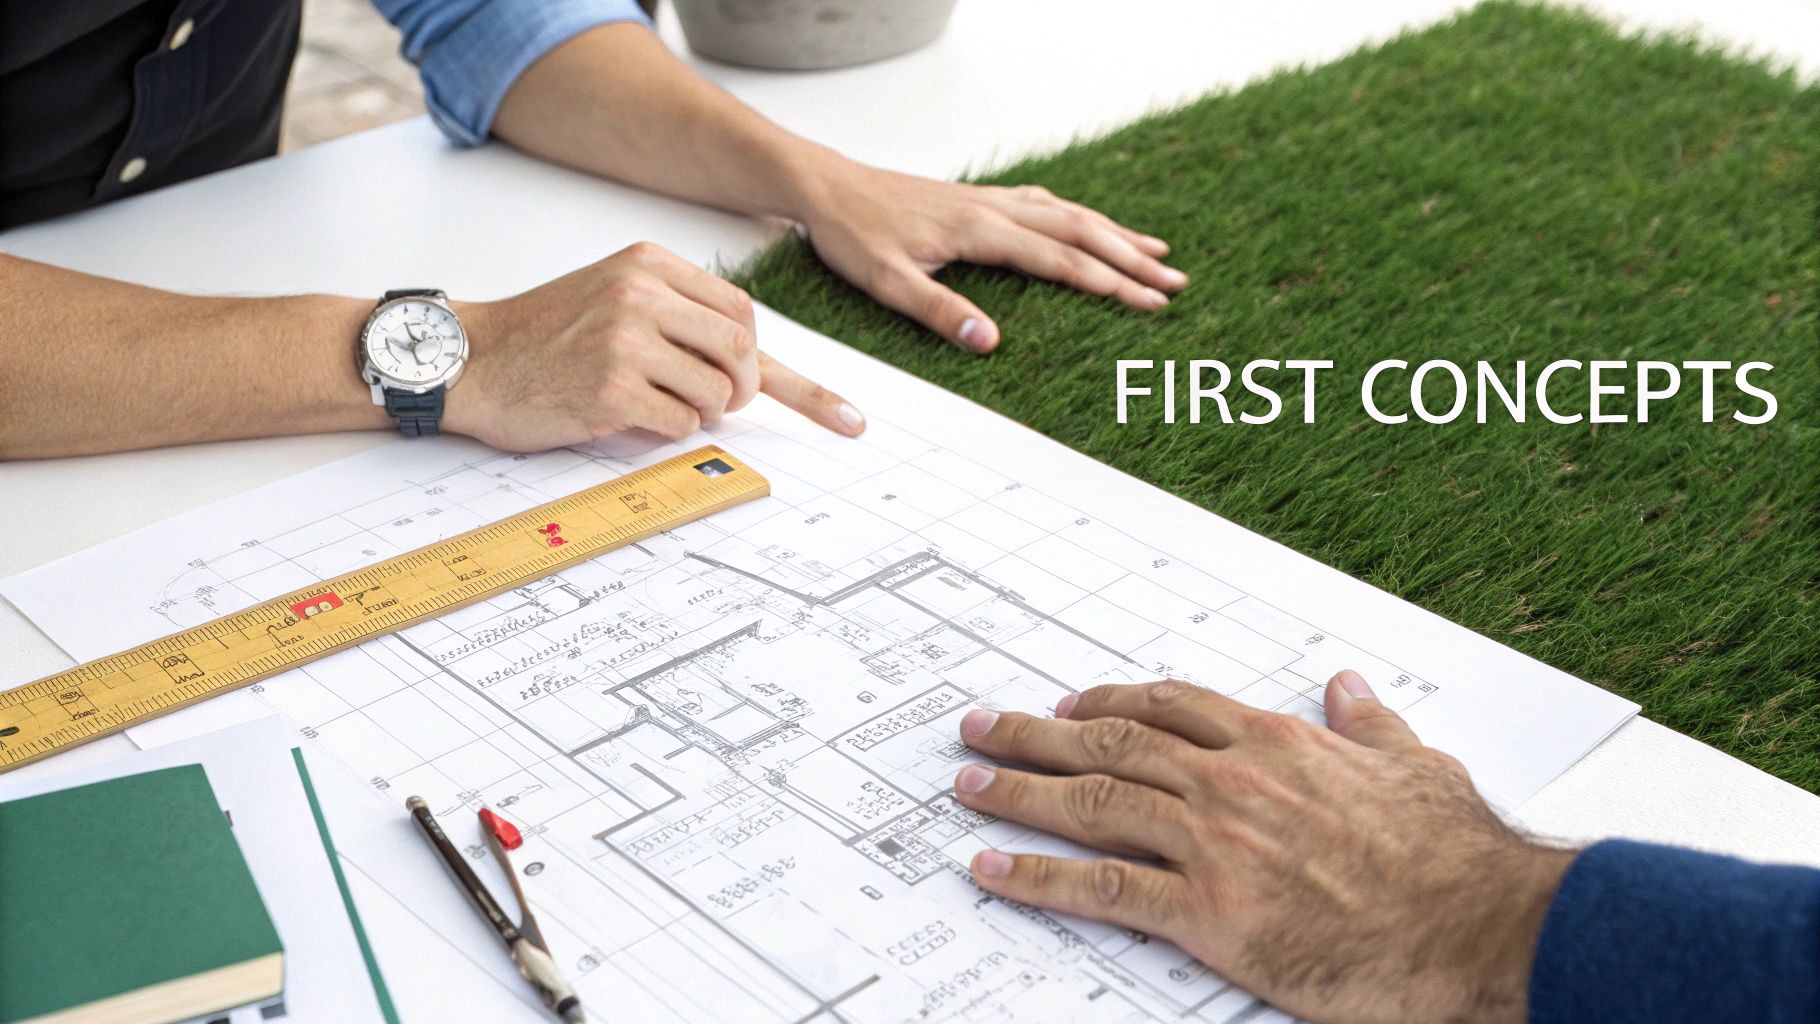
Schematic Design: Giving Ideas a Form

Once we have the program locked in, we can move into Schematic Design. This is where the magic really starts to happen, as all those abstract ideas from Pre-Design get translated into the very first visual concepts. It’s an exciting time, because you finally get to see what your project might look like.

Don't expect detailed blueprints yet. At this stage, your architect will be creating broad-stroke drawings and simple models. It's a highly creative and iterative process focused on exploring the big-picture possibilities, not getting bogged down in the tiny details.

Schematic Design is the bridge between the 'why' and the 'what.' It’s where we test big ideas, explore the building’s personality, and establish a clear direction that will guide the rest of the design process.

The work produced here is intentionally conceptual, designed to spark conversation and get your feedback. You’ll typically see things like:

  • Rough Sketches and Massing Models: Simple 3D models, either physical or digital, that show the building's overall size, shape, and how it sits on the property.
  • Basic Floor Plans: These diagrams illustrate the general layout and show how different rooms and spaces relate to one another.
  • Site Plans: These drawings show how the building connects to its surroundings, including things like driveways, walkways, and initial landscaping ideas.

To really get the functional relationships right, architects often use conceptual tools like an interior design bubble diagram to map out how different spaces should connect and flow. This helps ensure the layout feels intuitive and works efficiently before we commit to a specific design.

Your feedback during this phase is absolutely essential. Now is the time to say what you love, what you're not so sure about, and why. Moving a room is easy on a schematic sketch, but it becomes exponentially more difficult and expensive once we start creating detailed construction drawings. When you sign off on a schematic design, you’re setting the fundamental course for the entire project.

Refining the Blueprint for Construction

Two designers review architectural blueprints and tools on a table, with 'FIRST CONCEPTS' visible.

The creative energy of Schematic Design has given the project its soul and direction. But how do you turn those initial concepts into a building that can actually stand up? That critical jump from a broad idea to a buildable reality happens across two of the most technically demanding phases: Design Development (DD) and Construction Documents (CD).

If Schematic Design was the initial sketch on a napkin, these next two stages are where we create the incredibly detailed, full-color painting.

This is where the design processes in architecture shift from asking "what if?" to defining "exactly how." Your architect's team will start coordinating with a small army of specialized consultants—structural engineers, mechanical and electrical experts, civil engineers—to weave all the complex systems into the design. It's an intense period of problem-solving that solidifies every detail and sets the stage for a smooth construction process.

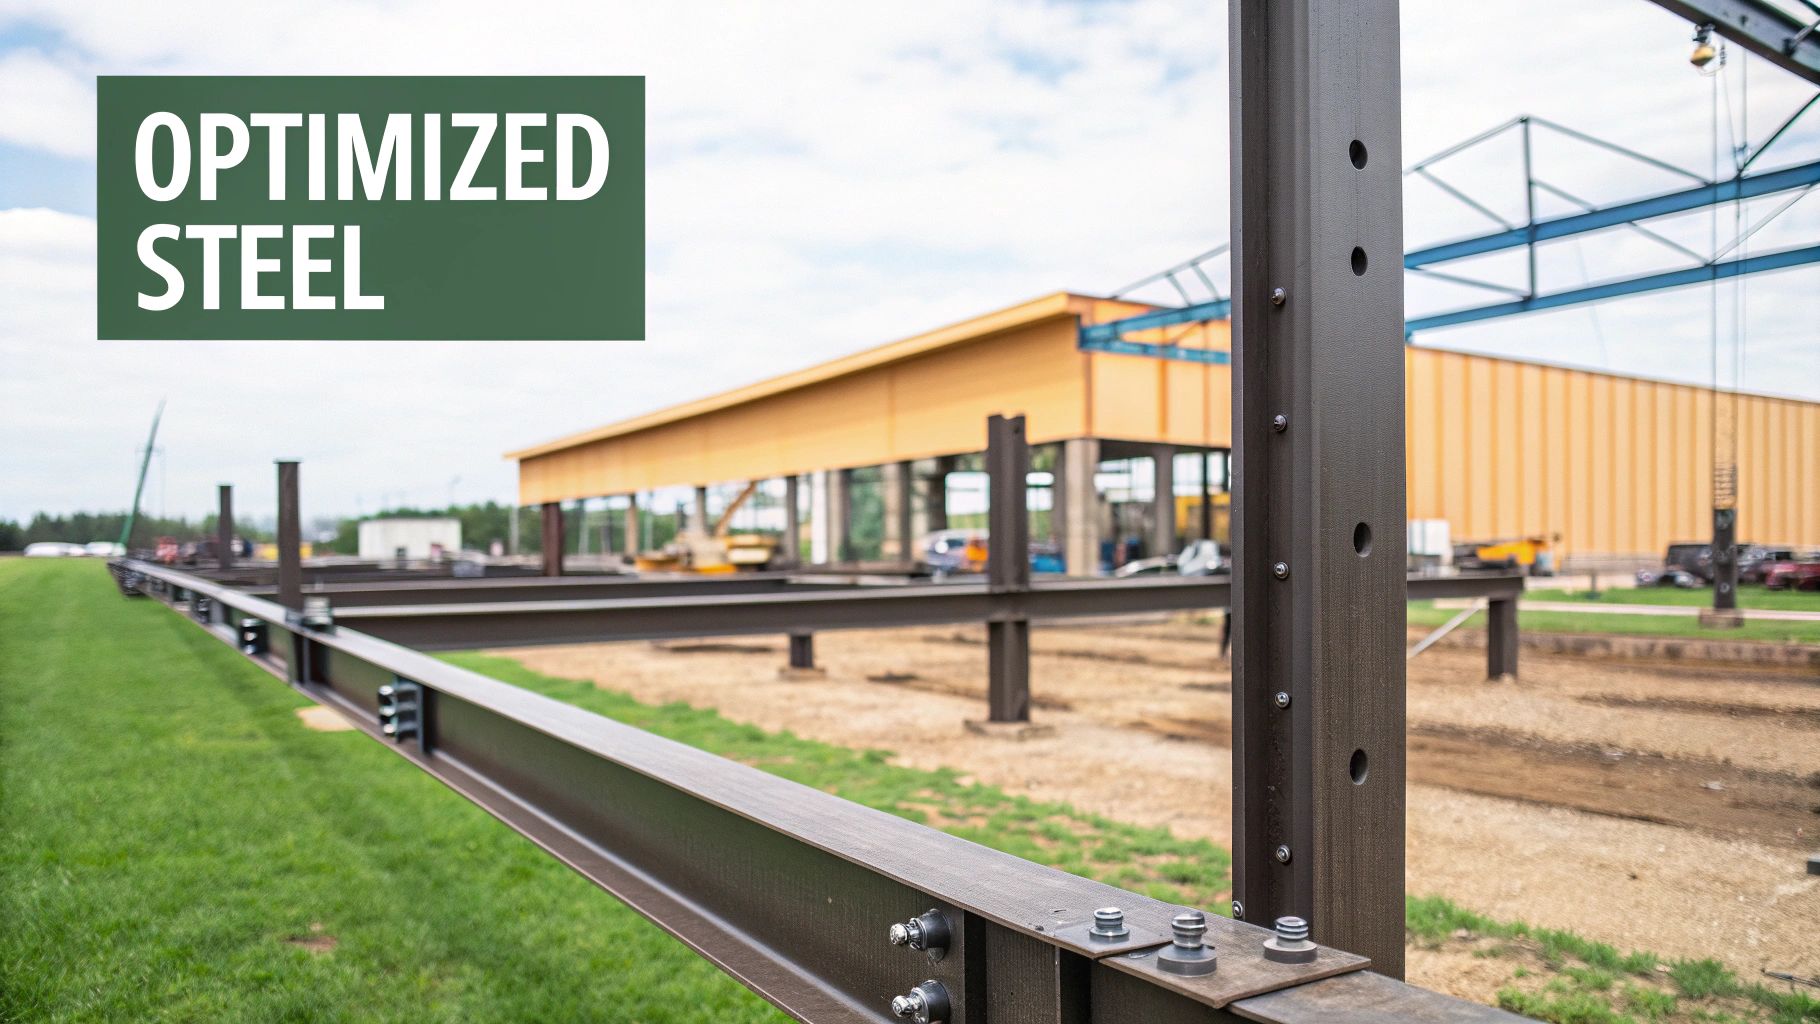
Design Development: Getting Serious with the Details

Think of the Design Development phase as the project's adolescence. The basic identity we established earlier begins to mature, gaining real substance and specific characteristics. The floor plans and exterior look you approved are now fleshed out with a much deeper layer of detail, and critical decisions get locked in for good.

This isn't just about aesthetics anymore; it's about performance. During DD, the team makes firm commitments on major building components that define the building's character and long-term durability.

Your job here is to make the final call on key selections. The big-picture layout is set, but we'll need your input on things like:

  • Material Selections: Finalizing the exterior materials like brick, siding, or metal panels, and choosing key interior finishes.
  • Fixture and Appliance Choices: Picking out the specific plumbing fixtures, lighting, and major appliances that will be installed.
  • Window and Door Specifications: Selecting the exact types, styles, and performance ratings for all windows and doors.

This phase results in a set of drawings and specifications far more detailed than anything you've seen yet. They show precisely how the building is put together, confirming that all its parts and systems work in harmony.

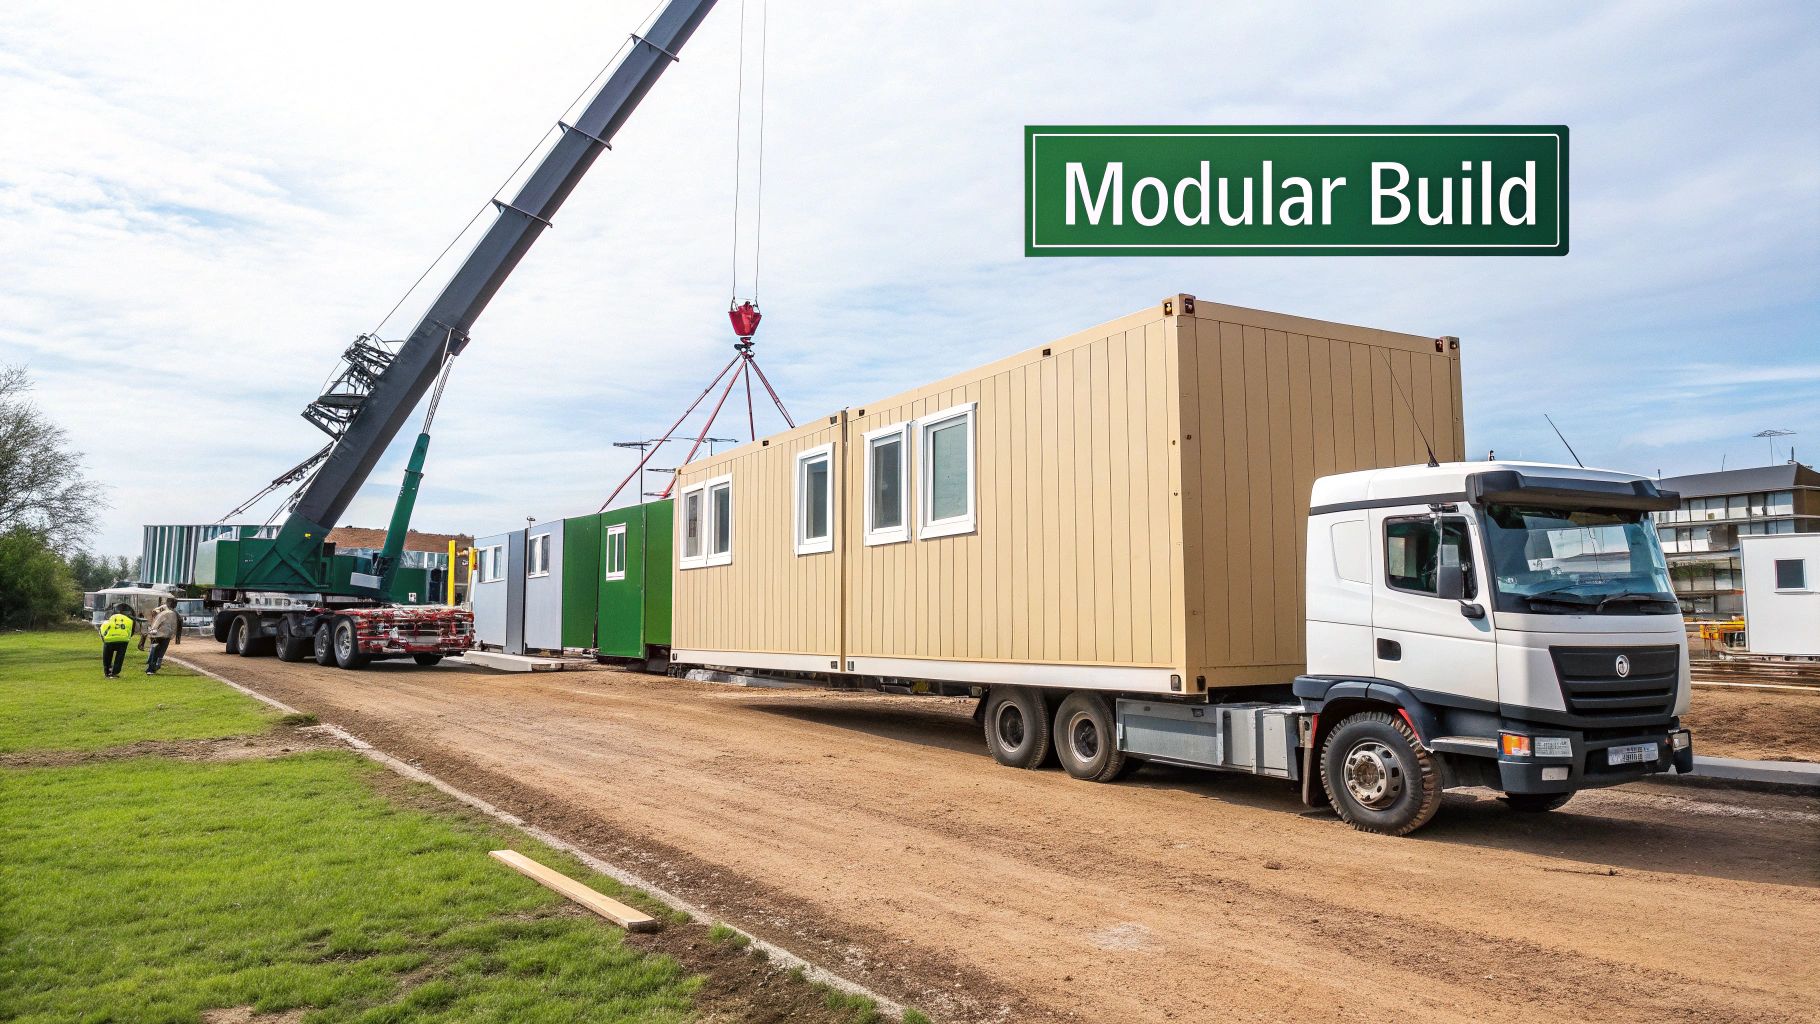
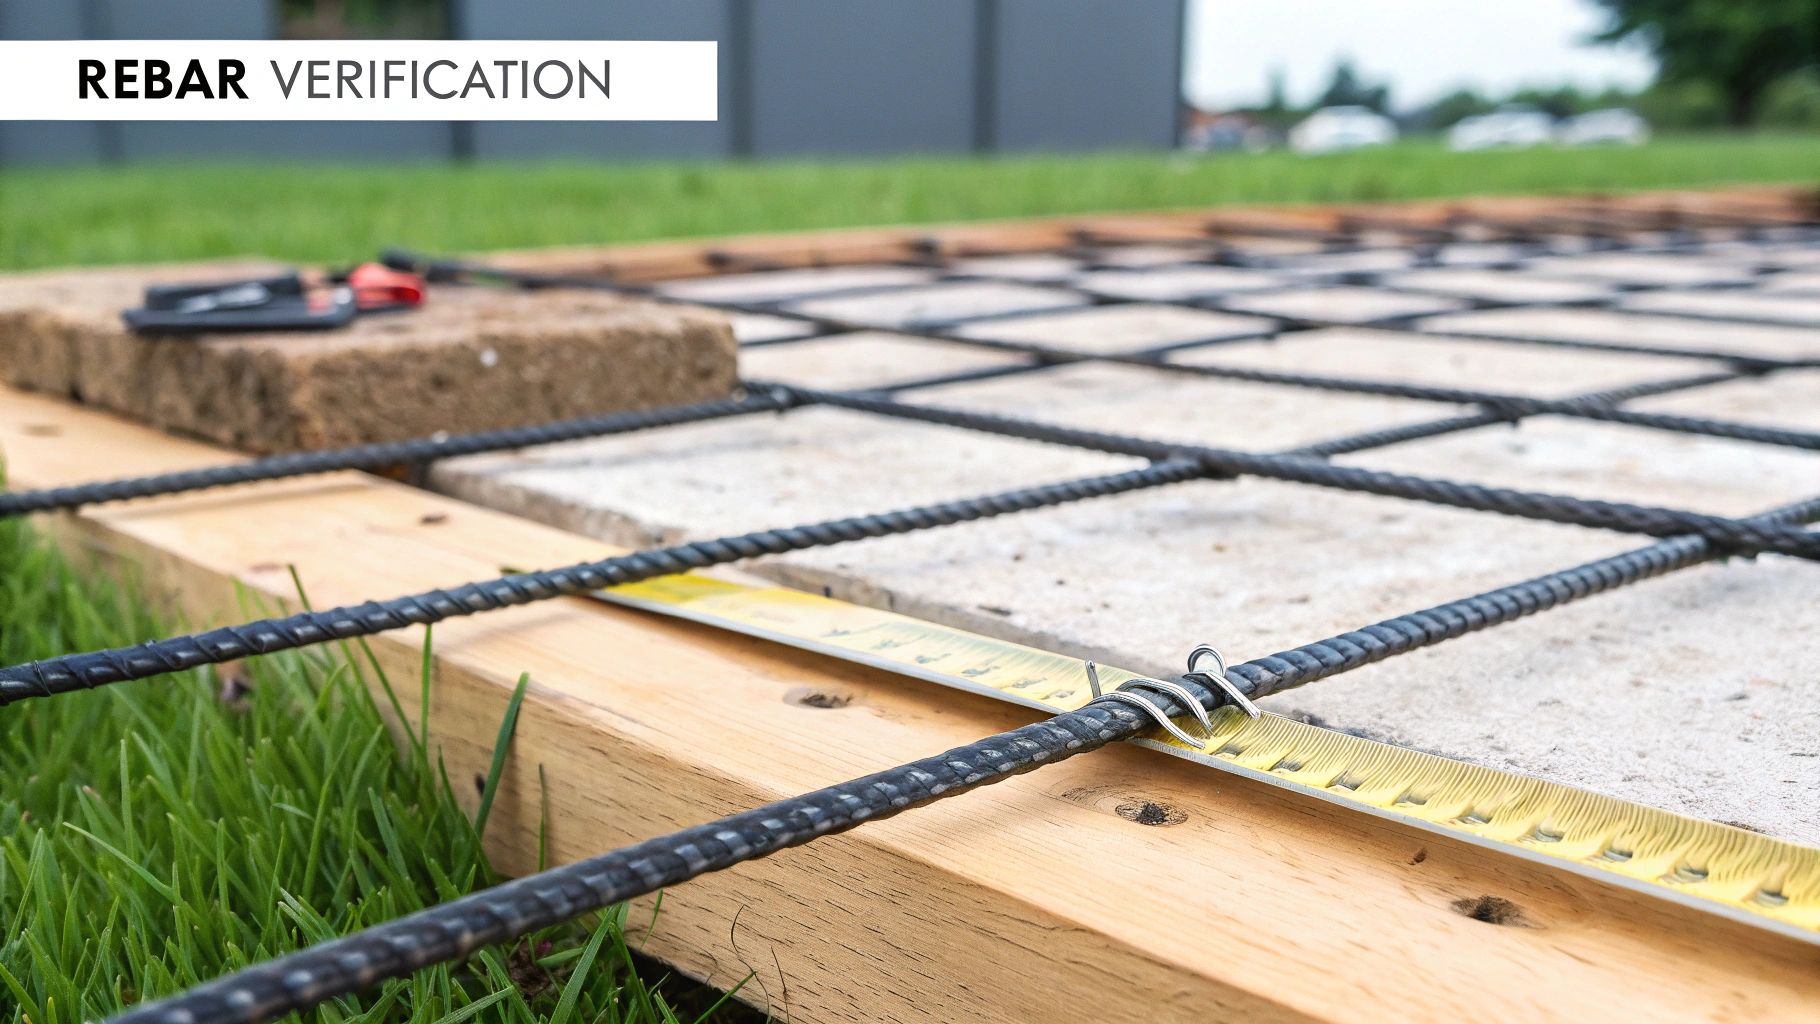
Construction Documents: Creating the Instruction Manual

Once Design Development is done and you've signed off on the refined design, the project moves into the Construction Documents (CD) phase. This is the longest and most demanding stage for the design team, often taking up 35-40% of the entire design schedule. The goal is simple but massive: create a comprehensive, legally binding set of instructions that tells a contractor exactly how to build your project.

Imagine you've bought a highly complex piece of furniture that arrives in hundreds of pieces. The Construction Documents are the hyper-detailed, step-by-step instruction manual that ensures every single bolt, panel, and screw ends up in the right place. Without it, you’d just have a pile of expensive parts.

The quality of the Construction Documents directly impacts the quality, cost, and timeline of the final build. Thorough, well-coordinated documents minimize ambiguity, leading to more accurate contractor bids and fewer expensive changes during construction.

This essential set of documents is made up of two main parts:

  1. The Drawings (Blueprints): This is the set of technical drawings that visually lays out the work. It includes everything from floor plans with precise dimensions to intricate detail drawings showing how a window is flashed into a wall.
  2. The Specifications (Specs): This is a hefty written document that works with the drawings. It provides detailed qualitative requirements for materials, equipment, installation standards, and workmanship. For example, the drawings show a wall, but the specs define the exact type of drywall, the stud spacing, the paint manufacturer and color, and the required quality of the finish.

This documentation is what you'll need to get building permits and what contractors will use to bid on the job. This is where the $249.2 billion global architectural services industry really proves its worth, managing incredible complexity to mitigate risk for clients. The industry is composed of around 326,000 businesses, all focused on turning intricate designs into tangible assets. For a closer look at the sector, you can review key architecture industry outlook data.

Protecting Your Investment Through Meticulous Planning

All the painstaking effort that goes into the DD and CD phases serves one primary purpose: to protect your investment. By solving design puzzles and coordinating all the building systems on paper, your architect prevents costly surprises and frustrating delays on the job site.

When a contractor has a clear, complete set of documents, they can give you a more accurate and competitive price. Ambiguity in the plans forces builders to guess, and they’ll often pad their bids to cover those unknowns. Worse, changes made once construction is underway are exponentially more expensive than changes made on paper. Thorough planning is the single best tool you have to keep your project on budget and on schedule.

Navigating Bids and Securing Approvals

Desk with architectural blueprints, a laptop, measuring tape, hard hat, and a sign saying 'DETAILED PLANS'.

With a complete set of construction documents, your project has reached a critical fork in the road. This is the moment the design on paper gets tested against the hard numbers of construction pricing and the detailed scrutiny of city officials. Two essential processes now kick off at the same time: finding the right builder and getting the legal green light to start digging.

This part of the design processes in architecture can feel a bit like spinning plates, but it’s all about protecting your investment. Your architect’s role changes here. They shift from being the primary designer to your strategic guide and advocate, helping you navigate the contractor selection process and the often-intimidating world of permits. Their experience is key to making sure this administrative hurdle is cleared smoothly, setting the stage for a successful construction launch.

Selecting Your Builder: The Bidding Process

Think of the construction documents as the official rulebook for the game. This phase, known as Bidding or Negotiation, is where you invite contractors to tell you how much it will cost to build your project based on that rulebook. The objective is simple: find a great builder who can execute the plans on time and on budget.

Generally, you have two main ways to pick a general contractor. Each comes with its own pros and cons, depending on your project’s needs and how you prefer to work.

  • Competitive Bidding: This is the classic approach, especially for public works or big commercial jobs. Your architect will send the plans out to a handful of pre-vetted contractors. They each come back with a sealed, fixed-price bid, and you typically award the job to the lowest qualified bidder. It’s a great way to ensure price transparency and competition.
  • Negotiated Contract: With this method, you pick a contractor you trust early in the process—sometimes even before the design is finished. You then work directly with them to negotiate a fair price. This path is far more collaborative and lets the builder give valuable feedback on costs and buildability as the design takes shape. It’s a popular choice when you already have a great relationship with a builder.

Your architect is your most valuable player here. They’ll help you vet the contractors, dig into the bids to make sure you're comparing apples to apples, and guide you toward a smart decision.

The architect's responsibility during the bidding process is to act as the client's trusted advisor. This involves clarifying the design intent for bidders and ensuring the bids received accurately reflect the full scope and quality detailed in the construction documents.

Securing Legal Go-Ahead: The Approvals Process

While you’re busy picking a contractor, your architect is simultaneously wrestling with the all-important approvals process. You cannot build anything until the local authorities have reviewed and stamped your plans, confirming they meet every relevant code and regulation. This is an absolute must for every single project.

How complicated this gets really depends on where you're building. At a minimum, it means submitting the drawings to the local building department. They’ll check your plans against building, fire, and energy codes.

But it often doesn't stop there. Many projects need a thumbs-up from several other agencies, each with its own schedule and requirements. These can include:

  • Zoning Boards: They make sure your project fits within the local rules for things like building height, property line setbacks, and parking.
  • Design Review Boards: In many towns and cities, these groups look at the project's aesthetics to ensure it fits with the community's character.
  • Historic Preservation Commissions: If you're working on a historic landmark or in a historic district, this commission has the final say on whether your plans are respectful of the building’s heritage.

Getting all these approvals can be a long and winding road, but your architect is your expert guide. They’ll prepare the paperwork, answer the tough questions from officials, and make any necessary tweaks to the plans to get them approved. Their firsthand experience with local agencies is what keeps the project moving forward and gets you the official clearance to start construction.

Ensuring Quality During Construction

An architect's job doesn't end when the blueprints are handed over. In fact, it shifts into one of the most crucial phases of the entire project: Construction Administration (CA). Think of your architect as your dedicated representative on the ground, the expert whose job is to protect your investment and ensure the vision we've developed together comes to life exactly as planned.

I like to compare it to a conductor leading an orchestra. The construction documents are the sheet music, and the contractor's team are the skilled musicians. The conductor’s role isn’t to play the instruments, but to ensure everyone is playing the right notes, in the right key, and at the right time. Without that oversight, the beautiful symphony on the page can easily turn into noise.

The Architect as Your On-Site Advocate

During construction, your architect becomes your eyes and ears, observing progress and making sure the work aligns with the plans. This isn't about micromanaging the builder; it's about safeguarding your interests and the integrity of the design. This active involvement is built around a few key, recurring tasks.

These responsibilities typically include:

  • Scheduled Site Visits: We'll be on-site at regular intervals and critical milestones to see the work firsthand. This lets us catch potential issues before they become expensive problems and answer questions on the spot.
  • Reviewing Payment Applications: Before you cut a check to the contractor, your architect reviews their invoice. We verify that the work you're being billed for has actually been completed and meets the quality standards outlined in the contract.
  • Answering RFIs (Requests for Information): It's completely normal for builders to have technical questions. We provide clear, timely answers to keep the project moving forward correctly.
  • Managing Change Orders: Sometimes, unexpected site conditions pop up, or you might decide you want to make a change. The architect manages this process formally, negotiating fair pricing and making sure any adjustments fit seamlessly into the overall design.

Protecting the Design Vision

A huge part of quality control comes down to reviewing submittals. These are the data sheets, material samples, and detailed shop drawings the contractor sends for approval before anything gets ordered or built. For example, we'll review the exact model of the windows, the specific batch of bricks, or the finish on a light fixture to confirm it’s precisely what was specified.

This attention to detail is especially important for custom features that give a building its unique character. Elements like intricate custom stone work require meticulous oversight to ensure the final installation matches the design intent in both material and craftsmanship.

Construction administration is the essential follow-through that transforms a well-designed project on paper into a well-built reality. It bridges the gap between design intent and final execution, ensuring the quality you paid for is the quality you receive.

Ultimately, having the architect involved through construction is your best insurance policy. It ensures the final building isn’t just a building, but the exact one you and your architect worked so hard to imagine. This diligent final phase is what brings your vision to life, just as you pictured it.

Common Questions About Architectural Design

Stepping into an architectural project for the first time can feel like learning a new language. It's only natural to have a lot of questions about how it all works, how much it will cost, and what's expected of you.

Getting a handle on the timeline, fees, and your own responsibilities is the best way to become a confident and informed partner in the process. Let's break down some of the most common questions we hear from clients.

How Long Does the Architectural Design Process Typically Take?

This is usually the first question on everyone's mind, and the honest answer is: it really depends. There's no single timeline that fits every project.

A small-scale interior renovation might move from an idea to construction-ready plans in just 3-6 months. A custom home, on the other hand, with all its personal details and complexities, could easily take 6-12 months for the design and permitting phases alone—before a shovel ever hits the ground.

For larger commercial or institutional buildings, the design process can stretch over several years. A few key things will always influence the schedule:

  • Project Complexity: The more detailed the design and the more sophisticated the building systems (like HVAC and electrical), the more time the Design Development phase will require.
  • Regulatory Hurdles: This is often the biggest wild card. Navigating zoning laws, city design review boards, and historic commissions can add significant and sometimes unpredictable delays.
  • Client Decision-Making: The pace of the project is directly tied to how quickly you can provide feedback and make decisions. Your involvement keeps the momentum going.

How Are Architectural Fees Typically Structured?

Architectural fees aren't one-size-fits-all. They’re usually structured in one of three ways, chosen based on the project’s scope and predictability. Understanding them helps you see how you'll be billed as the project progresses.

Typically, payments are tied to major project milestones. For instance, you might see invoices after the completion of Schematic Design, Design Development, and the Construction Documents. Once construction starts, billing usually shifts to a monthly schedule for Construction Administration services.

Here are the three most common fee structures:

  1. Percentage of Construction Cost: The architect's fee is a set percentage of the final construction budget. This often ranges from 8-15% and naturally scales the fee to the size and complexity of the project.
  2. Fixed Fee: A single, lump-sum fee is agreed upon before any work begins. This is a great option for projects where the scope is crystal clear and the path forward is straightforward.
  3. Hourly Rate: The architect bills for their time on an hourly basis. This structure is common for smaller projects, initial feasibility studies, or phases where the full scope isn't yet known.

What Is the Client's Most Important Role?

Your most critical role is to be the keeper of the vision and the primary decision-maker. This is especially true in the early stages of design. While your architect brings the design and technical expertise, you provide the "why" behind the project.

The client is the keeper of the vision. Your ability to communicate goals clearly in the beginning and provide decisive feedback throughout the process is the single most important factor in keeping a project on track, on budget, and true to its original purpose.

A great project is a partnership, and your active participation is what drives it forward. Your biggest contributions happen in the first half of the process:

  • Providing a Clear Brief: During Pre-Design, it's all about sharing your detailed vision—what you need the space to do, how you want it to feel, and what your budget looks like.
  • Offering Decisive Feedback: Your clear "yes" or "no" on the initial concepts during Schematic Design sets the direction for everything that follows.
  • Making Timely Choices: During Design Development, you'll be asked to select materials, fixtures, and finishes. Making these decisions on time is crucial for keeping the project moving toward construction.

What Is the Difference Between Design-Bid-Build and Design-Build?

These terms describe two different ways of structuring the team. The traditional process we've been walking through is what's known as Design-Bid-Build, but it's good to understand the alternative.

Design-Bid-Build
This is the classic approach. You hire an architect under one contract and a contractor under a completely separate one. The architect finishes the entire set of design drawings first. Then, those plans are given to several contractors who "bid" on the job, and you choose one to build it. This method is great for fostering price competition.

Design-Build
In this model, you hire a single firm under one contract to handle both the design and the construction. The architect and contractor are on the same team from day one. This integration can lead to better communication, faster timelines, and a single point of responsibility for you.

The right choice really depends on your priorities—whether that's cost certainty, speed, or a streamlined management process.


At Sherer Architects, LLC, we believe an informed client is an empowered one. Our team is here to guide you through every stage, making sure your vision is realized with clarity and confidence. If you're planning a commercial, adaptive reuse, or historic preservation project, let's start the conversation. Explore our services and see how we can bring structure to your vision.

Categories
Uncategorized

Mastering Construction Change Order Management

Handling change orders is the formal dance of documenting, reviewing, approving, and putting into action any shift from a project's original contract. It's the essential framework that keeps a project's scope, schedule, and budget in check, making sure everyone involved is on the same page.

Why Change Orders Are an Inevitable Part of Construction

Let's clear up a common misconception right away: change orders aren't a sign that someone messed up. In reality, they are a normal and necessary part of every single construction project. They're simply the mechanism for controlled evolution. The first step toward mastering the process is to stop seeing them as crises and start treating them as manageable events.

Changes pop up for all sorts of reasons. It could be the client suddenly wanting a higher-grade finish for the lobby flooring, or the excavation crew hitting an unexpected layer of bedrock that forces a redesign of the foundation. These kinds of adjustments aren't just common—they're practically guaranteed.

From Obstacles to Opportunities

If you think of every change order as an obstacle, you’re setting yourself up for a confrontational project. Experienced project managers know better. They go into a job expecting changes because they understand the initial blueprint is a well-informed starting point, not the final word set in stone.

This shift in mindset is everything. When a team is prepared for change, a new request doesn't cause panic. Instead, it triggers a calm, documented process. You move from a reactive "firefighting" mode to a proactive "solution-managing" one.

A well-managed change order is simply a documented conversation that protects the owner, the architect, and the contractor. It clarifies expectations and ensures fair compensation for new work, turning a potential point of conflict into a moment of structured collaboration.

The numbers don't lie. Research from the American Institute of Architects (AIA) looked at over 18,000 projects and found that 100% of them had at least one change order. The bigger the project, the more changes you can expect—smaller jobs averaged 1.7 change orders, while larger ones had nearly 12. You can dig into the AIA's findings to see how project scale and other factors come into play.

Ultimately, successful change order management comes down to having a solid system in place. A good process can absorb these modifications without derailing the entire project. The table below breaks down some of the most common triggers and what they typically mean for your schedule and budget.

Common Triggers for Construction Change Orders and Their Impact

This table breaks down the most frequent reasons change orders are initiated and the corresponding effects they have on project timelines and budgets.

Change Order Trigger Description Typical Impact on Schedule Typical Impact on Cost
Owner-Requested Changes The client decides to add, remove, or alter a feature after the contract is signed (e.g., upgrading materials, changing a room layout). Moderate to High Moderate to High
Errors or Omissions Mistakes or missing details in the original plans and specifications are discovered during construction. High High
Unforeseen Site Conditions Unexpected issues are found on-site, such as poor soil quality, hidden utilities, or hazardous materials. Moderate to High Moderate to High
Design Changes The architect or engineer refines the design to improve functionality, aesthetics, or performance. Low to Moderate Low to Moderate
Material/Labor Availability A specified material becomes unavailable or delayed, or there's a shortage of skilled labor, requiring substitutions. Moderate Low to Moderate
Code Revisions A building code or regulation changes after the project has started, forcing a design or construction adjustment. Low to Moderate Low to Moderate

Understanding these common triggers is the first step. With this context, we can now dive into the practical strategies and workflows needed to manage them effectively.

Building a Bulletproof Change Order Workflow

Flying by the seat of your pants with change orders is a sure-fire way to blow your budget, wreck your schedule, and sour relationships. Instead of reacting to every little shift, the pros build a structured, repeatable workflow. This isn't about adding red tape; it's about creating a clear and predictable path that protects everyone involved when things inevitably change.

The whole process kicks off the second someone spots a potential deviation from the contract. Catching it early is everything. A sub who notices a clash between the prints and what's actually on-site, or an owner who casually mentions a "small idea" they just had—both are triggers that need to be captured and documented right away. Ignoring these whispers is how a tiny tweak snowballs into a major project headache.

Most of the time, change orders bubble up from one of a few common sources: the client wants an upgrade, the site throws you a curveball, or there's an error or omission in the design that needs fixing.

Flowchart illustrating three common triggers for construction change orders: Upgrade, Site Issue, Design Fix.

As you can see, changes can come from anywhere—client inspiration, real-world discoveries, or a simple blueprint correction. Each one needs to be managed through the same steady, consistent process.

Crafting an Undeniable Change Order Request

Once you've identified a potential change, you need to formalize it with a Change Order Request (COR). Think of this document as your opening argument. A sloppy, half-baked COR is an invitation for pushback and delays. A well-crafted one greases the wheels for a smooth approval.

A truly solid COR does more than just say what's changing; it builds an airtight case. Here’s what it must include:

  • A Detailed Scope: Get specific. "Relocate wall" isn't going to cut it. You need something like, "Relocate the north wall of Office 101 three feet east. Scope includes demolition of existing wall, new steel stud framing, GWB on both sides, Level 4 finish, prime and two coats of paint to match existing, and relocation of two (2) electrical duplex outlets and one (1) data port."
  • Clear Justification: You have to explain why this is necessary. Is it an owner directive? A response to an unforeseen condition? Reference the specific RFI, drawing number (e.g., A-2.1), or meeting where the change was discussed. This context is critical.
  • A Transparent Cost Breakdown: This is non-negotiable. Break down the costs for materials, labor (with rates and estimated hours), equipment, and any sub-tier contractor quotes. Your markup for overhead and profit, typically a standard 10-15%, should have already been defined in the prime contract.
  • A Realistic Schedule Analysis: Don't just guess how much time it will add. The COR needs to clearly state the impact on the project timeline, showing exactly how many days are needed and how this change affects other critical path activities.

Navigating the Approval and Integration Process

With your rock-solid COR in hand, it's time for negotiation and approval. This shouldn't feel like a battle. When you present clear, thorough information, you’re not arguing; you're collaborating with the owner and architect to make an informed decision. Get the COR to them quickly, walk them through it, and be ready to explain the cost and schedule impacts.

The best negotiations happen when there's a foundation of trust and transparent data. A well-documented COR shifts the conversation away from haggling over price and toward collaboratively solving a problem for the good of the project.

Once the COR is signed by all the right people, it officially becomes a Change Order. But you're not done yet. The final, and most frequently missed, step is to weave that approved change back into the project's DNA.

This means taking several key actions immediately:

  1. Update the Contract: The change order is a legal amendment. It needs to be formally logged, numbered, and filed with the original contract documents.
  2. Adjust the Budget: The project's master budget must be revised right away to reflect the new contract value.
  3. Revise the Master Schedule: Any time extension from the change order has to be incorporated into the project schedule, pushing out milestones and the completion date accordingly.
  4. Distribute the Information: Get the approved change into the hands of the people who need it. The superintendent, the foreman, and the specific subs doing the work all need the updated drawings, specs, and direction.

Skipping this final integration phase is a rookie mistake. An approved change order that lives in a folder but not in the master plan creates chaos on site. It’s the very thing this workflow is designed to prevent. A bulletproof process follows the change from the first spark all the way to seamless execution in the field.

Clarifying Roles to Prevent Project Gridlock

Nothing grinds a project to a halt faster than confusion over a change order. When a change request lands and nobody's quite sure who owns the next step, you get a classic case of finger-pointing, missed emails, and delays that bleed money. A solid change order process isn't just about forms and software; it’s about people knowing exactly what they’re supposed to do and when.

Ambiguity is the enemy of progress on a job site. If roles aren't crystal clear from the pre-construction meeting, a simple owner request can trigger a chain reaction of chaos. The owner might think a verbal "go-ahead" is enough, the architect could sit on a technical review for a week, and the general contractor is left stuck in the middle, unable to price the work or direct their subs.

This kind of gridlock is entirely preventable. By defining and communicating each stakeholder's role before the first change order ever appears, you build a system of accountability. Everyone knows their part, from initiation to execution.

The Owner and The Architect

The Owner is the ultimate decision-maker. They're the one who typically initiates or must approve any change that impacts the budget or the timeline. Their most critical responsibility? Providing clear, timely decisions. A "maybe" or a delayed response has a serious ripple effect, holding up material procurement and scheduling for multiple trades down the line.

The Architect or Engineer is the technical authority. Their main job is to review a proposed change for design intent, code compliance, and sheer feasibility. They're the ones who ensure that a requested modification fits the overall project vision and won't create some unintended structural or MEP conflict. Their swift and thorough review is what keeps the process moving.

Think about a common scenario: an owner decides they want to add a large window to an exterior wall.

  • The Owner formally submits the request, usually to the GC.
  • The GC immediately forwards it to the Architect for a technical review.
  • The Architect has to verify if the change is structurally sound, how it affects the building envelope's performance, and if it still meets energy codes before giving a technical green light.

A delay on the architect’s desk can stall the entire process before anyone even talks about price.

The General Contractor and Subcontractors

The General Contractor (GC) is the central hub of the entire change order process. Think of them as the conductor of the orchestra. They're responsible for receiving the initial request, coordinating with the design team, and—most importantly—pricing the work and figuring out the real impact on the schedule. The GC gathers quotes from all affected subcontractors, compiles them into a comprehensive Change Order Request (COR), and presents the complete package to the owner for a final decision.

The Subcontractors are the boots on the ground, the specialists who provide the real-world cost and time estimates for their specific trades. When a GC asks for a price on a change, the subs have to respond quickly and accurately. Their input is the foundation of the whole COR; without it, the GC can't give the owner the complete picture. This is why clear, detailed communication from the GC to the subs is so vital—it prevents pricing errors and misunderstandings about the scope.

A well-defined responsibility matrix, often called a RACI chart, is one of the most powerful tools a project team can use. It strips away all the guesswork by mapping out exactly who is Responsible, Accountable, Consulted, and Informed for every step of the change order lifecycle.

To clear up any confusion from the start, we use a responsibility matrix like the one below. It's a simple but effective way to ensure everyone is on the same page.

Change Order Responsibility Matrix (RACI Chart)

Task/Decision Point Owner Architect/Engineer General Contractor Subcontractor
Identifies Need for Change R C C C
Submits Formal Request for Change A C R I
Reviews for Design & Technical Feasibility C A R C
Develops Scope & Gathers Sub Quotes I C A R
Prepares Cost & Schedule Impact Analysis I C A R
Submits Formal Change Order Request (COR) C I A I
Approves/Rejects Change Order Request A C I I
Issues Executed Change Order A I R I
Updates Contract Documents C R A I
Performs the Changed Work I I A R
Documents & Verifies Completed Change I C A R

This chart isn't just a document to be filed away; it's a living guide that prevents communication from breaking down. It ensures the right people are involved at the right time, turning what could be a contentious process into a smooth, collaborative effort.

By establishing this kind of clarity upfront, you transform change order management from a source of friction into just another structured, predictable part of running a successful project.

Creating Documentation That Stands Up to Scrutiny

When a change order goes sideways and fingers start pointing, your documentation is the only thing that matters. It’s your first, last, and best line of defense against claims, disputes, and costly litigation. Creating records that leave zero room for ambiguity isn’t just good practice; it's a fundamental part of risk management on any job site.

The goal here is to build an ironclad paper trail that tells the whole story of the change from start to finish. Every phone call, every sketch, every decision needs to be captured in a way that an outsider could piece together months—or even years—down the road. A vague note on a napkin or a quick "yeah, go ahead" in the hallway is an open invitation for trouble.

A desk with a plant, a green book, money, a document, and a pen for business records.

Anatomy of a Bulletproof Change Order Form

The foundation of any solid documentation system is a standardized change order form that’s used religiously on every project. While the specific layout can vary, a truly "bulletproof" form has several non-negotiable fields that cut through the noise and create a crystal-clear record. Think of it as your pre-flight checklist for any scope modification.

A robust form absolutely must include:

  • Unique Tracking Number: Simple and sequential (like CO-001, CO-002) so you can find it instantly.
  • Clear Project Identifiers: The official project name, number, and site address. No confusion about which job it belongs to.
  • Detailed Description of Change: This is the heart of the document. You have to spell out exactly what work is being added or removed, referencing specific drawing numbers, spec sections, and RFIs.
  • Justification for the Change: Get to the why. Is this an owner request? A design omission that just surfaced? An unforeseen site condition?
  • Comprehensive Cost Breakdown: The price needs to be transparent. Break it down into labor, materials, equipment, sub costs, and the contractually defined markup for overhead and profit.
  • Schedule Impact Statement: How many calendar days will this add to or subtract from the completion date? If there's no impact, you must explicitly state "zero (0) days" to avoid ambiguity.
  • Signature and Date Blocks: Designated lines for the owner, contractor, and sometimes the architect to formally execute the agreement.

This isn't just a memo; this level of detail turns the form into a legally binding amendment to your original contract.

The Power of the Central Change Order Log

Individual forms are critical, but they're only one piece of the puzzle. The real magic happens when you maintain a central change order log. This master document, whether it's a spreadsheet or a dedicated module in your PM software, gives you a live, at-a-glance dashboard of every single change on the project.

A well-kept log tracks the vitals for every Change Order Request (COR) and executed Change Order (CO).

Log Entry Status Description Cost Impact Schedule Impact
COR-007 Approved Relocate lobby reception desk +$7,250 +3 days
COR-008 Pending Owner Review Add exterior security cameras +$11,400 +5 days
COR-009 In Pricing Upgrade flooring in Break Room TBD TBD
CO-006 Executed Deduct value engineering for lighting -$4,800 0 days

This log becomes an indispensable tool for project managers. It immediately shows the cumulative financial and schedule impact of all changes, prevents items from falling through the cracks, and acts as the single source of truth in owner meetings. Getting a handle on process documentation best practices is what makes the difference between a clean closeout and a messy dispute.

Communication Protocols That Actually Work

Even the best forms and logs are useless if your communication is a disorganized mess. The final piece of the documentation puzzle is establishing clear protocols for how information flows. Effective change management isn’t just about paperwork; it's about making sure the right people are talking at the right time.

Cautionary Tale: A contractor on a mid-rise project moved a series of interior walls after getting a verbal nod from the owner's rep on site. The formal paperwork got pushed to the back burner. When the final invoice hit, the owner balked at the $45,000 charge, claiming they misunderstood the scope. With no signed change order, the contractor was stuck in a months-long legal battle and ended up eating most of the cost.

This is exactly why meticulous, real-time record-keeping is non-negotiable. It’s not about adding bureaucracy—it’s about protecting your bottom line. By combining detailed forms, a central log, and clear communication, you build a fortress of documentation that protects your budget, your schedule, and your business.

Protecting Your Budget and Project Timeline

A change order does more than just tweak the scope—it directly meddles with the financial and scheduling DNA of your project. If you don't have a firm grip on both, even a seemingly minor change can set off a chain reaction of cost overruns and delays, putting the entire job at risk. You have to be proactive and methodical about pricing the change and, just as importantly, analyzing its ripple effects.

The way you price a change order really sets the tone for fairness and transparency. Choosing the right method is critical, and it all comes down to the nature of the work. You wouldn't price a simple light fixture swap the same way you'd price the removal of an unexpected rock ledge discovered during excavation.

Overhead view of a desk with a tablet displaying a budget timeline, watch, calculator, and office supplies.

Choosing the Right Pricing Method

Your contract should spell out the approved pricing methods, but knowing which one to use in a given situation is a skill learned in the trenches. Most scenarios fall under one of three main approaches, and each has its place.

  • Lump Sum: This is your classic fixed price for the whole change. It’s perfect for well-defined adjustments where there are no unknowns, like changing from one specified type of flooring to another. The owner gets cost certainty right away, and the contractor knows exactly what they're getting paid. No surprises.

  • Time and Materials (T&M): When you run into unforeseen conditions or work with a scope you can't pin down, T&M is the only way to go. The contractor bills for their actual labor hours and material costs, plus a pre-agreed markup, which is often in the 10-15% range. This is the go-to for emergency repairs or when trying to estimate the work up front would be pure guesswork.

  • Unit Pricing: This method is a lifesaver for changes that involve quantifiable items where you don't know the final quantity yet. For example, if you hit bad soil and need to over-excavate, you can price the change per cubic yard of soil removed and new fill brought in. It’s a transparent, scalable way to price the work based on an agreed-upon rate.

A rookie mistake is trying to apply one method to every single change. If you try to lump sum an unpredictable task, the contractor could get burned. On the flip side, using T&M for a simple, defined task can make an owner feel like they're signing a blank check. The real skill is matching the method to the situation.

Defending Your Schedule with a Time Impact Analysis

Cost is only half the story. One of the biggest friction points in managing change orders is agreeing on a fair time extension. Just saying, "this will take five more days," won't cut it. You have to prove it. This is where a Time Impact Analysis (TIA) becomes your most valuable ally.

A TIA is a formal analysis showing exactly how a proposed change affects the project's critical path—that sequence of activities that dictates your completion date. This isn’t a gut feeling; it’s a calculated, methodical process.

A Time Impact Analysis turns a subjective argument about delays into an objective, data-backed conversation. It shifts the discussion from "I think we need more time" to "Here is the network logic showing exactly how this change adds seven days to the critical path."

To do a proper TIA, you have to insert the new activities from the change order directly into the project schedule. Then, you link them logically to the tasks that come before and after. When you rerun the schedule calculation, the real impact on the project's end date becomes clear as day. This hard evidence is what gives you leverage.

Negotiating with Confidence and Collaboration

When you walk into a meeting armed with transparent pricing and a solid TIA, you’re prepared for a productive conversation, not a confrontation. The goal isn’t to "win" the negotiation; it's to reach a fair agreement that keeps the project moving forward for everyone.

Here are a few tips I've picked up over the years for getting to that point:

  1. Present Data, Not Demands: Always lead with the facts. Show the owner and architect your cost breakdown and walk them through the TIA schedule. When they can see the logic behind the numbers and the timeline, it’s much harder to argue with the conclusion.
  2. Focus on the Project's Health: Frame the entire conversation around what’s best for the project. Keeping the schedule intact and making sure everyone is compensated fairly for extra work benefits the entire team and maintains momentum on site.
  3. Stay Collaborative: Keep the tone professional and focused on finding a solution. Think of a change order as a shared problem to solve, not a battle to be won. Those relationships are what will carry you through to a successful project completion.

At the end of the day, controlling the impact of changes boils down to process and proof. When you systematically price the work and analytically prove the schedule impact, you protect your budget, defend your timeline, and turn a potential conflict into just another manageable part of the job.

Using Technology and Handling Unique Project Demands

In today's construction world, trying to manage change orders with spreadsheets and email chains is just asking for trouble. It's a recipe for version control nightmares, lost messages, and delays that eat directly into your profit margin. Let's be honest, that manual approach just doesn't cut it anymore.

This is where dedicated construction management software, like Procore or Autodesk Construction Cloud, really shows its worth. These tools take the entire chaotic process and give it structure. A potential change can be logged right from a tablet in the field, which instantly starts a digital workflow. That Change Order Request (COR) is then automatically sent to the right people in the right order—from the PM, to the architect, and finally to the owner for the green light. The best part? Everyone can see exactly where a change stands in real-time. No more chasing people down for an update.

The features that really move the needle for project teams include:

  • Centralized Document Storage: Every RFI, photo, and subcontractor quote gets attached directly to the COR. This creates a single, bulletproof record.
  • Automated Workflows: You can build custom approval chains, which means no step gets skipped and everyone is accountable for their part of the review.
  • Financial Integration: Once a change order is approved, the system can automatically update the project budget, giving you a live, accurate view of your costs.

Special Considerations for Unique Projects

A standardized process is great, but some projects just don't play by the normal rules. I'm talking specifically about adaptive reuse and historic preservation jobs. On these projects, discovering unforeseen conditions isn't a risk—it's a guarantee.

When you're working on old buildings, you're often flying blind with incomplete or nonexistent drawings. You truly have no idea what's behind a wall or beneath a floorboard until you open it up. This level of uncertainty means your standard change order process needs a major adjustment.

On an adaptive reuse or historic preservation project, your contract has to be built for the unknown. You need clear provisions for dealing with unforeseen conditions, pre-agreed markups for T&M work, and a rock-solid process for documenting every discovery. This isn't just good practice; it's essential for managing risk.

Strategies for Managing Uncertainty

Contractors who excel at these unique projects build their entire process around navigating the unknown. The traditional change order model, which treats changes as annoying exceptions, simply fails here. You have to design a system that expects constant discovery and adjustment.

Here are a few tactics that work in the real world:

  • Build Flexibility into the Contract: Start with a contract that openly acknowledges the high likelihood of hidden issues. This means having clear language on how discoveries will be priced, often relying on Time and Materials (T&M) or pre-negotiated unit costs.

  • Conduct Intensive Preliminary Investigations: You'll never find everything, but you can get ahead of major headaches. Invest time upfront in non-destructive testing, GPR scanning, and even some targeted exploratory demolition to identify the big problems before you're deep into construction.

  • Establish a Contingency Protocol: Before the project starts, sit down with the owner and establish a clear plan for using the contingency fund. Define exactly what qualifies as an "unforeseen condition" and create a streamlined approval process for tapping into those funds. This keeps small issues from turning into big delays while you wait for a formal change order to be pushed through.

Answering Your Top Construction Change Order Questions

Even the most buttoned-up process can't account for every twist and turn on a job site. Questions are bound to come up. Let's tackle some of the most common ones that project managers wrestle with.

Can an Owner Refuse to Sign a Change Order?

Absolutely. An owner can, and often will, initially push back on a Change Order Request (COR). This usually boils down to a disagreement over the cost, a request for a time extension, or their belief that the work should have been covered under the original contract scope.

When this happens, your documentation is your best friend. You need to build a rock-solid case backed by hard evidence—think RFIs, photos of the unforeseen conditions, and direct references to the plans and specs. If an owner digs in their heels, you could be heading for a formal dispute. This is precisely why keeping a meticulous, real-time paper trail isn't just good practice; it's your ultimate line of defense.

What Is a Construction Change Directive?

A Construction Change Directive (CCD) is a different animal altogether. It’s essentially a top-down order from the owner or architect telling the contractor to get moving on a change before everyone has agreed on the final cost or schedule adjustment. CCDs are used to keep the project from grinding to a halt over negotiations, especially when the work is on the critical path.

The contractor is bound by the contract to perform the work in the CCD. The financial side of things gets sorted out later, typically formalized into a change order once the dust settles and all the true costs are tallied.

A Change Directive is basically an order to "work now, price it out later." It’s a tool to avoid gridlock but demands that you track every single cost meticulously so you get paid fairly for the work you've done.

How Do You Handle Multiple Small Changes?

It happens all the time: a series of small, related issues pop up in the same area. Instead of drowning in a sea of tiny change orders, the smart move is to bundle them. Group related Potential Change Orders (PCOs) into one consolidated Change Order Request (COR).

For instance, say an owner decides to tweak a single office layout. You can roll the wall relocation, the corresponding electrical moves, and the new flooring patch into one clear COR. This makes life easier for everyone involved in the approval chain. For more complex, on-the-fly issues, tools like augmented reality remote assistance can bring in an expert eye virtually, helping you troubleshoot and prevent a small issue from becoming a major change order.

Bundling keeps the paperwork from getting out of hand while ensuring every last adjustment is documented and signed off on before you proceed.


At Sherer Architects, LLC, we live and breathe the complexities of construction, from the first sketch to the final punch list. Our extensive background in commercial projects, adaptive reuse, and historic preservation gives us the foresight to anticipate challenges and manage change with a steady hand. We focus on building strong partnerships to steer your project away from potential pitfalls and toward well-managed, successful outcomes. If you're looking for a team that knows how to bring structure to life, let's talk. Connect with our team today to see how we can guide your next project to a profitable completion.

Categories
Uncategorized

8 Practical Construction Value Engineering Examples for 2025

In commercial and adaptive-reuse projects, maximizing value isn't just about cutting costs. It's about optimizing performance, lifecycle durability, and long-term profitability. Value engineering (VE) is the systematic process of analyzing function to identify and eliminate unnecessary costs without sacrificing quality, reliability, or aesthetic integrity. It is a proactive, creative, and collaborative approach that challenges assumptions and unlocks smarter, more efficient ways to build.

While often perceived as simple cost-cutting, true VE focuses on enhancing the overall project value, from initial design through to long-term operation. This strategic process extends beyond material swaps to encompass broader design choices. For example, focusing on aspects like maximizing natural light through strategic glazing is just one way of making design decisions that drive ROI by improving tenant well-being and reducing energy consumption over the building's life.

This guide moves beyond theory to provide tangible construction value engineering examples that project owners, developers, and contractors can implement. We will dissect eight powerful VE strategies, breaking down the problem, the proposed alternative, and the critical takeaways for your team. You will discover how to identify opportunities for significant improvements in cost, schedule, and performance, turning common design challenges into profitable and sustainable outcomes.

1. Substitution of Materials – High-Performance Concrete

A classic construction value engineering example involves substituting conventional concrete with High-Performance Concrete (HPC) or Self-Consolidating Concrete (SCC). This strategic shift focuses on lifecycle value over initial material cost. While HPC has a higher per-unit price, its superior strength, durability, and placement efficiency often lead to significant savings in labor, time, and long-term maintenance.

HPC is engineered for specific performance characteristics, such as high compressive strength, low permeability, and enhanced resistance to chemical and environmental degradation. SCC, a type of HPC, flows easily into complex formwork without mechanical consolidation, drastically reducing labor time and improving finish quality.

Strategic Analysis & Impact

The value proposition of HPC/SCC extends far beyond simple material replacement. It redefines structural possibilities and project timelines.

  • Cost & Time Impact: Initial material costs can be 15-30% higher. However, labor costs for placement and finishing can decrease by up to 50% with SCC. Faster formwork cycling and earlier strength gain can shorten the overall project schedule by weeks or even months on large-scale projects.
  • Performance Impact: The dense, impermeable nature of HPC extends the structure's service life, particularly in harsh marine or industrial environments. This reduces future repair costs, making it a powerful tool for lowering the total cost of ownership.
  • Design Impact: Higher strength allows for smaller-profile structural elements like columns and beams. This can increase usable floor space, a direct value-add for commercial and adaptive reuse projects where every square foot counts.

Key Insight: The most effective use of this VE measure is when it's considered during the initial design phase. Retroactively substituting HPC can be challenging, but planning for it allows engineers to optimize the entire structural system around its unique properties.

Implementation & Takeaways

Successfully implementing HPC or SCC requires a shift in mindset from first-cost to lifecycle value analysis.

  • Collaborate Early: Involve your structural engineer and a knowledgeable concrete supplier during the design development stage. Their expertise is crucial for mix design and logistical planning.
  • Focus on Placement Efficiency: The primary savings often come from labor reduction and speed. Ensure the construction team is trained on the specific handling and quality control procedures for SCC to maximize these benefits.
  • Model Lifecycle Costs: For owners and developers, a lifecycle cost analysis (LCCA) is essential. It will clearly demonstrate how the higher initial investment in HPC generates long-term returns through reduced maintenance and increased durability, justifying the upfront expenditure. The American Concrete Institute (www.concrete.org) provides extensive resources on HPC standards and applications.

2. Modular Construction and Prefabrication

A powerful construction value engineering example is the shift from traditional stick-built methods to modular construction and prefabrication. This strategy involves manufacturing building components, from entire rooms to facade panels, in a controlled factory setting. These modules are then transported to the construction site for assembly, fundamentally changing the project delivery model from sequential to parallel processing.

This approach minimizes on-site variables like weather delays and skilled labor shortages while maximizing quality control. Companies like Factory OS are pioneering this technology for multi-family housing, and hotel chains like Marriott have successfully deployed prefabricated bathroom pods to accelerate project completion and ensure consistent quality across properties.

A large crane lifts a modular building section while another is on a truck, at a construction site.

Strategic Analysis & Impact

Adopting modular construction is a strategic decision that impacts the entire project lifecycle, from financing and design to final assembly and turnover. It is less a material swap and more a fundamental process re-engineering.

  • Cost & Time Impact: While direct material costs can be similar, the primary value comes from schedule compression. Projects can see a 30-50% reduction in overall duration because site preparation and foundation work occur simultaneously with factory module fabrication. This leads to significant savings in general conditions, financing costs, and faster revenue generation.
  • Performance Impact: Factory production enables superior quality control, tighter building envelopes, and reduced material waste by up to 90%. This results in more energy-efficient buildings with lower long-term operating costs and predictable performance.
  • Design Impact: This method thrives on standardization. It is ideal for projects with repetitive units like hotels, dormitories, or multi-family housing. The design must be locked in early, which imposes discipline but also ensures cost and schedule certainty.

Key Insight: The greatest barrier to modular adoption is logistical planning, not manufacturing. Success hinges on meticulously coordinating module transportation, site access for large cranes, and just-in-time delivery to avoid on-site storage issues.

Implementation & Takeaways

Implementing a modular or prefabricated strategy requires a paradigm shift towards early collaboration and detailed pre-planning.

  • Engage Manufacturers Early: Bring a modular manufacturer like Factory OS or a specialized facade fabricator into the design process from the very beginning. Their input is critical to optimizing designs for factory production and transport.
  • Design for Manufacturing and Assembly (DfMA): The architectural and engineering teams must design with the manufacturing process in mind. This includes standardizing MEP connections, module interfaces, and structural connection points to streamline both factory work and on-site assembly.
  • Prioritize Logistics Planning: Develop a comprehensive logistics plan that covers transportation routes, delivery sequencing, and site staging. This plan is as critical as the architectural drawings and is essential for realizing the schedule benefits of this VE approach.

3. Value Engineering in HVAC System Design – Right-Sizing Equipment

A fundamental construction value engineering example in mechanical systems is the precise "right-sizing" of HVAC equipment. This strategy challenges the common, yet costly, practice of oversizing systems as a conservative safety measure. Instead, it focuses on meticulous load calculations to match equipment capacity directly to the building's actual thermal demands, optimizing both upfront capital and long-term operational costs.

Oversized HVAC units are not just more expensive to purchase; they operate inefficiently. They cycle on and off too frequently (short-cycling), which prevents them from effectively dehumidifying the air, increases component wear, and consumes excess energy. Right-sizing ensures the system runs for longer, more stable cycles, providing better comfort and performance at a lower operational cost.

Strategic Analysis & Impact

The value of right-sizing is realized through a holistic improvement in cost, performance, and sustainability. It's a shift from a "bigger is better" assumption to a data-driven, efficiency-focused approach. When considering Value Engineering in HVAC System Design, optimizing equipment choices and integrating advanced systems, such as implementing energy recovery ventilator technology, can significantly enhance overall system value and energy efficiency.

  • Cost & Time Impact: Initial equipment costs can be reduced by 15-25% by avoiding oversized, higher-capacity units. Long-term energy savings can be substantial, with documented cases like the University of Pennsylvania reducing energy use by 35% after a right-sizing initiative.
  • Performance Impact: Right-sized systems provide superior dehumidification and more consistent temperature control, directly improving occupant comfort and indoor air quality. This also reduces mechanical strain, leading to a longer equipment service life and fewer maintenance issues.
  • Design Impact: Proper sizing requires early coordination between the architect and mechanical engineer. It forces a more integrated design process where building envelope performance (insulation, windows, air tightness) is directly tied to mechanical system selection, leading to a more efficient building overall.

Key Insight: Right-sizing isn't about under-sizing; it's about precision. It relies on accurate energy modeling and load calculations (like ASHRAE's Manual J for residential or similar commercial standards) that account for all variables, including solar gain, occupancy patterns, and lighting loads.

Implementation & Takeaways

Successful implementation moves beyond rule-of-thumb estimates to embrace detailed engineering analysis. This data-first approach de-risks the project and locks in future savings.

  • Insist on Detailed Load Calculations: Do not accept sizing based on square footage alone. Mandate that your MEP engineer performs comprehensive load calculations using industry-standard software and methodologies from ASHRAE.
  • Leverage Energy Modeling: Use energy modeling software during the design phase to simulate how different system sizes will perform under actual expected conditions. This helps visualize the operational cost impact of various equipment choices.
  • Integrate Envelope and Systems: The best results are achieved when envelope improvements are coordinated with HVAC sizing. A better-insulated, tighter building requires a smaller, less expensive HVAC system, creating a cascading value effect.

4. Elimination of Architectural Non-Essentials

One of the most direct construction value engineering examples is the strategic elimination or modification of non-essential architectural elements. This process involves a critical review of decorative features that add significant cost but provide little to no functional or structural value. The goal is to preserve the core design intent and aesthetic appeal while optimizing the budget.

Common targets for this VE analysis include elaborate facade articulation, premium finish materials in non-critical areas, complex rooflines, and ornamental details that drive up material and labor costs. By scrutinizing these components, teams can reallocate funds to higher-impact areas or achieve substantial direct savings without compromising the building's overall quality or brand identity.

Strategic Analysis & Impact

This VE approach requires a delicate balance between cost control and design integrity. When done collaboratively, it can refine a project's focus and enhance its financial viability.

  • Cost & Time Impact: This strategy can reduce overall project costs by 5-15% or more, depending on the initial design's complexity. Simplifying intricate facade details or storefront systems can significantly reduce labor hours and shorten the schedule for building envelope construction.
  • Performance Impact: While primarily a cost-saving measure, eliminating complex geometries can sometimes improve building performance. Simpler forms can lead to a more continuous and effective thermal envelope, reducing thermal bridging and improving long-term energy efficiency.
  • Design Impact: The key challenge is maintaining aesthetic appeal. This is achieved by focusing on form, proportion, and color rather than expensive ornamentation. For example, switching from a costly imported stone rainscreen to a high-quality insulated metal panel system can achieve a modern look while dramatically cutting costs.

Key Insight: This is not about making a building bland; it's about making smart design choices. The most successful applications occur when architects, owners, and contractors collaborate early to define which elements are "mission-critical" to the design vision and which are "nice-to-haves" that can be value-engineered.

Implementation & Takeaways

Implementing this strategy effectively hinges on open communication and a shared understanding of project priorities from the outset.

  • Prioritize Design Elements: Early in the design phase, collaboratively rank architectural features based on their importance to the brand, user experience, and street appeal. This creates a clear hierarchy for VE discussions.
  • Use High-Value Alternatives: Instead of eliminating a feature, find a more cost-effective way to achieve a similar effect. Use high-quality ceramic tile that mimics granite, or use architectural precast concrete panels to replicate the look of cut stone at a fraction of the cost.
  • Leverage Mockups: Before committing to a large-scale material change, create physical or digital mockups. This allows stakeholders to visualize the alternative and ensure it aligns with the aesthetic goals, preventing costly dissatisfaction later. The National Institute of Building Sciences (www.nibs.org) offers extensive guidance on value methodology in design.

5. Constructability Review and Sequence Optimization

One of the most impactful construction value engineering examples shifts focus from what is being built to how it is being built. A constructability review involves a comprehensive analysis of construction methods, sequencing, and logistics during the design phase. By bringing construction professionals into the design process early, teams can identify and eliminate inefficiencies before they become costly rework or schedule delays on site.

This proactive approach, often formalized through methods like Integrated Project Delivery (IPD) or Early Contractor Involvement (ECI), integrates practical field knowledge into architectural and engineering plans. The goal is to ensure the design is not only sound but also efficient to build, considering factors like site access, material handling, labor availability, and safety.

Strategic Analysis & Impact

Integrating build-ability analysis early in the design process is a fundamental value engineering strategy that prevents problems rather than solving them. Its value is measured in reduced risk and enhanced efficiency.

  • Cost & Time Impact: Early involvement of construction experts can reduce overall construction costs by 5-15%. This is achieved by minimizing change orders, optimizing schedules, and improving labor productivity. For example, large-scale mixed-use developments have seen schedule improvements of over 18 months by using an ECI approach to streamline sequencing.
  • Performance Impact: A design optimized for construction leads to higher quality. Clash detection using Building Information Modeling (BIM) prevents MEP (Mechanical, Electrical, Plumbing) conflicts, reducing the need for field modifications that can compromise system integrity. This results in fewer defects and a better-performing final asset.
  • Risk Impact: This process directly mitigates project risk. Identifying potential logistical bottlenecks, safety hazards, or sequencing conflicts during design allows the team to plan solutions in a controlled environment, rather than reacting under pressure during construction. Healthcare projects using IPD have reportedly reduced costly change orders by as much as 90%.

Key Insight: The value of a constructability review is directly proportional to how early it is implemented. Bringing a general contractor or construction manager on board during schematic design provides the greatest opportunity to influence key decisions that lock in cost and schedule efficiencies.

Implementation & Takeaways

Successful implementation requires a commitment to collaboration and the use of modern planning tools. It's a procedural shift that prioritizes integrated expertise over siloed design and construction phases.

  • Establish a Collaborative Structure: Formalize the involvement of the construction team from the project's inception. Use an IPD or ECI contract structure to align the goals of the designer, contractor, and owner.
  • Leverage BIM Technology: Utilize BIM for 4D sequencing simulations and advanced clash detection. This allows the entire team to visualize the construction process step-by-step, identifying potential conflicts and optimizing the schedule before breaking ground. Providers like Autodesk offer powerful tools for this analysis.
  • Conduct Regular Workshops: Schedule dedicated constructability review workshops at key design milestones (e.g., 30%, 60%, and 90% design completion). These sessions should focus on specific building systems, site logistics, and trade sequencing. The Associated General Contractors of America (AGC) offers resources on best practices for these collaborative processes.

6. Foundation System Optimization – Spread Footings vs. Deep Foundations

A pivotal construction value engineering example is the rigorous analysis and optimization of a building's foundation system. This strategy challenges initial assumptions by comparing deep foundations, such as driven piles or drilled piers, against shallow foundations like spread footings. A comprehensive geotechnical investigation can reveal that a less expensive shallow foundation is viable, or that a targeted hybrid approach is more efficient than a uniform deep system.

This VE analysis hinges on understanding the specific soil-bearing capacity and settlement characteristics of a site. Rather than defaulting to a conservative and costly deep foundation system, the goal is to precisely match the foundation solution to the actual ground conditions and structural loads, potentially saving a significant portion of the substructure budget.

Excavated ground showing different soil layers with a grassy field and house in the background, illustrating foundation choice.

Strategic Analysis & Impact

The value of foundation optimization goes directly to the project's bottom line, as the foundation can be one of the single largest cost centers. It's a clear example of how upfront investment in analysis yields major downstream savings.

  • Cost & Time Impact: A switch from deep to shallow foundations can reduce foundation costs by 10-30% or more. A commercial development in Texas, for instance, saved an estimated $2.1M by shifting from pilings to spread footings after a detailed soil study. The construction schedule can also be accelerated by avoiding the time-consuming mobilization and installation of pile-driving equipment.
  • Performance Impact: The goal is to achieve the required structural performance for the lowest cost, not to compromise it. A properly designed shallow foundation on suitable soil is just as reliable as a deep one. The key is ensuring the geotechnical data is accurate to prevent long-term settlement issues.
  • Design Impact: Optimizing the foundation allows for more efficient load path distribution. On a shopping center project, a hybrid approach used robust drilled piers only under heavy column loads while employing simpler spread footings for lighter wall loads, reducing overall material and labor costs without sacrificing stability.

Key Insight: This value engineering opportunity is lost if not pursued early. Commissioning a comprehensive geotechnical boring program before the structural design is finalized is the most critical step. Waiting until later makes redesigning the entire structural load path prohibitively expensive and complex.

Implementation & Takeaways

Successful foundation optimization is a direct result of early and expert-led geotechnical due diligence.

  • Invest in Geotechnical Data: Don't skimp on the initial soil investigation. A thorough report from a qualified geotechnical engineer provides the essential data needed to explore all viable foundation alternatives with confidence.
  • Engage Experts Early: Involve the geotechnical engineer and structural engineer in collaborative design meetings from the schematic phase. This allows them to evaluate multiple options and align the structural grid with the most favorable soil conditions.
  • Evaluate Hybrid Systems: The best solution isn't always "all or nothing." Analyze if a combination of deep and shallow foundations can be used to address variable soil conditions or differing structural loads across the building footprint, optimizing cost-effectiveness. The American Society of Civil Engineers (ASCE) provides extensive guidelines and standards for foundation design and soil analysis.

7. Structural Steel Value Engineering – Grade Selection and Connection Optimization

A powerful construction value engineering example in steel-framed projects is the strategic optimization of steel grades and connection designs. This approach moves beyond simply choosing the cheapest material and instead focuses on a holistic view of the entire steel package, from raw material to fabrication and final erection. By selecting higher-strength steel grades and simplifying connection details, teams can reduce tonnage, labor, and project timelines.

While higher-grade steel may have a greater cost per ton, its increased strength allows for smaller, lighter structural members. This reduction in overall weight has a cascading effect, saving on material, transportation, and erection costs. Similarly, optimizing connections to favor simpler, standardized, and repeatable designs significantly cuts down on complex and expensive fabrication labor.

Steel beams and columns at a construction site with a large building, featuring 'OPTIMIZED STEEL' text.

Strategic Analysis & Impact

This VE measure is a system-based analysis that creates value by integrating design, fabrication, and erection considerations. It is not just about material cost but the total installed cost.

  • Cost & Time Impact: Material savings from reduced tonnage can be significant, often in the 12-18% range for the structural steel package. More impactful are the time savings; for instance, a stadium project that simplified its bolted connections was able to reduce fabrication and erection time by three months, creating immense value in schedule compression.
  • Performance Impact: Using higher-grade, lighter members does not compromise structural integrity. In fact, it can improve it by reducing the building's overall dead load, which can lead to smaller foundation requirements and better seismic performance.
  • Design Impact: Lighter, smaller-profile steel members can increase clear spans and create more open, flexible interior spaces. This is a crucial benefit in commercial office and adaptive reuse projects where maximizing usable floor area is a primary driver of financial return.

Key Insight: The most significant savings are unlocked when the structural engineer, general contractor, and steel fabricator collaborate during the design phase. A fabricator's input on connection design is invaluable, as they can identify details that are difficult or time-consuming to produce with their specific equipment and processes.

Implementation & Takeaways

Implementing this strategy requires proactive collaboration and a focus on the total cost of the steel system, not just the per-ton price.

  • Engage the Fabricator Early: Bring your steel fabricator onto the design team as early as possible. Their practical knowledge of efficient connection types (e.g., bolted vs. welded, standardized shear tabs) can prevent costly and time-consuming details from being locked into the design.
  • Leverage BIM and Modeling: Use Building Information Modeling (BIM) and advanced structural analysis software to run multiple scenarios. This allows the team to precisely compare the total cost and schedule impact of different steel grades and connection strategies.
  • Standardize Everything Possible: Work with the design team to standardize connection details and member sizes across the project as much as feasible. Repetition is the key to fabrication efficiency and can dramatically reduce both cost and the potential for errors. The American Institute of Steel Construction (www.aisc.org) offers extensive design guides and standards for optimizing steel structures.

8. Mechanical System Integration – Combined Systems and Heat Recovery

A powerful construction value engineering example moves beyond individual components to optimize entire building systems. This approach integrates multiple mechanical systems to reduce equipment redundancy, improve energy efficiency, and enhance occupant comfort. Instead of designing heating, ventilation, and air conditioning (HVAC) as separate, isolated units, this strategy creates a synergistic system where outputs from one process become inputs for another.

Common applications include combined heating and cooling hydronic loops, heat recovery ventilation (HRV) systems that capture energy from exhaust air, and integrated building automation systems (BAS) that intelligently manage system operations. While initial design complexity increases, the long-term benefits in operational savings and reduced capital costs are substantial.

Strategic Analysis & Impact

Integrating mechanical systems is a holistic strategy that transforms a building's energy profile and operational budget. The value is found in eliminating waste and maximizing efficiency across the entire mechanical infrastructure.

  • Cost & Time Impact: Initial capital costs for integrated equipment and advanced controls can be higher. However, this is often offset by reducing the total amount of equipment needed, potentially saving 15-20% on mechanical systems. For example, a shared geothermal loop eliminates the need for individual chillers and boilers for each building zone.
  • Performance Impact: The primary benefit is a significant reduction in energy consumption, often between 20-30%. An HRV system in a corporate headquarters can recover over 65% of the heat from exhaust air, drastically cutting annual heating costs. This directly lowers operational expenses and improves the building's environmental footprint.
  • Design Impact: This approach requires more upfront coordination and dedicated space for centralized equipment. However, it can also reduce the need for bulky rooftop units or extensive ductwork, freeing up valuable architectural space and improving aesthetics.

Key Insight: The success of mechanical system integration hinges on early collaboration and sophisticated energy modeling. Engaging a mechanical engineer specializing in sustainable design during the schematic phase is critical to identifying opportunities and accurately quantifying the long-term return on investment.

Implementation & Takeaways

Implementing integrated systems requires a forward-thinking project team committed to performance over siloed design.

  • Engage Experts Early: Bring your mechanical engineer and controls specialist into the design process from day one. Their expertise is essential for evaluating complementary system opportunities, such as linking a building’s data center cooling loop to its domestic hot water system.
  • Leverage Energy Modeling: Use detailed energy modeling software to validate design choices and provide clear data on projected savings. This analysis is crucial for securing owner buy-in and justifying any initial cost premiums.
  • Prioritize Commissioning and Training: Integrated systems are more complex. Thorough commissioning before occupancy is non-negotiable to ensure all components work together as designed. Operator training and clear maintenance protocols are vital for achieving and sustaining peak performance. For guidance on standards, organizations like ASHRAE (www.ashrae.org) offer extensive resources.

8-Point Construction Value Engineering Comparison

Measure Implementation Complexity 🔄 Resource Requirements ⚡ Expected Outcomes 📊 Ideal Use Cases 💡 Key Advantages ⭐
Substitution of Materials – High-Performance Concrete 🔄 Moderate–High: specialized mix design, strict QC, possible equipment mods ⚡ Higher material cost (+20–30%), experienced suppliers, trained crews 📊 Improved strength/durability, extended service life (100+ yrs), reduced lifecycle costs and placement time 💡 High-rise, marine structures, parking structures, harsh environments ⭐ Higher strength & durability; faster placement (SCC); smaller structural elements
Modular Construction and Prefabrication 🔄 High upfront planning & coordination; factory workflows required ⚡ Capital for factories, transport logistics, standardized tooling and interfaces 📊 30–50% schedule reduction; 20–30% labor savings; better quality control; less waste 💡 Repetitive residential, hotels, healthcare, large-volume or fast-track projects ⭐ Faster delivery, predictable budgets, superior factory QC
Value Engineering in HVAC Design – Right-Sizing 🔄 Moderate: detailed load calculations and control integration ⚡ Modeling tools, HVAC design expertise, advanced controls and commissioning 📊 15–25% equipment cost reduction; 20–30% annual energy savings; improved IAQ 💡 Offices, institutional buildings, retrofits, occupancy-variable spaces ⭐ Improved efficiency, performance, and lower operating costs
Elimination of Architectural Non-Essentials 🔄 Low–Moderate: design choices and stakeholder alignment ⚡ Minimal: alternative finishes, samples, potential mockups 📊 10–20% savings on architectural scope; faster construction; lower maintenance 💡 Retail, hotels, corporate offices, projects needing cost-controlled aesthetics ⭐ Cost reduction while retaining acceptable aesthetics and simpler maintenance
Constructability Review & Sequence Optimization 🔄 Moderate–High: collaborative IPD, BIM workflows, early contractor involvement ⚡ BIM software, contractor time, workshops and collaborative processes 📊 5–15% cost reduction; 10–20% schedule acceleration; fewer change orders 💡 Complex projects, healthcare, infrastructure, mixed-use developments ⭐ Reduced rework, improved coordination, better risk management
Foundation System Optimization 🔄 Moderate: geotechnical investigations and comparative analysis ⚡ Geotechnical borings, specialist engineering, possible ground improvement 📊 10–30% foundation cost savings; faster build with suitable shallow solutions 💡 Sites with variable soils; commercial and multi‑story developments ⭐ Significant cost savings and optimized construction schedule/equipment
Structural Steel VE – Grade & Connection Optimization 🔄 Moderate: structural analysis and fabricator collaboration ⚡ Access to premium-grade steel, skilled fabricators, modeling tools 📊 12–18% reduction in steel costs; reduced weight, shipping and fabrication time 💡 High-rises, bridges, stadiums and large steel-framed projects ⭐ Smaller members, faster installation, standardized/efficient connections
Mechanical System Integration – Combined Systems & Heat Recovery 🔄 High: complex systems coordination, controls and commissioning ⚡ Integrated equipment, advanced controls, commissioning and operator training 📊 15–20% equipment cost reduction; 20–30% energy efficiency improvement 💡 Corporate campuses, healthcare, net‑zero targets, large mixed-use buildings ⭐ Lower OPEX, reduced footprint, improved resilience and energy recovery

From Examples to Execution: Implementing a Value-First Mindset

The diverse array of construction value engineering examples detailed in this article, from optimizing foundation systems to integrating high-performance HVAC, share a common thread. They reveal that true value engineering is far more than a last-minute cost-cutting exercise; it is a proactive, strategic mindset woven into the fabric of a project from its earliest conception.

The transition from examining these examples to executing them requires a fundamental shift in perspective. Instead of asking, "How can we make this cheaper?" the value-first approach asks, "How can we achieve the essential function for the lowest lifecycle cost without sacrificing quality, durability, or performance?" This question transforms the project dynamic from a sequence of siloed tasks into a collaborative, value-seeking mission.

Recapping the Core Principles of Effective VE

Throughout the examples, several critical themes emerged as non-negotiable pillars of successful value engineering implementation:

  • Early and Continuous Collaboration: The most impactful VE opportunities are identified long before ground is broken. Integrating contractors, engineers, and architects in the schematic design phase, as seen in the foundation and structural steel optimization examples, prevents costly redesigns and unlocks synergistic solutions.
  • Lifecycle Cost Analysis (LCA) is Paramount: Initial savings are only part of the equation. As the HVAC right-sizing and high-performance concrete examples demonstrated, a higher upfront investment can yield substantial long-term returns through reduced energy consumption, lower maintenance, and increased durability. True value is measured over the building's entire lifespan.
  • Function Over Form (Without Sacrificing Design): The principle of eliminating non-essential architectural elements is not about creating bland, utilitarian structures. It's about rigorously questioning every component's purpose and cost-benefit ratio to ensure the budget is allocated to features that deliver the highest functional and aesthetic return for the owner and end-users.

Your Actionable Roadmap to Implementing Value Engineering

Moving from theory to practice is the ultimate goal. For developers, owners, and contractors looking to leverage these principles, the path forward involves a structured, intentional approach. It’s not about applying a single tactic but about building a systemic process.

Strategic Insight: Value engineering should be a scheduled, non-negotiable part of the pre-construction process. Treat VE workshops with the same importance as budget reviews or zoning meetings to formalize their role in project delivery.

To put these ideas into action, consider the following steps:

  1. Assemble an Integrated Team Early: Break down traditional silos. Bring your general contractor, key subcontractors (like mechanical and structural), and design team to the table during the conceptual phase.
  2. Define Project Functions Clearly: Before exploring alternatives, ensure all stakeholders agree on the essential functions of each building system and space. What must it do? What performance criteria are non-negotiable?
  3. Mandate a Lifecycle Perspective: Require that major decisions, especially those concerning the building envelope, MEP systems, and structural components, are evaluated using LCA. Look beyond the initial bid price.
  4. Empower Your Team to Challenge Assumptions: Foster a culture where every team member feels empowered to question the status quo and propose innovative alternatives. The best construction value engineering examples often come from a fresh perspective challenging a long-held assumption.

By embracing this proactive and collaborative framework, you transform value engineering from a reactive tactic into a powerful strategic tool. It becomes the engine that drives innovation, enhances project feasibility, and ultimately maximizes the long-term profitability and performance of your real estate assets. This is not just about building cheaper; it’s about investing smarter, building better, and creating enduring value that stands the test of time.


Ready to apply a value-first mindset to your next commercial or adaptive-reuse project? The team at Sherer Architects, LLC specializes in integrating creative design with practical, performance-driven value engineering to maximize your return on investment. Explore our portfolio and see how we turn ambitious concepts into functional, cost-effective realities at Sherer Architects, LLC.

Categories
Uncategorized

what is value engineering in construction: Boost value, cut costs

When developers hear the term “value engineering,” their minds often jump straight to cost-cutting. They picture swapping out high-quality materials for cheaper alternatives or slashing features to meet a shrinking budget. But that common assumption misses the mark entirely.

True value engineering (VE) isn't about making things cheaper; it's about making them smarter. It’s a systematic method for getting the most value out of every dollar spent by focusing on function, not just cost, without ever compromising on quality, safety, or performance.

Unpacking the Core Concept of Value Engineering

Two engineers collaborating on blueprints and a house model, discussing value engineering for construction projects.

Think of it like a master chef refining a signature dish. The goal isn't just to make it cheaper. The chef wouldn't simply swap out fresh herbs for dried ones. Instead, they might discover a new cooking technique that intensifies the natural flavors, allowing them to use less of an expensive ingredient while actually making the dish taste better.

That’s value engineering in a nutshell. It’s a creative, proactive, and analytical process that seeks to boost the overall value of a project, not just trim its initial price tag.

Function Over Form

At its heart, VE begins by asking one simple but powerful question about every single element of a project: “What does it do?”

This function-first approach forces the project team to look past the blueprints and think about the fundamental purpose of each component. For instance, a wall isn't just a wall. Its primary functions are to provide structural support, act as a thermal barrier, and block sound. Once you define those functions, you can start exploring different—and potentially better—ways to achieve them.

A VE workshop typically involves a few key activities:

  • Analyzing Function: Pinpointing the essential purpose of every system, material, and method.
  • Creative Brainstorming: Thinking outside the box to generate alternative designs or materials that fulfill the same function.
  • Life Cycle Costing: Looking beyond the initial purchase price to consider long-term expenses like maintenance, energy consumption, and eventual replacement.

The goal is to find the sweet spot where performance, quality, and cost intersect to create the highest possible value for the owner. It’s about making smarter, more informed decisions from the ground up.

To better grasp the core ideas, let’s break down the fundamental principles that separate true value engineering from simple cost reduction.

Core Principles of Value Engineering at a Glance

Principle Description Example in Construction
Focus on Function Prioritize the purpose of an element over its physical form or specification. Instead of just specifying a "brick exterior," define the function as "durable, weather-resistant cladding with a classic aesthetic." This opens the door to evaluating advanced composite panels or engineered brick systems.
Maintain or Improve Quality Any proposed change must meet or exceed the original performance and quality standards. Switching from a specified HVAC unit to a different model that not only costs less upfront but also offers 20% better energy efficiency and a longer warranty.
Consider Life Cycle Costs Evaluate the total cost of ownership, including initial construction, maintenance, operations, and disposal. Choosing LED lighting over cheaper fluorescent options. While the initial cost is higher, the savings in energy bills and bulb replacements over 10-15 years deliver superior long-term value.
Promote Innovation Encourage creative, multi-disciplinary thinking to find novel solutions to design challenges. Instead of a traditional stormwater drainage system, a team might propose a green roof and permeable pavers to manage runoff, which also adds amenity space and reduces the heat island effect.

These principles guide the entire process, ensuring that every decision genuinely adds value rather than just removing cost.

Interestingly, this whole methodology has its roots in a time of crisis. It was developed during World War II at General Electric, where an engineer named Lawrence D. Miles was tasked with maintaining production despite severe material shortages. He had to find innovative ways to achieve product function without the usual components, sparking a systematic approach that evolved into the VE we use today. You can find more about its origins and modern applications in resources from industry experts like Gordian.com.

The Real-World Benefits of Value Engineering

So, why should a developer or project owner actually care about value engineering? It's a fair question. The simple answer is that it delivers real, measurable returns that you'll feel long after the ribbon-cutting ceremony.

While it’s often mistaken for just another way to slash budgets, a properly run VE process does something far more valuable. It turns a good project into a high-performing asset built for long-term success.

The most obvious win is a reduction in initial construction costs. When you get a team to analyze the function of every single component, you start finding some serious savings. For instance, a VE workshop might reveal that a prefabricated structural system delivers the exact same performance as building it on-site, but with far less material waste and fewer labor hours. That's real capital freed up for other priorities or dropped straight to the bottom line.

Slashing Long-Term Operating Expenses

But here's where value engineering really shows its power: its intense focus on life cycle costs. A building's sticker price is just the beginning of the story. VE forces you to look at the whole picture—decades of operational and maintenance expenses.

This kind of forward-thinking pays off big time in a few key areas:

  • Energy Efficiency: Suggesting a more efficient HVAC system or better insulation might add a little to the upfront cost, but it can easily cut utility bills by 15-20% for the entire life of the building.
  • Maintenance Reduction: Think about swapping out carpet in high-traffic areas for polished concrete. It's a simple change that eliminates years of cleaning and replacement costs.
  • Improved Durability: By selecting a truly robust roofing system from the start, you're not just buying a roof; you're preventing a future of expensive leaks and repairs that chip away at the building's value.

The core idea here is moving past the temptation of the cheapest upfront option and instead focusing on genuine, lasting value. It's about making smarter decisions by looking at the project from every angle, not just the initial price tag.

This shift in mindset is crucial. When a team evaluates all the considerations beyond the lowest bid, they're actively protecting the asset from future headaches and financial drains.

Enhancing Project Quality and Performance

It's not all about the money, either. Often, the VE process just leads to a flat-out better building.

By challenging old assumptions and pushing for creative solutions, the process uncovers smarter ways to do things. A team might discover an alternative site layout that dramatically improves traffic flow, or suggest a different window glazing that floods the space with natural light and makes it a more pleasant place to be.

These aren't just small tweaks. They are fundamental improvements that boost the building's function, make tenants happier, and ultimately increase the property's market value. By optimizing the relationship between function and cost, VE ensures every dollar you spend is working hard to create a more durable, efficient, and valuable asset.

How the Value Engineering Process Unfolds

Don't mistake value engineering for some chaotic, free-for-all brainstorming session. It’s a highly structured and disciplined process—a methodical treasure hunt where a diverse team follows a clear map to uncover hidden value in a project.

This systematic approach ensures every decision is backed by solid data and directly supports the project's core functions. The entire process is broken down into six distinct phases that guide the team from a high-level analysis all the way to specific, actionable recommendations. When done right during the design stage, studies show this can lead to cost savings of 5% to 15% of the total project cost, all without compromising quality or safety. You can dig deeper into these outcomes by checking out value engineering resources on Gordian.com.

The Six Phases of a VE Study

The VE job plan provides a repeatable framework that keeps everyone focused. Let’s walk through each stage using a practical example: choosing the right HVAC system for a new commercial office building.

  1. Information Gathering: This is the bedrock of the whole process. The team starts by gathering every relevant project document they can get their hands on—design plans, cost estimates, material specifications, and the owner’s project requirements (OPR). For our HVAC example, this means collecting hard data on the building’s size, expected occupancy, insulation R-values, and local climate patterns.

  2. Function Analysis: Next, the team asks a deceptively simple question: "What does this component actually have to do?" They boil down its purpose into a simple two-word, verb-noun phrase. For an HVAC system, the primary function is to "condition air." Secondary functions might include things like "circulate air," "control humidity," and "filter particulates."

  3. Creative Brainstorming: Once the core functions are crystal clear, it’s time to generate alternatives. No idea is a bad idea at this stage. For the HVAC system, the team might throw out ideas ranging from a traditional rooftop unit to a variable refrigerant flow (VRF) system, geothermal heat pumps, or even a cutting-edge hybrid design with natural ventilation.

The whole point of this exercise is to turn cost optimization into real, tangible project value, as this flowchart shows.

Flowchart illustrating how costs are processed through operations to create business value.

As you can see, trimming both initial and long-term operational costs directly boosts the overall project value, creating a more profitable and sustainable asset for the owner.

From Ideas to Implementation

With a list of creative ideas in hand, the team’s next job is to systematically filter and refine them to find the true winners.

  1. Evaluation: Here, the team gets critical. They sift through the brainstormed ideas, weighing them against key criteria like cost, feasibility, and performance. The geothermal system might get tossed out because of its high upfront cost, while the VRF system gets flagged as a strong contender thanks to its incredible energy efficiency and zoning flexibility.

This is where abstract ideas collide with real-world constraints. The goal isn't just to find a cheaper option but to pinpoint the one that delivers the best possible balance of cost, performance, and long-term reliability.

  1. Development: The top-ranked ideas get fleshed out. This involves detailed technical analysis and, most importantly, life cycle cost calculations. For our HVAC example, the team would build a side-by-side financial model comparing the traditional unit to the VRF system, projecting everything from upfront installation costs to energy savings over 20 years and anticipated maintenance expenses.

  2. Presentation: Finally, the VE team presents its formal recommendations to the project owner and other key stakeholders. They don’t just offer an opinion; they make a data-driven case for the proposed changes, demonstrating exactly how their chosen alternative—the VRF system in this case—will deliver far superior value over the building's entire life.

Assembling Your Value Engineering Team

A successful value engineering workshop is a team sport. It absolutely depends on bringing diverse expertise and a spirit of open collaboration together to uncover the best solutions. The process thrives when different perspectives challenge the status quo. Think of it like assembling a special ops team for your project—each member brings a unique skill set critical for the mission's success.

Just gathering architects and engineers in a room isn't going to cut it. A truly effective VE team pulls together individuals who see the project through completely different lenses, from high-level design concepts all the way down to on-the-ground construction realities. This blend of viewpoints is what sparks the creative problem-solving at the heart of value engineering.

Key Players and Their Contributions

Every role on the team is distinct, and every one of them is essential. The real magic happens when the architect’s design vision meets the contractor’s practical knowledge of material costs and labor, all guided by the owner's strategic goals.

This collaborative dynamic is what breaks down siloed thinking. It ensures that any proposed changes are not just innovative but also genuinely practical. After all, a great idea on paper is useless if it can't be built efficiently or doesn't align with what the owner actually needs long-term.

The strength of a value engineering team lies in its diversity. When designers, builders, and owners work together, they can identify cost-saving opportunities that would be invisible from a single viewpoint.

So, let's break down the primary roles and what each person brings to the table.

A well-structured team ensures that every angle of the project is considered, from big-picture goals to the smallest construction details. Here’s a look at who typically sits around the value engineering table and the part they play.

Value Engineering Team Roles and Key Contributions

Role Primary Responsibility Example Contribution
VE Team Facilitator Guides the workshop, keeps the process on track, and fosters an environment of open communication and creative thinking. Mediates a debate between the architect and engineer, helping them find a middle ground on a structural change that satisfies both design intent and budget.
Project Owner/Client Defines the project's goals, budget, and what "value" truly means. They are the ultimate decision-maker on which recommendations to accept. Clarifies that long-term energy efficiency is a higher priority than the lowest possible initial cost, guiding the team's focus toward life cycle savings.
Design Team (Architects & Engineers) Provides deep knowledge of the design intent, technical specifications, and performance requirements for all project systems. Explains the functional requirements of the building envelope, allowing the team to brainstorm alternative materials that still meet performance criteria.
Contractor/Construction Manager Offers real-world insights into constructability, labor costs, material availability, and current market pricing for potential alternatives. Points out that a specified flooring material has a 6-month lead time, suggesting a readily available and equally durable alternative to avoid project delays.

Ultimately, the goal is to create a dynamic where the collective knowledge of the group is greater than the sum of its parts. This collaborative approach is what turns a standard project review into a powerful value-finding exercise.

Let's See Value Engineering in Action

Spacious industrial interior with large grid windows, bright sunlight, and mixed turf and wood flooring.

Theory is one thing, but seeing how this all plays out on a real job site is where it clicks. Let's walk through a classic scenario for commercial developers: turning an old, forgotten warehouse into a high-end, modern office space. This kind of adaptive reuse project is a perfect sandbox for a sharp VE team to work their magic.

The architect’s initial plans were stunning. They called for a massive, all-glass curtain wall system to replace the old brick facade. It looked incredible on paper and promised to drench the interior in sunlight, but the price tag was eye-watering. Worse, the design had terrible energy performance, locking the future owner into sky-high utility bills for decades.

Thinking in Functions, Not Just Features

This is where the value engineering team steps in. They didn't just see a "glass wall." They immediately started breaking it down into its core functions. What does this facade actually need to do?

  • Let natural light deep into the building.
  • Create a premium look that attracts top-tier tenants.
  • Provide a solid thermal barrier against the elements.
  • Act as the building's structural skin.

By defining the jobs the wall needed to perform, the team could start thinking outside the box. The all-glass design was a home run on light and aesthetics, but it struck out completely on insulation and cost.

This is the heart of value engineering: You stop asking, "What is it?" and start asking, "What does it do?" That simple shift opens up a world of creative possibilities that aren't chained to one specific, expensive material.

After some brainstorming, the team came back with a hybrid approach. Their design used high-performance insulated metal panels for a large portion of the facade, which immediately sent the building's R-value through the roof. But they didn't sacrifice the vision. They strategically placed larger, triple-pane window units that still created that bright, airy feeling and funneled daylight far into the office.

The Winning Outcome

The results spoke for themselves. The hybrid facade didn't just slash the upfront construction budget; it was also projected to deliver a 30% reduction in annual heating and cooling costs. That’s a powerful one-two punch that directly increases the property's net operating income and overall asset value.

And this isn't a one-off. This same thinking applies across the board. On huge infrastructure jobs like highways, VE workshops regularly find savings between 8% to 12% just by questioning standard materials and construction methods. You can see more on the proven track record of value engineering from Gordian.com.

In the end, the warehouse project was a massive success because the VE team delivered a solution that was smarter, not just cheaper. They preserved the architect's core vision while making the entire project more profitable and sustainable.

Clearing Up Common Value Engineering Myths

If you’ve been around the construction industry long enough, you’ve probably heard some strong opinions about value engineering. Unfortunately, a lot of what gets passed around misses the point entirely, framing VE as a desperate, last-minute budget hack.

Let’s set the record straight and tackle a few of the biggest myths head-on. The truth is, value engineering is a powerful strategic tool when you understand what it really is.

The most damaging myth is that value engineering is just a fancy term for cost-cutting. This is a fundamental misunderstanding. Cost-cutting is a reactive hatchet job—slashing expenses, often at the expense of quality, function, or long-term performance.

True value engineering is proactive. It’s a deep dive into the value ratio of a project, which is simply a function divided by its cost. The goal isn't just to make things cheaper; it's to find smarter ways to achieve the same—or better—function for less money.

Think of it this way: a cost-cutter might see high-end windows on the spec sheet and immediately swap them for a cheaper, lower-grade model to save a few bucks. A value engineering team looks at the purpose of those windows—daylighting, thermal performance, aesthetics—and might find a completely different solution. Maybe the answer is a redesigned facade with fewer but larger, more efficient windows that achieve all the original goals for a lower overall cost. It's about ingenuity, not just subtraction.

Timeliness and Efficiency

Another common misconception? "It’s too late for VE, the design is already done." While it’s absolutely true that the best time for a VE workshop is early on, you can find opportunities for improvement at almost any stage.

A sharp contractor can spot significant savings during construction by suggesting an alternative building method or a readily available material that doesn’t require a major redesign. It’s never a lost cause.

The core principle is continuous improvement. A well-run value engineering process doesn't slow projects down; it prevents the costly delays and change orders that arise from discovering problems late in the game.

Finally, there’s the fear that VE will bog down the project schedule. A formal VE workshop is a highly focused, short-term sprint, not a months-long committee meeting. By getting the right people in a room to challenge assumptions early, you actually prevent the kind of time-sucking, budget-killing change orders that plague projects down the line.

This systematic focus on long-term value is precisely why so many public agencies have made it standard practice. In countries like the UK and Australia, where VE has been part of the process for years, it's estimated that every $1 invested in a study can return anywhere from $10 to $30 in lifecycle savings. You can learn more about how value engineering drives smarter, data-driven decisions at Gordian.com.

Those numbers prove VE isn't about trimming the fat; it’s a powerful tool for making a strategic investment in your project’s future.

Frequently Asked Questions

Even after you get the hang of the theory, some very practical questions always come up. Let's tackle a few of the most common ones I hear from developers and project teams.

What Is the Difference Between Value Engineering and Cost Cutting?

This is the million-dollar question, and the distinction is crucial. Cost-cutting is purely reactive. It’s about slashing the upfront budget, often by swapping in cheaper materials or eliminating features, which can seriously compromise quality and long-term performance.

Value engineering, on the other hand, is a proactive, disciplined process. It’s not about finding a cheaper widget; it's about asking if we even need that widget in the first place. VE dissects the function of every component to find smarter, more efficient ways to get the same or better result, often for a lower total cost over the building's life.

The core difference is the question you're asking. Cost-cutting asks, "How can we make this cheaper?" Value engineering asks, "How can we achieve this function more effectively?"

When Is the Best Time to Perform a VE Study?

The simple answer? As early as possible. The sweet spot is during the schematic or early design development phase. Think about it: it’s infinitely cheaper and easier to move a line on a digital drawing than it is to tear down a freshly poured concrete wall.

Making fundamental changes at this early stage has a massive ripple effect on savings. While a sharp general contractor can still spot opportunities during construction, the potential for big-impact savings shrinks the further along you get.

Can Value Engineering Be Applied to Smaller Projects?

Absolutely. People often think VE is only for massive, nine-figure projects, but the principles scale beautifully. A smaller commercial build or tenant fit-out won't need a formal, multi-day workshop with a dozen consultants.

Instead, a focused half-day meeting with the owner, architect, and builder can achieve the same goal. The function-first mindset is what matters, and it can uncover huge value and prevent costly mistakes on projects of any size.

Categories
Uncategorized

A Practical Guide to Fire Station Floor Plan Design

A fire station floor plan is far more than just a blueprint for a building. It's the operational DNA of the entire facility, a strategic map that directly impacts response times, firefighter safety, and the crew's well-being. Think of it this way: every hallway, every doorway, every designated zone is meticulously planned to shave precious seconds off a call when it matters most.

Why a Modern Fire Station Floor Plan Matters

Spacious fire station interior with a red fire truck, firefighters, and a sign stating 'FLOOR PLAN MATTERS'.

Imagine a high-performance engine. For it to run at peak capacity, every single component must work in perfect harmony. The same is true for a fire station, and the floor plan is the engineering schematic that ensures this synergy. It dictates the flow of people, equipment, and information, all under the immense pressure of an emergency.

A poorly designed station introduces friction. It adds seconds to turnout times and creates unnecessary risks for the crew. On the other hand, a thoughtfully designed fire station floor plan creates a facility that’s both a rapid-response launchpad and a safe, restorative home for its firefighters.

The Core Concept of Zoning

The absolute cornerstone of modern fire station design is zoning. This isn't just about labeling rooms; it's a philosophy that divides the station into distinct areas based on their function. This strategic separation is crucial for preventing cross-contamination and streamlining movement.

Every layout decision comes back to how these three primary zones interact:

  • Operational Zone: This is the "hot" zone. It's where the action happens, containing the apparatus bay for vehicle storage and the critical decontamination areas. Durability, safety, and direct, unimpeded access to the exterior are the top priorities here.
  • Living Zone: This is the "clean" zone—a sanctuary. It includes bunk rooms, the kitchen, the dayroom, and fitness areas. The entire focus is on creating a healthy and restful environment, completely isolated from the toxins and carcinogens of the operational side.
  • Administrative and Public Zone: This area serves as the station's front office, housing command staff, reporting rooms, and public-facing spaces like a lobby. It acts as a necessary buffer between the public and the private living quarters of the firefighters.

A fire station is one of the few building types that must function as a high-stakes industrial facility, a residential dwelling, and a public administrative building all at once. The floor plan is the key to making these competing needs coexist effectively.

From Blueprint to Lifeline

The way these zones connect is non-negotiable. For example, the path leading from the apparatus bay back into the station must pass directly through a decontamination corridor. This isn't optional; it’s a critical health and safety measure that prevents dangerous particulates from being tracked into the kitchen or sleeping areas.

Likewise, the route from the bunk rooms to the apparatus bay needs to be as short and straight as humanly possible. An efficient plan gets rid of sharp turns, extra doors, and cluttered hallways. This isn't just about convenience; it’s about shaving critical seconds off the response when the alarm sounds. Every single choice, from the width of a corridor to the placement of a door, directly impacts the station's ability to protect its community and keep its own people safe.

Exploring the Core Zones of a Fire Station

Interior view of a fire station with a "CORE STATION ZONES" sign, green turf, and equipment area.

A fire station is much more than just a building; it’s a high-performance machine fine-tuned for rapid response and a sanctuary for the crew who calls it home. Every space has a very specific job, from the adrenaline-fueled operational areas to the quiet, restorative living quarters.

Getting the fire station floor plan right means understanding how these distinct zones work together. The goal is to create a seamless flow that enhances safety, efficiency, and the well-being of the firefighters. Let's break down the essential components.

The Apparatus Bay: The Heart of Operations

The apparatus bay is the undeniable nerve center of the station. This isn't just a fancy garage—it's the launchpad where every single emergency response begins. The design here is all about durability, space, and, most importantly, speed.

Floors have to be heavily reinforced to support the massive weight of modern fire trucks, and ceiling heights must be generous enough to clear the tallest aerial ladders. Even the doors are a critical decision; fast-acting bifold or four-fold models are often chosen over traditional overhead doors because they can shave precious seconds off a crew's departure time.

Of course, proper ventilation is non-negotiable. Sophisticated systems are designed to capture and vent harmful diesel exhaust fumes immediately, preventing them from creeping into the station’s other zones.

The Decontamination Zone: A Critical Buffer

Tucked right next to the apparatus bay is arguably one of the most vital areas in any modern fire station: the decontamination (decon) zone. This space functions as a one-way corridor, designed to trap carcinogens and other contaminants before they can find their way into the living quarters.

The decon zone is the single most important design element for long-term firefighter health. It creates an essential airlock between the "hot" operational side and the "clean" living side of the station.

Firefighters returning from a call must follow a strict protocol that moves them through this area. The zone is typically broken down into a few key spaces:

  • Gross Decon: Where firefighters get an initial rinsing of their turnout gear.
  • Gear Storage: Dedicated, separately ventilated rooms to store contaminated gear away from everything else.
  • Transition Showers: A required stop for firefighters to shower before they're allowed to enter the clean living areas.

Living Quarters: The Sanctuary

Once through the decon zone, firefighters step into the "clean" side of the station. This is their home away from home for grueling 24 or 48-hour shifts, so the floor plan must be designed to support genuine rest and recovery.

  • Bunk Rooms: We've seen a major shift away from large, open-bay dormitories toward individual or semi-private bunk rooms. This one change can drastically improve sleep quality—a vital component for maintaining mental and physical health in such a high-stress profession.
  • Kitchen and Dayroom: This is the communal hub, the heart of the station's social life. An open-concept kitchen flowing into a comfortable dayroom helps build camaraderie and teamwork. The design should feel less institutional and more residential, giving crews a real space to decompress.
  • Fitness Center: Staying in peak physical condition is part of the job. A well-equipped, dedicated fitness area—often with easy access to an outdoor space—is now a standard feature in any new fire station floor plan.

Administrative and Specialized Support Areas

Beyond the main operational and living zones, today's stations require a handful of other key spaces. A watch room or communications center often acts as the station's brain, requiring specific layouts for dispatch equipment and monitoring systems. When designing these high-tech hubs, it’s wise to account for advanced emergency management system features to ensure the physical space can support the technology.

You'll also find training rooms, administrative offices for the captain or chief, and even public-facing community rooms becoming standard. Each zone, from the rugged apparatus bay to the quiet bunk room, has a distinct and crucial role to play. A successful design orchestrates their functions into a seamless whole, creating a facility that is safe, efficient, and truly supportive of its crew.

To give you a clearer picture, here's a quick summary of how these zones are organized:

Core Zones in a Fire Station Floor Plan

Zone Key Spaces Included Primary Design Goal
Apparatus Bay Vehicle Bays, Tool Storage, Workshop Maximize speed, durability, and operational readiness.
Decontamination Gross Decon, Gear Storage, Showers Isolate contaminants and protect firefighter health.
Living Quarters Bunk Rooms, Kitchen, Dayroom, Fitness Promote rest, recovery, and crew camaraderie.
Support & Admin Offices, Watch Room, Training, Public Areas Manage station operations and community engagement.

Ultimately, a thoughtfully zoned floor plan ensures that every part of the station works in harmony, supporting the health and readiness of the firefighters who depend on it.

Designing for Safety and Rapid Response

A fire station floor plan isn't just about arranging rooms logically—it's a life-saving tool where every single design choice shaves seconds off a response time. This is where the rubber meets the road, turning architectural theory into a facility that has to perform flawlessly under extreme pressure. When an alarm blares, seconds count, and the building's layout is the crew's first and best advantage.

The goal is to create a sense of controlled urgency. This means circulation paths need to be dead simple, direct, and completely free of obstacles. When a call comes in, firefighters have less than a minute to go from zero to one hundred. A great floor plan makes that transition feel like second nature.

It all boils down to two key principles: creating the fastest possible path to the trucks and protecting the crew's long-term health by keeping the "dirty" part of the job separate from the "clean" living spaces. These aren't just nice ideas; they're critical goals we achieve with smart, deliberate design.

Optimizing the Response Path

The path from the bunk room to the apparatus bay is the single most important route in the station. The mission is simple: keep it as short and as straight as humanly possible. No zig-zagging hallways, no unnecessary doors, no clutter to trip over in the dark.

Put yourself in the boots of a firefighter jolted awake at 3 AM. The path needs to be so ingrained that they can navigate it on muscle memory alone. This is why you'll often see living quarters placed right next to the apparatus bay, sometimes with several direct-access doors to prevent a traffic jam when everyone is scrambling at once.

A fantastic real-world example of this principle comes from a large-scale project in Australia. By building new stations and relocating older, poorly-sited ones across Greater Sydney, they saw a measurable drop in average fire engine arrival times. The data proved that better layouts and locations didn't just improve response times—they led to better fire containment and less property damage. It’s a powerful testament to how a building's design directly impacts community safety. You can read more about these findings on the U.S. Fire Administration website.

The Critical Separation of Hot and Clean Zones

Just as critical as getting out the door quickly is protecting the crew's health when they get back. We now know far more about the long-term dangers of carcinogens and other toxins that cling to gear and equipment after a fire. A modern fire station floor plan has to tackle this head-on with an uncompromising approach to zoning.

We think about it in terms of "hot," "warm," and "clean" zones.

  • Hot Zone: This is the apparatus bay itself, where contaminated trucks and gear first return.
  • Warm Zone: Think of this as an airlock. It’s a dedicated decontamination corridor where firefighters can do a gross decon of their gear, store it in specially ventilated rooms, and shower before going any further.
  • Clean Zone: This includes the living quarters, kitchen, administrative offices, and any public-facing areas. Contaminated gear or personnel are never allowed to cross into this space.

By forcing a one-way flow from the hot zone, through the warm zone, and into the clean zone, the floor plan itself becomes an active defense mechanism. It protects firefighters from chronic exposure to hazardous materials long after the fire is out.

This isn't just a "best practice"—it's a non-negotiable standard for protecting the health and careers of first responders. Following strict building codes, like those from the National Fire Protection Association (NFPA), is mandatory. For a look at how technology is helping manage these complex requirements, it's worth exploring the role of AI in navigating building codes and regulations.

Smart Apparatus Bay Design

The design of the apparatus bay is where speed and safety converge. There are two primary models, and the right choice often comes down to the site's limitations and the department's operational needs.

Drive-Through Bays:
This layout is the gold standard for safety, period. It allows apparatus to pull in from one side of the station and drive straight out the other, completely eliminating the need for slow, dangerous backing maneuvers. This forward-only flow is much safer on-site and can shave precious seconds off a departure. The only real downside is that it requires a larger lot with access on two sides, which can be tough to find in dense urban areas.

Back-In Bays:
This is the more traditional and space-efficient approach, but it requires drivers to reverse massive vehicles into tight spots. While it’s incredibly common, it inherently brings a higher risk of accidents. To make it work safely, the design must include a generous concrete "apron" in front of the station for maneuvering, clear sightlines, and is often supplemented with sophisticated vehicle cameras and sensor systems to give drivers an extra set of eyes.

No matter which model you choose, every bay must have a robust vehicle exhaust capture system. These are typically hose-based systems that connect directly to a vehicle's tailpipe to vent toxic diesel fumes outside. It’s an absolutely critical health and safety feature that prevents those fumes from building up inside the station where people live and work.

Common Fire Station Layouts and When to Use Them

Not every fire station is built from the same blueprint. What works for a quiet, rural volunteer department will be completely wrong for a high-call-volume urban crew. Choosing a layout isn’t about picking what looks best—it’s a critical decision that has to balance the reality of your site, your budget, and the daily operational needs of your firefighters.

Think of it like choosing a tool for a job. You wouldn't use a screwdriver to hammer a nail. In the same way, the right floor plan is the one that’s perfectly suited to the unique demands of the community it serves. The first step is getting familiar with the most common designs.

Before we dive into specific layouts, this graphic illustrates the three core principles that guide every modern fire station design: speed, safety, and readiness.

An infographic showing a three-step process: Fast Path (running person), Clean Zone (water drop), and Safe Bay (delivery truck).

This flow—from a rapid response path to controlling contaminants and maintaining a secure apparatus bay—is the foundation of an efficient and safe station.

The Single-Story Layout

When you have the land to work with, the single-story layout is king. It’s the most common design for a reason: it’s simple, efficient, and fast. By placing all the essential zones—apparatus bays, living quarters, and administrative offices—on the same level, you create the shortest, most direct path from the bunk room to the truck.

This design naturally eliminates stairs and fire poles. While poles are an iconic part of fire station lore, they also represent a significant fall risk. Keeping everything on one floor creates a safer, more intuitive environment that shaves precious seconds off turnout times and makes meeting ADA requirements much simpler.

Of course, the big catch is its footprint. A single-story station needs a lot of real estate, which can be a deal-breaker in dense urban areas where land is either unavailable or prohibitively expensive.

The Two-Story Configuration

What do you do when your site is tight? You build up. The two-story fire station floor plan is the classic solution for compact urban lots. Typically, the apparatus bay and support spaces occupy the ground floor, while the living quarters—bunks, kitchen, dayroom—are stacked directly above.

This vertical design dramatically shrinks the building’s footprint, allowing a full-service station to fit on a much smaller piece of land. It’s also the reason the fire pole was invented, offering a gravity-powered shortcut to get crews from the living area down to the trucks. Modern designs also rely on well-placed, wide staircases as a safer alternative.

The decision to go multi-story is almost always driven by site constraints. It’s a brilliant way to save space, but it adds complexity. You have to carefully engineer the flow to ensure crews can still get from the second floor to the bay safely and without delay.

Back-In Versus Drive-Through Designs

This is one of the most fundamental decisions you'll make, and it shapes the entire site plan. The traditional back-in model is a space-saver, but it forces firefighters to perform tricky, high-risk backing maneuvers every time they return to the station. This layout can be made much safer with a large concrete apron for maneuvering and the help of modern vehicle cameras and sensors.

The drive-through design, on the other hand, is the gold standard for on-site vehicle safety. It allows apparatus to enter through one set of bay doors and exit through another, completely eliminating the need to back in. This simple forward flow dramatically cuts the risk of accidents. For instance, a new station proposed in Huntington, Indiana, made this a core safety feature of its design.

The trade-off is obvious: land. A drive-through station needs a "through lot" with access from two streets or a very deep parcel to accommodate the flow. That’s a luxury many municipalities just don't have.

Ultimately, the best fire station floor plan is the one that gives its crew the safest and most efficient path to response, all while respecting the real-world constraints of the budget and the building site. Whether it’s a sprawling single-story campus or a compact two-story urban station, the goal is always the same: a fast, safe, and effective response.

How Fire Station Design Has Evolved

To get a real handle on the modern fire station floor plan, it helps to look at where it came from. The fire stations we build today didn't just appear overnight; they're the result of centuries of trial, error, and adaptation, with each era leaving its own distinct mark on the blueprint.

Imagine the earliest firehouses. They were little more than basic sheds or barns, built for one simple purpose: to keep horse-drawn pumpers and handcarts out of the rain and snow.

Their job was straightforward—store the gear. The designs were purely practical, usually just a big central door and maybe a small stable off to the side. You wouldn't find living quarters, decontamination zones, or fitness rooms. The mission was purely logistical.

The Shift to Motorized Apparatus

The invention of the motorized fire engine in the late 19th and early 20th centuries changed everything. This one piece of technology forced a ground-up rethink of fire station design. The story of how fire station layouts evolved is really the story of these technological and social shifts.

As engines replaced horses, stations had to get bigger and stronger to accommodate larger, heavier vehicles that needed to get out the door fast. This meant designing larger apparatus bays with wider doors and reinforced floors. You can take a deeper dive into this architectural shift and how it still influences us today by exploring the history of fire station design.

But this wasn't just about making space for bigger trucks. Motorized apparatus gave fire departments incredible speed and range, turning firefighting from a small-scale neighborhood effort into a professional, city-wide service. This new level of professionalism demanded full-time firefighters on duty around the clock.

From Garage to Home

The introduction of 24-hour shifts created a whole new list of design needs. A fire station could no longer just be a garage for a truck; it had to function as a second home for the crew. This is when the idea of separate "living zones" really started to emerge.

  • Bunk Rooms: What started as large, open dormitories slowly evolved into more private sleeping quarters.
  • Kitchens: A shared kitchen became the heart of the station, a necessity for crews living and eating together.
  • Dayrooms: Spaces for training, unwinding, and building camaraderie became standard.

This dual purpose added new layers of complexity to the floor plan. The building was now serving two very different masters: the urgent, industrial demands of the apparatus bay and the everyday residential needs of the firefighters.

The modern fire station floor plan is a direct response to an expanded mission. It has evolved from a simple equipment shed into a multi-functional facility that must support not only emergency response but also the long-term health, wellness, and operational readiness of its firefighters.

And that evolution is still happening. Today, we're focused on firefighter health and safety like never before. New designs include sophisticated decontamination corridors to keep carcinogens out of the living areas and create more restorative environments for the crew. Every new challenge continues to shape the blueprint for the fire station of tomorrow.

Answering the Big Questions About Fire Station Design

When you're planning a project as vital as a fire station, a lot of questions come up. It's only natural. From city officials to the design team, everyone needs solid answers to make the right calls. Let's tackle some of the most common questions we hear when developing a modern fire station floor plan.

Getting these fundamentals right is the first step toward building a station that's a smart investment in the safety of both the community and its firefighters.

What Is the Most Critical Factor in a Fire Station Floor Plan?

Hands down, the single most critical factor is the speed and clarity of the response path. When the alarm sounds, there needs to be a straight, unobstructed shot from the living quarters to the apparatus bay. Every single second shaved off that time can make a life-or-death difference out in the field.

This means thinking carefully about where you put every room, doorway, and hall to cut down travel time and remove any bottlenecks. Running a very close second is the non-negotiable separation of "hot zones"—areas contaminated by carcinogens and soot from a fire—from the "clean zones" where the crew eats and sleeps. That division is absolutely essential for protecting their long-term health.

How Much Does a New Fire Station Typically Cost?

The final price tag can swing pretty wildly depending on the region, the station's size, and the features you include. That said, you can generally expect construction costs to fall somewhere between $190 and over $250 per square foot in today's market.

For a smaller station of around 15,000 square feet, you're looking at a construction budget in the neighborhood of $2.8 million to $3.75 million. And that's just for the building itself. Don't forget that this number doesn't cover land costs, architectural fees, site work, or the specialized equipment, all of which will add a significant amount to the total project cost.

What Are the Benefits of a Drive-Through Apparatus Bay?

The biggest win here is safety. A drive-through bay means firefighters don't have to back those massive, heavy engines into a tight space—a tricky maneuver that’s a recipe for accidents, injuries, and expensive vehicle damage.

A drive-through apparatus bay simplifies vehicle movement into a continuous forward motion, improving both on-site safety and operational speed during departures and returns.

This design naturally makes things run smoother, since trucks can get in and out faster. The main trade-off? You need a bigger piece of land with access from two sides. Securing a site like that, especially in a built-up urban area, can be a major challenge and a big-ticket item.

How Do Modern Floor Plans Support Firefighter Wellness?

Today’s fire station designs are worlds away from the old models, with a much bigger focus on both physical and mental well-being. It all starts with those distinct contamination control zones we mentioned, which are designed to keep toxic exposures from fires from following firefighters into their living spaces.

The living quarters themselves are also designed to be places of rest and recovery. We're seeing a major shift toward private or semi-private bunk rooms because good sleep is no longer a luxury—it's a necessity. Other features that are now becoming standard include:

  • Dedicated Fitness Rooms: To help the crew stay in peak physical condition.
  • Quiet Rooms or Decompression Areas: Giving firefighters a space to mentally recharge after a tough call.
  • Natural Lighting: Flooding dayrooms and common areas with daylight has a proven positive effect on mood.
  • Access to Outdoor Spaces: A simple patio or green space offers a welcome place to unwind.

These aren't just amenities; they are crucial components that help firefighters manage the incredible stress that comes with the job.


At Sherer Architects, LLC, we see every fire station as a unique puzzle where every piece—from operational flow to firefighter wellness—must fit together perfectly. We walk owners and developers through each phase of the design and construction process, making sure the final building is not only beautiful and built to last but is perfectly tuned for its critical mission. See how our attentive listening and decades of experience can bring structure to your vision at https://shererarch.com.

Categories
Uncategorized

The Ultimate Guide to the Design of Hospitals

The way we design hospitals has fundamentally changed. It’s no longer about just putting up functional buildings; it's about crafting complex ecosystems designed for healing. The architecture itself has become an active partner in improving patient outcomes, lifting staff morale, and serving the wider community.

Rethinking the Blueprint for Modern Hospitals

Bright, modern hospital lobby with an indoor tree, large windows, and 'Healing by Design' sign.

Picture a hospital not as a sterile, intimidating place, but as a space intentionally designed for recovery. Every detail—from the hallways and patient rooms to the waiting areas—is purposefully shaped to lower stress, stop infections from spreading, and support the caregivers doing their critical work. This move away from a purely clinical model to a truly human-centered one is what modern healthcare architecture is all about.

This guide gets into the strategic, layered thinking required to build the healthcare facilities of the future. We're going to look past the concrete and steel to the core principles that strike a balance between complex medical functions and a deeply human experience. One of the main goals here is to proactively boost hospital operational efficiency, which ensures everything runs smoothly and resources are used wisely.

From Clinical Boxes to Healing Spaces

Not long ago, hospitals were designed primarily for the convenience of the medical staff. This often led to a confusing maze of corridors and cold, impersonal rooms that could make a stressful situation even worse for patients. Today, that perspective has been completely flipped. We now have solid evidence showing a direct connection between the physical environment and a patient's well-being.

The modern hospital is designed with the understanding that the building itself is a critical tool in the healing process. Every design choice, from the flow of natural light to the layout of a patient room, is made with recovery in mind.

We've learned that patients who feel calmer and more comfortable tend to have better health outcomes. This patient-first mindset is what drives the big architectural decisions and shapes every single phase of a project, from the initial idea to the day the doors open.

The Pillars of Modern Hospital Design

To bring these sophisticated healing environments to life, architects and hospital leaders have to build on several integrated pillars. Think of these as the essential framework for a facility that’s safe, effective, and ready for whatever comes next.

Key areas of focus include:

  • Advanced Infection Control: This means using layouts, materials, and ventilation systems that are actively hostile to pathogens and their transmission.
  • Seamless Technology Integration: The building's infrastructure has to support it all—telehealth consultations, electronic health records, robotic surgical assistants, and smart room controls.
  • Built-in Flexibility and Adaptability: We need to create spaces that can be reconfigured on the fly to meet new medical demands, like handling a sudden patient surge during a public health crisis.

When you get these elements right, hospital design becomes much more than a construction project. It becomes a strategic investment in community health, staff well-being, and truly superior patient care.

The Core Principles That Shape Modern Hospitals

Hospital hallway featuring a 'PATIENT-CENTERED CARE' sign on a window with a view of greenery.

Great hospital design isn't just about aesthetics or building codes. It's a deep, strategic process focused on creating a true healing environment. The best facilities are built on a foundation of core principles that put patients first, empower staff to work efficiently, and ensure the hospital remains viable for decades to come. The building itself must become an active participant in the care process.

This shift in thinking is happening globally. With over 16,500 hospitals worldwide, architects are constantly adapting to new challenges like managing epidemics, caring for aging populations, and treating chronic diseases. It’s no surprise that North America and Europe are leading the charge in hospital architecture, pushing these patient-centric principles to the forefront of every new project. For a deeper dive, check out the global hospital architecture market analysis from Fortune Business Insights.

Let's break down the key ideas that drive modern hospital design.

Key Principles of Modern Hospital Design

The following table summarizes the foundational concepts that turn a building into a high-functioning healthcare environment. Each principle has a clear goal and real-world applications that directly influence patient outcomes and operational success.

Design Principle Primary Goal Practical Example
Clinical Adjacencies Minimize travel time for staff and patients, speeding up care delivery. Placing the Emergency Department next to diagnostic imaging (X-ray, CT) for rapid trauma assessment.
Infection Control Reduce hospital-acquired infections (HAIs) through environmental design. Using specialized HVAC systems for negative pressure rooms and non-porous, antimicrobial surfaces.
Flexibility & Future-Proofing Design spaces that can adapt to changing technology and healthcare needs. Building patient rooms with the infrastructure to easily convert to ICU-level care during a surge.

These principles aren't just abstract ideas; they are practical, deliberate choices that have a massive impact on the day-to-day reality of a hospital.

Mastering Clinical Adjacencies

Think of clinical adjacencies as the art of choreographing a complex dance. It’s about strategically placing departments to make every movement logical and efficient, saving precious time when it matters most. Just like a chef arranges a kitchen so every tool is within reach, a hospital architect places interacting departments side-by-side.

The classic example is positioning the Emergency Department (ED) right next to diagnostic imaging. When a patient arrives with a critical injury, you can't afford to waste minutes wheeling them down long corridors. This tight adjacency means they can get from the ambulance bay to a CT scanner in moments, leading to faster diagnosis and life-saving intervention. The same logic applies to locating surgical suites near the Intensive Care Unit (ICU) to make post-op transfers as smooth and safe as possible.

The success of a hospital's layout is measured in steps saved and seconds gained. Smart adjacencies reduce staff fatigue, minimize patient transport risks, and directly contribute to better clinical outcomes.

Designing for Infection Control and Safety

In a hospital, the building itself must be an ally in the fight against infection. This goes far beyond routine cleaning; it means embedding infection control into the very DNA of the facility to create a shield that protects everyone inside.

Architects use several key strategies to achieve this:

  • Airflow Management: This involves sophisticated HVAC systems that create negative pressure rooms, which are essential for containing airborne pathogens and isolating patients with infectious diseases.
  • Material Selection: Surfaces matter. Choosing non-porous, antimicrobial, and easy-to-disinfect materials for floors, walls, and counters prevents germs from finding a place to hide and multiply.
  • Smart Layouts: Good design creates intentional separation between "clean" areas (like sterile supply rooms) and "soiled" ones (like utility closets). Prioritizing single-patient rooms is also a huge factor in preventing cross-contamination.

This meticulous approach extends to every detail, including the design of hospital sterile storage racks where medical supplies are kept. Proper storage is a critical link in the chain of infection control, ensuring instruments remain sterile until the moment they are needed.

Embracing Flexibility and Future-Proofing

Healthcare changes at a breakneck pace, and a hospital built today must be ready for the medical realities of tomorrow. Flexibility is about designing spaces that can be reconfigured without a full-scale, disruptive renovation. It's an investment in the building's long-term relevance.

This "future-proofing" can take many forms. For instance, a universal room design allows a standard patient room to be quickly adapted for higher-acuity care, like an ICU bed, simply by activating pre-installed medical gas lines and electrical outlets. This kind of planning is invaluable during a public health crisis or a sudden patient surge.

Another approach is using modular walls and open-plan structural designs. This makes it far easier to expand a department or integrate new technology down the road, all with minimal interruption to the hospital's daily operations. This foresight ensures the facility can evolve right alongside medicine itself.

The Journey of Building a Hospital, from Blueprint to Bedside

Building a hospital isn't like putting up an office tower; it's more akin to orchestrating the birth of a small, hyper-specialized city. It's a massive undertaking that follows a clear, deliberate path, each stage built carefully on the one before it. The entire process is designed to transform a community's need for care into a living, breathing facility that saves lives.

It all starts long before a single line is drawn on a blueprint. This first crucial step, Programming and Feasibility, is where the big, foundational questions get answered. Think of it as the strategic DNA of the entire project.

Phase 1: Programming and Feasibility

Imagine you’re opening a new restaurant. Before you even think about the color of the napkins, you have to decide: What kind of food are we serving? Who are our customers? How many tables do we need? That's the essence of hospital programming.

This stage is all about deep-dive research. We're looking at community health data to pinpoint the most pressing needs—is it a larger, more efficient emergency department? An expanded maternity ward? A brand-new cancer center? We bring everyone to the table—doctors, nurses, administrators, and community leaders—to define the project’s goals and what it absolutely must do. A detailed business case is built, spelling out the vision, estimating the costs, and projecting the potential return, ensuring the whole idea is viable before anyone commits serious money.

Phase 2: Schematic Design and Development

Once we've figured out the "what" and "why," the team moves into Schematic Design. This is where architects start turning all those words and data points into the first rough sketches. They’ll create block diagrams and preliminary floor plans that show how different departments will connect—essentially mapping out the hospital's circulatory system.

From there, we get into Design Development, where that initial vision gets a heavy dose of engineering reality. This is an intensely collaborative phase. Architects work shoulder-to-shoulder with structural, mechanical, electrical, and plumbing (MEP) engineers to weave in the hospital's complex backbone—the HVAC systems, medical gas lines, electrical grids, and IT networks. It’s like a massive, high-stakes puzzle, fitting all these critical systems together safely and efficiently.

Phase 3: Regulatory Approvals and Compliance

Hospitals are some of the most heavily regulated buildings on the planet, and for good reason. The Regulatory Approval phase is a gauntlet of codes and standards all aimed at ensuring patient safety, accessibility, and privacy. The design has to successfully navigate a maze of requirements from a whole host of authorities.

Key areas we have to nail down include:

  • Americans with Disabilities Act (ADA): Making sure every inch of the facility is accessible to people with disabilities.
  • Health Insurance Portability and Accountability Act (HIPAA): Designing spaces that protect patient privacy, from the way a check-in counter is configured to the acoustics of a consultation room.
  • Facility Guidelines Institute (FGI): Following the industry-accepted baseline standards for healthcare design and construction.
  • Local and State Building Codes: Satisfying all the fire safety, structural, and environmental rules.

Getting all the necessary permits is a critical—and often painfully long—step that requires meticulous documentation and review.

This isn't just a box-ticking exercise. Navigating the web of regulations fundamentally drives the design, influencing everything from room layouts and corridor widths to the materials we choose. Getting compliance wrong early on can lead to eye-watering redesign costs and major project delays down the road.

Phase 4: Construction and Commissioning

Finally, with an approved design locked in, we can start building. The Construction phase demands an incredible level of specialized management to coordinate the dozens of trades working on site. A hospital is worlds more intricate than a typical commercial building, demanding expertise in everything from installing lead-lined walls in imaging suites to calibrating sophisticated air filtration systems in operating rooms.

As the industry grapples with challenges like workforce shortages and tight finances, new ways of getting projects done are taking hold. Approaches like Design-Build and Integrated Project Delivery (IPD) are gaining ground because they bring designers and builders together much earlier in the game. This fosters better communication and efficiency, which is becoming vital for managing the sheer complexity of modern hospital construction. You can discover more about the trends shaping the hospital architecture market and how the field is evolving.

The very last step before the doors swing open is Commissioning. This is an exhaustive testing process where every single system—from the backup generators down to the nurse call buttons—is checked, double-checked, and pushed to its limits to prove it works exactly as intended. Only after this rigorous validation can a hospital be deemed ready and safe to welcome its first patients.

Managing the Complex Costs of Hospital Construction

Hospital construction projects are, without a doubt, some of the most financially intensive builds in any sector. For developers and owners, getting a firm grip on what drives the budget is non-negotiable. The costs go far beyond just bricks and mortar; they’re a tangled web of physical materials, specialized equipment, and essential services, each with a hefty price tag.

The scale of this industry is massive. In the United States alone, hospital construction is on track to become a $34.6 billion industry by 2025. That figure is the result of a steady 2.1% compound annual growth rate over the last five years—a remarkable trend, especially considering the project delays and supply chain chaos kicked off by the pandemic. You can dive deeper into the numbers in this in-depth hospital construction industry analysis from IBISWorld.

Differentiating Hard Costs and Soft Costs

To truly manage a hospital budget, you first have to break it down into its two core parts: hard costs and soft costs.

Think of hard costs as everything you can physically touch when you walk through the finished building. These are the direct, tangible expenses tied to the actual construction.

Examples of hard costs include:

  • Structural Materials: The steel skeleton, concrete foundations, and roofing that give the building its form.
  • Specialized Medical Equipment: Big-ticket items that are the heart of the hospital, like MRI machines, CT scanners, and linear accelerators.
  • MEP Systems: The incredibly complex mechanical, electrical, and plumbing networks, including the high-spec HVAC systems vital for sterile and clinical environments.

On the other hand, soft costs are all the essential but less tangible services needed to get the project off the ground and through to completion. You can't see them in the final structure, but the project would completely fall apart without them. These typically cover architectural and engineering fees, legal permits, insurance, and specialized consultants.

This visual helps illustrate the general flow of a hospital project, moving from initial concept to the final build-out.

A visual representation of the construction process, showing planning, design, approval, and build stages.

Every single stage in this process carries its own mix of hard and soft costs, all of which need to be tracked and managed with precision.

Key Drivers of Budget and Schedule Overruns

Even the best-laid plans can go sideways. Hospital projects are notoriously susceptible to budget and schedule creep, and knowing where the pitfalls are is the first step to avoiding them.

One of the biggest culprits today is the global supply chain. A single delayed shipment of specialized medical equipment or a shortage of specific building materials can trigger a domino effect, bringing multiple trades to a standstill and pushing the completion date further and further out.

A successful hospital project isn't just about managing the budget on paper; it's about proactively managing risk in the real world. Acknowledging potential disruptions from the start allows teams to build contingencies and response plans into the project timeline.

Another huge factor is the intricate coordination of specialized trades. A hospital construction site is like an orchestra with dozens of highly specialized players—from medical gas installers and shielding experts to low-voltage data technicians. If one team's work gets delayed, it can easily prevent three or four others from even starting their jobs. This is where truly effective project management becomes the linchpin that holds everything together, keeping the complex process moving forward.

Designing Hospitals for Sustainability and Resilience

A rooftop with solar panels and a green roof on a building, representing sustainable resilience.

We used to think about hospital design in terms of immediate patient needs. Today, that perspective has broadened to include a much deeper responsibility—the long-term health of the community and the planet. This isn't just about building a place for treatment; it's about creating a core piece of community infrastructure.

The shift is from simply building for today to engineering a facility that’s both environmentally responsible and ready for whatever crises might come its way. This dual focus on sustainability and resilience is no longer a "nice-to-have" feature. It's now a fundamental part of modern healthcare architecture and a strategic investment that pays off in operational savings, better public health, and long-term viability.

Building Green for Healthier Outcomes

In a hospital, sustainable or "green" design goes far beyond just shrinking an environmental footprint. It's about creating a healthier indoor environment for the very people the facility serves—patients and staff. Think of it as a form of preventative care for the building itself.

Key green building practices we see in the field include:

  • Energy-Efficient Systems: High-performance HVAC systems, LED lighting, and better insulation can make a huge dent in a hospital's massive energy bill.
  • Water Conservation: With a facility running 24/7, low-flow fixtures and systems for harvesting rainwater and recycling greywater are essential for minimizing water consumption.
  • Non-Toxic Materials: We carefully select paints, flooring, and furniture with low or zero volatile organic compounds (VOCs). This directly improves indoor air quality, which is absolutely critical for patients with respiratory issues.

These practices are no longer on the fringe; they're essential parts of the design strategy. There's a clear industry-wide push to integrate building systems that not only improve patient care but also reduce environmental impact. You can explore the latest research on healthcare building design to see just how prevalent this trend has become.

Engineering Resilience for Unpredictable Events

If sustainability is about a hospital's day-to-day impact, resilience is about its ability to stand strong and stay fully operational when a crisis hits. A truly resilient hospital becomes a community's ultimate safe harbor during a hurricane, a massive power outage, or the next pandemic.

Resilience isn't just about having a backup generator. It's about designing a self-sufficient ecosystem that can function independently when external support systems are compromised.

This means we have to design for self-sufficiency and durability from the ground up. For example, we now place critical infrastructure like emergency generators and main electrical gear on upper floors to protect them from flooding—a hard lesson learned from past disasters. Integrating on-site power generation with solar panels and battery storage means the hospital can keep the lights on and the ventilators running during a prolonged blackout.

This proactive approach ensures the facility can continue to provide life-saving care when the community needs it most. By planning for the worst-case scenario, designers and owners guarantee the hospital remains a pillar of strength and reliability. It's one of the smartest, most essential investments you can make.

Digging Into the Big Questions in Hospital Design

When you get into the nitty-gritty of designing a hospital, a few key questions always surface. Whether you're a developer, a hospital administrator, or an architect, you need to get your head around the core drivers, the latest trends, and the critical mistakes that can make or break a project. Let's tackle some of the most common questions head-on.

The sheer scale of investment here tells you how high the stakes are. The market for healthcare buildings was sitting around USD 299.57 billion in 2025. It’s expected to climb to USD 340.6 billion by 2029, a clear signal of the relentless demand for better, smarter healthcare spaces. You can discover more insights about healthcare building trends on Research and Markets.

What Is the Single Most Important Factor in Modern Hospital Design?

If you have to boil it all down to one thing, it's the careful balancing act between the patient experience and clinical efficiency. People often treat these as competing priorities, but that’s a huge mistake. The truth is, they're two sides of the same coin.

Think about it. A confusing floor plan isn't just a clinical inefficiency; it creates real stress and anxiety for patients and their families. On the flip side, a design that thoughtfully incorporates natural light and private, quiet rooms doesn't just feel better for the patient—it's been proven to speed up recovery times. That frees up beds faster, which is a direct boost to clinical efficiency. The best designs create a virtuous cycle where one reinforces the other.

How Is Technology Changing Hospital Layouts?

Technology isn't just a bolt-on feature anymore; it's fundamentally rewiring the hospital's physical DNA. The rise of digital health tools means architects have to completely rethink how space, infrastructure, and movement work together.

You can see this playing out in a few key ways:

  • Telehealth Integration: Modern hospitals need dedicated, sound-proofed rooms for virtual consultations. These spaces are becoming just as important as traditional exam rooms, linking specialists to patients anywhere.
  • AI-Driven Logistics: Automated carts are now delivering everything from medications to linens. This requires a new approach to corridor design and storage, sometimes even creating separate "backstage" pathways for robotic traffic.
  • Smart Patient Rooms: Rooms are being built from the ground up as integrated tech hubs. They can monitor vitals, let patients control their own lighting and temperature, and offer communication and entertainment all through a single device.

A modern hospital has to be a digital-first environment. The architecture must be planned to support the flow of data with the same precision it uses to support the flow of people.

What Are the Biggest Mistakes to Avoid?

Every project has its own quirks, but there are a few classic blunders that can send a hospital project off the rails. These mistakes lead to expensive fixes down the road and create operational nightmares that last for years.

Here are three of the biggest ones we see time and again:

  1. Failing to Involve Clinical Staff Early: When architects and developers don’t get doctors, nurses, and technicians in the room from the very beginning, they end up with spaces that look great in a blueprint but are a nightmare to actually work in.
  2. Underestimating Regulatory Timelines: Getting through the maze of health codes and city approvals is a marathon, not a sprint. Assuming you’ll get your permits quickly is one of the most common reasons for massive schedule delays.
  3. Not Planning for Future Expansion: A hospital that’s already at 100% capacity on opening day is a hospital with a very short shelf life. Smart design always includes modular components and sets aside "soft space"—areas that can be easily and inexpensively converted to handle future growth or new medical services.
Categories
Uncategorized

Sustainable Design in Architecture A Practical Guide

Sustainable design isn't just about bolting on a few solar panels and calling it a day. It’s a complete design philosophy that considers a building’s environmental footprint, its economic performance, and, most importantly, the well-being of the people inside it. It’s about designing and constructing buildings that are genuinely efficient, healthy, and resilient from their very foundation.

Rethinking Architecture Beyond Aesthetics

Two women discussing documents and a wooden architectural model at a sustainable design event.

For a long time, "green" building was seen as a fringe movement, something that came with a high price tag and experimental, sometimes odd, designs. That perception has been turned completely on its head. Sustainable design is no longer a "nice-to-have" add-on; it's now an essential practice. The shift is driven by hard economic realities, stricter regulations, and a growing recognition of the massive impact our buildings have on the world.

This isn’t just about surface-level changes or chasing a green certification. It’s a fundamental rethinking of how buildings are supposed to work and how they serve their occupants and the wider community over their entire lifetime.

At the heart of sustainable design is a simple but powerful set of core principles. We've outlined them below to provide a quick reference for the foundational ideas we'll be exploring.

Core Principles of Sustainable Architecture

Principle Objective
Conserve Energy Minimize the building's reliance on non-renewable energy through passive design, efficient systems, and on-site renewables.
Work with Climate Design structures that respond to the local climate, harnessing natural light, wind, and shading to reduce energy needs.
Minimize New Resources Reduce consumption of new materials by prioritizing reuse, recycled content, and responsibly sourced materials.
Respect the Site Preserve or restore the site's natural ecosystems and manage water responsibly to minimize environmental disruption.
Holistic Approach Integrate all design elements—from site planning to material selection—into a cohesive, high-performing system.

This framework shows how every decision contributes to a larger, integrated goal: creating a building that works better on every level.

The Triple Bottom Line in Building Design

At its core, true sustainable design runs on the "triple bottom line"—a framework that measures success not just by financial returns, but by its positive impact on people and the planet. When you apply this lens to architecture, you start to see how to create real, lasting value.

  • People: This is all about human well-being. A sustainable building actively promotes health and productivity with clean indoor air, abundant natural light, and a connection to the outdoors. It's a place people want to be in.
  • Planet: This pillar tackles environmental responsibility head-on. It’s about shrinking a building's carbon footprint by slashing energy and water use, choosing materials that are sustainably sourced, and cutting down on waste.
  • Profit: This is the economic engine. Sustainable buildings deliver clear financial wins through lower utility bills, reduced maintenance costs, higher property values, and an enhanced ability to attract and keep tenants.

Sustainable architecture is not a limitation on creativity. Instead, it is a powerful framework that guides architects to create smarter, more resourceful, and ultimately more impactful structures that deliver measurable, performance-driven results for owners and occupants alike.

A Framework for Smarter Structures

Looking at architecture this way changes everything. Decisions about a building’s orientation on a site, the type of insulation in its walls, or the efficiency of its HVAC system are no longer just technical line items. They become strategic choices that directly impact long-term operational costs, occupant satisfaction, and the building's overall resilience.

The market is responding in a big way. The global green building sector is set to explode, growing from $618.58 billion in 2025 to a projected $1,374.23 billion by 2034. This growth isn't a fluke; it's fueled by rising energy costs, stronger corporate sustainability goals, and the undeniable need for buildings that can stand up to future challenges. You can explore the latest green building trends here to see just how strong this momentum is.

This powerful economic shift confirms it: sustainable design is simply the new standard for intelligent, forward-thinking architecture.

Why Smart Buildings Are Sustainable Buildings

Making the move to sustainable design isn't just an environmental statement anymore; it's a strategic business decision with a clear, measurable bottom line. When you weave intelligent technology and forward-thinking design into the fabric of a building, it stops being a static shell and starts acting like a dynamic, high-performing asset. This is exactly where sustainability delivers its most powerful financial and operational punch.

At its heart, a smart building uses technology to automate and fine-tune everything from heating and cooling to lighting and security. When these systems are designed with sustainability as the goal, they work together beautifully. What you get is a structure that not only shrinks its environmental footprint but also boosts its economic value and becomes a better place for people to be.

Driving Down Operational Costs

The most immediate and concrete win from sustainable design is a massive cut in day-to-day running costs. Let's face it, buildings are energy hogs, and those utility bills make up a huge chunk of a property's lifelong expense. Smart, sustainable design tackles this problem head-on.

  • Energy Efficiency: Think of high-performance insulation, energy-smart windows, and intelligent HVAC systems as a team working to slash heating and cooling bills. Add in automated sensors that adjust lights and temperature when a room is empty, and you stop paying to heat or light empty space.
  • Water Conservation: Simple additions like low-flow fixtures, rainwater harvesting systems, and smart irrigation for landscaping can cut water use by 30% or more. That's a huge saving on your water bill.
  • Reduced Maintenance: When you choose durable, high-quality materials and design systems to last, you spend less time and money on repairs and replacements. This keeps long-term maintenance budgets in check and avoids disruptive downtime.

A sustainable building isn’t an expense; it’s an investment in radical efficiency. By designing for lower consumption from day one, you create an asset that pays you back every month through reduced utility bills and maintenance costs.

Increasing Asset Value and Mitigating Risk

Looking past the monthly savings, sustainable design is really about future-proofing your investment. In a market that’s growing more aware of climate risks and new regulations, green buildings are simply more valuable and resilient. It’s no surprise that properties with verified green credentials often fetch higher rental rates and sale prices.

This extra value comes from their built-in ability to handle risk. As energy codes get tighter and carbon taxes become a reality, a high-performance building is already ahead of the curve, saving you from expensive retrofits later. To get a full picture of these benefits, it’s worth exploring the various smart building solutions available that can seriously elevate a building's environmental performance. These technologies also make a property far more attractive to savvy investors and top-tier tenants who care about corporate responsibility and predictable costs.

Enhancing Health and Productivity

Maybe the most important benefit of all is the positive effect sustainable design has on people. The very things that make a building green—plenty of natural light, clean indoor air, and a connection to the outdoors—also happen to be the things that help people thrive. This human-centric approach delivers incredible returns.

Study after study shows that people working in green buildings report getting sick less often and being more productive. Things like low-VOC (volatile organic compound) paints, advanced air filtration, and biophilic design elements directly create a healthier place to be. For any commercial property, that's a huge competitive edge, helping you attract and keep the best talent. A building that takes care of its people is a building that performs better on every single level.

Practical Strategies for Green Building Design

Putting sustainable design principles into practice isn't about lofty ideals; it's about using a proven toolkit of actionable strategies to create buildings that truly perform. Architects draw from a few key playbooks, and each one plays a distinct role in a building's overall efficiency and the health of the people inside it.

You can think of it like building a high-performance race car. Some of the most important gains come from the car's fundamental shape—its aerodynamics—which helps it slice through the air with less resistance. Then you have the advanced engine and smart electronics that fine-tune fuel use for maximum power. Great architectural design works the same way, blending foundational passive strategies with sophisticated active systems.

Harnessing Nature with Passive Design

The smartest and often most budget-friendly place to start is with passive design. This is all about making the building work with its natural environment instead of fighting against it. It means using free, abundant resources like sunlight and airflow to do the heavy lifting that would otherwise demand energy-guzzling mechanical systems.

Here are some of the cornerstones of passive design:

  • Building Orientation: This is the first and most critical move. Simply positioning a building to capture the sun's warmth in the winter while shielding it from the intense summer sun can slash heating and cooling costs right from the start.
  • Daylighting: Thoughtfully placed windows, light shelves, and skylights can fill a space with natural light. This dramatically cuts down on the need for artificial lighting, which is a huge energy drain in most commercial buildings.
  • Natural Ventilation: Designing for cross-breezes with operable windows and vents allows fresh air to cool the building naturally, reducing the strain on air conditioning systems.
  • Thermal Mass: Materials like concrete, brick, and stone are fantastic for regulating indoor temperatures. They act like thermal batteries, absorbing heat during the day and slowly releasing it at night to keep the space comfortable.

This infographic does a great job of showing how these kinds of strategies translate directly into benefits for building owners and the people who use the space.

An infographic illustrating sustainable building benefits: savings, increased value, and improved wellness.

As you can see, the connection is clear: smarter design choices lead to real-world financial savings, higher property values, and healthier, more productive environments.

The Role of Passive vs. Active Strategies

To really grasp how these pieces fit together, it helps to see them side-by-side. Passive strategies are the "good bones" of the building, while active systems are the "smart muscles" that do the work when needed.

Passive vs. Active Sustainable Design Strategies

Strategy Type Examples Primary Benefit
Passive Building orientation, daylighting, natural ventilation, thermal mass, high-performance windows, green roofs. Reduces the fundamental energy demand of the building before any mechanical systems are turned on.
Active High-efficiency HVAC, geothermal systems, solar panels, low-flow plumbing fixtures, LED lighting with sensors. Optimizes energy and resource consumption through efficient technology and renewable sources.

A well-designed building leans heavily on its passive features first, significantly reducing the load—and the cost—of the active systems it needs.

Optimizing with Active Systems

While passive strategies lay the groundwork, active systems are the high-tech components that push performance to the next level. These are the technologies that consume energy, so the entire goal is to make them as lean and efficient as possible. When we design green buildings, integrating energy-saving measures like innovative alternative heating sources becomes a key part of the conversation.

Active systems should complement, not compensate for, poor passive design. An efficient HVAC system in a well-insulated, properly oriented building works far less and costs much less to run.

We're talking about technologies like geothermal heat pumps, high-efficiency HVAC units that recover energy from exhaust air, and intelligent building automation systems that adjust lighting and temperature based on who is in the room. The final layer is often renewable energy, like solar panels, which allow a building to generate its own clean power right on-site.

Choosing Smarter Materials

Every single material that goes into a building has an environmental footprint—from how it was sourced and manufactured to what happens to it when the building's life is over. Sustainable material selection is about choosing materials with the best lifecycle story. This is often guided by a life-cycle assessment (LCA), which is a deep dive into a material's impact from cradle to grave.

We prioritize materials that are:

  • Reclaimed or Recycled: Using salvaged wood, recycled steel, or crushed concrete reduces the demand for brand-new resources.
  • Locally Sourced: This minimizes transportation emissions and boosts the local economy.
  • Low-VOC: Choosing paints, adhesives, and flooring with low or no Volatile Organic Compounds is critical for maintaining healthy indoor air quality.
  • Sustainably Harvested: Products like Forest Stewardship Council (FSC) certified wood guarantee that they come from responsibly managed forests.

Buildings are responsible for roughly 37% of global carbon emissions, so our material choices matter immensely. This is where we see a major push toward eco-friendly materials like plant-based fibers, natural stone, and certified wood, alongside smart tech like Building Management Systems (BMS) that optimize resource use in real-time.

Managing Every Drop of Water

Finally, sustainable design treats water as the precious resource it is. Smart water management focuses on two things: reducing consumption and reusing water whenever possible.

This includes straightforward steps like installing low-flow fixtures and faucets, as well as more integrated solutions like designing landscapes with native, drought-tolerant plants. On a larger scale, we can implement systems for rainwater harvesting to use for irrigation or greywater recycling for non-potable needs like flushing toilets.

Measuring What Matters in Sustainable Design

In sustainable design, good intentions only get you so far. To make a real difference, we have to move past abstract goals and into the world of hard numbers. How do you actually prove a building is efficient, healthy, and kind to the environment?

It all comes down to measurement.

Think of it like a fitness tracker for your building. You monitor steps and heart rate to understand your personal health, right? We do the same for buildings, using specific metrics to gauge their performance. These data points turn "sustainability" from a fuzzy concept into tangible, trackable outcomes that demonstrate real-world value.

The Numbers That Tell the Story

When we want to know a building’s true environmental footprint, we focus on a few critical benchmarks. These metrics create a common language for setting and hitting sustainability goals, making it clear to everyone—from architects to investors—what success actually looks like.

Three of the most important are:

  • Energy Use Intensity (EUI): This is basically the building’s miles-per-gallon rating. It measures the total energy a building uses over a year, divided by its square footage (kBTU per square foot per year). A lower EUI means a more efficient building, which translates directly to smaller utility bills and a lighter carbon footprint.
  • Embodied Carbon: This metric uncovers the hidden environmental toll of a building before it even opens. It accounts for all the greenhouse gas emissions tied to making, shipping, and installing the materials—from the concrete in the foundation to the glass in the windows. Choosing materials with low embodied carbon is one of the most powerful moves we can make to cut a project's upfront climate impact.
  • Indoor Environmental Quality (IEQ): This one is all about the people. IEQ measures the things that make a space healthy and comfortable: air quality, thermal comfort, access to daylight, and acoustics. High IEQ scores are directly linked to happier, more productive people and fewer sick days. It’s a win-win.

Performance data is what separates genuine sustainable design from "greenwashing." Without credible numbers from metrics like EUI and IEQ, sustainability is just a marketing slogan. With them, it becomes a verifiable asset.

Why Third-Party Certifications Matter

While individual metrics are crucial, comprehensive certification systems offer a holistic, third-party stamp of approval. These programs provide a trusted roadmap for designing a green building and give owners a respected seal of approval to prove it.

Think of them as different standards of excellence. Each has a slightly different focus, but they all share the same goal: promoting better buildings. They lend credibility and make it much easier for owners to market their property’s sustainable features to savvy tenants and investors.

A Quick Look at the Major Certification Systems

Several globally recognized systems exist, and knowing their core focus helps you pick the right one for your project’s specific goals.

Here’s how the big ones stack up:

Certification Primary Focus Best For
LEED A balanced, market-driven approach covering energy, water, materials, and IEQ. It’s the most widely recognized system in North America. Commercial projects that need broad, credible validation to gain a competitive edge.
BREEAM A highly detailed, science-based assessment popular in Europe that digs deep into a wide range of sustainability categories. Projects that demand a rigorous, evidence-based approach to performance, especially in international markets.
Living Building Challenge The most ambitious standard out there, pushing for regenerative buildings that actually give more back to the environment than they take. Visionary projects aiming for the absolute peak of sustainability, like becoming net-positive for energy and water.

These frameworks aren't just checklists; they're powerful tools for holding everyone accountable. They ensure that a project’s green design is a verified reality, not just a plan. By embracing these measurement tools, we can create buildings that aren't just beautifully designed—they're measurably better for people, the planet, and the bottom line.

Making the Financial Case for Going Green

When we talk about sustainable architecture, the conversation often centers on environmental good. That’s important, but for developers and property owners, the most powerful argument is usually financial. Deciding to build green isn't just about altruism anymore; it's a hard-nosed business decision driven by regulations, powerful incentives, and a solid return on investment.

The regulatory landscape is constantly shifting under our feet. Building and energy codes are getting stricter every year. If you design a building to meet only the bare minimum standards of today, you’re setting yourself up for expensive, mandatory retrofits down the line. It’s a classic case of being penny-wise and pound-foolish.

Navigating Codes and Unlocking Incentives

This is where smart design comes in. By proactively designing beyond current codes, you not only protect your asset from future regulatory headaches, but you also open the door to a whole suite of financial incentives. These programs are specifically designed to make sustainability profitable.

Think of them as a financial toolkit to get your project off the ground:

  • Federal and State Tax Credits: These are a huge deal. They offer dollar-for-dollar reductions on your tax bill for things like renewable energy, major efficiency upgrades, and even sustainable practices within historic preservation projects.
  • Utility Rebates and Grants: Don't overlook your local utility company. They often offer direct cash rebates for installing high-efficiency HVAC systems, LED lighting, or better insulation, which immediately cuts your project costs.
  • Expedited Permitting: Time is money, right? Many cities will fast-track the permitting process for projects that meet specific green building standards, getting you to construction sooner.

These programs are game-changers. They help close the cost gap between a standard build and a high-performance one, making the financial choice a lot simpler.

Calculating the Long-Term ROI

Incentives help with the upfront investment, but the real financial muscle of sustainable design shows up over the life of the building. The long-term ROI is all about slashing operational expenses and boosting your asset's value.

A sustainable building is an asset engineered for performance. Every design choice aimed at reducing energy and water consumption directly translates into lower utility bills, creating a predictable and continuous financial return for the owner.

People often overestimate how long it takes to see a payback on green features. When you factor in lower utility bills, reduced maintenance from using more durable materials, and even improved productivity from happier tenants, the numbers start to look very attractive. For commercial properties, these savings—combined with the ability to attract and keep high-quality tenants—drive up net operating income and, ultimately, the building's market value.

The push for better building codes is happening worldwide. Still, there’s a long way to go, as over 50% of new global construction isn’t covered by any mandatory energy efficiency codes. Initiatives like the Buildings Breakthrough Agenda are working to change that, aiming to make near-zero emission buildings the global standard by 2030. You can learn more about these global efforts to advance building codes and see where the industry is headed.

Ultimately, sustainable design isn't just about checking a box. It’s about positioning your property to win in a market that demands efficiency, resilience, and proven financial performance.

Sustainable Design Principles in Action

A vibrant scene of people interacting with a modern brick building featuring glass and an elevated walkway on a sunny day.

It’s one thing to talk about sustainable principles in theory, but it’s seeing them solve real-world problems that truly shows their power. Here at Sherer Architects, our portfolio is less a collection of projects and more a series of stories—stories of how smart design helped our clients achieve their business goals while creating beautiful, high-performing buildings that give back to their communities.

Every project is a fresh opportunity to apply these ideas, whether it's a brand-new commercial building or a careful historic renovation. The objective is always the same: to create a structure that's more efficient to run, healthier for the people inside, and gentler on the planet.

This isn't about chasing the latest trend. It’s about delivering lasting value through resourceful solutions built to stand the test of time.

Balancing Preservation and Performance

Adaptive reuse is one of our passions. It's the ultimate act of sustainability because it saves the massive amount of embodied carbon already locked into an existing building. The challenge, and the fun, is weaving modern performance into a historic structure without losing its soul.

Take a recent project we handled: converting a century-old warehouse into contemporary office space. The client loved the historic brick and old-growth timber framing but needed a building that could keep up with modern energy codes.

We focused on a few key moves:

  • High-Performance Insulation: By adding high-R-value insulation to the inside of the exterior walls and roof, we dramatically improved the building’s thermal performance without touching the historic brick facade.
  • Energy-Efficient Windows: We had windows custom-milled to match the original historic profiles, but with modern, low-e coated, insulated glass. This one change made a huge difference in cutting down heating and cooling needs.
  • Variable Refrigerant Flow (VRF) Systems: Instead of trying to force bulky, inefficient ductwork into the old structure, we used a VRF system. Its small refrigerant lines were easy to route, giving us zoned, highly efficient heating and cooling.

The final result is a building that celebrates its history while being fully ready for a high-performance future. By threading the needle between preservation and smart upgrades, we gave this structure a new lease on life for decades to come.

New Construction Designed for Efficiency

When we're starting from scratch on a new commercial building, we can optimize for performance right from day one. A great example is a new retail center we designed where the owner’s top priority was keeping long-term operating costs as low as possible.

We treat every commission like a puzzle, aligning all the pieces to deliver beautiful, enduring, and sustainable results. In new construction, passive design strategies are the cornerstone of that puzzle.

Our whole approach began with the basics of passive solar design. We oriented the building to soak up the low winter sun for passive heat, then used carefully calculated overhangs to block the high summer sun and ease the load on the air conditioning. Simple, but incredibly effective.

We layered on top of that foundation with daylighting controls, high-efficiency LED lighting, and a reflective "cool roof" to bounce away heat. Put it all together, and the final building uses about 40% less energy than a similar building constructed just to meet minimum code. That’s a direct savings of thousands of dollars every year for the owner, proving that great design is one of the smartest investments you can make.

Answering Your Questions About Sustainable Architecture

Even as sustainable design moves into the mainstream, it’s natural to have questions. Getting clear on the real-world costs, the lingo, and how it all comes together is key to moving forward with any project. Let's tackle some of the most common things we hear from clients and developers.

Does Sustainable Architecture Cost More?

This is the big one, and the answer isn't a simple yes or no. While some high-performance materials or systems might have a higher price tag upfront, a smart sustainable design process often finds savings elsewhere, like through more efficient material use. The real story, though, is about the long game.

The true financial benefit unfolds over the life of the building. You’ll see significant, predictable savings on energy, water, and maintenance that deliver a powerful return on your initial investment.

And that's before you even consider the financial incentives. When you factor in tax credits, utility rebates, and other programs, the business case for building sustainably becomes incredibly strong, often completely balancing out any higher initial costs.

What's the Difference Between "Green Building" and "Sustainable Design"?

People often use these terms interchangeably, but there's a helpful way to think about the distinction.

It really comes down to the "what" versus the "why."

  • Green Building is the "what." It points to the tangible things you can see and touch—the high-efficiency HVAC, the recycled steel beams, the low-flow plumbing fixtures. These are the products.
  • Sustainable Design is the "why" and the "how." It's the overarching philosophy that guides all those choices. This approach zooms out to consider the building’s entire lifecycle, from where the materials came from to how it operates day-to-day, its connection to the community, and what happens to it at the end of its life.

So, a green building is really the end result of a thoughtful, holistic sustainable design process.

Where Does Adaptive Reuse Fit In?

Adaptive reuse isn't just a component of sustainable architecture—it's one of its most impactful expressions. When we choose to renovate and repurpose an existing building, we are directly preserving its embodied carbon.

Think of embodied carbon as all the energy and emissions that were already spent to create the building in the first place—to manufacture the steel, fire the bricks, transport the materials, and put it all together. Demolishing a building essentially throws all of that away.

By opting for adaptive reuse, you sidestep the massive carbon footprint of both demolition and new construction. It's a triple win: you keep waste out of landfills, breathe new life into established neighborhoods, and save the unique character that makes a place special. Honestly, saving an existing building is often the most sustainable move you can make.


At Sherer Architects, LLC, we're passionate about making these principles work for our clients, creating buildings that are both profitable and high-performing. Whether you're planning a new commercial build, an adaptive reuse project, or a historic preservation effort, we're here to guide you. Learn how we can bring structure to your vision and create a beautiful, durable, and truly sustainable building.

Categories
Uncategorized

Finding Your Commercial Architectural Firm

Before you even think about searching for a commercial architectural firm, you need to do your homework. The single most important step you can take is creating a rock-solid project brief. This isn't just a simple wish list; it's the foundational document that translates your business goals into an architectural vision.

Get this right, and you'll attract firms that are a perfect fit for your project. Think of it as the blueprint before the blueprint.

Defining Your Project Before You Search

Jumping into calls with architects without a clear plan is a recipe for disaster. It's like setting sail without a map. A detailed project brief becomes your compass, guiding the entire selection process and paving the way for a successful partnership.

This document forces you to get specific about your goals, constraints, and non-negotiables. Taking the time now saves you from massive headaches and costly misunderstandings down the road. It’s a strategic tool that aligns your operational needs, brand aesthetic, and financial reality from day one.

The architectural services market is huge—it was projected to hit $249.2 billion globally by 2025. With so many firms out there, a clear brief is your best tool for cutting through the noise and connecting with the right talent. You can dig deeper into these market dynamics from IBISWorld.

Translate Business Goals into an Architectural Vision

Your building isn’t just a structure; it's a critical part of your business operations. How will this space actually support your day-to-day workflow? A restaurant, for instance, lives and dies by the seamless flow between the kitchen and the dining room. A medical clinic, on the other hand, must prioritize patient privacy and meet strict accessibility standards.

Start by thinking through these core elements:

  • Operational Workflow: Literally map out how people (employees, customers) and things (products, supplies) will move through the space. Where are the potential bottlenecks? Where can you build in efficiency?
  • Brand Aesthetics: What’s the vibe? Define the look and feel that tells your brand’s story. Are you going for modern and minimalist or something more traditional and welcoming?
  • Future Growth: What will your business look like in five or ten years? A smart, scalable design can save you from a gut-wrenching renovation later on.

This whole process of clarifying your vision, budget, and site is the foundation of your project brief.

A process flow diagram with icons for Vision, Budget, and Site, connected to mail and location symbols.

As the diagram shows, these three pillars—vision, budget, and site—are completely interconnected. One can't exist without the others.

Ground Your Project in Financial Reality

A vision without a budget is just a daydream. You need to establish a realistic preliminary budget and timeline to keep the project tethered to reality. Do some research on local construction costs, but don't forget to factor in all the "soft costs"—things like permits, engineering fees, furniture, and technology.

A well-defined budget does more than just limit spending; it forces creative problem-solving. When a commercial architectural firm understands your financial guardrails, they can propose innovative design solutions and material choices that deliver maximum impact without breaking the bank.

Finally, get a handle on your site's potential and its limitations. Local zoning laws, environmental regulations, and existing infrastructure will all shape what's possible. Understanding these constraints upfront means an architect can hit the ground running with a feasible plan from day one.

How to Vet Potential Architectural Partners

With your project brief finalized, you're ready to start the search for the right commercial architectural firm. This isn't just about scrolling through slick websites; it's a careful process of finding, evaluating, and shortlisting firms that genuinely have the chops for your specific project.

The real goal here is to get past the glossy photos and see a firm's actual, hands-on experience in your world. A beautiful portfolio is great, but a proven track record of solving the unique problems of your industry—whether it's retail, hospitality, or a tricky historic preservation project—is what really matters. That’s how you find a truly great partner.

A bright architectural workspace with house models, blueprints, and a laptop displaying a 'Project Brief'.

Sourcing and Initial Screening

Often, the best partners come from word-of-mouth. Start by asking around your professional circle—talk to contractors, commercial real estate brokers, and other business owners you trust. You can also check out professional directories from organizations like the American Institute of Architects (AIA), which let you filter by specialty.

As you start compiling a long list, do a quick sanity check against your project brief. Does a firm’s portfolio feature projects that are similar in scale and type to yours? If your project is a complex adaptive reuse, a firm that only shows off shiny new builds probably isn’t the right match.

Look Beyond the Polished Portfolio

Every portfolio is a sales pitch, carefully curated to look impressive. Your job is to dig deeper and analyze it with a critical eye. You're looking for proof that a commercial architectural firm gets the business side of things, not just the aesthetics.

Here’s what to zero in on:

  • Project Niche: Do they have a clear specialty? Deep experience in your specific project type, like medical facilities or mixed-use developments, is a huge plus.
  • Real-World Problem-Solving: Look for case studies that explain how they tackled tough challenges. Did they successfully navigate a complex zoning issue or solve an unexpected structural problem? That’s gold.
  • The Technical Nitty-Gritty: If you can, ask to see a sample set of construction documents. These technical drawings reveal a firm’s attention to detail in a way a photograph never can.

The core ideas behind picking a professional partner hold true across different fields. In fact, many of the same principles apply, and you can get a good perspective by reviewing these things to consider before hiring a consulting firm. It really drives home the importance of doing your homework, no matter the industry.

To help structure your review, a simple evaluation matrix can be incredibly useful for comparing firms apples-to-apples.

Key Evaluation Criteria for Shortlisting Firms

Evaluation Area What to Look For Red Flags to Watch For
Relevant Experience A portfolio with multiple projects similar to yours in size, scope, and industry. All their "relevant" projects are from over a decade ago; no recent work in your sector.
Design Philosophy An approach that aligns with your brand and functional goals (e.g., focus on sustainability, user experience). A rigid, "one-size-fits-all" design style that they apply to every project, regardless of the client.
Problem-Solving Case studies that detail how they navigated complex zoning, budget, or construction challenges. Vague project descriptions that focus only on the finished look, not the process.
Local Knowledge Proven experience with local building codes, permitting processes, and relationships with city officials. They are based out-of-state with no local office or demonstrated experience in your municipality.
Client Testimonials Specific, positive feedback from past clients; willingness to provide references. No testimonials available, or they are hesitant to connect you with previous clients.

Using a checklist like this ensures you don’t get swayed by a single flashy project and instead focus on the qualifications that will truly drive your project's success.

Verifying Experience and Expertise

Client needs are always changing, and today there’s a huge focus on things like sustainable design and adaptive reuse. These trends are driving major growth in the industry, with the global architectural services market projected to jump from $214.19 billion in 2025 to $275.16 billion by 2029.

You're not just hiring a designer. You're bringing on a strategic partner who needs to understand the business drivers behind your project. Their ability to turn your operational needs into a functional, efficient space is everything.

This makes verifying a firm’s actual experience more important than ever. Don't be shy about asking for references from clients with projects like yours. Call them and ask about the firm's communication style, how they handled the budget, and their knack for solving problems on the fly. This kind of direct feedback is invaluable and will help you narrow your list down to the real contenders.

Crafting a Request for Proposal That Gets Results

Let’s be honest: a generic Request for Proposal (RFP) will land you a pile of equally generic, uninspired responses. If you want to really understand what a commercial architectural firm can do for you, your RFP needs to push them past the marketing fluff and get to the heart of their expertise. This document is your best tool for getting clear, comparable proposals.

Think of your RFP as the first real test of a firm's competence and attention to detail. A well-crafted RFP shows you're a serious client, and that attracts serious, high-quality firms. It sets the tone for a professional relationship built on clarity from day one.

A person reviews architectural plans and property images on a tablet and paper during an outdoor portfolio review.

Core Components of an Effective RFP

The best RFPs strike a delicate balance. They need to be detailed enough to paint a clear picture of your project but flexible enough to let firms show off their unique problem-solving skills. The goal is to make it easy for you to compare apples to apples while still seeing what makes each firm tick.

Make sure to include these key elements:

  • Your Comprehensive Project Brief: Attach the detailed brief you've already put together. This is crucial for giving firms the full context—your vision, operational needs, budget constraints, and site specifics.
  • Specific Questions About Their Approach: Don't just ask for a portfolio. Ask how they would tackle your project's unique challenges. A good example would be, "Given our site's zoning restrictions, what would be your initial strategy for securing the necessary approvals?"
  • Team and Project Management Details: You need to know who you’ll be working with. Request an organizational chart for the proposed team, complete with bios for the key people who will be hands-on with your project. It's also wise to ask about their communication protocols and the project management software they use.

When you demand this level of detail, you force firms to actually think about your project before they even hit "send" on their proposal.

An RFP is more than a questionnaire; it’s a diagnostic tool. The quality and specificity of a firm's response directly reflect their engagement, expertise, and genuine interest. A boilerplate proposal is a major red flag.

What to Ask to Get Real Answers

To cut through the noise, your questions need to be sharp and focused on tangible outcomes. Don’t just ask about their experience; ask for proof. This pushes firms to back up their claims with real-world evidence.

Try including prompts like these:

  1. Past Performance: "Please provide 2-3 case studies of projects similar to ours in scale and complexity. Detail the initial budget, the final cost, and an explanation for any significant variances."
  2. Challenge Resolution: "Describe a major unforeseen challenge on a past commercial project and walk us through the specific steps your team took to resolve it."
  3. Value Proposition: "Beyond simply meeting the requirements, what unique value or innovative approach does your firm bring to this specific project?"

Questions like these get to the core of a firm’s process, their problem-solving chops, and their ability to deliver on budget. The answers will tell you far more about who they are as a partner than any glossy portfolio ever could, helping you find the right commercial architectural firm to bring your vision to life.

Leading Interviews That Reveal the Real Story

A slick portfolio and a polished RFP might get a firm on your shortlist, but the interview is where you truly discover if they’re the right partner for your project. This is where you move past the glossy photos and scripted case studies to get a feel for the people you’ll be working with. You need to understand their culture, how they communicate, and how they solve problems when things don’t go according to plan.

Think of it less as an interrogation and more as the beginning of a crucial conversation. You’re looking for a team you can trust to navigate the inevitable complexities of a commercial build. This means asking the kinds of questions that reveal how they think, not just showing off what they’ve already built.

Go Beyond the Standard Script

Anyone can give you a canned answer to, "What's your design philosophy?" The real gold is in the situational questions. Your job is to push past the rehearsed pitches and see how they think on their feet. This is how you find out who can actually walk the walk.

Instead of asking broad, generic questions, frame them around specific, real-world challenges you anticipate. This tests their practical know-how and gives you a genuine glimpse into their working style.

Here are a few questions that get to the heart of the matter:

  • On Budgeting: "Tell me about a time a commercial project hit a major budget snag. What caused it, how did you break the news to the client, and what specific steps did you take to get things back on track?"
  • On Red Tape: "Our site has some tricky zoning overlays. Walk me through your process for dealing with the local planning department to clear up conflicts and get approvals without major delays."
  • On Collaboration: "Describe a project where you and the client had a serious disagreement on a key design element. How did you handle that conversation and what was the outcome?"

There are no single "right" answers here. What you're listening for is honesty, a clear process, and a problem-solving approach that puts the client first.

Why Local Know-How Is a Game-Changer

Never underestimate the advantage of a firm that knows your local turf inside and out. This is especially true when you consider how concentrated the architectural services market is. With North America's market projected to hit $159.088 billion by 2025 and Europe's expected to reach $185.503 billion, deep regional expertise is a powerful asset. You can find more details in these regional architectural market trends.

An architect with strong local connections understands the unwritten rules. They know who to call at the planning department, they have a network of trusted local contractors, and they have an instinct for the regional style and environmental quirks. That kind of intelligence can save you an incredible amount of time, money, and headaches.

Put Them to the Test with a Real Problem

To see how they really operate, end the interview with a hands-on challenge. Think of it as a mini-workshop. Give them a simplified version of a real problem your project is facing—a weirdly shaped site, a conflicting program need, or a tough budget target.

For instance, you could pose this challenge: "We have to fit 10,000 square feet of usable space on this awkward lot. The catch is we need to maximize natural light and can't go over a 25-foot height limit. What are your immediate thoughts on how we could approach the building's massing and orientation?"

Their reaction will tell you almost everything you need to know. You're not looking for a perfect, finalized design on the spot. You're watching their process unfold.

  1. What are their first questions? Do they jump right into solutions, or do they ask clarifying questions to better understand your goals?
  2. How do they work together? Does one person dominate, or do they brainstorm as a team, building on each other's ideas?
  3. How do they communicate their ideas? Are they able to explain their thinking clearly? Do they grab a pen and start sketching to help you visualize their concepts?

This simple exercise gives you a real-life preview of what it would be like to sit in a room and solve problems with their team, making your final decision that much easier.

Sorting Out Contracts and Fee Structures

You've done the legwork, vetted the firms, and found the perfect architectural partner. Now comes the final, critical step before anyone even thinks about breaking ground: getting the agreement down on paper. This is where verbal promises and great conversations become a binding contract that protects everyone involved. Getting a firm grip on architectural fees and contract details is essential—it sets the stage for a financially clear and successful project.

A solid, well-defined contract is the bedrock of a good client-architect relationship. It cuts through ambiguity, lays out exactly what to expect, and gives you a clear path for handling any bumps in the road. Think of it as the legal blueprint that goes hand-in-hand with the architectural one.

Two male designers collaborating on architectural plans and material samples in an office setting.

Decoding Architectural Fee Structures

Architects don't have a one-size-fits-all price tag. Their fees are usually structured in one of a few common ways, and the best fit for you will depend on your project's size, complexity, and how predictable the work is. Knowing your options here is key to negotiating a fair deal.

  • Percentage of Construction Cost: This is a classic model, especially for larger projects. The fee is a set percentage of the total construction cost, often between 5% and 12%. The nice thing is that it aligns your architect's incentives with keeping the budget in check. The downside? If construction costs unexpectedly balloon, so does their fee.
  • Fixed Fee (Stipulated Sum): This is exactly what it sounds like—a single, all-in price for the entire scope of work. It’s fantastic for budget certainty and works best when your project is clearly defined from the get-go. Just remember that if you add work later, it'll likely require a separate agreement.
  • Hourly Rate (Time and Materials): If your project is small or the scope is still a bit fuzzy, an hourly rate might be the way to go. You pay for the actual time spent, which offers a ton of flexibility. The risk, of course, is that costs can get unpredictable if the project scope creeps. Many firms use specialized time tracking software for architects to keep this transparent and accurate, so don't be afraid to ask how they log their hours.

Key Clauses to Look For in Your Contract

Before you put pen to paper, read that contract. Every word of it. It might feel like a chore, but doing your due diligence now can save you from massive headaches down the line. I always tell my clients to pay extra close attention to a few key areas that really define the working relationship.

A contract is more than just a legal document—it's a communication tool. It forces everyone to get on the same page about what's being done, what's being delivered, and how payments will work. It nips misunderstandings in the bud.

Be sure to comb through these sections:

  1. Scope of Work: This needs to be crystal clear. It should spell out every single service the firm will provide, from the first rough sketch to the final construction oversight. Leave no room for interpretation.
  2. Deliverables and Schedule: What are you getting and when are you getting it? The contract should list the tangible documents (drawings, models, reports) you'll receive at each phase and the deadlines for each.
  3. Payment Schedule: This section should clearly state when payments are due. Usually, payments are tied to hitting specific project milestones, which is a great way to ensure progress is being made.
  4. Ownership of Designs: This is a big one. Typically, the architect retains the copyright to their designs, but you get a license to use them for your specific project. Make sure you understand exactly what that means for you.

By carefully working through the fee structure and the fine print of the contract, you're not just hiring a firm—you're building a solid foundation for a great partnership.

Common Questions About Hiring an Architect

https://www.youtube.com/embed/Q7hRuC67rfQ

When you're looking to hire a commercial architectural firm, a few big questions almost always come up. It's totally normal. Getting straight answers to these is the key to feeling confident about your decision.

Let's break down some of the most common things business owners and developers ask when they're trying to find the right architectural partner.

What Should I Expect to Pay in Architectural Fees?

This is the big one, right? Let's get right to it. For a commercial project, you can generally expect architectural fees to fall somewhere between 5% and 12% of the total construction cost.

That's a pretty wide range, and the final number isn't just pulled out of a hat. It really hinges on the complexity of your project, the firm's level of experience in your specific niche, and exactly what services you need them to handle. A highly technical historic renovation with tricky structural issues is going to land on the higher end of that scale. On the other hand, a more straightforward new build on a clean, simple site will likely be on the lower end.

Pro Tip: Never accept a fee without a detailed proposal breaking down exactly what's included. A transparent fee structure is your best defense against surprise costs for things like permitting help, interior design work, or construction oversight. You need the full financial picture upfront.

Knowing this range helps you budget properly from the get-go and compare different proposals fairly.

How Long Does the Architect Selection Process Take?

Finding the right architect isn't something you want to rush. A solid, thoughtful selection process usually takes anywhere from four to twelve weeks. This timeline gives you enough breathing room to do your homework without letting the process drag on forever.

Here’s a rough idea of how that time breaks down:

  • Initial Research (1-2 weeks): This is when you're digging in, finding potential firms, and doing a first pass based on their online portfolios and reputation.
  • RFP & Proposal Review (2-3 weeks): You'll send out your Request for Proposal (RFP) and give firms time to put together a quality response. Then it's your turn to review what they send back.
  • Interviews & Final Selection (2-4 weeks): The final stretch. You'll meet with your top contenders, talk to their references, and hammer out a contract with the firm you choose.

It might feel like a long time, but trust me, investing this time now pays huge dividends later. It ensures you find a team that genuinely gets your vision.

What Is the Most Important Factor in Choosing a Firm?

A slick portfolio is great, and a competitive price is obviously important. But if I had to name the single most critical factor, it’s this: direct, proven experience with projects just like yours. I’m talking about similar scope, scale, and complexity.

Think about it. A firm that has already navigated the specific challenges of your industry—whether that’s complex healthcare codes, the logistics of a retail space, or the workflow of an industrial facility—is bringing so much more to the table than just a design.

That kind of specialized experience means they can anticipate problems before they happen, leading to smarter design decisions, a much smoother permitting process, and far fewer costly surprises once construction starts. It’s the difference between hiring a firm to design a building and partnering with an expert who knows how to design a high-performing asset for your business.


Ready to build a partnership that brings structure to your vision? At Sherer Architects, LLC, we combine decades of specialized experience in commercial, adaptive reuse, and historic preservation projects with a commitment to attentive listening and rigorous research. Let's start the conversation about your project today.

Categories
Uncategorized

construction project management best practices: Quick Tips

The landscape of commercial construction, adaptive reuse, and historic preservation presents more complex challenges than ever. From volatile material costs to intricate code compliance and demanding timelines, successful projects require more than just a solid blueprint; they demand an absolute mastery of process. To navigate these obstacles and deliver enduring, profitable, and sustainable results, project managers must implement a suite of proven strategies that drive efficiency and mitigate risk. This guide is built to deliver precisely that.

We are detailing 10 crucial construction project management best practices that transform complex challenges into predictable, successful outcomes. This is not a theoretical overview. We will move beyond the basics, offering actionable insights, specific implementation details, and real-world examples to help you optimize every project phase, from initial preconstruction planning to the final handover. You will learn how to integrate modern methodologies like Building Information Modeling (BIM) and Lean Construction, and refine foundational skills in risk management, cost control, and stakeholder communication.

Whether you are renovating a historic landmark, upfitting an existing commercial space, or developing a new multi-use hub, these principles are the foundation of modern project success. The goal is to provide a clear, comprehensive roadmap that empowers commercial developers, property owners, and contractors to build smarter, eliminate waste, and achieve superior project results. Each practice outlined below is designed for immediate application, providing the tools needed to control costs, maintain schedules, and ensure the highest standards of quality and safety.

1. Building Information Modeling (BIM)

Building Information Modeling (BIM) is a revolutionary approach to construction project management that moves beyond traditional 2D blueprints. It involves creating and managing a digital 3D model of a project's physical and functional characteristics. This intelligent model serves as a shared knowledge resource, integrating data from architects, engineers, contractors, and other stakeholders into a single, cohesive environment.

This digital twin allows teams to visualize the entire project in three dimensions, simulate construction sequencing, and identify potential issues long before breaking ground. By embedding layers of information into the model, from structural specifications to MEP (mechanical, electrical, and plumbing) systems, BIM facilitates unprecedented collaboration and data-driven decision-making. This practice is crucial for complex commercial projects and especially valuable in adaptive reuse, where integrating new systems into an existing structure presents unique challenges.

Why BIM is a Top Best Practice

BIM has become an indispensable tool in modern construction for several key reasons. Its primary benefit is proactive clash detection. By layering different discipline models (e.g., structural, HVAC, plumbing) on top of one another, teams can instantly identify where pipes might run through beams or where ductwork conflicts with electrical conduits. Resolving these clashes digitally during the design phase is exponentially cheaper and faster than discovering them on-site, preventing costly rework and schedule delays.

Furthermore, BIM enhances cost estimation accuracy, streamlines prefabrication processes, and improves long-term facility management. The detailed model provides a clear basis for material takeoffs and informs maintenance schedules for the building's entire lifecycle.

Key Insight: The true power of BIM lies in its role as a "single source of truth." When all stakeholders work from the same integrated model, communication breakdowns are minimized, and alignment is maximized from preconstruction through to operations.

How to Implement BIM Effectively

  • Establish a BIM Execution Plan (BEP): Before the project begins, create a formal BEP that outlines goals, roles, responsibilities, and the level of detail required for the model at each project stage.
  • Invest in Training: Ensure all team members, from designers to on-site supervisors, are properly trained on the chosen BIM software (like Autodesk Revit or Trimble Connect) and understand the project's specific protocols.
  • Start Small: If your organization is new to BIM, pilot the process on a smaller, less complex project to build internal expertise and refine your workflows before applying it to a large-scale development.
  • Utilize a Centralized Platform: Implement a cloud-based common data environment (CDE) where all stakeholders can access, update, and collaborate on the latest version of the model in real time.

For a visual overview of how BIM transforms construction, watch this short video:

2. Integrated Project Delivery (IPD)

Integrated Project Delivery (IPD) is a project delivery approach that contractually unites the owner, designer, and contractor as a single collaborative entity. This model fundamentally shifts the project dynamic from siloed responsibilities to shared risk and reward, aligning all key stakeholders around a common set of project goals from the earliest stages of conception.

Unlike traditional design-bid-build methods where parties operate independently, IPD fosters a team-oriented environment built on trust, transparency, and mutual respect. This structure is particularly effective for complex commercial and adaptive reuse projects, where early input from construction experts can inform design decisions, leading to significant cost savings and schedule efficiencies. Successful examples, like projects for Stanford University and Intermountain Healthcare, have demonstrated IPD's power to deliver projects under budget and ahead of schedule.

Why IPD is a Top Best Practice

The primary advantage of IPD is its ability to optimize project outcomes by leveraging collective expertise. By involving the contractor during the design phase, constructability issues are identified and resolved on paper, not in the field. This early collaboration prevents the costly change orders and disputes that often plague traditional projects, fostering an environment of proactive problem-solving rather than reactive blame.

Furthermore, IPD’s shared risk/reward model incentivizes innovation and efficiency. When all parties have a financial stake in the project's success, they are motivated to find creative solutions, reduce waste, and improve overall value. This alignment is a cornerstone of modern construction project management best practices, ensuring decisions are made for the good of the project, not just for an individual entity.

Key Insight: IPD transforms the contractual relationship from a potential source of conflict into a framework for collaboration. By tying financial success directly to project outcomes, it ensures every key stakeholder is pulling in the same direction.

How to Implement IPD Effectively

  • Utilize a Multi-Party Agreement: Use specialized contracts, such as those from the American Institute of Architects (AIA) or ConsensusDocs, that clearly define the shared risk/reward structure, decision-making processes, and liability limitations for the core team.
  • Establish a Co-location "Big Room": Whenever possible, create a shared physical or virtual space where the owner, designers, and builders can work together daily. This proximity accelerates communication, decision-making, and problem resolution.
  • Implement Lean Construction Principles: IPD works best when paired with Lean methodologies like the Last Planner® System. These tools help manage workflow, reduce waste, and improve the reliability of project schedules through collaborative planning.
  • Foster a Culture of Transparency: Adopt an open-book accounting policy where all project costs are visible to the core team. This transparency builds trust and enables more informed, data-driven decisions about the budget.

To learn more about the principles and contracts, explore the resources from the Lean Construction Institute.

3. Lean Construction Methodology

Lean Construction applies principles from lean manufacturing to the construction industry, creating a new paradigm focused on maximizing value and systematically eliminating waste. This methodology goes beyond simply managing tasks; it refines the entire project delivery process to improve workflow, enhance productivity, and ensure predictable outcomes. It's a holistic approach that fosters collaboration and continuous improvement among all project stakeholders.

Instead of a traditional top-down, "push" system, Lean Construction utilizes "pull" planning, where work is scheduled based on downstream demand. This philosophy is particularly effective in complex commercial builds and adaptive reuse projects where coordinating multiple trades and navigating unforeseen site conditions requires exceptional efficiency and communication. Major firms like Turner Construction have successfully integrated lean initiatives to streamline their operations and deliver superior results.

A sign on an easel saying 'ELIMINATE WASTE' at a construction site with building materials.

Why Lean Construction is a Top Best Practice

The core advantage of Lean Construction is its relentless focus on waste reduction, which extends beyond just materials. It targets eight key areas of waste: defects, overproduction, waiting, non-utilized talent, transportation, inventory, motion, and extra-processing. By minimizing these inefficiencies, projects see significant improvements in both schedule and budget performance.

A cornerstone of this practice is the Last Planner System® (LPS), a collaborative scheduling technique that dramatically improves workflow reliability. By empowering the "last planners" (foremen and team leads) to make commitments about upcoming work, the LPS ensures that schedules are realistic and achievable. This proactive approach prevents the cascading delays that plague many conventional construction projects.

Key Insight: Lean Construction transforms project management from a command-and-control system into a collaborative, commitment-based culture. This shift empowers on-site teams, improves morale, and aligns everyone toward the common goal of delivering value to the client.

How to Implement Lean Construction Effectively

  • Implement the Last Planner System®: Start by creating a master schedule, then break it down into phase schedules and weekly work plans. Involve trade foremen in look-ahead planning to identify and remove constraints before they impact work.
  • Conduct Daily Huddles: Hold brief, 10-15 minute stand-up meetings each morning on-site. These huddles allow teams to coordinate daily tasks, discuss progress, and quickly address any impediments to maintain workflow.
  • Use Visual Management: Set up visual boards on-site to display schedules, progress updates, and key performance indicators. This makes information accessible to everyone and promotes transparency and accountability.
  • Map Your Processes: Before making changes, map out your current workflows to identify specific points of waste and inefficiency. This provides a clear baseline for measuring the impact of your lean initiatives.

4. Effective Risk Management Planning

Effective risk management is a systematic process of identifying, analyzing, and responding to potential threats that could impact a construction project's objectives. This practice moves beyond reactive problem-solving by creating a structured framework to anticipate issues related to budget, schedule, safety, and quality. It involves developing a comprehensive plan before work begins, detailing potential risks and the strategies to mitigate them.

This forward-thinking approach is essential for any construction endeavor, but it is particularly critical in adaptive reuse projects where unforeseen conditions, like hidden structural defects or hazardous materials, are common. By establishing a clear process for risk assessment, teams can quantify potential impacts and develop proactive response strategies, turning uncertainty into a manageable variable. This is a core component of successful construction project management best practices.

Why Effective Risk Management is a Top Best Practice

Proactive risk management is a cornerstone of project success because it prevents minor issues from escalating into major crises. Its primary advantage is enhanced project predictability and control. By systematically identifying potential threats, from geotechnical risks in a high-rise foundation to permit delays in a highway project, project managers can allocate resources more effectively and set realistic stakeholder expectations.

This process directly protects the project's financial health by establishing contingency reserves based on quantified risk exposure rather than guesswork. It also improves safety outcomes by identifying and mitigating job site hazards before they can cause accidents. For a deeper understanding of proactive strategies, refer to this guide on "Managing Risk in Project Management".

Key Insight: The goal of risk management isn't to eliminate all risk, which is impossible. Instead, it's about shifting from a reactive "firefighting" mode to a proactive state where the team is prepared to handle disruptions efficiently and with minimal impact.

How to Implement Risk Management Effectively

  • Create a Comprehensive Risk Register: Early in the planning phase, conduct a workshop with all key stakeholders to brainstorm potential risks. Document each one in a risk register, assigning an owner, a probability score, an impact score, and a preliminary response plan.
  • Allocate Appropriate Contingency: Based on the risk analysis, set aside a contingency budget (typically 5-20% of the total project cost) specifically to cover the costs of managing identified risks should they occur.
  • Establish Risk Triggers: For high-priority risks, define specific early warning signs or "triggers." These triggers will signal that a risk is about to materialize, allowing the team to implement its response plan before the full impact is felt.
  • Conduct Regular Risk Reviews: Risk is not static. Hold monthly or bi-weekly meetings to review the risk register, update the status of existing risks, identify new ones, and remove those that have passed.

5. Comprehensive Project Scheduling and Planning

Comprehensive project scheduling and planning is the practice of creating a detailed, realistic, and dynamic roadmap for a construction project. It goes beyond a simple timeline, employing sophisticated techniques like the Critical Path Method (CPM) to identify the sequence of tasks that directly impact the project's completion date. This best practice involves breaking down the entire project into manageable components, assigning resources, and establishing clear dependencies and milestones.

A man reviews a project schedule on a tablet, with blueprints and documents on a wooden table.

This detailed planning establishes a clear sequence for all activities, from permitting and site prep to final inspections. It serves as the primary tool for guiding project execution, tracking performance against benchmarks, and managing resource allocation. For complex undertakings like fast-track commercial builds or the intricate sequencing required in adaptive reuse projects, a robust schedule is not just a guide; it's the project's central nervous system.

Why Comprehensive Scheduling is a Top Best Practice

Effective scheduling is a cornerstone of construction project management best practices because it provides visibility and control. By using techniques like CPM, project managers can identify which activities have zero "float" or slack, meaning any delay in these tasks will directly delay the entire project. This allows for proactive management, enabling teams to focus resources and mitigation efforts where they are most needed to prevent costly overruns.

Furthermore, a well-developed schedule facilitates resource leveling, ensuring that labor and equipment are used efficiently without being over-allocated or left idle. It provides a clear, data-driven basis for communicating progress to stakeholders and justifying any necessary adjustments to the project plan, making it an indispensable tool for maintaining budget and timeline discipline.

Key Insight: A project schedule is more than a calendar; it's a dynamic management tool. The most successful projects treat the schedule as a living document, constantly updated to reflect real-world progress and used to forecast outcomes and make informed decisions.

How to Implement Comprehensive Scheduling Effectively

  • Develop a Work Breakdown Structure (WBS): Start by breaking the entire project scope down into smaller, more manageable work packages. This hierarchical decomposition forms the foundation for accurate task and duration estimates.
  • Involve the Entire Team: Engage subcontractors, superintendents, and lead tradespeople in the scheduling process. Their hands-on experience is invaluable for creating realistic duration estimates and identifying potential sequencing challenges.
  • Build in Realistic Contingencies: No project goes exactly as planned. Incorporate schedule buffers or contingency time for high-risk activities or phases known for potential delays, such as permitting or material procurement.
  • Maintain and Update Regularly: The schedule is only useful if it's accurate. Implement a strict routine for updating progress (e.g., weekly) and re-forecasting completion dates. Use software like Procore, Microsoft Project, or Oracle Primavera P6 to manage these updates efficiently.

6. Rigorous Quality Management and Control

Rigorous quality management and control is the systematic process of ensuring all aspects of a construction project meet or exceed established standards and client expectations. This practice moves beyond simple end-of-phase inspections to embed quality into every step of the process. It involves a proactive framework of quality planning, quality assurance (process-oriented), and quality control (product-oriented) to prevent defects before they occur.

This comprehensive approach ensures that materials, workmanship, and final deliverables adhere to design specifications, building codes, and safety regulations. In complex projects like hospital construction, rigorous quality control is non-negotiable for patient safety and regulatory compliance. Similarly, in adaptive reuse projects, it is vital for ensuring that new systems integrate seamlessly and safely with the historical structure, preserving integrity while meeting modern performance standards.

Why Rigorous Quality Management is a Top Best Practice

Effective quality management is fundamental to a project's long-term success and reputation. Its core benefit is the prevention of defects and costly rework. By identifying and correcting non-conformance issues early through systematic inspections and process controls, teams can avoid the significant schedule delays and budget overruns associated with fixing problems after work is completed. This is a cornerstone of effective construction project management best practices.

Furthermore, a strong quality program enhances safety, increases the building's lifespan, and improves stakeholder satisfaction. Documenting quality processes provides a clear record of compliance and performance, which is invaluable for commissioning, facility management, and mitigating potential liability claims down the line.

Key Insight: Quality is not just a final inspection; it's a culture built on proactive planning and continuous verification. Shifting focus from finding defects to preventing them transforms quality control from an expense into a value-generating investment.

How to Implement Quality Management Effectively

  • Define Clear Acceptance Criteria: Before construction begins, work with stakeholders to develop and document specific, measurable, and objective quality standards for all major project components.
  • Implement a "First Work in Place" Protocol: Inspect the very first installation of any repeatable task (e.g., the first window, the first section of ductwork) to ensure it meets standards. Once approved, this serves as the benchmark for all subsequent work.
  • Use a Digital Quality Management System: Leverage mobile apps and software to create standardized inspection checklists, document issues with photos and notes in real-time, and track corrective actions through to completion.
  • Conduct Regular Quality Training: Ensure all team members and subcontractors understand the project's specific quality standards, expectations, and their individual responsibilities for achieving them.

7. Proactive Safety and Health Management

Proactive Safety and Health Management is a foundational best practice that moves beyond mere compliance to foster a deeply ingrained culture of safety. This approach involves systematically identifying potential hazards, assessing risks, and implementing preventative control measures long before an incident can occur. It prioritizes leading indicators like safety training and regular inspections over lagging indicators like injury rates.

This comprehensive system includes detailed safety planning during preconstruction, daily on-site safety meetings, thorough incident investigations, and empowering every team member to take ownership of site safety. For complex adaptive reuse projects, where workers encounter unknown conditions within existing structures, a proactive safety program is not just beneficial, it is essential for mitigating unique and unforeseen risks.

A yellow hard hat and clipboard on a table at a construction site with blurred workers and 'ZERO INJURIES' text.

Why Proactive Safety is a Top Best Practice

A robust safety program is the cornerstone of successful construction project management. Its most significant benefit is the prevention of workplace injuries and fatalities, which protects a project's most valuable asset: its people. This focus cultivates a positive work environment, improves morale, and enhances worker productivity and retention.

Furthermore, a strong safety record directly impacts the bottom line by reducing insurance premiums, minimizing the risk of costly OSHA fines, and preventing schedule disruptions caused by accidents. Companies like Turner Construction have demonstrated through their "Building L.I.F.E. (Living Injury Free Every day)" program that a zero-injury culture is an attainable goal that also yields significant financial and reputational rewards.

Key Insight: The most effective safety programs shift the mindset from reaction to prevention. By implementing a near-miss reporting system, teams can identify and correct systemic issues before they escalate into serious incidents, creating a cycle of continuous improvement.

How to Implement Proactive Safety Effectively

  • Develop a Site-Specific Safety Plan (SSSP): Before mobilization, create a detailed SSSP that identifies project-specific hazards, outlines emergency procedures, and assigns clear safety responsibilities to all personnel.
  • Conduct Daily Toolbox Talks: Start each day with a brief safety meeting to discuss the day's tasks, associated hazards, and relevant control measures. This keeps safety top-of-mind for every worker on site.
  • Empower All Personnel: Establish a clear "Stop Work Authority" policy that empowers any individual on site, regardless of their role, to halt an operation if they perceive an immediate danger.
  • Track Leading Indicators: Focus on metrics that predict future performance, such as the number of safety observations conducted, training hours completed, and hazards corrected, rather than only reacting to accidents after they happen.

8. Stakeholder Communication and Engagement

Effective stakeholder communication and engagement is the practice of systematically identifying, analyzing, and managing the expectations of every individual and group invested in a project's outcome. This goes far beyond simple project updates; it involves creating a structured framework for transparent dialogue with everyone from investors and tenants to regulatory bodies, community groups, and the project team itself.

This strategic approach ensures all participants are aligned on goals, timelines, and budgets. In complex commercial and adaptive reuse projects, where stakeholders often have competing interests, a proactive communication strategy is the glue that holds the project together. It transforms potential adversaries into partners by managing expectations, resolving conflicts before they escalate, and fostering a collaborative environment.

Why Stakeholder Communication is a Top Best Practice

Mastering stakeholder engagement is one of the most critical construction project management best practices because it directly mitigates non-technical risks. A primary benefit is proactive conflict resolution. By establishing clear channels for feedback and addressing concerns head-on, project managers can prevent minor disagreements from escalating into major disputes that cause delays and legal challenges, a common issue in public infrastructure projects with extensive community oversight.

Furthermore, strong communication builds trust and secures buy-in, which is essential for smooth decision-making and navigating the permitting process. It ensures that everyone understands the "why" behind project decisions, leading to greater support and fewer roadblocks from start to finish.

Key Insight: Project success is often defined not just by being on time and on budget, but by satisfying stakeholder expectations. A formal communication plan is the tool that ensures these expectations are clearly defined, understood, and managed from day one.

How to Implement Stakeholder Communication Effectively

  • Develop a Formal Communication Plan: At the project's outset, create a detailed plan that identifies all stakeholders, their interests, and the preferred frequency and format for communication (e.g., weekly emails, bi-weekly meetings).
  • Establish a Single Point of Contact: Designate a specific person to manage communications with each key stakeholder group to avoid mixed messages and ensure consistency.
  • Maintain Meticulous Documentation: Document all major decisions, meeting minutes, and change orders in writing and distribute them through a centralized platform to ensure everyone has access to the same information.
  • Be Transparent and Prompt: Address concerns and conflicts as soon as they arise. Provide honest, regular updates on schedule and budget performance, even when the news isn't positive, to maintain credibility and trust.

9. Cost Management and Budget Control

Cost Management and Budget Control is the disciplined process of planning, estimating, tracking, and controlling project costs from inception to completion. This practice ensures a project is completed within its approved budget, safeguarding profitability and financial viability. It involves establishing a detailed cost baseline, continuously monitoring actual expenditures against planned spending, and implementing formal processes to manage any changes or variances.

This financial oversight is more than just accounting; it’s a proactive management function. For large-scale commercial builds or complex adaptive reuse projects, where unforeseen conditions can quickly escalate expenses, rigorous cost control is the bedrock of project success. By integrating cost data with project schedules and scope, managers gain a holistic view of financial health, enabling them to make informed decisions that prevent budget overruns.

Why Cost Management is a Top Best Practice

Effective cost management is fundamental to delivering value and achieving a positive return on investment. Its primary benefit is preventing scope creep and budget overruns. A structured change order process ensures that any proposed modification to the project scope is thoroughly evaluated for its cost impact before approval. This prevents small, unmanaged changes from accumulating and eroding the project’s contingency and profit margins.

Furthermore, disciplined cost tracking provides early warning signs of financial distress. By comparing actual costs to the budget on a weekly or bi-weekly basis, project managers can identify negative trends long before they become critical. This foresight allows for timely corrective actions, such as value engineering or re-sequencing work, to bring the project back on track.

Key Insight: Proactive cost management is not about cutting corners; it's about making strategic financial decisions. A well-managed budget provides the stability needed to focus on quality, safety, and delivering the project as promised without constant financial crises.

How to Implement Cost Management Effectively

  • Develop a Detailed Cost Baseline: Create a granular, line-item budget during preconstruction, using historical data and multiple estimates for validation. This baseline becomes the benchmark against which all future costs are measured.
  • Implement a Strict Change Order Process: Establish a formal, multi-step approval workflow for all change orders. No work should proceed on a change until its cost impact is fully approved in writing by the client and relevant stakeholders.
  • Utilize Earned Value Management (EVM): For complex projects, use EVM to integrate cost, schedule, and scope performance. This powerful technique, championed by the Project Management Institute (PMI), provides objective metrics to forecast final project costs and completion dates.
  • Track Costs and Variances Religiously: Use construction-specific accounting software to track every dollar spent. Hold weekly meetings to review budget-versus-actual reports and analyze any variances to understand their root cause.

10. Effective Subcontractor and Supply Chain Management

Effective Subcontractor and Supply Chain Management is the strategic process of selecting, contracting, coordinating, and managing all third-party vendors, from specialty subcontractors to material suppliers. This practice goes beyond simple procurement; it is about building a high-performing, reliable network that functions as a seamless extension of the project team. A well-managed supply chain is critical for controlling costs, maintaining the project schedule, and ensuring quality workmanship.

This comprehensive approach involves rigorous prequalification of partners, developing clear and fair contracts, and establishing robust communication channels to monitor progress and resolve issues. In complex commercial and adaptive reuse projects, where specialized skills and materials are often required, managing these relationships effectively can be the difference between a profitable, on-time project and one plagued by delays, cost overruns, and disputes.

Why Subcontractor and Supply Chain Management is a Top Best Practice

This discipline is one of the most vital construction project management best practices because projects are rarely completed by a single entity. The primary benefit is risk mitigation. A thoroughly vetted subcontractor is less likely to default or produce substandard work, and a resilient supply chain with backup suppliers protects the project from material shortages or sudden price spikes. This proactive management prevents bottlenecks that can halt progress across the entire job site.

Furthermore, strong partnerships foster collaboration and innovation. When subcontractors are treated as valued partners, they are more likely to offer cost-saving suggestions and go the extra mile to meet project goals. This leads to better quality, more efficient workflows, and a positive on-site culture, which ultimately translates to a superior final product for the client.

Key Insight: Your project is only as strong as its weakest link. Treating your subcontractors and suppliers as integral partners, rather than just vendors, builds a foundation of trust and reliability that is essential for navigating the complexities of modern construction.

How to Implement Effective Vendor Management

  • Establish Rigorous Prequalification Criteria: Before inviting bids, develop a formal process to vet potential partners on their financial stability, safety record (e.g., EMR score), past project experience, and references.
  • Use Clear and Comprehensive Contracts: Utilize detailed contracts that explicitly define the scope of work, payment schedules, quality standards, and communication protocols to prevent misunderstandings down the line.
  • Implement Performance Monitoring: Regularly track subcontractor and supplier performance using key metrics like schedule adherence, quality of work, and safety compliance. Monthly scorecards can help identify issues early.
  • Maintain Open and Consistent Communication: Hold regular coordination meetings and maintain a central, written log of all communications, change orders, and decisions to ensure everyone is aligned. Prompt payment of invoices is also crucial for maintaining good faith.

Construction Project Management: 10 Best Practices Comparison

Approach / Practice Implementation Complexity 🔄 Resource Requirements ⚡ Expected Outcomes 📊 Ideal Use Cases 💡 Key Advantages ⭐
Building Information Modeling (BIM) High — steep learning curve, interoperability challenges 🔄 High — software, hardware, training, data infrastructure ⚡ Very high — better coordination, 20–30% less rework 📊⭐ Complex, multi-discipline projects; lifecycle/facility management 💡 Clash detection, accurate estimates, centralized data ⭐
Integrated Project Delivery (IPD) High — complex contracts and cultural change 🔄 Medium–High — facilitation, legal support, collaborative systems ⚡ High — cost reduction (5–15%), improved schedule/quality 📊⭐ Projects needing early stakeholder alignment and innovation 💡 Shared risk/reward, fewer disputes, aligned incentives ⭐
Lean Construction Methodology Medium — requires continuous cultural change 🔄 Medium — training, supply-chain coordination, implementation tools ⚡ High — waste down 20–30%, productivity up 10–25% 📊⭐ Repetitive workflows, contractors focused on waste reduction 💡 Eliminates non-value work, improves flow and productivity ⭐
Effective Risk Management Planning Medium — ongoing analysis and expertise required 🔄 Medium — risk workshops, analysts, contingency reserves ⚡ High — fewer surprises, protected profitability and schedule 📊 High-risk projects (infrastructure, international, geotechnical) 💡 Early mitigation, contingency planning, improved confidence ⭐
Comprehensive Project Scheduling & Planning Medium — time-intensive, detailed dependencies 🔄 Medium — schedulers, tools (CPM), historical data ⚡ High — accurate durations, early delay warnings 📊 Complex sequences, fast-track, mega-project scheduling 💡 Critical path visibility, resource optimization, milestones ⭐
Rigorous Quality Management & Control Medium — inspection regimes and documentation load 🔄 Medium — inspectors, testing, QA systems and training ⚡ High — reduced rework, regulatory compliance, customer satisfaction 📊⭐ Healthcare, data centers, safety-critical builds 💡 Defect reduction, consistent standards, warranty risk down ⭐
Proactive Safety & Health Management Medium — program setup and cultural adoption 🔄 Medium — training, PPE, audits, safety staff ⚡ Very high — prevents injuries, lowers incident-related costs 📊⭐ High-hazard sites, large crews, regulatory scrutiny 💡 Injury prevention, lower insurance costs, compliance ⭐
Stakeholder Communication & Engagement Low–Medium — process and cadence management 🔄 Low–Medium — communication platforms, reporting effort ⚡ High — fewer misunderstandings and disputes, better alignment 📊 Public projects, multi-stakeholder programs, complex owners 💡 Builds trust, speeds decision-making, reduces change orders ⭐
Cost Management & Budget Control Medium — detailed tracking and change control 🔄 Medium–High — cost systems, EVM, estimators, accountants ⚡ High — early overrun detection, maintained profitability 📊 Fixed-price projects, portfolios, mega-project financial control 💡 Budget discipline, forecasting, variance management ⭐
Subcontractor & Supply Chain Management Medium — vetting, contracting and performance monitoring 🔄 Medium — prequalification, backup suppliers, KPIs ⚡ High — timely deliveries, consistent workmanship, fewer delays 📊 Projects dependent on many vendors or JIT delivery 💡 Reduced supply risk, stronger vendor relationships, quality control ⭐

Integrating Best Practices for Enduring Success

Navigating the intricate landscape of modern construction, especially within the demanding realms of commercial projects and adaptive reuse, requires more than just a competent team and a set of blueprints. The difference between a project that merely meets specifications and one that delivers enduring value lies in the deliberate, systematic integration of proven methodologies. The ten construction project management best practices we've explored are not isolated tactics to be deployed ad-hoc; they are interconnected pillars that form a resilient framework for project delivery.

From the digital-first approach of Building Information Modeling (BIM) that creates a single source of truth, to the collaborative ethos of Integrated Project Delivery (IPD) that aligns all stakeholder incentives, these principles work in concert. A comprehensive project schedule is not just a timeline; it's a dynamic tool that informs your cost management strategy and highlights potential risks before they materialize. Similarly, a Lean Construction mindset, focused on eliminating waste, directly enhances both your quality control and safety management programs by fostering a culture of continuous improvement and meticulous attention to detail.

From Knowledge to Action: Your Next Steps

Merely understanding these concepts is the first step. The true challenge and reward come from weaving them into the operational fabric of your organization. It's about moving from a reactive to a proactive stance, transforming potential liabilities into predictable outcomes and profitable assets.

Actionable Takeaways to Implement Now:

  • Audit Your Current Process: Select one recently completed project and evaluate it against these ten best practices. Where were the gaps? Did a lack of proactive risk planning lead to budget overruns? Could better stakeholder communication have streamlined the permitting phase?
  • Prioritize a Pilot Program: You don't need to implement everything at once. Choose one or two high-impact practices to pilot on your next project. For example, introduce a more rigorous preconstruction planning phase using BIM or implement daily huddle meetings to improve subcontractor communication and flow, a core tenet of Lean.
  • Invest in Technology and Training: The right tools are force multipliers. Whether it’s adopting project management software that facilitates transparent communication or investing in training for Lean methodologies, empowering your team with the right resources is critical for successful implementation.

The Holistic Advantage in Modern Construction

Ultimately, mastering these construction project management best practices is about building a cohesive, predictable system. It’s a commitment to a philosophy where proactive planning mitigates unforeseen challenges, where transparent communication builds trust, and where rigorous quality control ensures the final product is not just built to code, but built to last.

This integrated approach is the key to unlocking true project potential, especially in complex adaptive reuse or historic preservation scenarios where every decision carries significant weight. By shifting from a collection of disparate tasks to a unified strategy, you cultivate a project environment defined by efficiency, accountability, and excellence. This commitment doesn't just get projects done; it builds a reputation for delivering exceptional results on time and on budget, turning every build into a cornerstone of enduring success.


Ready to see how an integrated, architect-led approach can transform your next commercial or adaptive reuse project? The team at Sherer Architects, LLC builds these best practices into every design and management decision, ensuring your vision is realized with precision and expertise. Contact us today to discuss how we can bring your project to life.

Categories
Uncategorized

Your guide to construction quality control checklist

In commercial construction, adaptive reuse, and historic preservation, success is measured not just by completion, but by endurance and performance. The gap between a good project and a great one often lies in the rigor of its quality control. A generic checklist won't suffice; what's needed is a dynamic, phase-by-phase framework that anticipates challenges and verifies compliance at every critical juncture. This guide provides a definitive construction quality control checklist, breaking down the eight most crucial inspection and verification stages.

We'll move beyond the obvious, offering actionable steps and practical examples for each critical point. You will learn how to verify everything from concrete strength and structural steel certifications to the integrity of your building envelope. This comprehensive approach ensures that every component, from foundation to finish, meets exacting standards. It’s about building a systematic process that catches issues early, long before they become expensive problems or safety hazards.

This meticulous oversight is vital throughout the project lifecycle. A key milestone that exemplifies the non-negotiable nature of detailed quality checks before handover is the practical completion inspection, which serves as a final, exhaustive review of all works. By implementing these detailed checks from day one, you can mitigate risks, prevent costly rework, and ensure your final structure is safe, compliant, and built to last. This checklist is your roadmap to delivering a project that stands as a testament to quality, durability, and meticulous planning.

1. Concrete Quality Testing and Strength Verification

Concrete is the literal foundation of most commercial and adaptive-reuse projects, making its integrity non-negotiable. This critical point on any construction quality control checklist involves a systematic process of testing concrete materials before, during, and after placement. The goal is to verify that the concrete mix meets or exceeds the specified design strength, durability, and workability requirements outlined in the project's structural plans and building codes.

This process ensures the structural safety and long-term performance of the building. It mitigates risks associated with structural failure, costly rework, and potential liability. For high-rise construction, bridge projects, or structures in seismic zones, stringent concrete testing is a fundamental requirement mandated by law and engineering best practices.

Key Testing Procedures

Verification relies on standardized tests, primarily those governed by ASTM International and the American Concrete Institute (ACI).

  • Slump Test (ASTM C143): Performed on-site just before the pour, this test measures the consistency and workability of fresh concrete. It immediately indicates if the water-cement ratio is correct, preventing issues like segregation or poor finishability.
  • Compressive Strength Test (ASTM C39): This is the most crucial test. Cylindrical samples are taken from the concrete batch on-site, cured under controlled conditions (ASTM C192), and then crushed by a specialized machine at specific intervals (typically 7, 14, and 28 days). The results confirm if the concrete has achieved its required design strength (e.g., 4,000 psi).
  • Air Content Test (ASTM C231/C173): For exterior concrete exposed to freeze-thaw cycles, this test verifies the volume of microscopic air bubbles entrained in the mix. Proper air entrainment provides space for freezing water to expand, preventing surface spalling and internal cracking over time.

Implementation and Best Practices

Successful concrete quality control requires proactive planning and meticulous documentation. Major contractors on large-scale commercial projects, such as a new corporate campus or a multi-level parking garage, often retain independent, third-party testing laboratories. This practice ensures unbiased, verifiable results and adds a layer of accountability.

Key Insight: Don't wait for a problem. Establish clear acceptance and rejection criteria with the structural engineer and concrete supplier before the first truck arrives on site. This protocol should detail the exact steps to take if a test fails, preventing costly delays and disputes.

To effectively integrate this into your workflow:

  • Schedule in Advance: Coordinate with the testing lab well before scheduled pour dates to ensure personnel are available. Factor in the lab's turnaround time for 28-day strength test reports.
  • Document Everything: Every test result, batch ticket, and sample location must be logged immediately. This creates a traceable record of quality for every structural element.
  • Address Failures Promptly: If a 7-day or 28-day test fails to meet the minimum strength, immediately notify the project engineer. A documented corrective action plan, which may involve further testing (like core drilling) or structural remediation, must be implemented and approved.

2. Structural Steel Inspection and Material Certification

For projects relying on a steel skeleton, from towering skyscrapers to expansive industrial facilities, the integrity of every beam, column, and connection is paramount. This essential point on a construction quality control checklist involves a rigorous verification process to ensure all structural steel meets the exact specifications for grade, dimension, and material properties. It encompasses the entire lifecycle of the steel, from the foundry to its final placement.

Man in a high-vis vest performing quality control, writing on a clipboard at a steel construction site.

This process is critical for ensuring the structure can safely bear its intended loads and resist environmental forces. Proper certification and inspection prevent the use of substandard or incorrect materials, which could lead to catastrophic structural failure. For government contracts, bridge projects, or buildings in high-seismic areas, these verification steps are non-negotiable and mandated by codes from bodies like the American Institute of Steel Construction (AISC).

Key Testing Procedures

Verification is based on certified documentation and physical inspections, adhering to standards from ASTM International and the American Welding Society (AWS).

  • Mill Test Reports (MTRs): This is the birth certificate for steel. The MTR is a quality assurance document provided by the steel mill that certifies a material’s chemical analysis and mechanical properties. It must be reviewed and matched against the project specifications (e.g., verifying Grade 50 steel) before the steel is fabricated or shipped to the site.
  • Welding and Bolting Inspections: Certified Welding Inspectors (CWIs) must visually and, if required, non-destructively test welds to ensure they are free of defects and meet design requirements (AWS D1.1). Similarly, high-strength bolted connections must be inspected to confirm proper bolt tensioning using methods like turn-of-nut or direct tension indicators.
  • Dimensional and Damage Inspection: Upon delivery, every piece of steel must be inspected for shipping damage, such as bends or twists, and measured to confirm its dimensions align with the approved shop drawings. Any discrepancies must be documented and resolved immediately.

Implementation and Best Practices

Effective steel quality control is about traceability and proactive verification, not reactive problem-solving. Major commercial projects, like a new hospital wing or data center, often employ third-party special inspectors to provide an independent layer of oversight for all steel fabrication and erection processes, ensuring unbiased compliance.

Key Insight: Implement a "gatekeeping" system. No steel member should be offloaded or erected until its corresponding Mill Test Report has been received, reviewed, and approved by the project engineer. This simple protocol prevents uncertified material from ever entering the building's structural system.

To effectively integrate this into your workflow:

  • Request MTRs Early: Make the submission and approval of MTRs a prerequisite for payment to the steel fabricator. This ensures documentation is a priority.
  • Tag and Track: Establish a system for tagging each steel member with a unique identifier that links it back to its MTR and its specific location in the structure as shown on the erection drawings.
  • Inspect Upon Arrival: Designate a specific laydown area for steel delivery inspections. Check for transit damage, surface contaminants like excessive rust or oil, and verify piece marks against the shipping manifest and drawings before accepting the material.

3. Formwork and Shoring Safety Verification

Formwork and shoring are the temporary skeletons that support concrete and other materials until they can support themselves. This point on a construction quality control checklist involves the rigorous inspection and certification of these temporary systems to ensure they can safely handle immense construction loads without failure. The goal is to prevent catastrophic collapses, protect workers, and ensure the final structural elements are formed to the correct dimensions and specifications.

This process is a critical safety and quality assurance measure, particularly in multi-story construction or projects involving heavy concrete beams and decks. A failure in formwork not only poses a direct threat to life but also leads to significant project delays, budget overruns, and severe structural defects in the finished product. Verification is mandated by OSHA and is a cornerstone of responsible project management.

Key Inspection Procedures

Verification requires adherence to engineered designs and industry standards, primarily guided by OSHA regulations and ACI guidelines.

  • Design and Drawing Review: Before installation, the project’s structural engineer or a designated qualified person must review and approve the formwork design drawings. This step confirms the system is engineered to support the anticipated dead and live loads, including the weight of wet concrete, workers, and equipment.
  • Pre-Pour Inspection: A competent person must conduct a thorough visual inspection of the erected formwork system just before the concrete pour. This checklist-driven inspection verifies that all components (shores, braces, connectors) are installed correctly, plumb, and according to the approved design.
  • Monitoring During and After Pour: Continuous monitoring is essential as the concrete is placed. Observers watch for any signs of deflection, settlement, or distress in the formwork. Post-pour inspections ensure the system remains stable as the concrete begins to cure and transfer its load.

Implementation and Best Practices

Effective formwork verification is a collaborative effort between the general contractor, the concrete subcontractor, and the project engineer. On complex projects, like a new hospital wing or an elevated bridge deck, a specialized formwork engineering firm is often engaged to design and certify the system.

Key Insight: Treat formwork as a temporary structure with the same engineering rigor as the permanent one. A detailed removal (stripping) schedule, approved by the project engineer, is just as critical as the installation plan. Removing supports too early can lead to structural failure, even days after the pour.

To effectively integrate this into your workflow:

  • Engage a Qualified Designer: For anything beyond simple slab-on-grade work, ensure the formwork system is designed by a qualified professional engineer specializing in temporary structures.
  • Conduct Pre-Pour Meetings: Hold a specific meeting with the site superintendent, concrete crew, and inspector to review the formwork design, inspection checklist, and emergency procedures.
  • Document All Inspections: Every pre-pour and post-pour inspection must be documented with a signed-off checklist, notes, and photographs. This creates a clear record of due diligence and compliance.
  • Control the Stripping Process: Adhere strictly to the engineer-approved schedule for removing forms and shoring. This timing is based on concrete strength test results, not just the calendar, to ensure the structure can safely bear its own weight.

4. Rebar Placement and Installation Verification

Reinforcing steel, or rebar, is the skeletal system within concrete structures, providing the tensile strength that concrete lacks. Verifying its correct placement is a crucial step in any construction quality control checklist, as improper installation can compromise the entire structural integrity of a building, leading to cracks, premature failure, or even collapse. This inspection process ensures that the size, spacing, positioning, and concrete cover of the rebar precisely match the structural engineer's design specifications.

This verification is non-negotiable for ensuring the long-term durability and safety of concrete elements like foundations, columns, beams, and slabs. It directly prevents issues such as corrosion from inadequate concrete cover and structural weakness from incorrect splicing or spacing. For projects like high-rise residential buildings or highway bridge decks, meticulous rebar inspection is a fundamental prerequisite before any concrete is poured.

Rebar grid being measured with a tape measure on a construction site, ensuring proper spacing for concrete.

Key Testing Procedures

Verification is a visual and manual inspection process guided by industry standards from the American Concrete Institute (ACI) and the Concrete Reinforcing Steel Institute (CRSI).

  • Placement and Spacing Check: Using a tape measure, inspectors confirm that the spacing between bars (both horizontal and vertical) matches the design drawings. They also verify the correct number of bars and their specified sizes (e.g., #5 rebar at 12 inches on-center).
  • Concrete Cover Verification: Inspectors measure the distance from the rebar to the edge of the formwork. This "cover" is critical for protecting the steel from moisture and corrosion. Specialized tools like plastic rebar chairs or dobies are checked to ensure they are correctly sized and placed to maintain this required distance.
  • Lap Splice and Tie Inspection: Where two bars overlap to create a continuous line of reinforcement, the length of this "lap splice" is measured to ensure it meets the minimum length specified in the plans. Inspectors also confirm that the rebar is securely tied with wire to prevent shifting during the concrete pour.

Implementation and Best Practices

A successful rebar inspection program hinges on a formal pre-pour sign-off process. For major projects, such as marine structures with enhanced corrosion protection requirements or government-funded infrastructure, a third-party special inspector is often mandated to perform and certify the rebar installation before the concrete contractor is allowed to proceed.

Key Insight: Treat the pre-pour rebar inspection as a mandatory "hold point" in the construction schedule. No concrete should be ordered or poured until the structural engineer or their designated inspector has formally signed off on the rebar placement. This single checkpoint prevents irreversible and costly mistakes.

To effectively integrate this into your workflow:

  • Schedule a Formal Inspection: Coordinate the inspection with the project superintendent, structural engineer, and third-party inspector for a specific time after all rebar is tied but before the concrete pour is scheduled.
  • Document with Photos: Take detailed, dated photographs of the rebar placement, including close-ups with a tape measure visible. This creates a permanent visual record of compliance for the project archives.
  • Resolve Deviations Immediately: If any discrepancies are found, such as incorrect spacing or insufficient cover, they must be corrected on the spot. The inspector must then re-verify the corrected areas before granting approval for the pour.

5. Electrical Installation and Safety Compliance Inspection

An electrical system is the central nervous system of any modern commercial building, making its proper installation a paramount safety and operational concern. This point on a construction quality control checklist involves a rigorous, multi-stage inspection process to verify that all electrical systems are installed according to project plans, specifications, and, most importantly, prevailing electrical codes like the National Electrical Code (NEC). It covers everything from wiring and conduit to panels, grounding, and final system testing.

This process is critical for preventing fire hazards, ensuring occupant safety, and guaranteeing the reliable performance of all building systems. For facilities with specialized needs like hospitals or data centers, which have stringent power reliability and redundancy requirements, meticulous electrical inspection is not just a best practice; it is a fundamental requirement for functionality and accreditation.

Key Testing Procedures

Verification ensures that the installed system is safe, functional, and compliant. Inspections are often performed by local building officials, but a thorough internal QC process is essential.

  • Rough-in Inspection: This occurs before walls and ceilings are closed. Inspectors verify proper installation of outlet boxes, correct wire sizing and type for each circuit, secure conduit runs, and appropriate support and protection of wiring. This is the last chance to easily correct issues within walls.
  • Panel and Service Inspection: This focuses on the main electrical service, distribution panels, and subpanels. It includes verifying correct breaker installation, proper conductor termination and torque settings, clear and accurate panel labeling (circuit directories), and confirming that grounding and bonding systems are installed per NEC requirements.
  • Final Inspection and System Testing: After all devices (lights, switches, receptacles) are installed, a final inspection is conducted. This includes functional testing, such as verifying proper operation of Ground Fault Circuit Interrupters (GFCIs) and Arc-Fault Circuit Interrupters (AFCIs), confirming correct polarity at all outlets, and performing insulation resistance tests on major feeders if specified.

Implementation and Best Practices

A successful electrical quality control program relies on proactive coordination and unwavering attention to code compliance. On major projects, such as a new industrial facility with hazardous area classifications, general contractors depend on highly qualified, licensed electrical subcontractors who maintain their own internal QC process, which is then verified by third-party inspectors and local authorities.

Key Insight: Treat electrical inspections as phased gates, not a single final event. A "pre-inspection" walkthrough with your electrical foreman before the official inspector arrives can identify and correct 90% of potential issues, preventing failed inspections, costly re-inspection fees, and schedule disruptions.

To effectively integrate this into your workflow:

  • Schedule Phased Inspections: Coordinate rough-in, above-ceiling, and final inspections with the project schedule. Never cover work that has not been inspected and approved.
  • Maintain Meticulous Records: Keep a dedicated log of all inspections, test results (e.g., megohmmeter readings), and corrective actions taken. This documentation is vital for the Certificate of Occupancy.
  • Verify Code Compliance: The NEC is updated every three years. Ensure your electrical team is working with the edition adopted by the local jurisdiction. Address any discrepancies between plans and code requirements with the design team immediately.

6. Masonry Quality Control and Bond Testing

Masonry, whether structural block, brick veneer, or historic stone, is defined by the quality of its individual units and the mortar that binds them together. This point on a construction quality control checklist establishes a rigorous process for verifying materials and workmanship to ensure the system’s structural integrity, weather resistance, and aesthetic consistency. The goal is to confirm that the entire masonry assembly meets the specified strength, durability, and appearance standards.

Proper masonry quality control is essential for preventing common failures like water infiltration, cracking, and efflorescence, which can lead to costly repairs and compromise the building envelope. For projects like a historic building restoration or the facade of a new commercial headquarters, meticulous attention to masonry detail is fundamental to both long-term performance and the project's visual success.

Key Testing Procedures

Verification is guided by standards from organizations like The Masonry Society (TMS) and ASTM International to ensure repeatable and reliable results.

  • Mortar and Grout Testing (ASTM C780 / C1019): Similar to concrete testing, samples of mortar and grout are taken on-site during construction. These samples are tested for compressive strength and consistency to ensure they meet the mix design requirements and have the necessary bonding properties.
  • Masonry Prism Testing (ASTM C1314): This is a critical test for structural masonry walls. Small assemblies, or prisms, are built on-site using the actual brick/block, mortar, and grout from the project. These prisms are then cured and compression-tested in a lab to verify the ultimate compressive strength (f'm) of the entire masonry system, confirming it aligns with the structural engineer's design.
  • Visual Workmanship Inspection: Continuous on-site inspection is non-negotiable. This involves checking for consistent mortar joint thickness, ensuring joints are fully packed, verifying the proper installation of flashing and weeps, and confirming that wall ties are correctly embedded and spaced.

Implementation and Best Practices

Effective masonry QC depends on setting clear standards before the first block is laid and maintaining them through diligent oversight. On large-scale projects, such as a multi-story university building with an intricate brick facade, a dedicated inspector or third-party agency specializing in masonry is often engaged to oversee the work and conduct testing.

Key Insight: Create a physical on-site mockup panel for approval before full-scale installation begins. This sample panel should include all elements: the specified brick or block, mortar color and joint profile, ties, and flashing. It serves as the definitive quality benchmark against which all subsequent work is measured.

To effectively integrate this into your workflow:

  • Pre-Installation Conference: Hold a meeting with the mason, general contractor, architect, and testing agency to review submittals, mockup requirements, testing frequency, and acceptance criteria.
  • Document Material Deliveries: Log all delivery tickets for masonry units, mortar components, and reinforcement. Ensure they match the approved submittals before being incorporated into the work.
  • Protect the Work: Ensure that newly laid masonry is properly protected from rain and extreme temperatures during the critical curing period to prevent washouts, efflorescence, or loss of strength.

7. Welding Quality Inspection and Certification

For steel-framed structures, bridges, and industrial facilities, the integrity of welded connections is a paramount safety concern. This point on a construction quality control checklist involves the systematic inspection and testing of all structural welds to ensure they meet the stringent strength, quality, and code requirements specified by project engineers. The goal is to verify that every connection is free from defects and possesses the necessary load-bearing capacity.

This process is fundamental to preventing catastrophic structural failures. It ensures that the building performs exactly as designed under various loads, including gravity, wind, and seismic forces. In projects like high-rise buildings, critical infrastructure, or pressure vessel fabrication, rigorous weld inspection is mandated by codes from the American Welding Society (AWS) and other governing bodies.

Key Testing Procedures

Verification is achieved through a combination of visual inspection and advanced Non-Destructive Testing (NDT) methods performed by certified inspectors.

  • Visual Inspection (VT): This is the most common and fundamental method, conducted before, during, and after welding. Inspectors check for proper joint preparation, correct weld size and profile, and surface defects like cracks, undercut, or excessive porosity. It is the first line of defense against poor workmanship.
  • Ultrasonic Testing (UT): This NDT method uses high-frequency sound waves to detect internal discontinuities within the weld. A transducer sends a signal into the material, and the return echo is analyzed to identify hidden flaws like lack of fusion or slag inclusions without damaging the connection.
  • Radiographic Testing (RT): Similar to a medical X-ray, this technique uses X-rays or gamma rays to produce an image of the weld's internal structure on film. RT is highly effective for identifying internal voids, cracks, and other volumetric defects, and is often required for 100% inspection on critical connections like those in pressure vessels or pipelines.

Implementation and Best Practices

Effective welding quality control depends on proactive oversight and meticulous record-keeping. General contractors on major projects, such as a new hospital wing or a bridge rehabilitation, will engage a third-party inspection agency with certified NDT technicians. This ensures an independent, unbiased assessment of weld quality and compliance.

Key Insight: Qualification is preventative. Verify that every welder on site holds current certifications (e.g., AWS D1.1) for the specific position and type of weld they will be performing before any structural steel is joined. This single step prevents the vast majority of common weld defects.

To effectively integrate this into your workflow:

  • Establish Clear Criteria: Define the acceptance and rejection standards for all welds with the structural engineer, based on AWS or other applicable codes, before fabrication begins.
  • Document Everything: Each weld inspection must be documented with a detailed report, including the welder's identification, location of the weld, inspection method used, and findings. Photographic evidence should support all visual inspections.
  • Schedule Phased Inspections: Plan NDT to occur as work progresses, not at the end. This allows for timely identification and correction of any deficient welds before they are covered by other building elements, avoiding costly and complex rework.

8. Building Envelope and Moisture Barrier Verification

The building envelope acts as the primary barrier between the conditioned interior and the exterior environment, making its integrity essential for long-term durability and energy performance. This critical point on a construction quality control checklist involves a systematic inspection and testing of all waterproofing membranes, air barriers, and weather-resistive barriers. The goal is to prevent uncontrolled air leakage and water infiltration, which can lead to structural damage, mold growth, and poor energy efficiency.

Man inspecting house exterior with a moisture meter, revealing a moisture barrier.

This verification process protects the owner’s investment by ensuring the building performs as designed, reducing operational costs, and preventing costly future repairs. For high-performance green buildings or structures in regions with extreme weather, a meticulously sealed and waterproofed envelope is a fundamental requirement driven by building codes and sustainability standards like LEED. For a comprehensive quality control plan, understanding detailed roofing inspection practices is crucial for ensuring the integrity of the building envelope.

Key Testing Procedures

Verification combines visual inspections with standardized performance tests, often guided by standards from the Air Barrier Association of America (ABAA) and ASTM International.

  • Visual Inspection and Continuity Checks: Before and after cladding is installed, inspectors visually verify that all barrier materials are installed per manufacturer specifications. This includes checking for complete coverage, proper lapping of seams, and correct flashing and sealing around all penetrations like windows, doors, and MEP conduits.
  • Water Penetration Testing (ASTM E1105): This field test is commonly performed on window installations and curtain wall systems. A calibrated spray rack delivers a uniform stream of water at a specified pressure against a section of the building facade while a negative air pressure differential is created inside, simulating wind-driven rain.
  • Whole-Building Air Leakage Test (ASTM E779): Often called a "blower door test," this procedure depressurizes or pressurizes the entire building using large, calibrated fans. It measures the total air leakage rate, which is then compared against the project's specified air tightness requirements (e.g., a certain CFM per square foot of envelope area).

Implementation and Best Practices

Effective building envelope verification requires coordination between multiple trades, including framers, window installers, roofers, and MEP contractors. It is often managed by a third-party building enclosure consultant who can provide unbiased oversight and testing.

Key Insight: Treat the air and moisture barrier as a single, continuous, and monolithic system. A small, unsealed pipe penetration can compromise the performance of the entire wall assembly, negating the investment in high-quality materials.

To effectively integrate this into your workflow:

  • Hold Pre-Installation Meetings: Gather all relevant trades to review sequencing, detailing, and compatibility of different barrier products before work begins.
  • Document with Photos: Take detailed photographs of all flashing, seals, and membrane laps before they are covered by subsequent layers like brick or siding. This creates a permanent record of quality.
  • Test Early and Re-Test: Conduct water penetration tests on mock-ups or the first few installed window units. If deficiencies are found, they can be corrected before the entire building is completed, preventing rework. If a test fails, a documented corrective action must be implemented and the area must be re-tested until it passes.

8-Point Construction Quality Control Comparison

Item Implementation Complexity 🔄 Resource Requirements ⚡ Expected Outcomes 📊 Ideal Use Cases 💡 Key Advantages ⭐
Concrete Quality Testing and Strength Verification Moderate — scheduled sampling, lab and NDT procedures High — laboratory access, curing space, trained technicians Reliable compressive strength verification; code compliance; documented batches High-rise, bridges, commercial pours, projects requiring certified strength ⭐ Very high structural assurance; prevents failures; strong documentation
Structural Steel Inspection and Material Certification Moderate–High — mill report review, dimensional checks, NDT High — NDT equipment, certified inspectors, supplier coordination Verified material grade, weld quality, and traceability Skyscrapers, bridges, industrial facilities, government contracts ⭐ Ensures material authenticity and capacity; reduces collapse risk
Formwork and Shoring Safety Verification High — engineered design review, installation inspection, load testing High — structural engineers, monitoring tools, temporary systems Safe temporary support; reduced collapse and injury risk; protected schedule Multi‑story formwork, heavy beams, bridge decks, OSHA‑regulated sites ⭐ Prevents collapse; improves safety and concrete finish
Rebar Placement and Installation Verification Moderate — detailed pre‑pour visual and measurement checks Moderate — experienced inspectors, measuring tools, photo documentation Correct reinforcement placement, adequate cover, splice compliance High‑rise, bridges, marine structures, government projects ⭐ Ensures reinforcement accuracy; enables early correction pre‑pour
Electrical Installation and Safety Compliance Inspection Moderate — circuit, grounding, continuity and load testing Moderate — certified electricians, electrical test gear, documentation NEC compliance; reduced fire/electrical hazard risk; occupancy approval Commercial buildings, hospitals, data centers, industrial facilities ⭐ Prevents electrical hazards; ensures code compliance and safety
Masonry Quality Control and Bond Testing Moderate — mortar/prism testing, visual workmanship inspection Moderate–High — lab testing, skilled masons, time for prism curing Verified bond strength, durability, moisture resistance Historic restoration, facades, multi‑story masonry, heritage projects ⭐ Ensures durability and weather resistance; prevents infiltration
Welding Quality Inspection and Certification High — welder qualification, visual and advanced NDT (RT/UT), destructive tests High — NDT specialists, radiography/UT equipment, testing labs Verified weld integrity; detection of internal flaws; code compliance High‑rise steel connections, pressure vessels, bridges, pipelines ⭐ Detects critical flaws; verifies welder competence; prevents failures
Building Envelope and Moisture Barrier Verification Moderate — visual, spray/water penetration testing, thermal imaging Moderate — moisture/spray equipment, thermal cameras, dry conditions Reduced water intrusion; improved energy efficiency; longer lifespan Commercial facades, high‑performance buildings, renovations ⭐ Prevents water damage and mold; improves energy performance

From Checklist to Certainty: Embedding Quality into Your Project DNA

The journey from architectural vision to a completed, high-performing structure is paved with thousands of critical details. As we've explored through the eight essential stages, from pre-construction planning to final commissioning, a construction quality control checklist is far more than a simple document. It is the operational framework for excellence, the practical tool that transforms abstract quality goals into tangible, verifiable results on the job site. This isn't about ticking boxes; it's about embedding a culture of precision and accountability into the very DNA of your project.

Moving beyond a reactive, "catch-it-when-it's-broken" mindset is the single most impactful shift a project team can make. A proactive approach, underpinned by the detailed checkpoints we've outlined, prevents errors before they occur. It stops a small discrepancy in rebar placement from becoming a significant structural concern, and it ensures a minor gap in the building envelope doesn't lead to major moisture intrusion issues years down the line. This proactive diligence is the foundation of risk management, cost control, and schedule adherence.

The True ROI of a Rigorous Quality Control Process

The immediate benefits of a robust quality control program are clear: reduced rework, fewer change orders, and a smoother path to project completion. However, the long-term value extends far beyond the construction phase.

  • Asset Longevity: Quality construction directly translates to a more durable, resilient building with lower lifecycle maintenance costs. Every verified weld, properly installed moisture barrier, and correctly commissioned MEP system contributes to the asset's long-term performance and value.
  • Reputation and Trust: For developers, contractors, and owners, a reputation for delivering high-quality projects is invaluable. It builds trust with investors, attracts premium tenants, and secures future opportunities. A comprehensive construction quality control checklist is your proof of commitment to this standard.
  • Occupant Safety and Satisfaction: Ultimately, buildings are for people. Rigorous adherence to structural, electrical, and fire safety codes is non-negotiable. Quality finishes and functional systems create a positive, reliable environment for occupants, enhancing satisfaction and tenant retention.

From Document to Dynamic Strategy

The power of a checklist lies in its consistent and diligent application. It must be a living document, integrated into daily workflows, site meetings, and project reporting. It requires clear ownership, with every team member understanding their role in the quality chain, from the subcontractor installing masonry to the project manager verifying material submittals.

This process is especially crucial in the nuanced fields of adaptive reuse and historic preservation. These projects introduce unique variables, from integrating modern MEP systems into historic structures to matching new materials with original building fabric. A generic checklist falls short here; a tailored, expert-guided quality control plan is essential to navigate these complexities and honor the building's character while ensuring modern performance and safety standards.

Key Takeaway: A construction quality control checklist is not a static document but a dynamic management system. Its purpose is to create a predictable, repeatable process for achieving an exceptional outcome, protecting your investment and solidifying your reputation for excellence. By embracing this systematic approach, you move from hoping for quality to ensuring it with certainty.


Navigating the complexities of commercial construction, particularly in adaptive reuse and historic preservation projects, requires specialized expertise. A robust construction quality control checklist is your roadmap, but an experienced architect is your expert guide. The team at Sherer Architects, LLC excels in creating and implementing these detailed quality frameworks to ensure your vision is realized with precision and integrity.

To see how their dedicated approach can safeguard your next project's success, visit Sherer Architects, LLC today.