
The journey from a promising idea to a finished building isn't a single, lightning-strike moment of inspiration. It’s a structured, collaborative process that carefully translates a client's vision into a tangible reality. Think of it as moving from an abstract concept to a highly detailed, buildable plan, with checkpoints all along the way to keep everything on track, on budget, and aligned with your goals.
Your Blueprint for Success: Understanding the Design Process
Many people imagine architectural design as one big creative sprint. A better way to think about it is like directing a movie. You start with a script (the pre-design phase), move to storyboards and concept art (schematic design), and only then do you create the final, detailed shot list for production (the construction documents). This deliberate progression is crucial for managing the immense complexity of a building project and heading off expensive problems before they start.
This guide is here to pull back the curtain on that entire process. We'll turn what can feel like an intimidating puzzle into a clear, step-by-step roadmap. When you understand what happens in each phase, you’re empowered to make smart, confident decisions that ensure the final building is exactly what you envisioned.
A Journey of Progressive Refinement
At its heart, the architectural design process is sequential. Each phase logically builds on the decisions and discoveries of the one before it. This is a critical feature, not a bug, because it prevents the kind of costly, eleventh-hour changes that can derail a project. It’s infinitely easier—and cheaper—to move a wall on paper during the early design stages than it is after the steel has been erected.
This methodical approach ensures that every critical element—from tricky site constraints and local zoning laws to material choices and the structural system—is thoughtfully considered and woven into one cohesive plan. The goal is to build the entire project perfectly on paper before a single shovel ever hits the ground.
The flowchart below shows this basic progression, moving from initial discovery and big-picture ideas to the nitty-gritty details needed for construction.
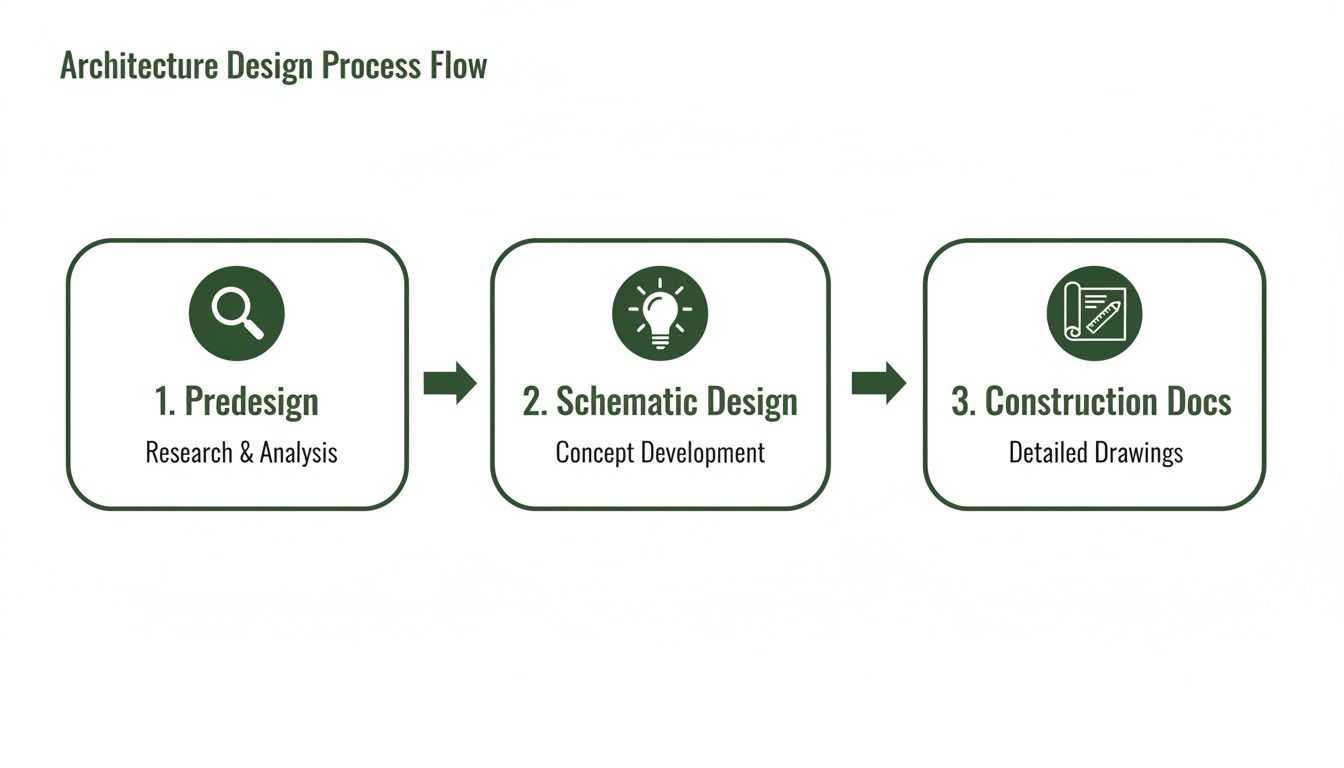
As you can see, the early-stage work—all that discovery and conceptual thinking—forms the essential foundation for the technical precision required in the later phases.
Why a Structured Process Matters
Following a defined architectural process isn’t just about neat project management; it’s the very backbone of the industry. The global architectural services market hit a staggering $249.2 billion between 2020 and 2025, which speaks volumes about the consistent need for professional, well-managed design. And with construction output expected to jump by 42.0% by 2030, that reliance is only growing. You can dive deeper into these trends in IBISWorld's comprehensive global report.
This industry-wide commitment to a phased approach brings some major advantages to your project:
- Financial Control: The process creates natural checkpoints for reviewing the budget and getting approvals before moving forward.
- Risk Mitigation: Problems with zoning, engineering, or costs are flushed out early when they are easiest to solve.
- Predictable Outcomes: You always know what deliverables to expect and have a clear sense of the timeline for each stage.
- Stakeholder Alignment: It gets everyone—you, the architect, engineers, and future contractors—on the same page, working from a single, unified plan.
To give you a high-level overview, here are the standard phases you can expect in nearly any architectural project.
The Five Core Phases of Architectural Design
| Design Phase | Primary Goal | Typical Timeline Allocation |
|---|---|---|
| 1. Predesign | Define the project's goals, scope, budget, and constraints. Feasibility studies. | 5% – 15% |
| 2. Schematic Design | Develop the big-picture concept, including floor plans, massing, and aesthetics. | 15% – 25% |
| 3. Design Development | Refine the design, selecting materials, systems, and detailing key components. | 15% – 25% |
| 4. Construction Docs | Create the detailed technical drawings and specifications for bidding & building. | 35% – 45% |
| 5. Construction Admin | Architect oversees construction to ensure it aligns with the design documents. | Varies (Ongoing) |
Think of this table as your project’s roadmap. Now, let’s break down each of these steps in detail so you can navigate your next project like a seasoned pro.
Phase 1: Laying the Groundwork with Predesign and Feasibility
Before a single line is ever drawn, the most critical work of the entire architectural process begins. This initial stage, often called predesign or feasibility, is pure discovery. Think of it as the foundational investigation before a single brick is laid—it’s where we gather the facts, understand the "why," and define the absolute boundaries of what's possible.
This phase is all about answering the big, fundamental questions: What are we actually building? Why are we building it here? And, most importantly, can it even be done? We’re not talking about aesthetics yet; this is about pure viability. We work right alongside you to nail down clear project goals, analyze the site's quirks and constraints, and map out a realistic budget, all while navigating the often-tricky maze of local zoning laws. This is where your vision first shakes hands with the hard realities of land, law, and finances.

Defining the Project Program
The main deliverable from this phase isn’t a drawing; it's the project program. This is essentially the project's detailed written brief, a master document that outlines every last requirement and objective.
To create it, we do a deep dive into your operational DNA. We ask pointed questions to understand not just the spaces you need, but precisely how they need to function and interact.
- Quantitative Needs: How many offices do you need? What’s the target square footage for the retail floor? How many parking spots does the city require?
- Qualitative Goals: What’s the feeling you want in the lobby? Should the office layout promote loud collaboration or quiet, focused work? What identity should the building project?
- Adjacency Requirements: Which teams need to be right next to each other for peak efficiency? How do we intelligently separate public-facing areas from private, secure zones?
This program becomes our North Star. It’s the definitive checklist we’ll measure every future design decision against to make sure the final building doesn’t just look good, but works brilliantly.
Conducting a Thorough Feasibility Study
At the same time, we run a feasibility study to determine if the project is actually a sound investment. We put the idea under a microscope, examining it from every critical angle to spot any potential "deal-breakers" before you've committed serious capital.
A feasibility study is your project’s reality check. It rigorously tests the idea against real-world constraints, providing the data needed to make a confident go/no-go decision. This step can save clients hundreds of thousands of dollars by preventing them from pursuing a project that is fundamentally flawed.
For a commercial developer, this means a serious market analysis to confirm there's real demand. For an adaptive reuse project, it means a deep structural assessment to understand the old building’s bones and the true scope of repairs needed.
The study typically breaks down into three parts:
- Site Analysis: We dig into the property’s physical DNA—topography, soil conditions, access to utilities, and how the sun hits the lot. For a look at how similar foundational analysis is applied in other design fields, you can explore this guide on how to design landscape plans.
- Zoning and Code Review: We pore over local ordinances to figure out exactly what you can build, including tough limits on height, setbacks, and land use. This gets especially complicated with historic properties, where we have to balance preserving character with meeting modern safety codes.
- Preliminary Budgeting: We pull together a high-level cost estimate based on the program and our initial findings. This isn’t just construction—it includes all the "soft costs" like design fees, permits, and financing that are easy to forget.
By the end of the predesign phase, you won’t have a design for a building. You’ll have something far more valuable: clarity. You'll be armed with a detailed program, a realistic budget, and a comprehensive report confirming your vision is viable. It’s the solid ground we need to build everything that comes next.
Phase 2: Translating Vision into Form with Schematic Design
Okay, the foundational research from pre-design is done. Now for the exciting part. The schematic design phase is where your project's abstract vision starts to take on a real, tangible shape. This is where ideas leap off the page and become three-dimensional concepts. I like to think of this as the storyboarding stage for a film—we're creating the key scenes and visual narrative that will define the entire project.
Our main job here is to translate the written program—all those needs, wants, and requirements we defined—into broad-stroke design solutions. We'll be creating rough sketches, simple floor plans, and basic 3D "massing" models. These aren't detailed blueprints yet. They're conceptual tools to help us all see the building's overall form, feel its flow, and understand how it sits on the site and connects with its surroundings. We’re focused on the big picture, exploring a few different paths forward.

From Bubbles to Buildings
The process often starts with something surprisingly simple: a "bubble diagram." It’s exactly what it sounds like—a drawing of circles and lines that maps out the relationships between spaces. Which rooms need to be next to each other? Which ones need to be separate? How will people move from one area to another? This basic exercise ensures the building's layout is driven by pure function first, not just aesthetics.
From there, those bubble diagrams evolve into more refined, scaled drawings. We establish the building's general footprint, nail down the location of major spaces, and map out the core circulation like hallways and stairs. For a new commercial building, we might be testing how a retail floor plan can maximize customer flow and visibility. For an adaptive reuse project, the puzzle is figuring out how to thread modern systems and layouts into a historic structure without destroying its character.
Key Deliverables in Schematic Design
During this phase, we produce a core set of documents to communicate the concept and get your feedback. These aren't for construction, but they are absolutely essential for making informed decisions.
- Conceptual Site Plan: A bird's-eye view showing where the building sits on the property, along with parking, landscaping, and how people get in and out.
- Basic Floor Plans: Simple layouts for each floor, showing the general arrangement of rooms and their approximate sizes.
- Key Elevations and Sections: These are the first glimpses of what the building will look like. Elevations show the exterior from different sides, while sections slice through the building to show its height and volume.
- Narrative Description: A straightforward written summary that explains the design concept and the thinking behind our major decisions.
Together, these documents give you a complete, holistic picture of the proposed design long before we get buried in the technical details.
The Most Important Decision Point
Schematic design is, without a doubt, the most critical checkpoint for you as the owner. This is your moment to give honest, thorough feedback. Does the layout actually work for your business operations? Does the look and feel align with your brand? Is the scale of the building right for the neighborhood?
Your approval at the end of this phase is the green light. Making a huge change here—like rethinking the entire floor plan—is relatively easy and inexpensive. Trying to make that same change after the engineers have started their detailed work can lead to major budget overruns and painful schedule delays.
This phase typically accounts for 15% to 25% of the total architectural fee, and for good reason—it sets the direction for everything that follows. We'll often present two or three distinct concepts for you to review. This allows you to compare different approaches and choose the one that truly hits the mark.
When you sign off on a schematic design, you're locking in the project's soul. It gives the entire team the confidence to move forward into the more technical phases of design.
Phase 3: From Broad Strokes to a Builder's Blueprint
With your approval of the schematic design, we shift gears in a big way. The process moves from the big, exciting ideas of what the building will be to the nitty-gritty reality of exactly how it gets built.
Think of it like this: schematic design was the beautiful concept painting. Now, we’re drafting the full set of engineering blueprints for a high-performance engine. Every single bolt, wire, and connection has to be specified, coordinated, and drawn with absolute precision.
This phase is where the technical heavy lifting happens, and it's typically divided into two key stages: Design Development (DD) and Construction Documents (CDs). This is where we build the entire project on paper before a single shovel hits the dirt. It's no surprise that the bulk of the design fee—often 55% to 70%—is invested right here.
Design Development: Fleshing Out the Details
The Design Development (DD) stage acts as the crucial bridge connecting the approved concept to the final buildable plans. We take the conceptual floor plans and elevations and start layering in the real-world systems and materials that make a building function.
This is a period of intense collaboration. Our architectural team works hand-in-glove with our specialized consultants. Structural engineers nail down the steel or concrete frame, mechanical engineers map out every inch of HVAC ductwork, and electrical engineers plot the pathways for power and data.
Here’s a look at what we’re focused on during DD:
- Finalizing Materials: We make firm decisions on the major building components—from the exterior brick and window systems down to the specific flooring and ceiling types for each room.
- Integrating the Guts: This is where we coordinate the structural, mechanical, electrical, and plumbing (MEP) systems, making sure they all fit together without clashing.
- Adding Detail to Drawings: The initial sketches are transformed into much more detailed drawings, showing how walls are assembled, how key elements connect, and clarifying critical dimensions.
- Writing the Specs: We start drafting the "spec book," a formal document that describes the quality, performance, and installation requirements for everything in the building.
At its core, this stage is all about problem-solving and refinement. We are essentially building a highly detailed, virtual version of the building to iron out all the wrinkles ahead of time.
How Technology Gives Us a Sharper Pencil
Modern technology has completely changed how this detailed work gets done. With Building Information Modeling (BIM), the entire project team—architects, engineers, and consultants—collaborates on a single, shared 3D model in real time.
This approach allows us to run "clash detection," a digital process that can flag where a plumbing line might try to run through a steel beam. Finding these issues on a screen, long before they become expensive on-site rework, can reduce errors by as much as 20-30% on complex projects.
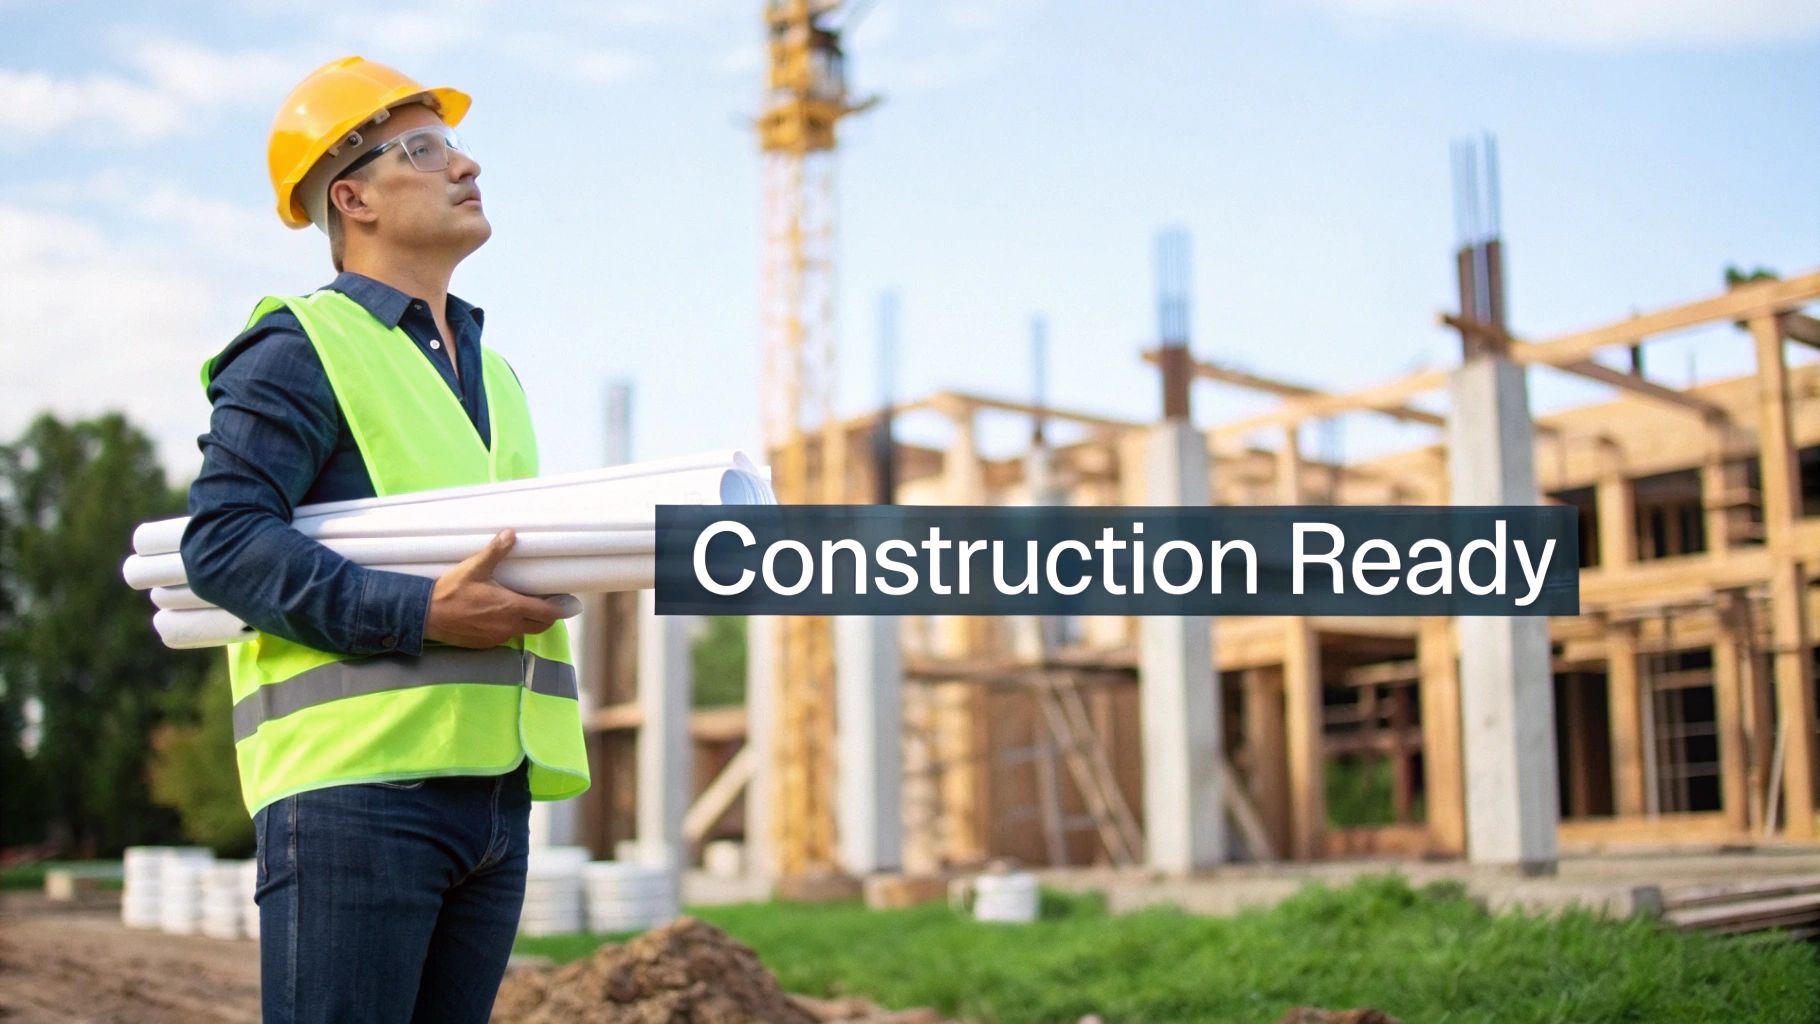
Construction Documents: The Final Set of Instructions
Once the Design Development phase is complete and you’ve signed off, we move into the final and most intensive stage: creating the Construction Documents (CDs). This is the culmination of all our work, resulting in the comprehensive set of drawings and specifications that will become part of a legally binding contract.
The Construction Documents aren't just drawings; they are the definitive, legal instructions for the contractor. Their purpose is twofold: to secure a building permit from the city and to give contractors the exact information they need to provide an accurate bid and build the project correctly.
This set of documents is incredibly detailed, deliberately leaving zero room for interpretation. It specifies everything from the exact type of screw for a particular wall assembly to the precise finish on a door handle.
This meticulous level of detail is essential for controlling costs and ensuring quality. A bulletproof set of CDs guarantees that every bidding contractor is pricing the exact same building, allowing for true, apples-to-apples comparisons.
As we finalize the plans, creating compelling visuals for final approvals or marketing becomes key. This is where we explore the top programs for architectural rendering to produce photorealistic images that truly bring the vision to life.
By the end of this phase, the design is locked in. The documents we produce are the final, unambiguous roadmap that will guide your project from paper to physical reality.
Phase 4: From Paper to Permit to Physical Construction
With a complete set of construction documents in hand, the project is ready to leap off the page and into the real world. This is the moment where all the meticulous planning, design work, and technical detailing face their ultimate test.
This phase is all about execution. It involves a critical sequence of events: selecting a builder, securing the legal permissions to build, and overseeing the construction itself. Each step is essential to turn your vision into a physical reality and protect your investment along the way.
Finding the Right Builder: Bidding and Negotiation
First things first: we need to select the general contractor who will actually build your project. The best way to do this is through a formal bidding process. We issue the construction documents we’ve prepared to a hand-picked list of pre-qualified contractors.
The detail in these documents is crucial. It ensures every contractor is pricing out the exact same scope of work, which gives you a true apples-to-apples comparison.
There are a couple of ways to approach this:
- Competitive Bid: This is the most common path. We invite several contractors to submit sealed bids, and the project usually goes to the lowest qualified bidder. It’s a great way to ensure price transparency.
- Negotiated Bid: Sometimes, it makes sense to select a preferred contractor early on and work with them directly to negotiate a fair price. This can create a more collaborative partnership from the get-go.
As your architect, we run this entire process for you. We send out the documents, field contractors' questions to make sure everyone is on the same page, and then analyze the bids that come back. We look beyond just the price, weighing their qualifications and experience before giving you our final recommendation.
Navigating the Gauntlet of Permitting
At the same time we’re managing the bidding, we submit the "permit set" of drawings to the local building department. Depending on the project, we may also need to submit to zoning boards or historic preservation commissions.
This is a formal review where officials check that our design complies with all building codes, life safety regulations, energy standards, and local ordinances. It can be an intricate and sometimes slow-moving process, but it’s an absolute must for building legally and safely.
The permitting stage is where having an experienced architect really pays off. We act as your expert advocate, speaking the technical language of city officials, quickly addressing their comments, and navigating the bureaucracy to get the approvals you need as efficiently as possible.
Once the permit is issued, the contractor can finally break ground. But our job is far from over.
Protecting Your Vision: Construction Administration
With a builder on board and permits in hand, construction begins. Our role now shifts into oversight, a phase known as Construction Administration (CA). Our main goal here is to make sure the building is constructed exactly as specified in our documents. It’s how we protect the integrity of the design and the quality of your final product.
Here’s what our hands-on involvement looks like during construction:
- Regular Site Visits: We’re on-site regularly to observe the progress and quality of the work, checking that it aligns with the design intent.
- Reviewing Submittals: Before any materials are ordered or installed, the contractor sends us shop drawings and product samples. We meticulously check these against our specifications to make sure they're right.
- Answering RFIs: Questions always come up on a job site. We respond quickly to contractor Requests for Information (RFIs) to clarify design details and solve problems before they cause delays.
- Approving Payment Applications: We review the contractor's monthly invoices, confirming that the work they’re billing for has actually been completed to the right standard before you release payment.
- Managing Change Orders: If a change is needed, we manage all the paperwork. We ensure costs are fair and that any adjustments are properly integrated into the project without compromising the design.
This active oversight is your best assurance that you’re getting the building you paid for—one that is safe, functional, and completely true to the vision we developed together.
Even with the best team, construction projects are complex and can present unexpected hurdles. Below are some of the most common issues clients run into and how a proactive approach can help you sidestep them.
Common Pitfalls in the Design and Construction Process
| Common Pitfall | Potential Impact | Mitigation Strategy |
|---|---|---|
| Incomplete or Vague Construction Documents | Inaccurate bids, frequent change orders, construction delays, and budget overruns. | Invest in a thorough and highly detailed set of construction documents from the start. Clarity on paper prevents confusion in the field. |
| Unrealistic Budget Expectations | Project stalls or requires significant "value engineering" (cuts) that compromise the original vision. | Engage in transparent cost discussions early and often. Conduct preliminary cost estimates at key milestones in the design process. |
| Poor Contractor Selection | Subpar workmanship, missed deadlines, communication breakdowns, and potential legal disputes. | Pre-qualify bidders based on experience, reputation, and financial stability, not just the lowest price. We help vet potential partners. |
| Delayed Decision-Making | Halts construction progress, creates a domino effect of schedule delays, and increases costs. | Establish clear communication channels and decision-making authority before construction begins. Trust the expert team you've assembled. |
| Ignoring a Contingency Fund | Unforeseen issues (like hidden structural problems in a renovation) can derail the project's finances completely. | Always budget a contingency fund (10-15% of construction costs is standard) to cover unexpected but necessary expenses. |
Being aware of these potential challenges is the first step in avoiding them. Our role as your architect is to anticipate these issues and guide you through a process designed to deliver a smooth and successful project from start to finish.
How Historic Buildings Change the Game
When you’re dealing with an existing or historic structure, the standard architectural playbook gets tossed out the window. Instead of a blank canvas, you start with a complex, living document—the building itself. Our first job is to act like forensic investigators, treating the building as our most important client.
It’s less about inventing something from whole cloth and more about a thoughtful conversation with the past. We're skillfully weaving modern needs into a rich, historic fabric, letting the original structure guide the new design.
Starting with a Deep Dive
This specialized approach kicks in right from the very beginning, even before design. We can't talk about new floor plans until we've completed a meticulous conditions assessment. Think of it as part architectural archaeology, part structural engineering.
We use tools like 3D laser scanning to capture hyper-accurate measurements of every nook and cranny. At the same time, we're digging through city archives, old photographs, and historical records to piece together the building's original story and how it was built. This intensive upfront work is the foundation for everything that follows.
Uncovering the Building's Story
The goal of this initial phase is to learn the building's "bones" and its unique history. We’re identifying the irreplaceable, character-defining features that absolutely must be preserved. We're also on the hunt for hidden structural problems or outdated systems that need a modern solution. This mapping of the existing conditions is non-negotiable for a successful historic project.
With adaptive reuse, every constraint is an opportunity in disguise. An old brick wall isn't an obstacle; it's a future centerpiece. A weathered timber beam isn't just a problem to solve; it's the soul of the new space. The real art is turning these "found" conditions into celebrated features.
Balancing Past and Present
During the design development phase, the work becomes a delicate balancing act. We have to thread today's building codes, accessibility standards, and your specific needs through the historic framework without damaging its soul.
This often leads to some really creative problem-solving. It might mean hiding state-of-the-art HVAC systems inside old service chases or designing a custom fire-suppression system that leaves historic plasterwork untouched.
Sustainability and preservation are natural partners. At its core, adaptive reuse is a powerful act of conservation—it saves a building from the landfill and dramatically reduces waste. This aligns perfectly with the current push for green building, a trend driving major growth in the $79.06 billion U.S. architectural services market. As a bonus, these thoughtful, sustainable projects are increasingly commanding premium prices. You can explore more on how the economy is shaping architecture at AIA.org.
Finally, getting the project approved adds another layer of complexity. We shift into an advocacy role, presenting our designs to historic preservation commissions. Our job is to show them exactly how the project honors the building’s past while giving it a vibrant, viable future.
Common Questions About the Design Process
If you're new to working with an architect, you probably have a lot of questions. That’s completely normal. Most of our clients come to us wondering about the same things: how long this will all take, how much it will cost, and what their role in the process will be.
Let's break down some of those common questions to give you a clearer picture of the road ahead.
How Long Does the Design Process Take?
This is the classic "it depends" answer, but for good reason. The timeline is tied directly to your project's size and complexity. For example, a straightforward interior renovation for a small retail space might breeze through the design phases in a few months.
On the other hand, designing a new multi-story building from the ground up can easily take more than a year before you ever break ground.
A few key things really drive the schedule:
- Project Scope: Bigger, more intricate buildings simply demand more time for design, engineering, and coordination.
- Permitting & Approvals: Every city and county is different. Some have notoriously slow review boards that can add months to your pre-construction timeline. We factor this in from the start.
- Decision-Making: The project moves at the speed of your decisions. Quick, clear feedback from you and your team is one of the best ways to keep everything on track.
When Is the Best Time to Hire an Architect?
The short answer? As early as you possibly can.
Ideally, you'd bring an architect on board before you've even bought the property or signed a lease. This is the pre-design or feasibility stage, and it’s the single most effective way to manage your risk.
An architect's initial feasibility study can save you from a multi-million-dollar mistake. Their first job is to confirm that what you want to build is legally, physically, and financially possible before you commit serious capital.
Having an expert in your corner from day one means they can perform critical due diligence, like analyzing the site and digging into zoning codes. This early research ensures you're not investing in a dead-end property or a project that can't get off the ground. It sets the entire endeavor on a solid foundation, making the rest of the process much smoother and more predictable.
Ready to transform your vision into a landmark building? The team at Sherer Architects, LLC is here to guide you through every step with expertise and dedication. Contact us today to discuss your project.