SHERER ARCHITECTS

Categories
Uncategorized

Mastering Exterior Designs of Restaurants A Developer’s Guide

Think of your restaurant's exterior as your most powerful marketing tool. It's the very first handshake with a potential customer, and in that split second, it tells a story about the experience waiting inside. A great facade isn't just about looking good; it's a strategic move that can make someone walk in or keep on walking, directly impacting your revenue.

Why Your Restaurant Exterior Is a Revenue Engine

Two people approach the modern, stylish entrance of "CURB APPEAL" building with large windows.

Your restaurant's exterior is far more than a simple shell. It’s a 24/7 billboard, a silent host, and often, your most effective salesperson. Long before anyone tastes your food or meets your staff, they've already formed an impression based on what they see from the street. That first judgment call is what drives foot traffic—or doesn't.

A compelling exterior instantly telegraphs your brand identity. It answers the questions running through a potential diner's mind: Is this a cozy, rustic bistro? A sleek, modern fine-dining spot? The materials, colors, lighting, and even the font on your sign all work together to build a narrative that attracts your ideal customer.

Turning Space Into Profit

One of the most obvious ways exterior designs of restaurants generate revenue is through outdoor dining. What started as a necessity in 2020 has become a permanent—and profitable—fixture. A 2023 survey found that 54% of diners are more likely to pick a restaurant if it has outdoor seating. Even more telling, 70% would wait longer for an outdoor table, which shows just how much value they place on it. This isn't a fleeting trend; investing in a well-designed patio or sidewalk cafe is a direct investment in your bottom line.

More Than Just a Pretty Face

Beyond outdoor tables, a smart exterior design improves everything from brand visibility to operational flow. It helps guide guests, makes your establishment a memorable landmark in a busy neighborhood, and sets the tone for a premium experience from the moment someone arrives.

A few key elements can make a world of difference:

  • An Inviting Entryway: A clear, well-lit, and accessible entrance makes people feel welcome and safe, removing any hesitation to step inside.
  • Effective Signage: This is non-negotiable. Your sign needs to be clear, visible, and on-brand. Modern digital outdoor signage solutions can even turn your storefront into a dynamic display for daily specials or upcoming events.
  • Strategic Lighting: Ambiance begins outside. The right exterior lighting can highlight unique architectural features, improve safety, and cast a warm, inviting glow that pulls people in off the street.

The exterior is not an expense; it is a carefully calculated investment in customer acquisition. Every design choice, from the type of awning to the placement of planters, should be viewed through the lens of its potential return.

When you shift your perspective, you stop seeing the exterior as a static structure and start seeing it as a dynamic tool for building your brand and boosting revenue. A thoughtful, well-executed design promises a quality experience and convinces passersby that your restaurant is the right choice—before they even open the door.

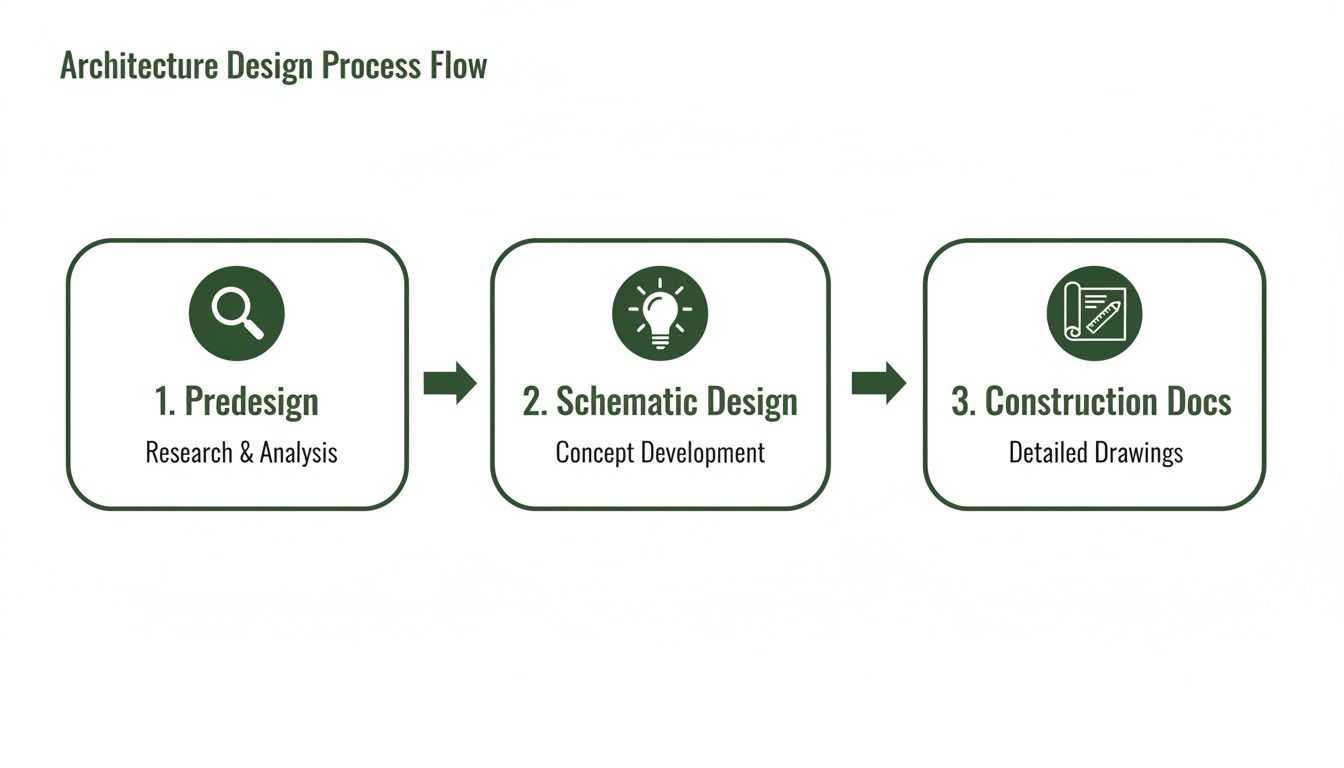
Navigating Site Constraints and Regulatory Hurdles

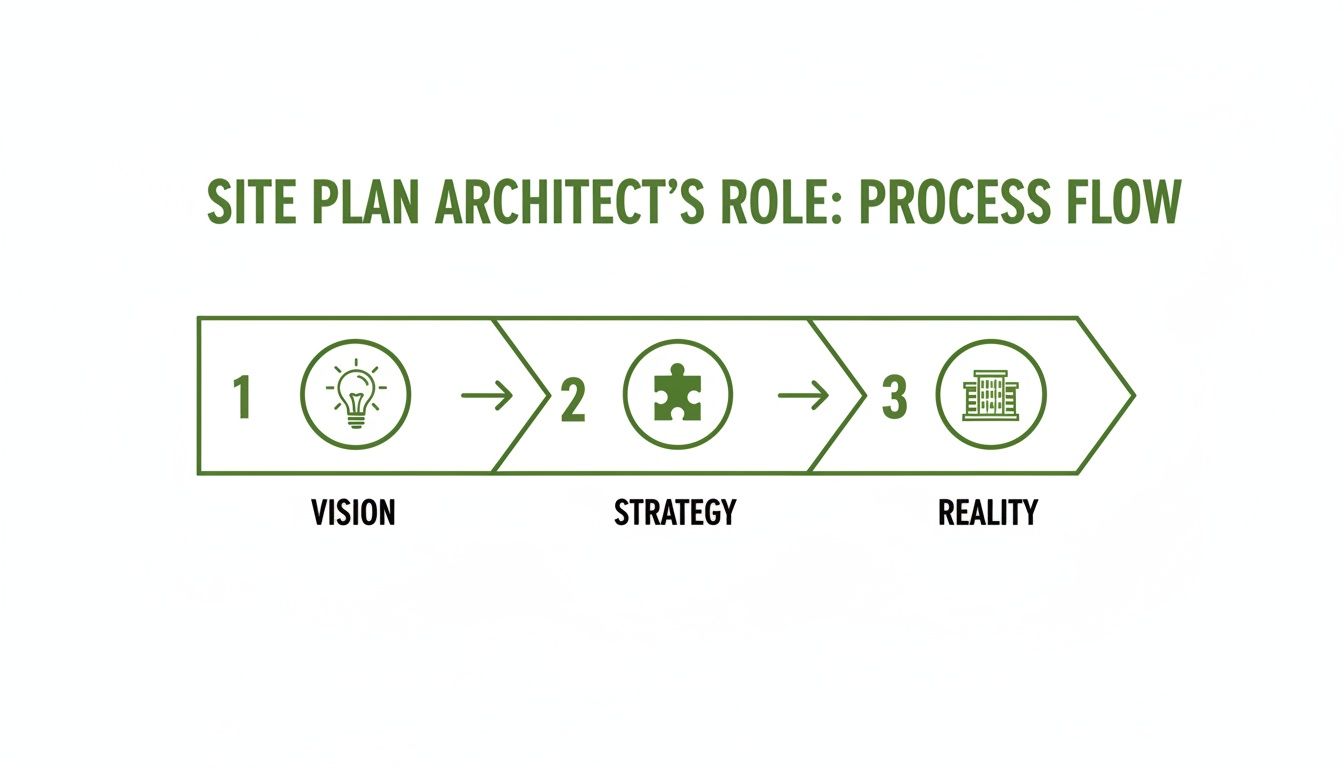
Before you even think about sketching a facade or breaking ground, the real work of designing a restaurant exterior begins. This is where you have to get intimate with the canvas you've been given—the site itself, with all its quirks, rules, and hidden potential. Think of it like a puzzle: if you don't get the foundational pieces right from the start, the whole picture will be off.

Trying to ignore these early constraints is a surefire way to burn through your budget with redesigns, get stuck in permit limbo, and fight endless battles with the city. The most successful projects don't fight the site's limitations; they embrace them. This early homework is what transforms potential headaches into the very features that will make your restaurant stand out.

Decoding the Local Playbook

Every town and city has its own rulebook for building, and you've got to know it inside and out. These regulations dictate everything from how far your building has to sit from the curb to what kind of trees you're allowed to plant. Your architect is your guide through this maze.

Here are the big ones you need to tackle right away:

  • Zoning Laws: These are the bedrock rules. They tell you if you can even build a restaurant there in the first place, and then they get into the nitty-gritty of building height, density, and how many parking spots you need. A "commercial" zone will have a totally different set of demands than a "mixed-use" one.
  • Landscape Ordinances: More and more cities are getting strict about green space, tree preservation, and how you manage rainwater. Overlook these, and you could be looking at hefty fines and a project that's dead in the water.
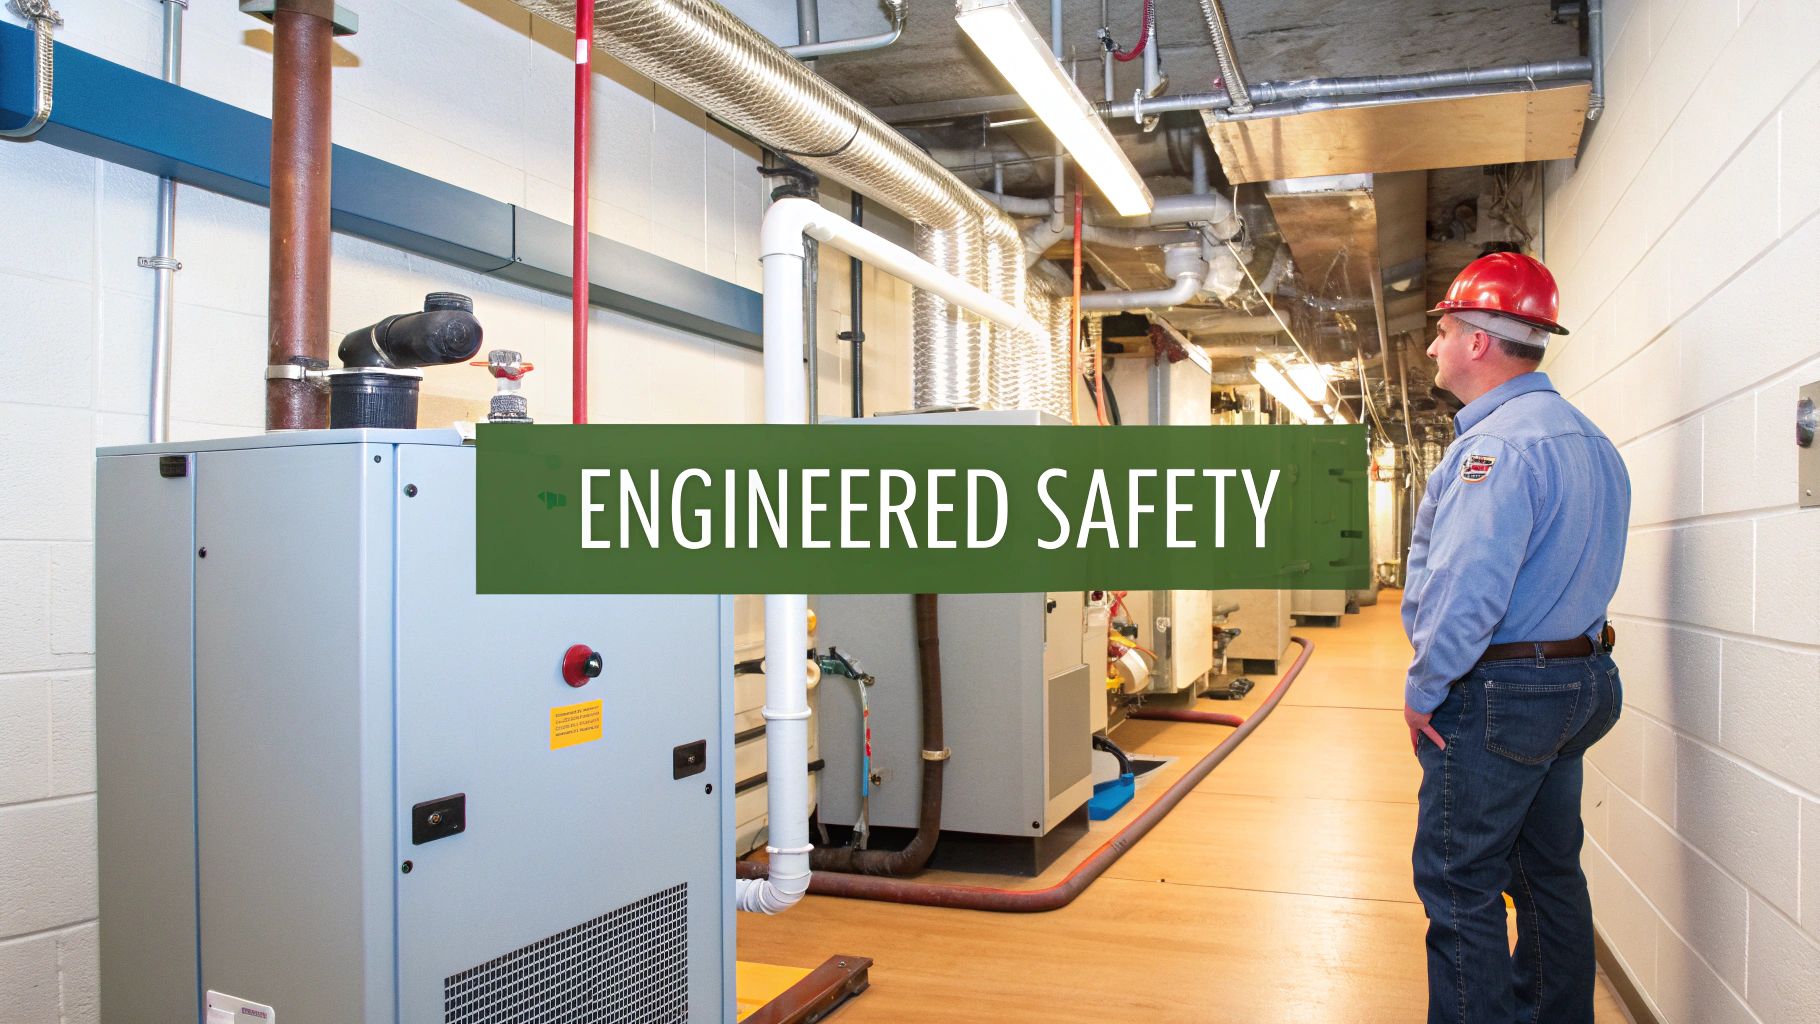
  • Building and Energy Codes: These are the technical specs that keep your building safe, accessible, and efficient. They'll influence your choices for everything from the glass in your windows to the slope of your entryway ramp.

The real trick isn't just to check the boxes on these rules. It's about weaving them into the design itself. A required green space can become a gorgeous rain garden, and a mandatory setback might just create the perfect space for a money-making patio.

The Power of Design Review Boards

If your project is in a historic district or a special design zone, get ready to meet the Design Review Board (DRB). These committees often have the final say on what your building looks like from the outside, and their job is to protect the neighborhood's character.

Going before a DRB is more than a show-and-tell with pretty renderings; you have to sell them a story. A good architect knows how to build a convincing case for your design. They can show the board how a modern material choice actually complements the old brick building next door, or how your new signage respects the feel of the street. It’s a game of communication and collaboration, convincing them that your restaurant will be a true asset to the community.

Turning Constraints into Creative Opportunities

A tiny urban lot might seem like a major disadvantage, but maybe it forces you into a brilliant vertical design with a destination rooftop bar. Those rigid historic preservation codes? They're a challenge, sure, but they can also give you a one-of-a-kind space with character that you could never replicate with new construction. It's all about your approach.

A deep-dive site analysis will always consider:

  1. Solar Orientation: Where does the sun hit and when? You can position the building to flood the dining room with warm, natural light in the winter while shielding it from the harsh afternoon sun in the summer. This isn't just about guest comfort; it’s a smart way to slash energy bills.
  2. Key Views: What do you want people to see from inside? A well-placed window can connect your diners to the energy of the street or offer a peaceful view of a park, making the meal an experience.
  3. Site Circulation: How will people and vehicles actually move through the space? You need a clear plan for how guests get from their car to the front door, how staff move efficiently, and where delivery trucks can go without creating a bottleneck.

When you treat these initial hurdles as creative prompts instead of problems, you lay a rock-solid foundation. You end up with an exterior that isn’t just compliant and good-looking, but truly intelligent. This is the foresight that prevents major headaches down the road and sets your restaurant up for success from day one.

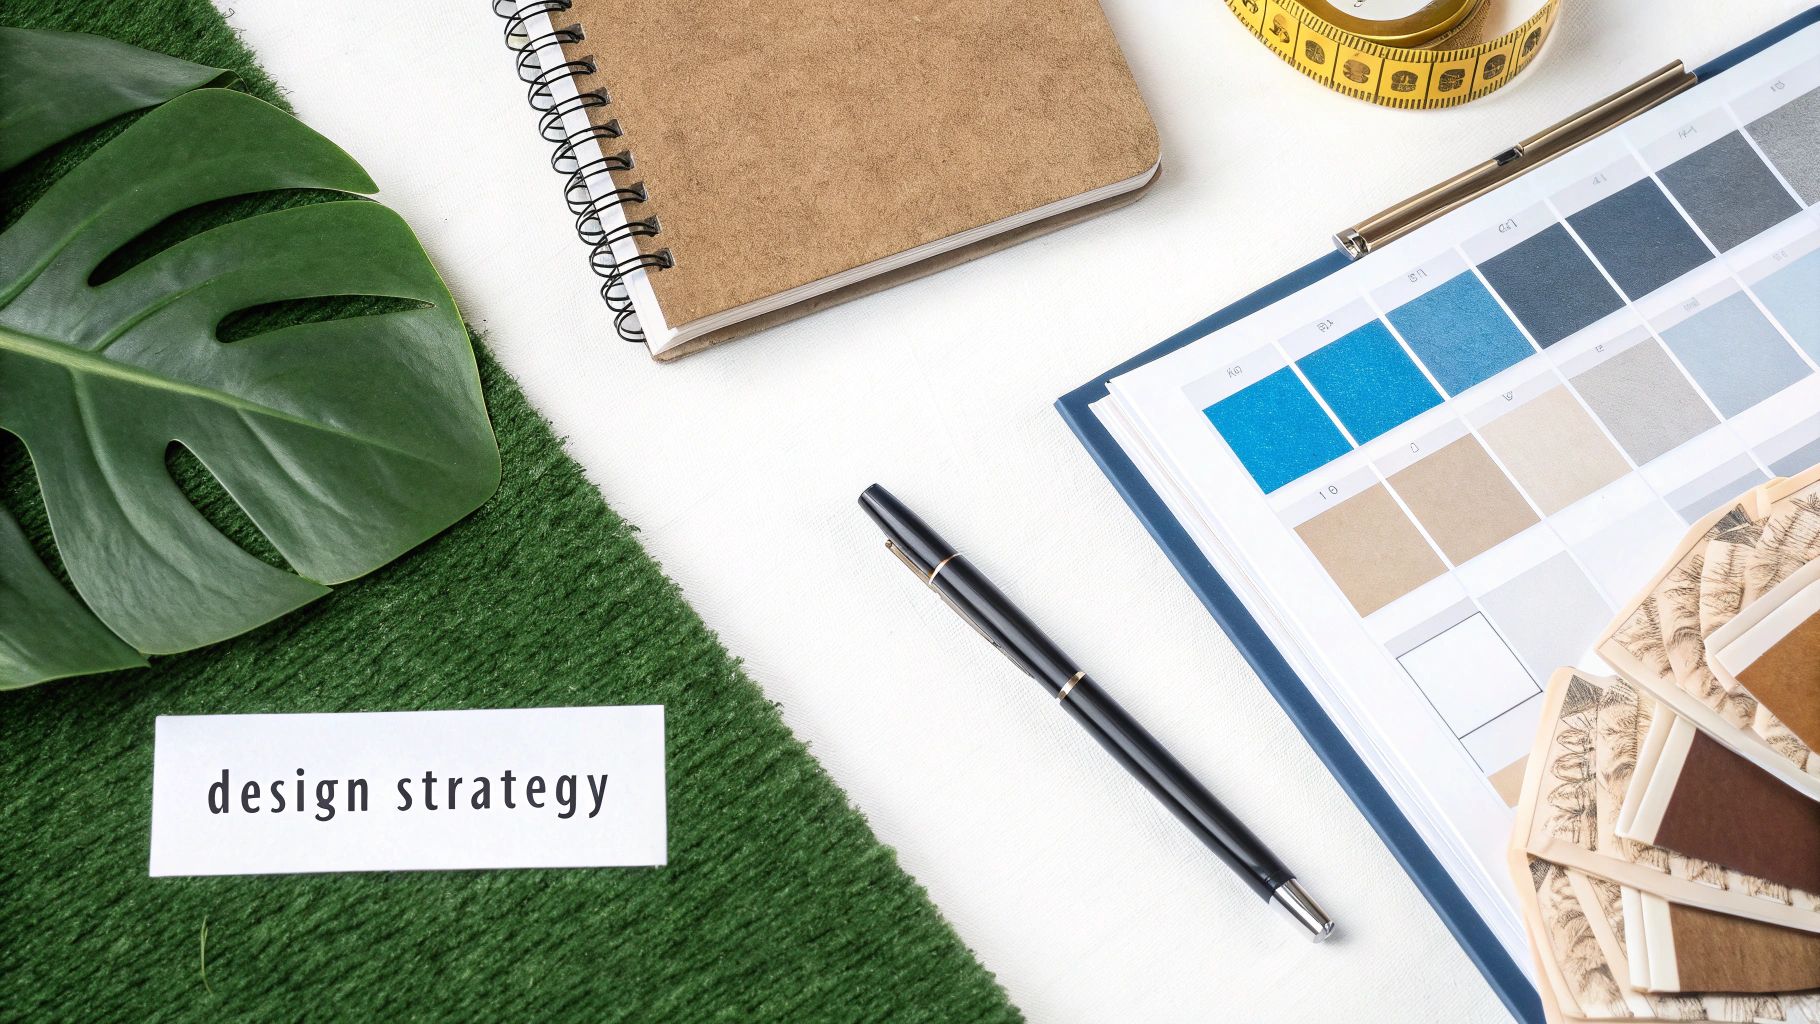
2. Choosing Materials That Define and Endure

Think of your restaurant's exterior materials as its wardrobe. They're not just a protective shell; they're the very first thing that tells your story to the world. A sleek metal facade whispers "modern and minimalist," while a wall of reclaimed timber might suggest a cozy, farm-to-table experience. This is your handshake with every potential guest, setting the stage long before they see a menu.

Picking the right materials is all about balancing that immediate "wow" factor with long-term reality. You need a palette that looks fantastic on day one but also stands up to sun, rain, and time without becoming a maintenance nightmare. This choice has a direct line to your future repair budgets and the building's overall cost of ownership.

Traditional Materials, Modern Applications

Some materials have been go-to choices for centuries, and for good reason. They're durable, they're beautiful, and they have a timeless appeal. But that doesn't mean they have to be boring.

  • Brick and Stone: Nothing says permanence and quality quite like brick and stone. Classic red brick can give off a historic pub vibe, while clean-cut limestone can signal high-end elegance. You can bring these classics into the 21st century by using thin brick veneers for a lighter touch or creating unique, eye-catching patterns in the brickwork.
  • Wood: If you're going for a natural, rustic, or warm atmosphere, wood is your best friend. Sourcing reclaimed timber can give your building instant character and a great sustainability story. For a more practical approach, thermally modified or engineered wood products give you that same look but with way better resistance to rot and pests.

Contemporary Facades: Performance and Personality

Modern materials let you get really creative, opening the door to unique shapes, colors, and textures that can turn your restaurant into a local landmark. Plus, they're often designed for efficiency and low upkeep.

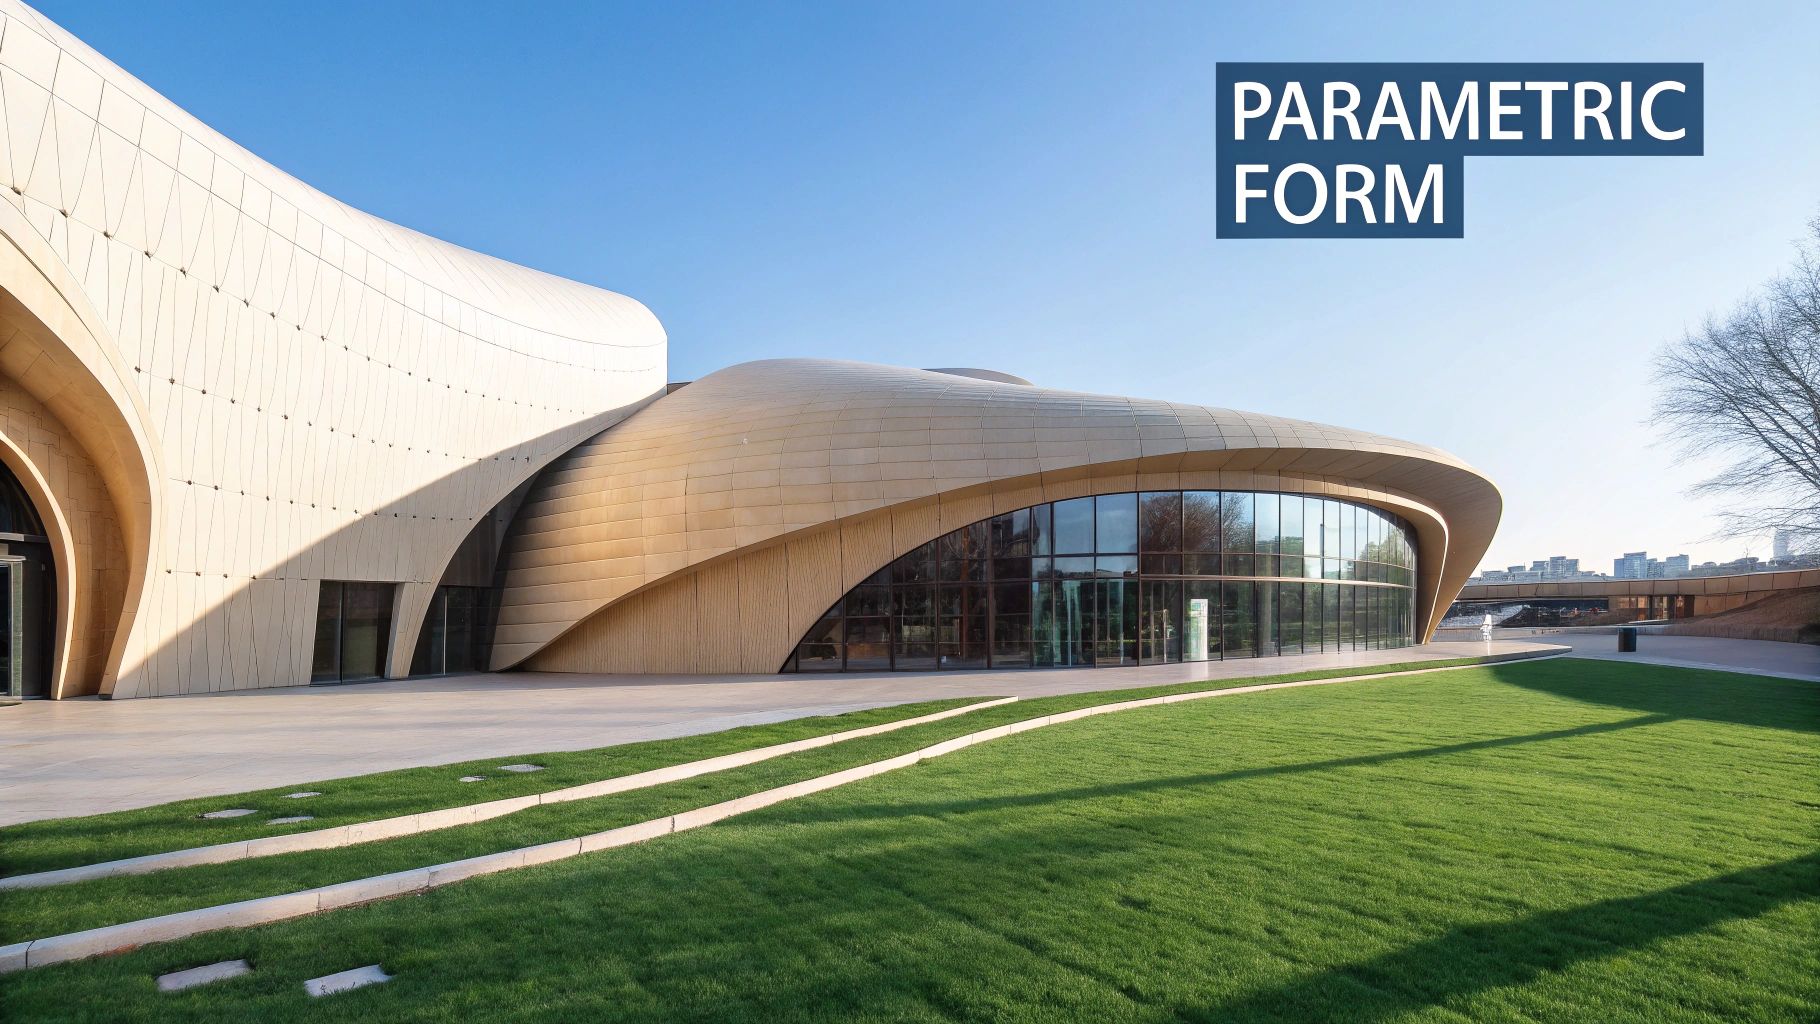
  • Metal Panels: Clean, tough, and sophisticated. Aluminum, steel, or zinc panels can be painted any color to match your brand, perforated to add texture, or even bent into dynamic, futuristic shapes. It's a fantastic option if you're aiming for an industrial or sharp, minimalist look.
  • Innovative Composites: Materials like fiber cement and high-pressure laminates are the chameleons of the building world. They can convincingly mimic wood, stone, or metal at a lower cost and with almost no maintenance. These composites are built to fight fading, cracking, and moisture, making them a savvy long-term investment.

Before you can settle on materials, though, you have to work your way down from the big picture. The decision-making process always starts with the rules and the reality of your specific location.

A flowchart illustrating the Site Compliance Hierarchy: Regulations flow down to Site, then to Design.

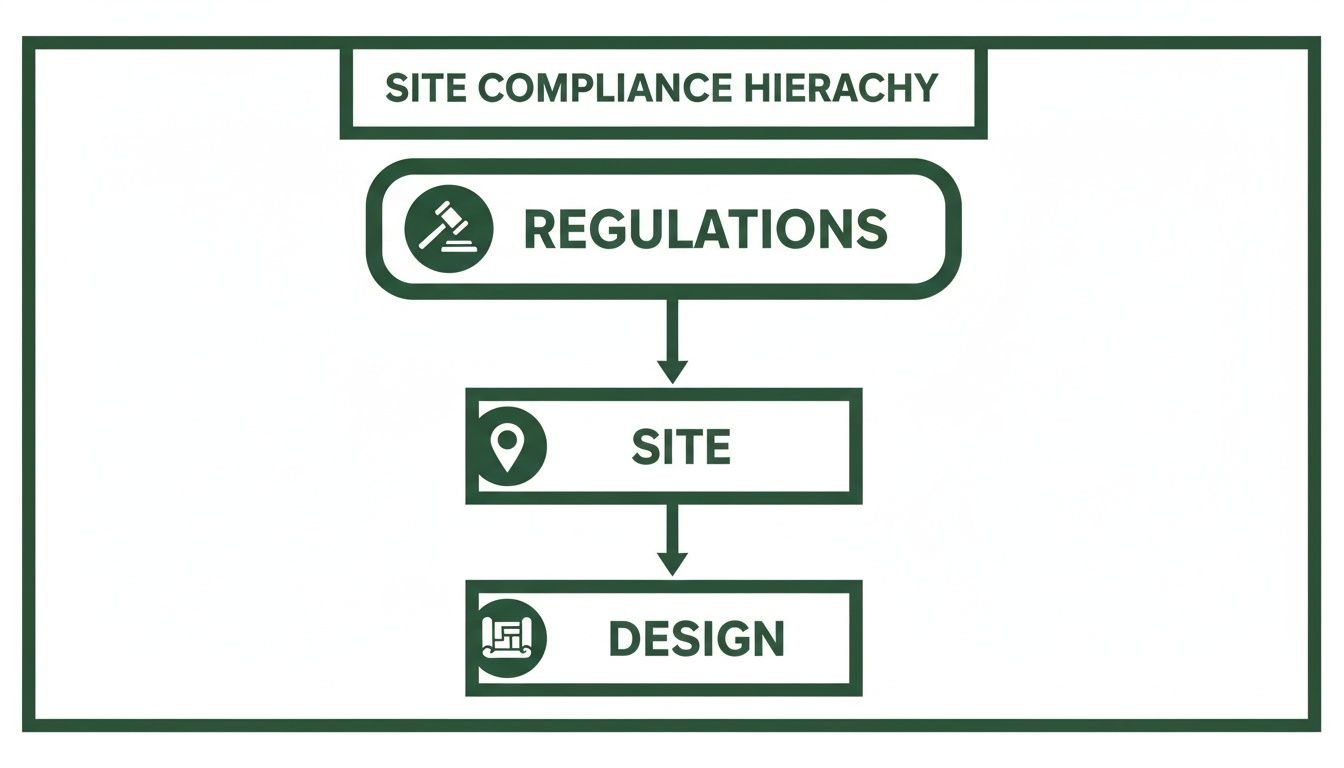
As you can see, regulations lay the foundation. They tell you what's even possible on your site, and only then can you start making smart design choices based on those constraints.

Windows, Walls, and Walkways

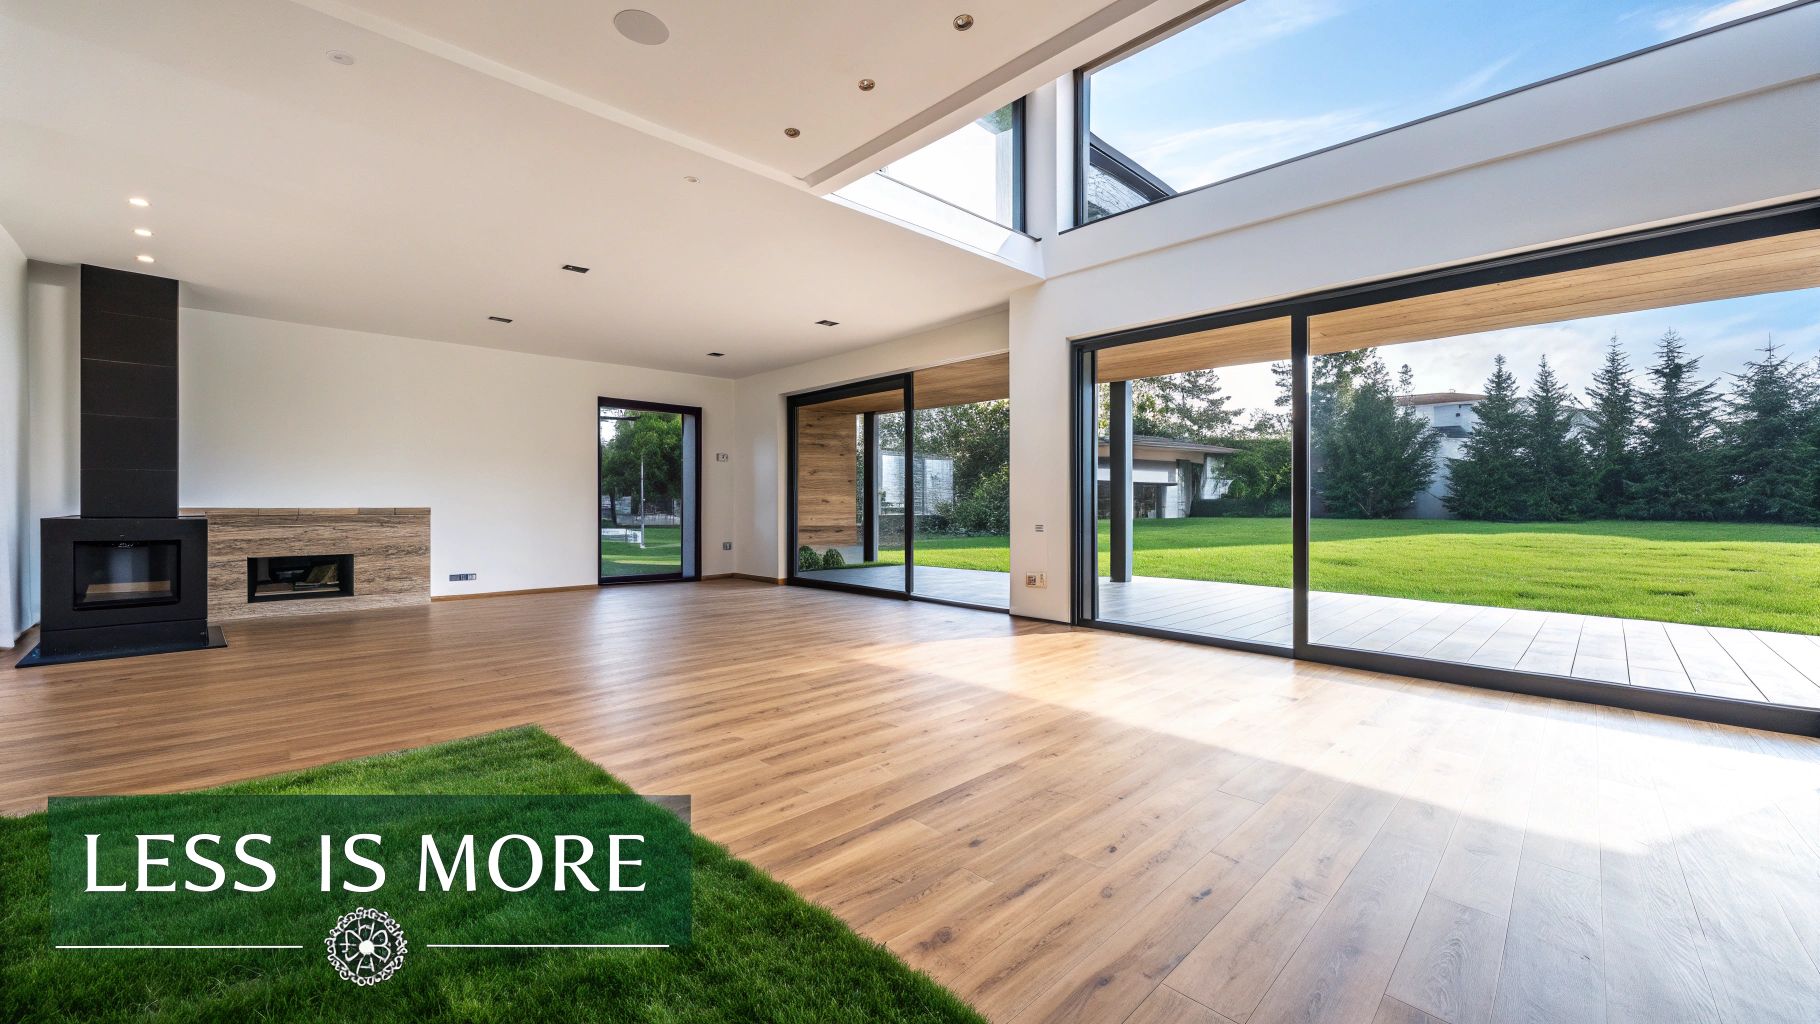
Beyond the main facade, the windows—what we call fenestration—are incredibly important. Big glass storefronts put the energy of your dining room on display, basically inviting people in from the street. Even better, installing operable windows or accordion-style glass walls can completely erase the line between your indoor and outdoor spaces, perfect for a patio connection.

The right combination of materials does more than create curb appeal; it builds a brand identity that is both memorable and resilient. It’s an investment in your restaurant’s physical and financial future.

When it comes to the surfaces people walk on, durability is everything. For outdoor dining areas, you need something that can handle heavy foot traffic and wild weather while still looking great. This is where options like concrete pavers or natural stone shine, as a proper expert patio paver installation can provide a surface that’s both beautiful and built to last.

In the end, every single material, from the cladding to the pavers, should be a deliberate choice that reinforces the story you want to tell.

Designing Profitable Outdoor Dining Spaces

An inviting outdoor restaurant dining area with string lights, patio heaters, awnings, tables, and chairs on a lawn.

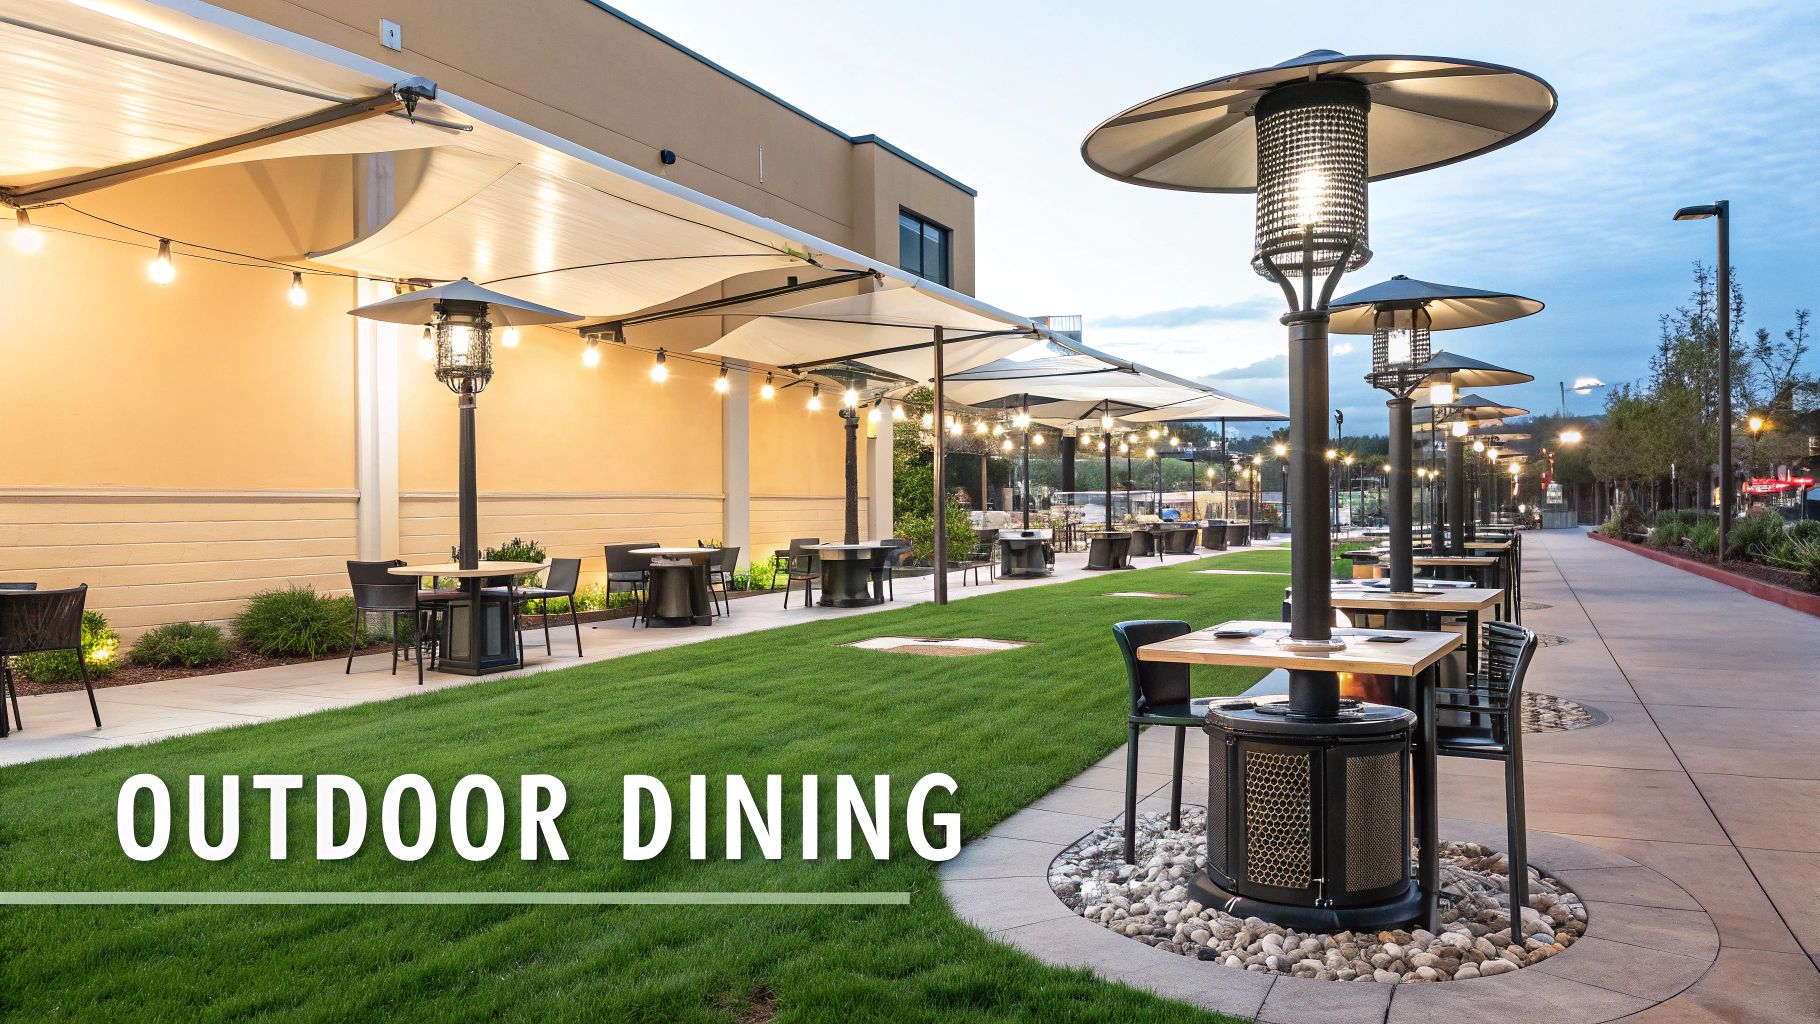
Turning an empty sidewalk strip or a forgotten courtyard into a buzzing outdoor dining area is one of the fastest ways a restaurant's exterior design can directly boost the bottom line. A well-designed patio isn't just about adding more seats; it’s about creating a destination, an experience that pulls people in off the street. It breathes life and energy into the restaurant, extending its presence far beyond the four walls.

Getting this right comes down to a careful balance of three key ingredients: strategic lighting that sets the perfect mood, clear signage that both guides and reinforces the brand, and comfortable, efficient seating that keeps guests lingering and staff moving freely. When these elements click, you create a profitable and magnetic extension of your indoor dining room.

Crafting Ambiance With Strategic Lighting

Exterior lighting is so much more than just a safety requirement. It's your number one tool for crafting ambiance, for making a patio feel intimate and almost magical as the sun goes down. Think of it as painting with light—you can spotlight stunning architectural details, wash tables in a warm, inviting glow, and cleverly draw the eye away from less appealing views, like a busy street.

An effective lighting plan always involves layering different types of light to create depth and visual texture:

  • Ambient Lighting: This is your base layer, providing the soft, overall illumination. String lights, overhead pendants, and wall sconces are perfect for this, creating a welcoming atmosphere without any harsh glares.
  • Task Lighting: This is your focused, functional light, aimed precisely where it's needed most. Think pathways, host stands, and directly over tables so guests can actually read their menus.
  • Accent Lighting: This is where the drama comes in. Use uplights to showcase a gorgeous old tree, a beautifully textured brick wall, or a unique water feature. It's the finishing touch that adds a layer of real sophistication.

Integrating Signage As a Brand Landmark

In an outdoor dining context, your signage has two jobs. Functionally, it needs to point people in the right direction, mark entrances, and display key information. But just as importantly, it acts as a critical brand touchpoint, constantly reinforcing the restaurant's identity.

A flimsy, cheap-looking sign can instantly make a beautifully designed patio feel like an afterthought. Your signage should feel like it grew right out of the building's architecture. The materials should echo the main facade—maybe it’s rustic carved wood for a cozy bistro or sleek, backlit metal for a contemporary hotspot. Don't forget the smaller cues, either; well-placed signs guiding guests from the host stand to their table ensure the journey feels seamless.

A well-designed outdoor space is not a separate entity but a fluid continuation of the indoor experience. The transition should be so natural that guests feel the restaurant's character and comfort extend effortlessly into the open air.

The Blueprint For Irresistible Outdoor Seating

The heart and soul of any al fresco dining area is, of course, the seating. This is where guest comfort, operational flow, and sheer durability all have to meet. A successful layout is a strategic one, designed to anticipate challenges like weather while getting the absolute most out of the available space.

A smart seating plan tackles several things at once. First, the layout must be a clear path for servers, not an obstacle course. At the same time, it needs to give diners a sense of personal space, ensuring they don't feel like they're sitting on top of the next table.

Here's a look at the essential components for a functional and appealing seating area:

  • Weather-Proofing: Weather is the ultimate wild card. Retractable awnings, large umbrellas, and permanent pergolas are non-negotiable for providing shade and shelter from a sudden downpour. For cooler climates, well-placed patio heaters or a central fire pit can easily extend your outdoor dining season by weeks, if not months.
  • Durable Furnishings: Outdoor furniture has to be tough. Stick to materials like treated wood, powder-coated aluminum, or high-quality synthetics that can take a beating from sun and rain. But don't sacrifice comfort for durability—nobody wants to sit on a rock-hard chair through a two-hour meal.
  • Smart Layouts: Don't just line up tables in a grid. Create different zones to accommodate various group sizes with a mix of two-tops, four-tops, and maybe a larger communal table. Use planters, low walls, or decorative screens to break up the space and create pockets of intimacy.

A thoughtful approach to planning an outdoor space is an investment that pays for itself. The following checklist is a practical tool for developers and owners to ensure all key considerations are addressed from concept to completion.

Outdoor Seating Design Checklist

Planning Stage Key Consideration Pro Tip
Concept & Zoning Local Codes & Permitting Engage with the city planning department early. Understand sidewalk cafe regulations, ADA accessibility, and fire code requirements before you design anything.
Concept & Zoning Flow & Circulation Map out clear pathways for both guests and staff. A server carrying a loaded tray should never have to squeeze between chairs.
Design & Layout Furniture Selection Choose durable, weather-resistant materials. Test chairs for comfort and ensure tables are stable and appropriately sized for your menu.
Design & Layout Weather Mitigation Plan for sun, rain, and cold. Invest in high-quality umbrellas, awnings, or heaters. This maximizes the number of days the space is usable.
Ambiance & Branding Lighting Scheme Layer ambient, task, and accent lighting. Ensure tables are softly lit but pathways are clear. String lights add instant charm.
Ambiance & Branding Landscaping & Greenery Use planters and vegetation to define the space, add natural beauty, and create privacy from the street.
Operations POS & Service Stations Set up a dedicated outdoor service station with a POS terminal if possible. This saves servers countless steps and speeds up service.
Operations Storage Where will cushions, umbrellas, and furniture be stored in the off-season or during severe weather? Plan for this to avoid clutter and damage.

By meticulously working through each of these points, you can avoid common pitfalls and transform a simple patio into a highly sought-after dining experience, turning your exterior into a consistent and powerful revenue stream.

Weaving in Sustainability and Biophilic Design

The exterior of a modern building featuring "Biophilic Design" signage, vertical green walls, and large windows, with a sidewalk.

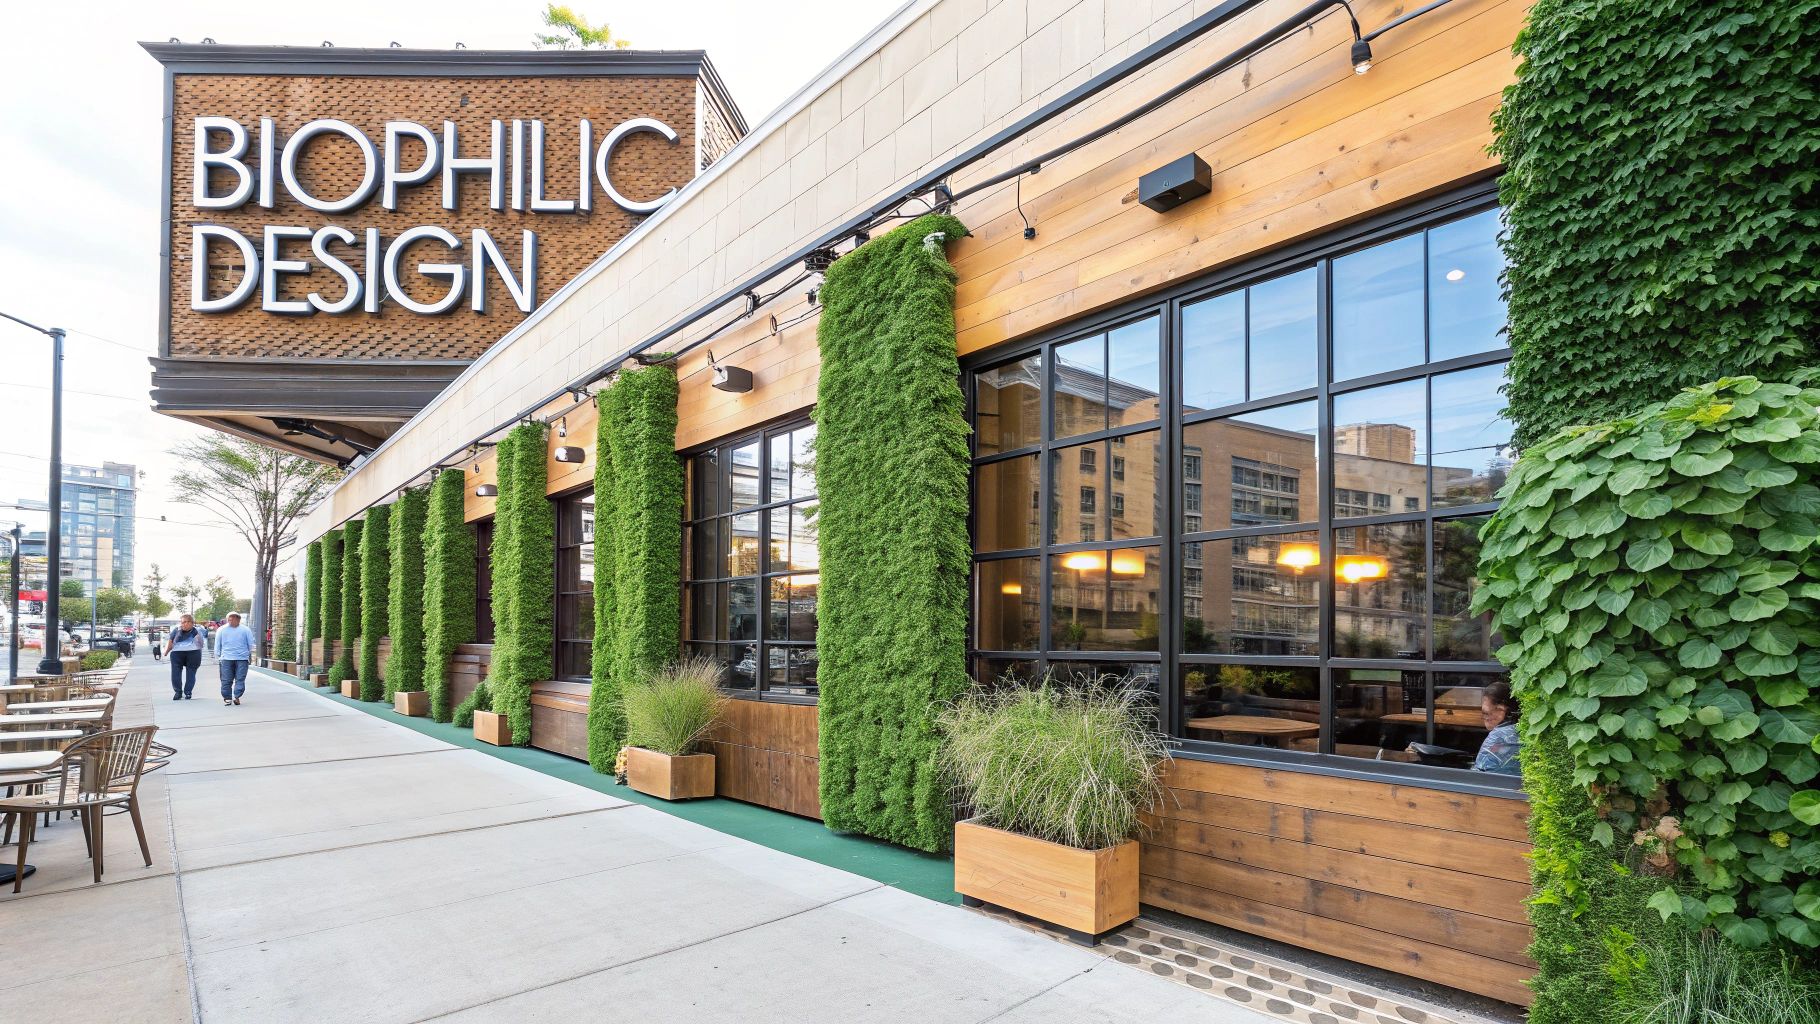
Diners today aren’t just looking for a good meal; they’re seeking an experience. This fundamental shift has pushed sustainability and biophilic design—the concept of connecting people with nature in built environments—from the fringes right into the mainstream of restaurant exterior design.

Adopting these principles isn't about just looking green. It's a savvy business move that can slash operating costs, elevate the guest experience, and forge a much stronger brand identity.

Bringing Nature into the Business Model

At its core, biophilic design operates on a simple premise: people are hardwired to connect with nature. When you apply this to exterior designs of restaurants, you're strategically incorporating natural light, plants, water, and organic materials to craft an atmosphere that feels healthier and more welcoming.

This goes way beyond sticking a few potted plants by the entrance. Real biophilic design embeds nature into the building’s very DNA.

Here’s how it comes to life:

  • Living Green Walls: These vertical gardens do more than just look good. They turn a plain facade into a lush, air-purifying landmark that grabs attention and sends a clear message about wellness.
  • Native Landscaping: Why fight the local climate? Using plants native to your area cuts down on water usage and maintenance while creating a landscape that feels authentic and deeply connected to its surroundings.
  • Water Features: The gentle sound of a fountain or a sleek, modern cascade can work wonders. It creates a pocket of tranquility, masks urban noise, and gives guests a moment of calm before they even step inside.

An exterior that breathes life isn't just a design choice; it's a market differentiator. It communicates a brand that is fresh, healthy, and modern, attracting customers who actively seek out spaces that make them feel good.

By creating an environment that engages the senses, you encourage guests to linger longer, spend more, and rave about their experience. Your building’s exterior suddenly becomes an active player in driving customer satisfaction.

Smart Design for a Greener Bottom Line

Beyond the natural aesthetics, practical sustainable strategies offer a huge long-term payoff by shrinking a building's environmental impact and its operational costs. Think of these choices as smart investments that keep giving back.

Building orientation and material choices are mission-critical. A cleverly oriented building can take advantage of passive solar gain, using large south-facing windows for warmth in the winter and deep overhangs for shade in the summer. It’s a simple design decision made upfront that can dramatically reduce heating and cooling bills for decades.

Blurring the line between indoors and outdoors is a measurable trend. Architects are increasingly designing with larger glazed openings, durable low-maintenance materials, and the right infrastructure for outdoor HVAC systems to support year-round patio dining. For adaptive reuse and historic preservation projects, these modern strategies must be carefully balanced with local codes, Design Review Board expectations, and historic tax credit rules.

Choosing Eco-Friendly Materials and Systems

The materials you select for the exterior provide another chance to walk the talk on sustainability—without compromising on style or durability.

Here are a few key material strategies to consider:

  • Locally Sourced Materials: Using stone, wood, or brick from regional suppliers cuts down on carbon emissions from transportation and pumps money back into the local economy.
  • Recycled and Reclaimed Content: Materials like reclaimed wood, recycled steel, or composite decking give a building unique character and a great story, all while keeping waste out of landfills.
  • High-Performance Windows: Upgrading to double- or triple-paned windows with low-emissivity coatings is a no-brainer. They minimize heat loss in winter and heat gain in summer, which you'll see reflected directly in your energy bills.

By making sustainability and biophilic design a core part of the plan from day one, you can create a restaurant exterior that isn't just beautiful but is also efficient to run and good for the planet. It's a forward-thinking approach that builds lasting value for the business, its patrons, and the community.

Unlocking Value with Adaptive Reuse

For developers looking to create truly memorable restaurant destinations, the best opportunities aren't always found on empty lots. Sometimes, they’re waiting inside the walls of existing buildings. Adaptive reuse—the art of repurposing old structures for new life—is a smart, sustainable, and often more cost-effective alternative to building from scratch. It’s about seeing the potential in a forgotten factory or the soul in a historic downtown bank.

These old buildings come with a built-in story, a history that a new build simply can't manufacture. Think of it as inheriting a narrative. Your restaurant doesn't just fill a space; it becomes the next chapter for a building that has seen generations come and go. That kind of authenticity is a powerful magnet for diners craving unique experiences.

The process of turning a historic structure into a bustling modern restaurant is a delicate dance. It’s all about preserving the irreplaceable character—the original brickwork, exposed timbers, or ornate metalwork—while weaving in the complex systems a contemporary restaurant needs to function.

Navigating the Preservation Puzzle

Pulling off a successful adaptive reuse project is a specialized skill. This is far more than a cosmetic makeover; it demands a deep understanding of how the building was originally put together and a thoughtful plan for bringing it into the 21st century. The real magic happens when the old and new coexist, where modern updates respect and even highlight the historic fabric.

This journey involves a few critical steps:

  • Detailed Building Forensics: Before a single line is drawn, architects need to become building detectives. They dig into the original construction methods and materials to get a clear picture of the structure's strengths and weaknesses.
  • Sensitive Systems Integration: The trickiest part is often threading modern HVAC, electrical, and plumbing through a building never designed for them—all without destroying the very features you’re trying to save.
  • Code Compliance: Getting an old building up to today's safety, accessibility, and energy codes requires some seriously creative problem-solving to meet modern standards while honoring the past.

Historic preservation isn't a constraint; it's a specialized discipline that unlocks immense value. It turns forgotten buildings into one-of-a-kind landmarks with stories that connect with guests and the entire community.

The Financial and Brand Payoff

Beyond creating a stunning space, adaptive reuse can be a savvy financial move. Many of these projects are eligible for federal and state historic tax credits, which can take a significant bite out of development costs and seriously boost the project's overall ROI. While the approval process for these credits can be intricate, the financial rewards are often well worth the effort.

Ultimately, choosing adaptive reuse for a restaurant is a strategic decision that pays off in both character and cash flow. You’re not just building a restaurant; you’re creating a destination with a real competitive edge. The result is a space that feels grounded, authentic, and completely unforgettable—a powerful foundation for any restaurant business to build on.

We hear a lot of the same questions from developers and restaurant owners when they start thinking about exterior design. Let's tackle some of the most common ones head-on.

How Much Should I Budget for My Restaurant Exterior?

This is the big one, and the honest answer is: it varies wildly. As a general rule of thumb, you can expect the exterior to account for anywhere from 10% to 25% of your total construction budget.

Where you land in that range depends entirely on the scope of your project. A simple facelift—fresh paint, a new sign, and a stylish awning—will keep you on the lower end. But if you’re planning major structural work like adding a patio, installing large-scale windows, or using high-end materials like custom stone or metalwork, you'll naturally trend toward the higher end of that budget. Think of it less as a cost and more as an investment in your restaurant's curb appeal and, ultimately, its revenue.

What Is the Biggest Mistake to Avoid with Outdoor Seating?

By far, the most common mistake we see is treating the patio or outdoor seating area as an afterthought. It's so much more than just throwing a few tables and chairs out on the sidewalk.

When outdoor space isn't planned from the very beginning, you end up with all sorts of problems: awkward pathways for servers, no real protection from the sun or a sudden rain shower, and furniture that just doesn't fit the vibe. A great patio feels like a natural extension of the restaurant, seamlessly connected to the interior flow, the kitchen, and your overall brand.

The key to modernizing a historic building is to respect its original character while making sensitive, contemporary interventions. The goal is to create a dialogue between old and new, not a competition.

This kind of thoughtful approach not only looks better but is also more likely to win over Design Review Boards and can even open the door to historic tax credits. It's about turning preservation into a smart business decision.


Ready to transform your vision into a landmark destination? The team at Sherer Architects, LLC specializes in commercial architecture, adaptive reuse, and historic preservation, delivering beautiful and enduring results. Explore our portfolio and start your project today.

Categories
Uncategorized

How a Site Plan Architect Unlocks Your Property’s Full Potential

A site plan architect is the person who looks at a raw piece of land—whether it's an empty lot or a property ready for a new chapter—and figures out the absolute best way to use it. They are the master planners who turn a developer's vision into a practical, buildable, and profitable reality.

They don't just plop a building down in the middle of a site. Instead, they solve a complex puzzle involving zoning codes, traffic flow, utility access, environmental constraints, and the overall human experience. They are the critical link between a great idea and a project that actually gets approved and built.

What a Site Plan Architect Actually Does

Imagine a site plan architect as the quarterback of the development team. The building itself might be the star receiver, but the quarterback reads the entire field—the zoning regulations, the slope of the land, the flow of traffic—and calls the plays that set the project up for success. They coordinate the entire team of engineers, surveyors, and landscape designers to execute a winning strategy.

Their job is to create a comprehensive blueprint for the entire property, not just the building. This involves thinking through every variable from the very beginning to maximize a property's potential.

The Strategic Visionary for Your Property

The whole process starts with a deep dive into the property itself. The architect walks the site, studies the topography, and analyzes everything from sun angles to existing trees and neighboring properties. Their first goal is to understand the land’s natural strengths and weaknesses.

This strategic thinking is absolutely essential for projects like:

  • New Commercial Construction: Figuring out the best spot for the main building, where to put parking for easy access, and how to create inviting green spaces that draw in customers.
  • Complex Renovations: Overhauling an existing site to improve traffic circulation, add an outdoor patio, or meet modern accessibility (ADA) requirements.
  • Adaptive Reuse Projects: Taking an old warehouse or a forgotten mill and creating a site plan that transforms it into a vibrant mixed-use space, like the Olympia & Granby Mills redevelopment here in Columbia, SC.

To give you a clearer picture, let's break down their core duties and why each one matters so much to your bottom line.

Core Responsibilities of a Site Plan Architect

Responsibility Impact On Your Project
Zoning & Code Analysis Ensures your project is compliant from the start, avoiding costly delays and redesigns with the city.
Site Layout & Massing Determines the optimal placement and orientation of buildings, parking, and open spaces to maximize usability and value.
Circulation & Access Planning Designs safe and efficient flow for vehicles and pedestrians, which is crucial for retail and commercial success.
Utility Coordination Works with engineers to map out connections for water, sewer, and power, preventing expensive infrastructure surprises.
Permit & Approvals Navigation Acts as your expert guide through complex Design Review Board (DRB) and zoning commission meetings.
Team & Consultant Coordination Keeps civil engineers, landscape architects, and surveyors aligned, ensuring everyone is working from the same playbook.

Ultimately, a site plan architect’s work prevents the kind of expensive, project-killing mistakes that come from a lack of foresight.

The Link Between Vision and Reality

At the end of the day, the site plan architect is the one who translates big ideas into a set of approved documents that a construction crew can actually build from. They become the central point of communication, working with civil engineers to figure out site grading and stormwater drainage, collaborating with landscape architects on creating beautiful and functional outdoor areas, and negotiating with city planners to get the green light.

A great site plan isn’t just about where the building sits; it's about how the entire property works. It dictates how people arrive, where they park, how they interact with the space, and how the project impacts its neighbors. This foundational work prevents costly mistakes and ensures long-term value.

Their expertise is often the single most important factor in keeping a project on budget, securing permits on time, and delivering a final product that meets its financial and functional goals. Without this expert guidance, even the most brilliant building design can be crippled by a poorly planned site.

The Site Planning Process from Concept to Approval

Getting from a rough idea to a city-approved, buildable site plan isn’t a single leap; it’s a journey with clear, deliberate steps. Think of a site plan architect as your guide through this entire process, making sure each phase builds logically on the one before. It's less about a one-off task and more about a structured progression that methodically turns your vision into a blueprint ready for dirt to move.

It all starts with getting the lay of the land—literally. Before any real planning can begin, the first order of business is getting a comprehensive site survey done. This initial step, which you can learn more about by understanding the site survey, gives us the critical topographic, boundary, and utility data that will influence every single decision we make down the line.

Initial Feasibility and Conceptual Design

This first phase is all about discovery and big-picture thinking. Your architect rolls up their sleeves and digs into the property's potential and its limitations, asking the core question: "What can we really do here?" This means a deep dive into local zoning ordinances, land use regulations, and any environmental constraints that set the rules of the game.

From that research, the architect develops a conceptual site plan. This isn't a technical drawing; it’s more of a high-level sketch that explores different ways the puzzle pieces can fit together. It's where we test out building footprints, access points, and how traffic might flow, letting you see the project's direction before a major investment is made.

Key takeaways from this stage usually include:

  • A Zoning and Code Analysis Report, which is basically a cheat sheet of all the rules that will shape the design.
  • Initial Site Analysis Diagrams that visualize things like sun paths, wind direction, and key access points.
  • Two or three conceptual layouts to give us a few different high-level options to discuss and kick around.

A green infographic illustrates a site plan architect's 3-step role: Vision, Strategy, Reality.

As this graphic shows, successful development isn't magic. It's about moving methodically from a broad vision to a concrete strategy, and finally, to a built reality.

Schematic Design and Municipal Coordination

Once we've landed on a concept you love, we move into schematic design. This is where we start adding layers of detail to the chosen layout. The building's placement gets locked in, the parking layout is finalized, and we begin weaving in preliminary landscaping ideas. The project really starts to feel real at this point.

This phase is also where teamwork becomes crucial. The site plan architect essentially becomes the project's quarterback, coordinating a whole team of specialized consultants.

The architect’s job is to orchestrate a symphony of experts. They make sure the civil engineer’s grading plan, the landscape architect’s planting design, and the surveyor’s boundary lines all sing from the same sheet of music, meeting both your goals and the city's rules.

This collaborative push results in a unified design package, ready for its first look by the local review boards.

Design Development and Construction Documents

Finally, we get into the most technical part of the journey. The architect and engineering team take the approved schematic design and translate it into a highly detailed set of construction documents. These are the exhaustive drawings and specifications a contractor will use to actually build the project. No stone is left unturned.

These documents detail everything, from precise grading and drainage plans to utility hookups and landscape material specifications. The full set is then formally submitted to the local authorities—like the Zoning Department and Design Review Boards—to get the final permits. A good site plan architect is invaluable here, navigating the often-tricky approvals process, making any needed tweaks, and advocating for the project to get that final green light for construction.

Unlocking Value in Commercial and Adaptive Reuse Projects

A well-designed site plan is more than just a drawing; it's a strategic financial tool that can make or break a project's profitability. For developers working on commercial and adaptive reuse projects, a site plan architect is the key to unlocking hidden value and heading off costly risks before a single shovel ever hits the ground. They're the ones who transform a property's layout into a high-performing asset.

With new commercial construction, the value an architect adds is almost immediate. A thoughtful site plan squeezes the most out of every square foot, ensuring cars can move without creating traffic jams, people can walk safely, and buildings are positioned to catch the best natural light. This isn't just about aesthetics—it cuts long-term energy costs and creates a place tenants actually want to be, which directly boosts property value and keeps occupancy rates high.

A vibrant retail street with modern commercial buildings, a bicycle, green space, and a busy parking lot.

Breathing New Life into Old Structures

Adaptive reuse projects are a whole different ballgame, and this is where a site plan architect's expertise becomes even more critical. The challenge here is to thread modern function and today's building codes into the very fabric of an older structure, all while preserving the character that makes it special.

Think of it as solving a complex puzzle with several key pieces:

  • Integrating Modern Infrastructure: How do you run new HVAC, electrical, and plumbing systems without gutting the historical integrity of the building? It takes a deft hand.
  • Meeting Current Codes: The revitalized site has to meet today's tough standards for accessibility (ADA), fire safety, and energy efficiency.
  • Enhancing Site Functionality: You have to completely rethink how parking, landscaping, and access work to serve the building’s new purpose, whether it's becoming a boutique hotel or a bustling retail hub.

The Financial Case for Adaptive Reuse

The adaptive reuse revolution is far more than a trend; it's a smart, sustainable strategy for turning outdated buildings into valuable commercial assets. This movement is a huge driver of growth in the architectural world, with U.S. services projected to hit $158 billion by 2034. Firms like Sherer Architects, LLC, have successfully completed over 200 renovations, adding decades to building lifespans.

This approach is often 40% more cost-effective than tearing down a building and starting from scratch. Better yet, projects focused on historic preservation can often qualify for tax credits that cover 20-45% of the rehabilitation costs, which significantly lowers the initial investment while increasing the property's long-term value.

By preserving the embodied carbon and unique character of an existing building, adaptive reuse delivers a powerful combination of environmental sustainability and economic return. It’s not just renovation; it’s a strategic reinvestment in a community's heritage and future.

A site plan architect is the conductor of this entire transformation, proving that saving an old building can be far more profitable than demolishing it. While the architect lays the groundwork for maximizing value, the long-term success of these properties often hinges on what happens after construction. To keep that value growing, it's worth exploring how effective property management applications can help streamline operations.

2. Navigating Costs, Timelines, and Common Pitfalls

Let’s talk about the two things that keep every developer up at night: time and money. Getting a handle on the financial and scheduling realities of site planning isn’t just good practice—it's absolutely essential for a successful project.

Think of your architect’s fee not as a simple line item, but as a strategic investment. You're paying for predictability, a clear path forward, and a massive reduction in risk.

Architectural fees for site planning aren't a flat rate; they're tailored to the unique demands of your project. A straightforward commercial build on a clean, level lot is a completely different ballgame than an adaptive reuse project on a historic site with tricky grading and a mountain of city regulations to climb. The fee naturally reflects that complexity.

What Really Drives a Project’s Timeline?

More than anything else, the approvals process sets the pace. While we can map out the design phases with a good degree of certainty, navigating zoning commissions and Design Review Boards (DRBs) is where things can get unpredictable.

This is where having a site plan architect with deep local knowledge becomes invaluable. They know the code, anticipate what reviewers are looking for, and prepare submissions designed to sail through. But even with the best preparation, the review cycle itself often has its own rhythm.

A typical project timeline usually breaks down like this:

  • Initial Design & Feasibility: 2-4 weeks
  • Schematic Design & Consultant Coordination: 4-6 weeks
  • Municipal Submittal & Review: 8-16 weeks (This is always the wild card)
  • Final Construction Documents: 4-6 weeks

When you add it all up, you’re looking at five to eight months just to get through the planning and approvals gauntlet. And that's before a single shovel hits the ground.

Avoiding the Mistakes That Break Budgets

The real, tangible value of a skilled site plan architect is their knack for seeing problems before they happen. Inexperience in site planning often leads to devastatingly expensive errors that don’t show up until construction is well underway. Your architect’s foresight is your best defense against these all-too-common traps.

The most expensive mistake is the one you have to fix after construction has already started. A thorough site plan identifies and solves problems on paper, saving you immense costs and headaches in the field.

These issues pop up more often than you'd think. A seasoned architect knows how to steer you clear of them from the very beginning.

Here’s a look at some of the most frequent missteps we see and how we get ahead of them.

Common Site Planning Pitfalls and How to Avoid Them

Common Pitfall Architect's Proactive Solution
Underestimating Utility Costs Engages civil engineers right away to accurately map and price connections for water, sewer, and power, preventing six-figure surprises.
Neglecting Stormwater Rules Designs a compliant and efficient stormwater management system from day one, avoiding fines and mandated redesigns from the city.
Inefficient Site Layout Creates a construction-friendly layout that minimizes earthmoving and optimizes material staging, saving significant time and labor costs.
Ignoring Accessibility (ADA) Integrates ADA requirements for paths, ramps, and parking into the initial design, preventing expensive retrofits and potential legal issues.

By tackling these critical issues during the planning phase, your site plan architect turns their fee from a cost into a high-return investment in your project's financial health and overall success.

How to Choose the Right Site Plan Architect

Picking a site plan architect is one of the most critical decisions you’ll make for your development project. This isn't just about hiring someone who can draw; it's about finding a strategic partner who will become your advocate, your problem-solver, and your guide through what can be a winding and unpredictable process.

The right architect doesn't just understand your vision—they have the experience and local know-how to make it a profitable reality. Finding that person means asking the right questions, ones that dig deeper than a simple portfolio review. You're vetting a key business partner, and their expertise will directly shape your project's timeline, budget, and ultimate success.

Two architects collaborate on building plans and designs, reviewing blueprints and a laptop.

Key Questions to Vet Potential Architects

Before you sign on the dotted line, you need to have a frank conversation with any potential candidates about their experience and how they work. A good discussion will give you a real feel for their capabilities and whether their style meshes with yours.

Here are the questions I always recommend asking:

  • Local Project Experience: "Can you walk me through a few site plans for projects you've successfully permitted right here in this municipality? I'm especially interested in ones similar in scale and use to what I'm planning."
  • Regulatory Familiarity: "How do you keep up with the constant changes in local zoning codes and Design Review Board preferences? Tell me about a time you had to navigate a particularly tricky approval process."
  • Team Collaboration: "What does your process look like for coordinating with civil engineers, surveyors, and landscape architects? How do you resolve disagreements when consultants have conflicting requirements?"
  • Communication Style: "What can I expect in terms of project updates—how often and in what format? Who will be my day-to-day point of contact?"

The answers you get reveal far more than just technical skill. They show you how an architect thinks on their feet, the strength of their professional network, and how they approach client communication. These qualities are every bit as important as their design talent.

Look Beyond the Portfolio

A slick portfolio is a great start, but it shouldn't be the only thing you consider. Pay close attention to how a site plan architect talks about challenges. Do they see them as frustrating roadblocks, or are they puzzles waiting to be solved? You want a partner who is upfront about potential hurdles and already thinking about solutions.

At Sherer Architects, for instance, we see every project as a unique puzzle. Our job is to fit all the pieces together perfectly: your goals, the site's limitations, the city's rules, and the budget. The goal is always a final picture that’s not just functional, but smart, sustainable, and built to last. It’s that collaborative, puzzle-solving approach that turns a good architect into a great strategic partner who will protect your investment from day one.

Common Questions About Site Plan Architecture

If you're a developer or property owner, you know that getting a project off the ground involves a lot of moving parts. Site planning is one of the most critical, yet often misunderstood, stages. To help clear things up, here are some straightforward answers to the questions we hear most often.

Think of this as your practical guide to understanding the site plan architect's role and how it all comes together.

How Is a Site Plan Different from a Floor Plan or Survey?

This is a great question, and it's easy to get them mixed up. The simplest way to think about it is in terms of scale and perspective.

A survey is the starting point—it's the official map showing your property's legal boundaries, elevation changes, and any existing features. A floor plan, on the other hand, zooms way in to show the interior of the building itself, detailing rooms, walls, doors, and windows.

The site plan is the master document that connects everything. It’s the bird's-eye view that shows how your building, parking lots, landscaping, and utility connections all fit together on the piece of land defined by the survey. It's the strategic roadmap for the entire property.

Can a Site Plan Architect Help Secure Financing or Tax Credits?

Absolutely. In fact, a professional site plan isn't just helpful—it's usually a requirement. Lenders need to see that your project is well-thought-out, viable, and compliant with all local rules. A clear, detailed site plan gives them the confidence that their investment is sound by minimizing perceived risk.

This becomes even more critical for adaptive reuse projects.

An experienced site plan architect is your key to unlocking historic preservation incentives. They know how to create designs that satisfy the strict standards for federal and state tax credits, which can completely change the financial picture of your project and boost your return on investment.

What Is the First Step to Start a Site Plan?

It all starts with a conversation. The first step is an initial consultation with a site plan architect to talk through your vision. This meeting is really a discovery session where you can explain what you want to achieve and the architect can give you a gut check on the property's potential and foreseeable hurdles.

To get the most out of this first meeting, try to bring a few things with you:

  • The property deed
  • Any existing surveys of the land
  • A simple summary of your goals for the project

From there, the architect will walk you through their process for the deep-dive research and feasibility work that has to happen before any design work begins.

How Does an Architect Handle Unexpected Issues During Construction?

Even the best-laid plans can hit a snag during construction. A good site plan architect doesn't just deliver a set of drawings and walk away; they remain your advocate and problem-solver on the job site.

When something unexpected happens—like discovering poor soil conditions or dealing with a material shortage—the architect steps in. They work directly with the contractors and engineers to find smart, efficient solutions. Because they know the design and the regulations inside and out, they can make necessary adjustments on the fly that keep the project moving, control costs, and ensure the final building is true to the original vision.


At Sherer Architects, LLC, we believe a well-executed site plan is the foundation of any successful development. If you're ready to unlock your property's full potential, contact us to start the conversation.

Categories
Uncategorized

How to Hire Commercial Architecture Firms That Deliver

Before you even think about shortlisting commercial architecture firms, the most important work you'll do is internal. It all starts with building a rock-solid project brief. This document is your roadmap, turning a back-of-the-napkin idea into a detailed, actionable plan. Get this right, and you'll get accurate proposals from firms that truly understand what you're trying to achieve.

First, Define Your Vision—Then Hire an Architect

A wooden desk with a tablet showing 'DEFINE VISION', an open architectural book, and a planning notebook.

Walking into meetings with architects without a clear, documented vision is a classic mistake. It leads to miscommunication, wasted hours, and proposals that miss the mark. The best commercial architecture firms don't just want your business; they want to solve your problem. A thorough brief gives them the details they need to offer realistic feedback, accurate fee structures, and creative solutions.

Think of it this way: your brief is the first filter. It immediately weeds out firms that aren't a good match, saving everyone a lot of headaches. This early planning phase is all about translating your abstract goals into concrete parameters—setting the rules of the game before you invite anyone to play.

From Vague Ideas to Concrete Plans

It’s time to get specific. Vague descriptions won't cut it. "A modern office space" is a start, but it's not a plan.

A better approach is to quantify everything: "An open-plan office for 75 employees, three private executive offices, two conference rooms, and a 500-square-foot collaborative lounge." That’s a description an architect can actually work with.

Your project brief should dig into the details on several fronts:

  • Functional Needs: How does the space need to work? Map out the critical workflows. For a restaurant, that means tracking the path from kitchen to table. For a warehouse, it's all about loading dock access and inventory movement.
  • Spatial Program: Get down to the numbers. Define the square footage for every single area, and don’t forget the less glamorous spaces like restrooms, storage closets, and mechanical rooms. They all count.
  • Aesthetic & Brand: What should the building feel like? Are you going for industrial grit, sleek minimalism, or something more traditional? More importantly, how does the design reinforce your company’s brand and culture?

A well-defined brief is your best defense against scope creep and budget overruns. It aligns everyone from day one and ensures the final design is a perfect match for your financial and operational goals.

Establishing Your All-In Budget

Your budget isn’t just a number; it’s a critical design constraint. A realistic, detailed financial plan gives commercial architecture firms the clear boundaries they need to design a project that’s both beautiful and buildable. Your "all-in" budget has to cover much more than just construction.

Be sure to break it all down:

  • Hard Costs: The bricks and mortar—physical construction, materials, and labor.
  • Soft Costs: All the professional services, like architectural and engineering fees, permits, legal reviews, and insurance.
  • FF&E: The costs for all furniture, fixtures, and equipment.
  • Contingency: This is non-negotiable. Set aside a buffer of 10-15% of your total project cost for the inevitable surprises.

Just as important is knowing the difference between your absolute must-haves and your nice-to-haves. This simple act of prioritization is a lifesaver. It empowers an architect to make smart trade-offs if the budget gets tight, protecting the core goals of the project without derailing the whole thing.

How to Find and Vet the Right Architectural Partner

Woman compares commercial architecture firms, viewing building designs on a laptop and a checklist.

Once you have a solid project brief in hand, the real work begins: finding the right team to execute your vision. Choosing between commercial architecture firms isn't just about a quick online search. It’s more like an investigation, a strategic hunt for a partner whose expertise aligns perfectly with what your project demands.

The global architectural services market is massive—it's projected to hit $249.2 billion by 2025. This isn't just a big number; it signifies a highly competitive field where specialization is everything. It's why firms like Sherer Architects can carve out a niche, developing deep, practical expertise in areas like sustainable commercial design and tricky adaptive reuse projects. You can get a clearer picture of the industry landscape by checking out the latest market data on IBISWorld.

Building Your Initial Longlist

Your first step is to cast a wide, but smart, net. A "commercial architects near me" search will get you started, but the real gems are often found a layer or two deeper. You want to look in places where quality and relevance have already been filtered.

Here are a few proven methods for uncovering top-tier candidates:

  • Industry Awards & Publications: Keep an eye on recent award winners from groups like the American Institute of Architects (AIA). If a firm is getting recognized for a project that mirrors your own in scale, function, or market, they should absolutely be on your list.
  • Local Business Journals: These publications are a goldmine. They're constantly covering new developments, groundbreakings, and project profiles. Make a note of the architects and design teams behind the projects that catch your eye.
  • Drive the Market: This is old-school, but it works. Take a drive around your city and look at the commercial buildings you genuinely admire. A quick property search online or even a call to the building manager can usually tell you which firm designed it.

Building a strong shortlist is about finding proof, not just promises. Look for firms that have already solved the types of challenges your project presents, from navigating local design review boards to executing a flawless historic preservation.

From Longlist to Shortlist

Now it’s time to get critical. The goal is to whittle your list down to three to five top contenders. This is where you move past the polished portfolio photos and start analyzing the substance and strategy behind their work.

When you're digging into their portfolios, ask these tough questions:

  • Does the complexity match? Look for evidence that they’ve handled projects with similar moving parts—tricky zoning negotiations, mixed-use components, or challenging site constraints.
  • Is their specialty relevant? If you’re planning an adaptive reuse project, how many have they actually completed? A firm that’s done one simple renovation isn’t the same as an expert in historic tax credits and complex structural retrofitting.
  • Do they have local wins? A firm’s track record with local planning departments, historic commissions, and review boards is invaluable. Proof that they’ve successfully navigated the very same regulatory hurdles you’ll be facing is a huge advantage.

Selecting the right architect requires a methodical approach. The following table provides a checklist to help you systematically evaluate and compare potential partners, ensuring you cover all the critical bases.

Key Criteria for Vetting Commercial Architecture Firms

Evaluation Criterion What to Look For Red Flags to Watch For
Relevant Portfolio Projects of similar scale, budget, and type (e.g., adaptive reuse, new build). A portfolio filled with residential projects or commercial work in a completely different sector.
Local Regulatory Experience A proven track record of successful approvals with your city's planning, zoning, and historic commissions. Vague answers about their experience with local codes or unfamiliarity with key city officials.
Team Expertise & Chemistry A dedicated principal, clear project manager, and a team that communicates well and understands your vision. High team turnover or difficulty getting a straight answer on who will actually be working on your project.
Client References Glowing reviews from past clients with similar projects who praise communication, budget adherence, and problem-solving. Reluctance to provide references or providing contacts for projects completed many years ago.
Design Philosophy An approach that aligns with your goals—whether it’s sustainability, historic integrity, or cutting-edge modernism. A rigid, "one-size-fits-all" design style that they try to apply to every project.
Technical Proficiency Expertise in relevant software (BIM, CAD) and an understanding of modern building materials and systems. Outdated software or a lack of experience with the specific construction methods your project requires.

Using a structured checklist like this helps you move beyond a gut feeling and make a data-driven decision, setting your project up for success from the very beginning.

The Power of Reputation and Real-World Feedback

Finally, you need to look beyond the firm’s own marketing materials. What do their past clients and industry colleagues really think? Candid feedback is one of the most powerful indicators of how they’ll perform.

Ask for a list of recent clients and actually make the calls. Get specific: How was their communication? Did they stick to the budget? What happened when an unexpected problem came up?

Don't stop there. A firm's reputation among general contractors and engineers is incredibly telling. These are the people in the trenches who know which commercial architecture firms deliver clear, buildable plans and which ones create chaos on the job site. This behind-the-scenes insight is often the most reliable predictor of a smooth and successful partnership.

Mastering the Interview and Proposal Review

You've got your shortlist of firms, and their portfolios look solid. Now for the real test: the interview. This is far more than just a formality. It’s your opportunity to get a feel for how these commercial architecture firms truly operate—how they think on their feet, communicate under pressure, and solve the kinds of messy, real-world problems that never show up in a glossy brochure.

Think of it this way: you’re not just hiring a vendor. You're bringing on a strategic partner for a complex, high-stakes, and often long-term journey. You need to find the team you can trust to have your back when things don't go according to plan, because at some point, they won't.

Questions That Go Beyond the Portfolio

Any firm can walk you through their greatest hits. Your job is to peel back the curtain and understand the process, not just the polished final product. Generic questions will get you generic, rehearsed answers. You have to dig deeper.

Here are a few questions I've found that really reveal how a team works:

  • "Tell me about a time a project went sideways because of an unforeseen issue. What was the problem, how did you break the news to the client, and what did you do to fix it?"
  • "What does your ideal client relationship look like? How much involvement and what kind of communication do you expect from our team from schematic design through construction?"
  • "How do you handle value engineering? Give me a specific example of how you cut costs for a client without gutting the design or sacrificing quality."
  • "What's your track record with the local design review board and zoning department? Walk me through your typical process for getting a project through those approvals."

Pay attention to how they answer. Are they speaking in vague hypotheticals or do they have specific stories? A team with real experience will have concrete examples ready to go. That’s the sign of a firm that has been in the trenches and knows how to communicate.

Decoding the Proposal and Fee Structure

After the interviews, the proposals will start rolling in. This is where you put on your analyst hat. A proposal is much more than a price tag; it's a detailed roadmap of what the firm will deliver, and when. If you see vague language or ill-defined scopes, that's a major red flag.

You’ll likely see a few different ways that commercial architecture firms structure their fees. It's important to understand the pros and cons of each.

The most common models are:

  1. Fixed Fee: A single, all-in price for a very specific scope of work. This gives you budget certainty, which is great, but it can get complicated if the scope needs to change mid-project.
  2. Percentage of Construction Cost: The fee is tied to a percentage of the final build cost, often in the 5-15% range. This model scales with the project's size, but some owners worry it creates an incentive for the project to cost more.
  3. Hourly Rates: You're billed for the actual time the architectural team spends on your project. This is perfect for initial feasibility studies, consulting, or smaller projects where the full scope isn't yet known.

When you're comparing proposals, look carefully for what's not included. Are things like 3D renderings, structural engineering fees, or a certain number of design revisions considered "additional services" with a separate price tag? A good, transparent proposal will spell all of this out clearly.

In the end, this decision shouldn't come down to just the lowest number. A slightly higher fee from a firm with a comprehensive scope and a proven ability to solve problems is almost always the smarter long-term investment. This is your chance to find a partner who fits your goals, your budget, and your communication style.

Untangling Contracts and Cutting Through Red Tape

You’ve found your firm. It feels like the hard part is over, but in many ways, the real work is just getting started. Now it's time to formalize the relationship and get ready to navigate the maze of local bureaucracy. This is where your architectural services agreement becomes the single most important document for the project.

Think of it as the blueprint for your professional relationship. It’s not just about the money; it’s about setting crystal-clear expectations to protect everyone involved. A good contract meticulously defines the scope of work, breaking down every phase from initial concepts to overseeing construction. It should also spell out exactly what you’re getting—like drawing sets, 3D renderings, or material specifications—and link those deliverables to a payment schedule. And whatever you do, don't just gloss over the liability clauses. Have your attorney review them with you so you understand exactly what the insurance requirements are.

Reading Between the Lines of the Agreement

When that contract lands on your desk, it’s time to put on your detail-oriented hat. Any ambiguity in the scope is a direct invitation for scope creep, surprise bills, and headaches down the road. You need absolute clarity on what's included in the base fee versus what counts as an "additional service."

Here are a few key areas I always tell clients to scrutinize:

  • Reimbursable Expenses: Get a clear list of what costs will be passed on to you. This could be anything from printing large-format drawings to travel or city permit application fees.
  • Ownership of Documents: This one surprises people. The architect almost always retains the copyright to their designs. The contract gives you a license to use them for this specific project, but you don't own the drawings themselves.
  • Termination Clause: Life happens. Make sure you understand the process and financial penalties if, for whatever reason, you or the firm need to part ways before the project is complete.

A thoughtfully negotiated contract is your best defense against future disputes. It aligns expectations on deliverables, timelines, and payment, setting the stage for a partnership built on trust, not misunderstandings.

From Your Signature to a Building Permit

With the contract signed, a truly experienced firm starts to show its real value by navigating the often-frustrating world of municipal approvals. This process can easily derail a project timeline, and a firm with deep local roots and relationships is worth its weight in gold. They become your advocate, your guide, and your translator in front of zoning boards, planning commissions, and historic review committees.

It’s one thing to design a beautiful building; it’s another to get it approved. A sharp architect knows precisely how to frame a request for a zoning variance, using solid design principles to build a compelling case. They can anticipate the kind of pushback a design review board might have and will prepare a presentation that proactively addresses those concerns. This is particularly crucial when you're working with the best in the business. In the US, the field is led by giants like Gensler, Perkins&Will, and HKS, who are consistently ranked among the top 300 architecture firms. You can see more about the leading US architecture firms of 2025 on Architectural Record. Their teams have the regulatory savvy to not only get projects approved but also to secure things like preservation grants or tax credits.

That kind of on-the-ground expertise is what prevents months of costly delays and keeps your project on track.

Ensuring a Successful Project From Design to Completion

Signing the contract isn't the finish line—it’s the starting gun for a deep, collaborative partnership. A successful project truly hinges on how well your team and your chosen commercial architecture firms work together, from the initial napkin sketches all the way to the final punch list.

This journey is built on a foundation of clear communication and a shared understanding of the process.

It all starts with schematic design, where your architect translates your vision into broad-stroke concepts, site plans, and initial floor layouts. From there, we move into design development, where those big ideas are refined with specific materials, building systems, and structural details. Finally, this all evolves into a comprehensive set of construction documents—the detailed blueprints and specifications your contractor will use to bring everything to life. Each phase needs your input and decisive action to keep the momentum going.

Fostering a Productive Partnership

To keep things running smoothly, you need to establish clear rules of engagement right from day one. Set up a predictable communication rhythm, whether it’s a standing weekly call or a shared project management portal. Transparent decision-making is just as important. Figure out who has the final say on changes and, crucially, how those decisions will be documented to prevent costly missteps down the road.

Your architect’s role during the construction phase is to be your advocate on-site. They conduct regular site visits to ensure the work conforms to the design documents, answer contractor questions, and help solve the inevitable field issues that arise, protecting the integrity of your original vision.

This workflow gives you a clear picture of the key stages leading up to construction, from getting the contract signed to final approval.

Infographic showing the three-step architectural approval process: contract, review, and final approval.

This streamlined process really highlights how a structured approach keeps everyone aligned before you even break ground.

Avoiding Common Project Derailers

Even the best-laid plans can go sideways without proactive management. Here’s a quick guide to identifying common challenges in commercial architectural projects and implementing strategies to prevent them from becoming major headaches.

Common Pitfall Potential Impact Preventative Strategy
Scope Creep Uncontrolled additions lead to budget overruns and timeline delays. Document the original scope meticulously. Evaluate every change request against the initial budget and goals before approval.
Budget Overruns Financial strain, project stalls, or compromises on quality. Establish a detailed budget with a contingency fund. Your architect should provide regular cost updates and suggest value-engineered alternatives.
Communication Gaps Misunderstandings cause rework, missed deadlines, and friction between teams. Set up a regular meeting schedule and use a central platform for all project communications. Always confirm key decisions in writing.

By anticipating these issues, your team can stay ahead of problems instead of just reacting to them. A good firm will help you navigate these challenges from the very beginning.

As your project nears completion, don’t forget the details that make a building truly functional and appealing. For instance, a comprehensive guide to signage for commercial buildings can be an invaluable resource for an element that is often an afterthought. A detail-oriented commercial architecture firm will integrate this into the design from the start.

This kind of comprehensive planning is why the industry continues to expand. The architectural services market is projected to grow from $214.19 billion in 2025 to $275.16 billion by 2029, a trend fueled by urbanization and infrastructure investment. By understanding the architect's role throughout construction, you can ensure the final building is a faithful execution of your investment.

Common Questions About Hiring Commercial Architecture Firms

Even for seasoned developers, bringing an architectural partner on board can kick up a lot of questions. Getting clear, honest answers from the get-go is the best way to move forward with confidence and sidestep the kind of misunderstandings that can derail a project timeline.

Here are a few of the most common questions we get from business owners and investors just starting the process.

Architect vs. Design-Build Firm: What’s the Difference?

This is one of the first hurdles. It's easy to get the two confused, but their roles are fundamentally different.

When you hire an architect, you're hiring an independent, licensed professional whose sole job is to design your project and represent your best interests. They are your advocate. A design-build company, on the other hand, is a single business that handles both the design and the construction. It's a one-stop-shop.

With a dedicated architect, you get an expert who is loyal only to you and the quality of the final product. A design-build firm can simplify communication by giving you one point of contact, but be aware that since the designer and builder are on the same team, it can create a potential conflict of interest if problems pop up during construction.

How Fees and Involvement Work

Money is always a big question. How do architecture firms actually charge for their work? It almost always comes down to one of three common models:

  • Percentage of Construction Cost: This is a classic model, where the fee is a percentage of the final build cost, typically ranging from 5-15%.
  • Fixed Stipulated Sum: A flat fee. This works best when the scope of the project is crystal clear from the beginning.
  • Hourly Rate: You'll see this most often for smaller consultations or for projects where the full scope is still a bit fuzzy.

No matter the model, your contract needs to spell out the fee structure in black and white, detailing exactly what services are included. As you research firms, you’ll find many are structured as Limited Liability Companies (LLCs). If you're unfamiliar with what that means for their operations, it’s worth a quick read on understanding the meaning of an LLC.

Your involvement is absolutely crucial in the early stages—what we call programming and schematic design. This is where we're downloading your vision, your budget, and how you need the space to function. A great firm won't just disappear; they'll establish a clear communication plan to pull you in at key milestones without burying you in daily details.

What About Historic Tax Credits?

For clients with older buildings, this question is a big one. An architect with deep experience in historic preservation is non-negotiable for these projects.

They are the experts who know how to navigate the notoriously strict approval processes with State Historic Preservation Offices (SHPOs) and the National Park Service. It's their specific knowledge of documentation, material science, and design standards that successfully secures the tax credits that can make or break the financial viability of your project.


Navigating a commercial build, adaptive reuse, or historic preservation project demands a partner who has been there before and operates with total transparency. At Sherer Architects, LLC, we make it our business to align every piece of the puzzle to deliver results that are not just beautiful, but also enduring and sustainable. Learn how our dedicated approach can bring structure to your vision and maximize your investment.

Categories
Uncategorized

Designing a Hospital A Practical Guide for Developers

Building a hospital is a monumental task, and the most critical work happens long before the first shovel hits the dirt. This initial strategic planning phase, which includes a deep-dive feasibility study, thorough market analysis, and meticulous space programming, is where the project's success is truly decided.

Get this part right, and you set the stage for a facility that meets clinical demands and financial targets. Skimp on it, and you're paving the way for costly rework and operational headaches down the line.

Building the Foundation Before Breaking Ground

The fate of a hospital project is sealed in its early planning. A rushed pre-design phase is a classic recipe for budget blowouts, inefficient workflows, and a building that just doesn't serve the community it was meant for. I like to think of this stage as mapping the hospital's strategic DNA—every decision made here will ripple through the entire design and construction process.

This foundational work ensures the building is a direct response to hard data, not just gut feelings or assumptions. For any developer or owner, this is your single most powerful tool for mitigating risk.

Getting the Market Analysis Right

Before a single blueprint is sketched, you have to know your market inside and out. A proper market analysis digs into the specific healthcare needs of the community you plan to serve. It's about finding out which service lines are desperately needed and which are already well-covered. This goes way beyond simple demographics; we’re talking about a forensic look at competitor services, local health trends, and even the dominant insurance providers in the area.

For example, your analysis might uncover an aging population with a high rate of heart disease but no dedicated cardiac center for miles. That’s a clear signal to prioritize a top-notch cardiology department, complete with cath labs and a cardiac ICU. On the flip side, it might show the area is saturated with maternity wards, steering you away from that investment.

You need to be evaluating data points like:

  • Demographic Trends: Look at age, income, and population growth projections. This helps you see where the demand will be in 5, 10, or 20 years.
  • Competitor Analysis: Literally map out who is doing what. Where are the gaps in care that you can strategically fill?
  • Community Health Needs Assessment (CHNA): Public health data is a goldmine. It tells you the most prevalent diseases and health issues your future patients are facing.

This data-first approach shifts the project from a speculative venture to a strategic one. It ensures you’re not just building a hospital correctly, but that you’re building the correct hospital for that specific market.

The process flows logically from understanding the market to defining the space, and finally, to picking the right spot.

Infographic showing a three-step hospital planning process: market analysis, space programming, and site selection.

As you can see, each step builds on the last, creating a rock-solid plan for the entire project.

From Services to Square Feet: The Art of Space Programming

Once you know which clinical services you'll offer, the next job is space programming. This is where we translate those services into a highly detailed list of every single room, its required size, and how it needs to relate to adjacent spaces. Think of it as the project's architectural brief—a document that quantifies the entire facility, foot by foot. You simply can't build a functional hospital without it.

A detailed space program is the bridge between your strategic vision and the physical design. It puts numbers to the hospital's operational needs, giving the architect a precise roadmap and preventing the kind of scope creep that kills budgets and timelines.

Let’s take an emergency department. A program won’t just have a line item for "ED." It will break it down into the exact number of trauma bays, triage rooms, and standard exam rooms. It will specify support spaces like nurse stations, medication rooms, and decontamination showers. This painstaking detail is what creates a department that can handle a crisis smoothly, rather than descending into chaos. It's the difference between a building that fights your staff and one that works for them.

Navigating the Labyrinth of Healthcare Codes

Two architects review blueprints and a large building model, collaborating on a design project.

Designing a hospital isn't just about architecture; it's about navigating a thicket of regulations. One wrong turn can lead to brutal delays and redesigns that blow up your budget. This isn't a simple box-ticking exercise. Getting it right means truly understanding the web of codes governing everything from how wide a corridor needs to be to the specifics of air filtration in an operating room.

Think of it as a layered puzzle. You have national standards, state-specific health department rules, and local zoning ordinances all piled on top of each other. They don't always play nicely together, and the real skill is in figuring out how to satisfy all of them from the very start.

The Key Players in Regulation

You’ll be answering to several different governing bodies, and each has its own rulebook and enforcement style. The Facility Guidelines Institute (FGI) is the big one, providing the foundational standards for most healthcare facilities across the U.S. Their guidelines are your starting point for patient room sizes, surgical suite layouts, and more.

But FGI is just the beginning of the story. Your state’s Department of Health will have its own licensing requirements that often add to or tweak the FGI standards. Then, local municipalities layer on their own building, fire, and zoning codes. It's a classic multi-jurisdictional headache.

The single biggest mistake a development team can make is assuming one codebook covers it all. You have to meticulously cross-reference state health mandates, FGI guidelines, and local ordinances to build a single, bulletproof compliance strategy.

For example, FGI might set a minimum for air changes per hour in an OR. Your state could demand a higher standard or specific filtration levels. Then, the local fire marshal will dictate the sprinkler systems and escape routes for that same room. You have to hit all three targets.

Common Hurdles and How to Clear Them

Some areas of hospital design are just magnets for compliance issues. Fire and life safety regulations are notoriously complex because the rules shift based on how a space is used. The requirements for an inpatient wing, an outpatient clinic, and a business office in the same building are all wildly different.

Ventilation is another minefield. Operating rooms, isolation rooms, and labs have incredibly strict rules for air pressure, filtration, and circulation to stop infections from spreading. These systems can't be an afterthought; they have to be baked into the architectural and structural plans from day one.

It’s also critical to get the electrical safety regulations right. For instance, knowing the ins and outs of the NEC tap rule for safe electrical wiring is essential for ensuring your power distribution systems are safe, compliant, and reliable.

Keep a close eye on these common trouble spots:

  • Hazardous Materials: The rules for storing and handling medical gases, chemicals, and radioactive materials are unforgivingly precise.
  • Accessibility: Meeting basic ADA standards is the floor, not the ceiling. Genuinely accessible design anticipates the needs of patients with a wide range of mobility challenges.
  • Medical Equipment: Heavy-duty imaging equipment like MRIs and CT scanners needs serious structural, electrical, and plumbing support that must be planned for well in advance.

Working with the Authorities Having Jurisdiction

The best way to manage all this complexity is to stop thinking of regulators as adversaries. The Authorities Having Jurisdiction (AHJs)—the state and local officials who sign off on your plans—should be your partners.

Get them involved early. Schedule preliminary review meetings during the schematic design phase. Walk them through your approach and ask for their interpretation of any gray areas in the code. This kind of open communication can spot a problem months before it becomes a change order during construction. A good relationship built on transparency is your most valuable asset for a smooth approvals process.

2. Designing Clinical Spaces for Peak Performance

Let's get to the heart of the matter: the clinical core. This is where the life-and-death decisions happen, and the physical design of these spaces has a direct, measurable impact on patient outcomes and staff efficiency. It's not just about aesthetics. A poorly planned clinical area creates constant friction, leading to medical errors and burnout. A thoughtfully designed space, on the other hand, becomes a silent partner in delivering exceptional care.

We're going to walk through four critical zones: the Emergency Department (ED), Operating Rooms (ORs), Imaging Suites, and Inpatient Units. Each has its own rhythm and unique demands, but they all share a fundamental need for clear circulation, smart adjacencies, and layouts that actually support the complex work happening within them.

The Modern Emergency Department

Most people think of the ED as the hospital's "front door," but from a design perspective, it's more like a high-stakes sorting facility running 24/7 under immense pressure. One of the most effective strategies I’ve seen is creating completely separate entrances for walk-in patients and ambulance arrivals. It's a simple move, but it immediately de-escalates chaos, allowing staff to triage less urgent cases without being swamped by critical emergencies rolling in.

Inside, the best EDs are broken down into distinct zones or "pods" based on patient acuity. You'll have dedicated areas for trauma, acute care, and a "fast-track" for minor issues. This model creates parallel workflows, allowing for more focused staffing and preventing a patient with a sprained ankle from tying up a bed needed for someone having a heart attack. It’s all about managing the inherent unpredictability of emergency medicine.

Optimizing the Surgical Suite

When you step into the world of operating rooms, sterility is king. The design absolutely must create an uncompromising barrier between clean and dirty pathways. A time-tested and highly effective layout is the sterile corridor system. It's a one-way street: sterile supplies and surgical teams enter the OR from a clean side, while all soiled materials and post-op patients exit through a separate, non-sterile corridor on the other.

This one-way flow is the bedrock of infection control. It also forces careful planning of all support spaces. For example, the Sterile Processing Department (SPD)—where every instrument is meticulously cleaned and sterilized—needs a direct, secure connection to that sterile core to maintain the integrity of the whole system.

The physical layout of a surgical suite is a direct expression of its infection control philosophy. Designing for a clear separation between sterile and non-sterile zones isn't a recommendation; it's a fundamental requirement for patient safety.

The Rise of Outpatient Services

One of the biggest shifts shaping hospital design right now is the massive migration from inpatient to outpatient care. So many procedures that once required an overnight stay are now done on a same-day basis, and this has profound implications for how we plan and allocate space.

This shift is a dominant force in healthcare architecture. In fact, for many health systems, outpatient revenue now equals or even exceeds inpatient revenue. This reality is forcing a total reconfiguration of facilities to better support same-day surgery, infusion centers, and advanced imaging. We're seeing new hospital projects reduce dedicated inpatient beds by 10–30% compared to older facilities, while dramatically increasing the number of procedure bays and observation areas. For a deeper look into this industry-wide trend, check out SmithGroup's detailed health forecast.

What does this mean for design? Flexibility is everything. A pre-op bay might need to function as a post-anesthesia care unit (PACU) during peak hours. Rooms have to be adaptable, capable of handling different procedures without a major overhaul. That requires building in robust infrastructure from day one—more medical gas outlets, more data ports, and flexible power options are non-negotiable.

Designing Patient-Centered Inpatient Units

After a procedure, the inpatient unit is where recovery begins. Modern design has thankfully moved away from those long, sterile institutional corridors. The focus now is on more manageable, human-scaled layouts. A popular and effective model is the decentralized nurse station, which places smaller work areas directly between small groups of rooms.

This simple change brings nurses physically closer to their patients, cutting down on wasted steps and improving direct observation. It also fosters a much quieter, calmer environment by breaking up the constant hustle of a large, central station.

Other key features we always build into our inpatient unit designs include:

  • Family Zones: Carving out dedicated space in the patient room for family members to sit, work, or rest comfortably. They are part of the care team.
  • Same-Handed Rooms: This is a big one. We design all rooms with the exact same layout—bed on the left, bathroom on the right, for example. This standardization dramatically reduces the risk of medical errors because staff instinctively know where to find everything, especially in a code-blue emergency.
  • Views and Natural Light: It's not a "nice-to-have." Ample windows with views of nature have been clinically shown to speed recovery times and lower stress. Orienting rooms to maximize daylight is a simple but powerful tool in the healing process.

Ultimately, designing a hospital’s clinical core is like solving a massive, three-dimensional puzzle of adjacencies, workflows, and future-proofing. When you get it right, you create an environment where caregivers can perform at their best and patients can heal in safety and comfort.


A critical piece of that puzzle is getting the departmental adjacencies right from the start. Placing departments that work together frequently next to each other saves precious time in transporting patients and equipment, which can be life-saving in an emergency.

Here's a look at some of the most critical adjacency pairings we prioritize in our planning.

Clinical Adjacency Planning Priorities

Primary Department High-Priority Adjacency Rationale for Proximity
Emergency Department (ED) Imaging (CT, X-ray), Lab Services Immediate access to diagnostic tools is crucial for rapid triage and treatment of trauma and acute cases.
Operating Rooms (OR) Sterile Processing (SPD), PACU Ensures a sterile instrument supply chain and facilitates smooth, safe patient transfer before and after surgery.
Intensive Care Unit (ICU) Surgical Suite, ED Allows for quick transfer of critically ill patients from surgery or emergency intake to intensive monitoring and care.
Labor & Delivery Neonatal ICU (NICU), OR Co-locating these services provides immediate access to specialized care for high-risk newborns and emergency C-sections.
Cardiology Catheterization Lab, Imaging (MRI/CT) Streamlines the diagnostic-to-treatment pathway for cardiac patients, reducing transport time during critical events.
Oncology/Infusion Pharmacy, Laboratory Close proximity to the pharmacy is essential for the timely and safe preparation of chemotherapy drugs.

Thinking through these connections early in the schematic design phase prevents major workflow headaches and operational inefficiencies down the road. It’s about designing for movement and logic, not just for static rooms on a floor plan.

Engineering for Safety and Long-Term Value

A brightly lit hospital hallway featuring a green 'Clinical Efficiency' sign and a person walking.

Great architecture and smart clinical layouts get a lot of attention, but a hospital’s real guts—its resilience and safety—are engineered deep within the walls. The mechanical, electrical, and plumbing (MEP) systems are the facility's lifeblood. This complex network is what truly dictates everything from patient recovery rates to the long-term operational budget.

For any developer or owner, making the right engineering calls upfront is one of the smartest ways to bake long-term value into the asset. We're not just talking about keeping the lights on. These systems are an active, critical part of the healing environment.

Mastering Air Quality for Infection Control

In a hospital, the air itself is a medical instrument. This is where Indoor Air Quality (IAQ) moves from a "nice-to-have" to a core design principle. Your HVAC system is the first line of defense against healthcare-associated infections (HAIs), which have devastating consequences for patients and providers alike.

The entire game is about precise control over air pressure, filtration, and circulation. For example, sensitive areas like operating rooms or protective units for immunocompromised patients must maintain positive air pressure. This means the pressure inside is slightly higher than outside, so when a door opens, clean, filtered air pushes out, keeping contaminants from drifting in.

On the other hand, airborne infection isolation rooms demand the opposite: negative air pressure. Here, the pressure is lower inside the room. This ensures that when the door is opened, any contaminated air is pulled into the room and safely exhausted, protecting the rest of the hospital. Pulling this off requires a meticulously balanced and sophisticated HVAC system.

The Role of Filtration and Air Changes

Filtration is another non-negotiable. And we’re not talking about the filters you buy at the hardware store. Healthcare facilities depend on High-Efficiency Particulate Air (HEPA) filters, which are engineered to capture 99.97% of airborne particles as small as 0.3 microns. They're absolutely essential in sterile environments for pulling bacteria, viruses, and other pathogens right out of the air.

Just as critical is the concept of Air Changes per Hour (ACH). This metric tells you how many times the entire volume of air in a room is swapped out with fresh, filtered air every hour. The demands vary dramatically by space:

  • Standard Patient Rooms: Typically require a minimum of 6 ACH.
  • Operating Rooms: Need a much higher rate, often 20 ACH or more, to quickly clear any contaminants.
  • Isolation Rooms: Require at least 12 ACH to ensure effective containment and safety.

Thinking about MEP systems solely in terms of upfront cost is a critical mistake. These systems represent a massive portion of a hospital's long-term operational budget. Investing in high-efficiency equipment and smart design from day one is one of the most effective ways to reduce lifecycle costs and boost the asset's overall financial performance.

Building Resilient Infrastructure

Beyond air quality, a hospital's core infrastructure must be designed for absolute, bulletproof reliability. Failure is simply not an option. That means engineering for redundancy in every key system.

Take the medical gas system, for instance—the network that delivers oxygen, medical air, and vacuum to patient bedsides. It must have multiple backups and alarms that instantly alert staff to any pressure drops.

The same goes for emergency power. Hospitals are required to have backup generators powerful enough to run life-support systems, surgical suites, and critical monitoring equipment for an extended time during an outage.

Water is another weak point if not planned for. The design must include a strategy for maintaining a supply of potable water during a municipal service interruption, often through large on-site storage tanks. This is the kind of resilient infrastructure that allows a hospital to keep saving lives when external utilities go down.

Hospitals are notorious energy hogs, but that consumption also creates a huge opportunity. A 300,000-square-foot hospital that manages to cut its energy use by 40% could save anywhere from hundreds of thousands to over a million dollars a year. This makes investing in high-efficiency systems a powerful financial move, not just an environmental one.

Adaptive reuse strategies, like those we champion at Sherer Architects, can push sustainability even further by extending a building's life and cutting embodied carbon by up to 20-40% versus new construction. You can dig deeper into these trends in the 2025 Hospital Construction Survey.

Getting the Project Built: Delivery Models and Financial Planning

An engineer in a hard hat inspects machinery in a facility with 'ENGINEERED SAFETY' text.

This is where the rubber meets the road. All the meticulous planning and brilliant design in the world won't matter if the project stumbles on a shaky financial foundation or gets bogged down by the wrong delivery method. For developers and owners, turning that vision into a physical, functioning hospital boils down to mastering the numbers and the team structure.

An elegant design is just a pretty picture if the budget is a fantasy or the delivery model creates conflict instead of collaboration. This phase is all about managing risk and making smart decisions that safeguard your investment for decades to come.

Building a Bulletproof Hospital Budget

A hospital budget is a different beast entirely from other commercial projects. The complexity is immense, and it’s easy to get fixated on the obvious hard costs—the concrete, steel, and labor—and completely underestimate everything else.

The real budget-busters are often hiding in the soft costs. From my experience, these can easily swell to 25-35% of your total project cost. If you don't account for them accurately from the very beginning, you’re setting yourself up for a world of financial pain down the line.

A truly comprehensive budget has to cover a lot of ground:

  • Professional Fees: This isn't just the architect and primary engineers. Think about the army of specialty consultants you'll need: medical equipment planners, acousticians, IT infrastructure experts, and more.
  • Permitting and Approvals: The fees and time required to navigate state health departments and local jurisdictions are significant. Don't treat this as an afterthought.
  • Medical Equipment (FF&E): Furniture, fixtures, and especially the high-tech medical equipment are a massive capital line item. We're talking about everything from hundreds of patient beds to multi-million-dollar MRI and CT scanners.
  • Contingency Funds: This is non-negotiable. A healthy contingency, typically in the range of 5-10% of total construction costs, is your safety net for the inevitable surprises and changes that pop up during construction.

Choosing the Right Project Delivery Model

How you structure the relationship between the owner, designer, and contractor will fundamentally shape your project's outcome. The old-school Design-Bid-Build approach, where you finish the design completely before hiring a contractor, is often slow and can create an adversarial "us vs. them" dynamic.

In the world of complex healthcare projects, more collaborative models are quickly becoming the standard. They just make more sense. Bringing everyone to the table early aligns goals and fosters a problem-solving mindset from day one.

The delivery model you choose is a strategic decision that shapes the entire project dynamic. For a complex build like a hospital, collaborative models that bring the contractor on board early are almost always superior for managing costs, schedule, and risk.

Let's look at two of the most effective alternatives:

  • Design-Build: Here, you sign a single contract with one entity that handles both design and construction. This single point of responsibility is a game-changer. It streamlines communication, slashes change orders, and can seriously compress the project timeline.
  • Integrated Project Delivery (IPD): This is the ultimate team sport. The owner, architect, and contractor all sign a multi-party agreement, sharing both the risks and the rewards. IPD drives incredible transparency and teamwork, making it perfect for the most complex or fast-tracked hospital projects.

The trend is undeniable. The U.S. hospital construction market, which hit an estimated $34.6 billion in 2025, is heavily shifting toward these collaborative methods. In fact, industry analysis suggests that design-build will account for about 47% of construction spending by 2028, largely because it can accelerate project delivery by 10–25%. If you want to dig deeper into these trends, you can find additional hospital construction insights on ibisworld.com.

The Financial Case for Resilience

A smart financial plan doesn't just stop on opening day. It has to look decades into the future and account for the hospital's long-term resilience. A facility that can’t keep its doors open during a hurricane, power grid failure, or the next pandemic is a fragile and deeply flawed asset.

Investing in resilience means hardening your facility against predictable threats. This could mean elevating critical MEP equipment above the flood plain, engineering the structure for higher wind loads, or building robust on-site power generation and water reserves.

Yes, these measures can add 5–15% to the initial construction cost. But the ROI is crystal clear. You're buying an insurance policy against catastrophic operational downtime and the staggering financial losses that follow. It’s an investment that protects revenue, staff, and the community when disaster strikes, ensuring your hospital can fulfill its core mission no matter what.

Common Questions About Designing a Hospital

Diving into a hospital project for the first time? It's natural to have questions. In my experience, a few key queries always seem to pop up early on. Let's tackle them head-on, so you can move forward with a clearer picture.

How Long Does The Hospital Design Process Typically Take?

You're looking at a design phase of roughly 12 to 24 months from the very first programming meeting until you have a set of construction-ready documents in hand. Of course, that's a wide range, and the final timeline really depends on the hospital's size, complexity, and how many specialty services you plan to include.

This period breaks down into the usual stages: schematic design, design development, and finally, the nitty-gritty construction documents. But it's the external factors that often stretch the schedule. Things like state regulatory reviews or navigating a tricky Certificate of Need (CON) process can easily tack on several extra months.

One way to potentially tighten this up is with a more integrated project delivery method. A design-build approach, for instance, can let design and early construction phases overlap, shaving valuable time off the total project duration.

What Is The Biggest Design Mistake To Avoid?

Hands down, the costliest and most frequent error I see is rushing the pre-design planning.

When a team jumps into schematic design without a solid, rigorously vetted space program and a real understanding of clinical workflows, it's a recipe for disaster. Why? Because every single change order made during construction is exponentially more expensive than a change made on paper.

Another common blind spot is failing to grasp the sheer volume required for all the MEP (mechanical, electrical, plumbing) systems. These aren't just pipes and wires; they are the hospital's lifeblood and can easily eat up 25-30% of the building's total volume. If you don't account for that massive footprint from day one, you’ll find yourself in a constant battle for space, forcing costly architectural compromises down the line.

Insufficient pre-design planning is the single most reliable predictor of budget overruns and operational headaches. The time and resources invested in meticulous upfront programming will pay for themselves many times over throughout the project's life.

How Can We Future-Proof A New Hospital Design?

Future-proofing isn't about predicting the future; it's about designing for flexibility. Healthcare delivery is always evolving, technology gets upgraded, and patient demographics shift. A smart building needs to adapt without requiring a complete teardown and rebuild.

Here are a few strategies we always build into our projects:

  • Embrace Modular and Universal Designs: By creating standardized room layouts, you build in agility. An exam room can be converted into a consultation space, or an office can become a small treatment room with minimal fuss.
  • Plan with "Soft Space": This is a simple but powerful concept. We deliberately place areas with simpler infrastructure—like administrative offices—right next to high-revenue clinical zones. When it's time to expand your OR suite or imaging department, you're knocking down drywall, not relocating major plumbing stacks.
  • Oversize Your Core Infrastructure: It’s far cheaper to build in extra capacity now than to add it later. Designing your MEP, IT, and structural systems to handle future technologies and higher patient loads gives you room to grow without a massive capital expense.

What Role Does Adaptive Reuse Play In Healthcare Development?

Adaptive reuse has become an incredibly important tool for health systems. It's a smart way to expand services quickly and manage costs. We're seeing more and more clients convert existing structures, like old office buildings or even big-box retail centers, into outpatient clinics, ambulatory surgery centers, or specialty care facilities.

The big win here is speed. It's almost always faster than ground-up construction.

But the benefits don't stop there. This approach is also inherently more sustainable. You reduce embodied carbon by keeping the original structure, you minimize demolition waste, and you can significantly lower the initial capital investment. For a healthcare provider, it's a powerful way to establish a footprint in a new community while breathing new life into an existing building.


The journey from an idea to a fully functioning hospital is incredibly complex. But with the right architectural partner, it can be a smooth and profitable one. At Sherer Architects, LLC, we specialize in guiding owners through every stage of commercial design, adaptive reuse, and historic preservation. We're here to help you solve the puzzle, aligning every piece to deliver a beautiful, enduring, and successful project. Learn how we can bring structure to your vision at https://shererarch.com.

Categories
Uncategorized

10 Essential Styles of Contemporary Architecture to Know in 2025

The world of architecture is in constant flux, with new ideas, materials, and technologies shaping the buildings we inhabit every day. Understanding the key styles of contemporary architecture is no longer just an academic exercise; it's a practical necessity for anyone involved in commercial development, historic preservation, or adaptive reuse projects. Each style offers a unique toolkit of solutions, addressing everything from environmental sustainability and site context to user experience and brand identity.

This comprehensive roundup unpacks ten of the most influential contemporary styles, moving beyond simple aesthetics to explore their practical applications. For developers, investors, and business owners, knowing the difference between Biophilic design and Neo-Brutalism can mean the difference between a project that resonates with its community and one that feels out of place. This guide is designed to provide actionable insights, examining the core principles, material palettes, and structural logic that define each architectural approach.

We will provide a clear, structured overview of each style's defining characteristics, its pros and cons for commercial applications, and specific considerations for code compliance and energy efficiency. You will learn not just what these styles look like, but how they function and what they can achieve. Whether you are planning a new commercial headquarters in South Carolina, breathing new life into a historic structure, or simply seeking to make an informed design choice, this guide will help you navigate the complex and exciting landscape of modern design with confidence.

1. Minimalist Architecture

Minimalist architecture is a design philosophy that champions simplicity by reducing a building to its necessary elements. Emerging as a reaction against the decorative excesses of earlier styles, it adheres to the principle of "less is more." This approach, one of the most enduring styles of contemporary architecture, focuses on creating serene and functional spaces through clean lines, unadorned surfaces, and an emphasis on form and material. The absence of ornamentation directs attention to the structure's spatial qualities, light, and the inherent beauty of the materials used.

Spacious contemporary living room featuring a modern black fireplace and large windows overlooking a lush green garden.

Key Characteristics and Implementation

The core of minimalism lies in its visual and material clarity. Key features include open-plan layouts, a monochromatic or neutral color palette, and a focus on simple geometric forms. Light is a critical element, used to sculpt spaces and create a sense of openness.

Implementation Tips for Commercial Projects:

  • Invest in Quality: With no ornamentation to hide behind, the quality of materials like concrete, steel, glass, and wood is paramount. The precision of joinery and finishes defines the aesthetic.
  • Prioritize Functionality: Every design element must have a purpose. Integrate storage seamlessly and design layouts that optimize workflow and circulation, making it ideal for efficient office or retail environments.
  • Strategic Lighting: Combine abundant natural light with carefully planned artificial lighting to highlight architectural forms and create ambiance. Recessed and hidden light sources maintain clean lines.

Applications and Considerations

Minimalism is highly versatile, suiting high-end retail spaces, modern offices, art galleries, and boutique hotels where a sophisticated and uncluttered environment is desired. Its timeless appeal can elevate a brand's image and provide a flexible backdrop for various uses.

For adaptive reuse, stripping a historic structure back to its essential frame can reveal its inherent character, creating a powerful dialogue between old and new. However, achieving high performance is crucial; without traditional cavities for insulation, careful detailing is required to meet modern energy codes and ensure thermal comfort. The simplicity of the design demands meticulous execution, as any imperfection becomes highly visible.

2. Parametric Architecture

Parametric architecture is a design process that utilizes algorithms and computational logic to generate complex geometric forms. Instead of designing static objects, architects establish a set of rules and parameters that define relationships between design elements. This data-driven approach allows for the creation of highly optimized, fluid, and responsive structures that can adapt to environmental factors, material constraints, and programmatic requirements. As one of the most innovative styles of contemporary architecture, it relies heavily on advanced software to explore design possibilities beyond human intuition.

A modern building showcasing parametric architecture with smooth, curved facades, large glass windows, and green grass in the foreground.

Key Characteristics and Implementation

The hallmark of parametric design is its dynamic, non-standard geometry, often resulting in flowing curves and intricate patterns reminiscent of natural systems. Popularized by pioneers like Zaha Hadid, this style produces visually striking buildings such as the Heydar Aliyev Center. The final form is a direct output of the input parameters, which can include everything from sunlight exposure to pedestrian flow.

Implementation Tips for Commercial Projects:

  • Define Clear Objectives: Begin by clearly defining the project constraints and performance goals (e.g., maximizing natural light, minimizing wind load). These will form the core parameters for the design algorithm.
  • Leverage Computational Tools: Utilize specialized software like Grasshopper for Rhino or Dynamo for Revit. These tools are essential for creating and manipulating the parametric models that drive the design.
  • Focus on Constructability: Early collaboration with structural engineers and digital fabricators is critical. The complex forms generated must be buildable, requiring innovative construction techniques and materials.

Applications and Considerations

Parametricism is ideal for large-scale, iconic projects like stadiums, cultural centers, and high-rise towers where performance optimization and a landmark aesthetic are primary goals. Its ability to analyze and respond to complex data makes it perfect for designing efficient building envelopes and unique interior spaces that enhance user experience.

In adaptive reuse, parametric tools can be used to design a modern, high-performance "skin" or addition that complements an existing historic structure. This creates a visually compelling dialogue between algorithmic precision and historical craft. However, the reliance on digital fabrication can increase initial costs and requires a highly skilled construction team. The non-standard components often demand custom manufacturing, making close coordination between the design and construction phases absolutely essential for project success.

3. Sustainable/Green Architecture

Sustainable or green architecture is a design approach that seeks to minimize the negative environmental impact of buildings through efficiency and moderation in the use of materials, energy, and development space. More than just a style, it is an ethical framework that prioritizes ecological harmony and long-term responsibility. This philosophy integrates renewable energy, recycled or sustainably harvested materials, and intelligent design strategies to create buildings that are not only energy-efficient but also healthier for their occupants and the planet. As one of the most critical styles of contemporary architecture, it directly addresses pressing global issues like climate change and resource depletion.

Key Characteristics and Implementation

The core of sustainable design lies in its holistic, systems-based thinking. Key features include passive design strategies (e.g., building orientation for optimal solar gain), integration of renewable energy sources like solar panels, use of green roofs and living walls, and advanced water conservation systems such as rainwater harvesting. The goal is to create a building that functions as a self-sufficient ecosystem.

Implementation Tips for Commercial Projects:

  • Embrace Passive Design: Conduct thorough site analysis to leverage natural light, ventilation, and solar orientation. This significantly reduces reliance on mechanical heating, cooling, and lighting systems.
  • Specify Sustainable Materials: Prioritize locally sourced, recycled, and rapidly renewable materials. Consider the entire lifecycle of a product, from extraction to disposal, to minimize its carbon footprint.
  • Integrate Performance Monitoring: Install smart building systems to track energy and water consumption in real-time. This data allows for continuous optimization and helps engage occupants in sustainability efforts.

Applications and Considerations

Sustainable architecture is applicable across all commercial sectors, from corporate headquarters like The Bullitt Center in Seattle to entire carbon-neutral communities like BedZED in London. It enhances brand reputation, lowers long-term operational costs, and improves employee well-being and productivity. To achieve a truly integrated green design, considering how these principles extend to the surrounding environment is key; explore some eco-friendly landscape design ideas for inspiration.

In adaptive reuse, retrofitting historic buildings with modern green technologies can dramatically improve their performance while preserving their cultural value. However, achieving certifications like LEED requires rigorous documentation and integrated design from the project's inception. Balancing historic preservation guidelines with the installation of new systems, such as high-performance windows or solar arrays, demands creative and sensitive design solutions.

4. Deconstructivism

Deconstructivism is an architectural movement that emerged in the late 1980s, challenging conventional notions of harmony, continuity, and structural stability. It is characterized by fragmentation, non-linear design processes, and an interest in manipulating a structure's surface. This provocative style, one of the more radical styles of contemporary architecture, aims to create a sense of controlled chaos, questioning established architectural rules by distorting and dislocating elements to create visually unpredictable and dynamic forms.

Key Characteristics and Implementation

Deconstructivism’s aesthetic is defined by its apparent lack of symmetry and its use of disjointed, angular, and warped forms. Buildings often appear as if they have been exploded and reassembled, featuring clashing planes and an absence of traditional right angles. The works of architects like Frank Gehry and Zaha Hadid, such as the Guggenheim Museum Bilbao, exemplify this approach.

Implementation Tips for Commercial Projects:

  • Balance Form with Function: While the exterior may be chaotic, the interior layout must still be functional. Ensure that the dramatic forms do not compromise circulation, usability, or occupant comfort.
  • Leverage Advanced Modeling: Complex geometries require sophisticated 3D modeling and Building Information Modeling (BIM) tools. These are essential for visualizing the design, coordinating systems, and developing accurate construction documents.
  • Engage Experienced Fabricators: The non-standard components often require specialized fabrication. Collaborate early with contractors and fabricators who have proven experience with complex, non-rectilinear construction.

Applications and Considerations

Deconstructivism is best suited for landmark projects like museums, concert halls, and corporate headquarters where making a bold, artistic statement is a primary goal. Its dramatic appearance can create an iconic identity for a brand or institution. Frank Gehry's Dancing House in Prague is a prime example of how this style can invigorate an urban context.

In an adaptive reuse context, a deconstructivist addition can create a striking contrast with a historic structure, highlighting both the old and new. However, the complex forms can be expensive to build and maintain. Structural engineering is highly complex, and achieving energy efficiency requires meticulous detailing to insulate and seal unconventional junctions. The success of a deconstructivist project relies heavily on precise execution and a budget that can accommodate its inherent complexity.

5. Biophilic Architecture

Biophilic architecture is a design philosophy that seeks to connect building occupants more closely to nature by integrating natural elements, materials, and forms into the built environment. This approach is rooted in the concept of biophilia, the idea that humans possess an innate tendency to seek connections with nature. Far from being merely decorative, this is one of the styles of contemporary architecture that prioritizes creating healthier, more productive, and psychologically restorative spaces through the deliberate use of living plants, natural light, water features, and organic patterns.

A modern indoor space features a towering green wall with 'NATURE INSIDE' text, a serene pond, and a skylight.

Key Characteristics and Implementation

The essence of biophilic design is creating a multi-sensory connection to the natural world. Key features include extensive living green walls, indoor gardens, natural materials like wood and stone, maximized daylight, and views of nature. Organic forms and patterns that mimic those found in the wild are also central to this style.

Implementation Tips for Commercial Projects:

  • Assess Local Ecology: Start by analyzing the local climate and native flora. Using indigenous plants reduces maintenance and water needs while creating an authentic sense of place.
  • Layer Natural Connections: Go beyond a single green wall. Incorporate multiple layers of nature, such as direct access to gardens, natural ventilation, water features for auditory appeal, and materials with natural textures.
  • Integrate Maintenance Systems: Plan for irrigation, drainage, and plant care from the project's inception. Automated systems are crucial for the long-term health and viability of large-scale plantings like those in Milan's Bosco Verticale.

Applications and Considerations

Biophilic design is exceptionally well-suited for workspaces, healthcare facilities, and hospitality venues where occupant well-being directly impacts outcomes. Corporate headquarters like Amazon's Spheres in Seattle use it to boost creativity and reduce stress. In adaptive reuse projects, biophilic elements can revitalize industrial or dated structures, creating a stark, appealing contrast between the building's original shell and a lush interior.

However, the approach demands significant upfront investment in specialized systems for irrigation and horticulture, along with ongoing maintenance budgets. Structural engineering must account for the added weight of soil, water, and plants. Building codes for fire safety and waterproofing require careful navigation, especially when integrating extensive interior plant life and water features.

6. Neo-Brutalism

Neo-Brutalism revives the monumental spirit of its mid-century predecessor, celebrating raw materials, bold geometric forms, and an unapologetic display of structure. It moves beyond the often-criticized coldness of original Brutalism by integrating contemporary technology, a greater emphasis on natural light, and refined detailing. This modern interpretation champions material honesty, particularly with exposed concrete, creating powerful, sculptural buildings that feel both permanent and dynamic. It stands as one of the more assertive styles of contemporary architecture, valuing structural expression over ornamentation.

Key Characteristics and Implementation

The essence of Neo-Brutalism is its focus on mass, texture, and form. Key features include large-scale cast-in-place concrete elements, a monolithic appearance, and deep-set windows that create dramatic shadow play. While concrete is the star, it is often paired with contrasting materials like glass, steel, or warm wood to soften interiors and enhance the user experience.

Implementation Tips for Commercial Projects:

  • Specify High-Quality Concrete: The final aesthetic depends entirely on the concrete mix and formwork. Use high-performance concrete and meticulously crafted molds to achieve a smooth, consistent finish.
  • Integrate Modern Systems: Thoughtfully conceal modern MEP (mechanical, electrical, plumbing) systems within the concrete structure to maintain clean lines without sacrificing functionality, a key improvement over its historical counterpart.
  • Balance Form with Comfort: Use the building's significant thermal mass to your advantage for passive heating and cooling. Counterbalance the hard surfaces with softer interior finishes, greenery, and strategic lighting to create inviting spaces for employees or customers.

Applications and Considerations

Neo-Brutalism is exceptionally well-suited for cultural institutions like museums and theaters, as well as civic buildings and high-end commercial headquarters that aim to project an image of strength, permanence, and artistic gravity. The style's dramatic and photogenic nature also makes it popular for boutique hotels and unique retail experiences.

In adaptive reuse, this approach can add a bold, contemporary wing to a historic building, creating a clear distinction between old and new. However, the weight and complexity of concrete construction demand significant structural planning and skilled labor. Detailing for water management is critical; proper drainage and sealing are essential to prevent staining and long-term degradation of the concrete facade, ensuring the building ages gracefully.

7. High-Tech Architecture

High-Tech architecture is an assertive style that celebrates the building's engineering and technological systems by making them visible aesthetic features. Emerging in the 1970s, it turns buildings "inside-out," moving structural frameworks and mechanical services to the exterior. This approach showcases the logic and process of construction, transforming functional components like steel skeletons, pipes, and elevators into the primary ornamentation. As one of the more expressive styles of contemporary architecture, it emphasizes transparency, industrial materials, and a commitment to technological innovation as the core design driver.

Key Characteristics and Implementation

The essence of High-Tech architecture is the glorification of technology and industrial aesthetics. Key features include exposed steel or aluminum structures, extensive use of glass, and clearly articulated mechanical systems. Designs often feature a lightweight, prefabricated, or modular quality, reflecting an adaptable and forward-looking philosophy seen in iconic works like the Pompidou Centre in Paris and the Lloyd's Building in London.

Implementation Tips for Commercial Projects:

  • Integrate Systems Early: The visual expression of mechanical, electrical, and plumbing (MEP) systems is central to the design. Involve engineering teams from the very beginning to ensure these elements are thoughtfully integrated, not just attached.
  • Detail for Durability: Exposed systems and structures are subject to weathering. Specify robust, high-performance coatings and materials like stainless steel or galvanized metal to ensure longevity and minimize maintenance.
  • Plan for Maintenance: Making systems visible also means making them accessible. Design with future maintenance in mind, providing clear access points and pathways for technicians without disrupting building operations.

Applications and Considerations

This style is particularly well-suited for projects that benefit from large, column-free interior spaces, such as exhibition halls, transportation hubs like Madrid-Barajas Airport's Terminal 4, and innovative corporate headquarters. The modularity and prefabrication inherent in the style can also accelerate construction schedules for projects like data centers or research facilities.

In adaptive reuse, applying a High-Tech approach can create a striking contrast by adding an exposed, modern structural or mechanical system to a historic building, highlighting both the old and the new. However, the complexity of coordinating and detailing exposed systems demands meticulous project management. Furthermore, achieving high levels of energy efficiency can be a challenge, requiring advanced glazing solutions and careful thermal-break detailing to counteract the potential for heat loss through extensive metal frameworks.

8. Contextual/Vernacular Contemporary

Contextual contemporary architecture, often called modern vernacular, creates a dialogue between past and present. It respects and adapts local building traditions, materials, and climate-responsive strategies while integrating modern design principles and technology. This approach rejects a one-size-fits-all globalized aesthetic, instead creating buildings deeply rooted in their specific place and culture. It is one of the most socially and environmentally conscious styles of contemporary architecture, valuing regional identity and wisdom.

Key Characteristics and Implementation

The essence of this style is its responsiveness to site, climate, and culture. It often features locally sourced materials like earth, stone, or timber, and incorporates passive design strategies borrowed from traditional buildings, such as natural ventilation and strategic shading. The form may evoke historical archetypes while being executed with modern precision.

Implementation Tips for Commercial Projects:

  • Thorough Research: Begin by studying the region's architectural history, climate patterns, and available materials. Engage with local communities to understand cultural practices and spatial needs.
  • Local Sourcing and Labor: Prioritize materials sourced from the region to reduce the carbon footprint and support local economies. Train and employ a local workforce, transferring valuable skills.
  • Adapt Traditional Techniques: Modernize traditional climate-control methods. For example, adapt the principles of a shaded courtyard or a ventilated roof for a modern office or retail complex to reduce reliance on mechanical HVAC.

Applications and Considerations

This approach is ideal for projects where cultural identity and sustainability are paramount, including community centers, schools, eco-lodges, and public buildings. It creates structures that resonate with the local population and offer a unique sense of place, which can be a powerful differentiator for a commercial brand. A prime example is the work of Diébédo Francis Kéré, whose schools in Burkina Faso use local clay and community labor to create innovative, climate-appropriate designs.

For adaptive reuse, this style provides a framework for respectfully integrating new functions into historic settings, using contemporary forms that complement rather than mimic the old. However, it requires a deep commitment to research and community engagement, and may involve adapting modern building codes to accommodate traditional materials or methods. The outcome is a building that is not just functional, but meaningful.

9. Adaptive Reuse/Heritage Contemporary

Adaptive Reuse is a design approach that breathes new life into existing buildings, repurposing them for functions different from their original intent. This sustainable practice celebrates architectural heritage by preserving the structure's soul while integrating contemporary elements for modern use. Instead of demolishing and rebuilding, this style of contemporary architecture creates a rich dialogue between past and present, resulting in unique, character-filled spaces that reduce embodied carbon and honor historical context. Prominent examples include London's Tate Modern, a former power station, and Cape Town's Zeitz MOCAA, ingeniously converted from a grain silo.

Key Characteristics and Implementation

The success of adaptive reuse hinges on a sensitive balance between preservation and intervention. Key features include the juxtaposition of old and new materials, the celebration of original structural elements like exposed brick or timber beams, and the clever insertion of modern systems and amenities. The goal is to make the building's history legible while ensuring it meets contemporary performance and accessibility standards.

Implementation Tips for Commercial Projects:

  • Conduct Thorough Assessments: Before design begins, a comprehensive structural and hazardous materials survey is non-negotiable. Efficiently assessing existing structures is key, and modern drone operations for infrastructure inspections are revolutionizing this critical preliminary stage, providing detailed data safely.
  • Balance Preservation and Modern Needs: Work with heritage consultants to identify key character-defining features. Plan for modern necessities like accessibility, thermal comfort, and high-performance MEP systems without compromising the building's historic integrity.
  • Strategic Material Contrast: Use contemporary materials like steel, glass, and polished concrete to clearly distinguish new interventions from the original fabric. This contrast highlights both old and new, creating a dynamic aesthetic.

Applications and Considerations

This approach is ideal for revitalizing urban cores, transforming vacant warehouses, factories, schools, and churches into vibrant offices, hotels, retail centers, or residential lofts. It offers significant marketing advantages by providing a unique story and a memorable sense of place that new construction often lacks.

However, adaptive reuse presents unique challenges. Unforeseen conditions can lead to budget and schedule overruns, and navigating historic preservation regulations can be complex. Integrating modern mechanical, electrical, and plumbing systems into a structure not designed for them requires creative engineering solutions. The payoff, however, is a culturally significant and environmentally responsible project that stands apart in the marketplace.

10. Kinetic/Interactive Architecture

Kinetic and interactive architecture represents the cutting edge of design, creating buildings that are dynamic, responsive, and engaging. This innovative approach integrates movement and technology, allowing structures to adapt to environmental conditions, user needs, or programmed events. Moving beyond static forms, these designs incorporate transformable spaces, responsive facades, and digital interactivity, treating the building as an evolving system rather than a fixed object. It is one of the most forward-thinking styles of contemporary architecture, blurring the lines between structure, machine, and user experience.

Key Characteristics and Implementation

The core of kinetic architecture is its ability to physically change. This is achieved through mechanical systems, smart materials, sensors, and automation. Key examples include the light-sensitive diaphragms of the Institut du Monde Arabe in Paris and the responsive, sun-tracking shades of Abu Dhabi's Al Bahar Towers, both of which optimize energy performance and occupant comfort.

Implementation Tips for Commercial Projects:

  • Define a Clear Purpose: Kinetic elements must serve a clear functional goal, such as energy management, spatial flexibility, or user engagement. Avoid movement for its own sake.
  • Plan for Longevity: Mechanical systems require maintenance and can fail. Prioritize robust, reliable engineering and design for easy access to components for repair or replacement.
  • Balance Innovation and Practicality: While technologically advanced, the systems must be intuitive and functional for everyday use. Extensive testing before implementation is critical to work out any operational issues.

Applications and Considerations

This style is ideal for landmark corporate headquarters, cultural institutions, and high-tech R&D facilities where a building’s design can communicate a brand’s commitment to innovation. It offers unparalleled flexibility, allowing a single space to be reconfigured for different uses, from an open-plan office to a partitioned event venue. The interactive potential can create immersive retail or museum experiences that captivate visitors.

However, the initial investment and long-term lifecycle costs are significant considerations. The complexity of mechanical and control systems demands specialized expertise in design, engineering, and construction. For adaptive reuse projects, integrating kinetic elements into historic structures is highly complex and often impractical, though interactive digital overlays can add a dynamic layer without altering the original fabric.

Comparison of 10 Contemporary Architecture Styles

Style 🔄 Implementation complexity ⚡ Resource requirements 📊 Expected outcomes ⭐ Key advantages 💡 Ideal use cases
Minimalist Architecture 🔄 Low — simple forms, disciplined detailing ⚡ Moderate — modest quantities, high-quality finishes 📊 Calm, spacious, low-maintenance interiors ⭐ Timeless aesthetic; cost-effective operation 💡 Residential, galleries, small commercial — invest in materials & lighting
Parametric Architecture 🔄 High — algorithmic workflows and iteration ⚡ High — specialized software, computational team, digital fabrication 📊 Complex, optimized forms; possible constructability trade-offs ⭐ Optimization, novel forms, material efficiency 💡 Signature projects, performance-driven facades — coordinate engineers early
Sustainable / Green Architecture 🔄 Moderate — integrated environmental systems ⚡ Moderate–High upfront — renewables, insulation, certifications 📊 Lower operating costs, reduced carbon footprint, healthier occupants ⭐ Long-term savings; marketability; environmental benefits 💡 Offices, housing, institutional projects — do site/climate analysis
Deconstructivism 🔄 High — fragmented geometry and detailed engineering ⚡ High — bespoke fabrication, skilled contractors 📊 Striking, iconic forms; potential functional compromises ⭐ Strong visual impact and cultural provocation 💡 Museums, cultural landmarks — ensure buildability and detailed docs
Biophilic Architecture 🔄 Moderate — integrates living systems and daylight strategies ⚡ Moderate — plants, irrigation, specialist maintenance 📊 Improved well‑being, productivity, urban biodiversity ⭐ Health and comfort benefits; restorative environments 💡 Workplaces, healthcare, residential — plan maintenance & native planting
Neo‑Brutalism 🔄 Moderate — heavy structural work, precise concrete detailing ⚡ Moderate — concrete-intensive, robust workmanship 📊 Monumental, durable presence with strong material expression ⭐ Durability; structural honesty; long lifespan 💡 Institutional or cultural buildings — use quality formwork and weather detailing
High‑Tech Architecture 🔄 High — exposed systems require tight coordination ⚡ High — advanced M&E, materials, specialist contractors 📊 Highly functional, adaptable buildings highlighting engineering ⭐ Systems integration; adaptability; performance transparency 💡 Airports, labs, tech hubs — document systems and plan maintenance access
Contextual / Vernacular Contemporary 🔄 Low–Moderate — adapts traditional methods to modern needs ⚡ Low–Moderate — local materials, community resources 📊 Strong cultural fit, climate-appropriate performance ⭐ Sense of place; lower embodied impact via local sourcing 💡 Regional housing, community buildings — engage local crafts and materials
Adaptive Reuse / Heritage Contemporary 🔄 High — surveys, code/heritage constraints, complex coordination ⚡ Moderate — renovation costs, heritage consultants, contingencies 📊 Preserved heritage, reduced embodied carbon, unique interiors ⭐ Environmental and cultural value; urban revitalization 💡 Conversions (warehouses, industrial) — thorough assessments and phased work
Kinetic / Interactive Architecture 🔄 Very High — moving systems, controls, realtime responsiveness ⚡ Very High — mechanical systems, sensors, ongoing maintenance 📊 Dynamic user experiences; responsive performance with reliability risk ⭐ Engagement, flexibility, optimized environmental control when reliable 💡 Pavilions, responsive facades, experimental buildings — define purpose and ensure robust maintenance

Building the Future: Choosing the Right Architectural Style

Navigating the diverse landscape of contemporary architecture can feel like learning a new language. As we've explored, each style, from the stark honesty of Neo-Brutalism to the flowing, nature-inspired forms of Biophilic design, offers a unique vocabulary to solve complex design problems. The journey through these distinct approaches reveals a powerful truth: style is never just about aesthetics. It is a strategic tool that directly influences a project's functionality, its relationship with its environment, and its ultimate financial performance.

The decision is not merely a choice between curved glass and exposed concrete. It's about selecting a framework that best aligns with your project's core objectives. The styles of contemporary architecture we've examined are responses to modern challenges-sustainability, urban density, technological integration, and a renewed desire for human-centric spaces.

From Theory to Tangible Assets

Understanding these styles is the first step; applying them effectively is what creates lasting value. For developers and property owners, especially in dynamic markets like South Carolina, this knowledge translates into tangible benefits.

  • Financial Performance: A project designed with Sustainable principles can significantly lower long-term operational costs, while a thoughtfully executed Adaptive Reuse can unlock immense value in an underutilized historic property, often leveraging tax incentives.
  • Market Positioning: A bold Deconstructivist or Parametric design can become a local landmark, attracting premium tenants and media attention. Conversely, a Contextual design can foster community goodwill and ease the approvals process in sensitive historic districts.
  • Future-Proofing: Embracing High-Tech or Kinetic Architecture isn't just about current trends. It's about building flexible, responsive structures that can adapt to the technological and social shifts of tomorrow, ensuring your asset remains relevant for decades.

The most critical takeaway is that these styles are not mutually exclusive. The most innovative projects often blend elements from different movements. Imagine a High-Tech office tower that integrates Biophilic principles to improve employee well-being, or an Adaptive Reuse project that uses Minimalist interiors to highlight historic textures. This synthesis is where true architectural excellence lies.

Actionable Next Steps: Aligning Vision with Execution

Selecting the right architectural direction is a foundational decision that impacts every subsequent phase of your project, from site planning and structural engineering to interior fit-outs and landscape design. It requires a partner who not only understands the visual language of these styles but also grasps their practical implications regarding building codes, material sourcing, energy performance, and constructability.

The styles of contemporary architecture provide a rich palette for creating buildings that are not only beautiful but also intelligent, efficient, and deeply connected to their purpose and place. Choosing the right approach is the first step toward building a legacy-one that respects its context, serves its occupants, and delivers a powerful return on investment. The future of our built environment is being shaped by these ideas, and by making informed choices today, you are actively participating in building a more inspiring and resilient tomorrow.


Ready to translate these architectural concepts into a successful project? The team at Sherer Architects, LLC specializes in navigating the complexities of contemporary design, from adaptive reuse in historic contexts to innovative new construction. We transform your vision into a built reality that is both strategic and inspiring. Visit us at Sherer Architects, LLC to see how we can bring our expertise to your next venture.

Categories
Uncategorized

A Practical Guide to the Financial Study of Feasibility in Real Estate

Before you even think about building, you need to answer one fundamental question: Will this project actually make money? A financial feasibility study is the tool that gets you there. It’s a hard-nosed, objective look at whether a real estate idea is economically viable, moving beyond gut feelings to a data-driven go/no-go decision.

This isn't just about crunching numbers. It's about stress-testing your vision against the realities of costs, revenues, and market risks.

Defining the Scope of Your Real Estate Project

A person works on architectural blueprints and a laptop, with a house model and coffee cup on a table.

Every successful financial analysis begins with a crystal-clear vision. Vague concepts like "a new retail space" just won't cut it. You need to draw a firm box around your idea, defining exactly what you want to build, who it's for, and the physical and financial constraints you're working within.

This step has never been more important. With business failures on the rise—the Bureau of Labor Statistics reports that 20.8% of businesses don't survive their first year—validating your concept is non-negotiable. Many of these failures happen because there was no real market need for the product. Your feasibility study is how you avoid becoming a statistic.

Gathering Your Core Inputs

To build a reliable financial model, you need to start with real-world data. These core inputs are the foundation of your entire analysis, and getting them right upfront saves you from costly rework and bad assumptions down the road.

Before you open a spreadsheet, you need to have answers to some critical questions:

  • What can you legally build? This comes down to zoning and entitlements. You need to know the local height restrictions, setback requirements, parking ratios, and land-use rules.
  • What are you building on? You'll need site-specific data from topography surveys, geotechnical reports, and environmental assessments (like a Phase I ESA). You don't want to discover contaminated soil or a high water table after you've already invested heavily.
  • What will the building actually do? These are your program requirements. Define the gross square footage, the number of residential units or commercial tenants, and the specific amenities your target market expects.

A solid commercial real estate market analysis is the first, most crucial step. It helps you understand what the market wants, validating your program before you go any further.

To get organized, it helps to have a checklist of the data you need to pull together.

Initial Data Checklist for Your Feasibility Study

Here's a quick rundown of the essential information you'll need to collect before you can build a meaningful financial model.

Category Key Data Points Example
Site & Legal Zoning designation, allowable uses, height limits, setbacks, parking requirements, entitlements process. "C-2 Commercial zoning allows for retail on the ground floor and 100 units."
Physical Data Topography survey, geotechnical report, Phase I Environmental Site Assessment (ESA), utility maps. "Geotech report indicates soil requires deep foundations, increasing costs."
Program & Market Target market, gross square footage (GSF), number of units/tenants, proposed amenities, market rents. "150-unit luxury apartment building with a pool, gym, and co-working space."
Existing Building (For adaptive reuse) As-built drawings, structural assessment, historical designation status. "The historic warehouse has original windows that must be restored, not replaced."

Having this information on hand transforms your study from a guessing game into a strategic planning tool.

A project's scope is its constitution. It sets the laws and boundaries for every subsequent decision. Without a well-defined scope, your financial projections are built on a foundation of sand, vulnerable to the slightest pressure.

The Power of a Clear Vision

Think about the difference here. One developer has a vague goal to build "an office building." Another has a sharply defined project: "a 50,000-square-foot, Class A office building targeting tech startups, featuring collaborative open-plan spaces, a rooftop terrace, and LEED Silver certification." The second vision is a real roadmap, giving you everything you need for accurate cost estimates and revenue projections.

This clarity is even more critical for an adaptive reuse project. You're not starting with a blank canvas. If you're turning an old warehouse into loft apartments, you have to meticulously document the building's existing condition—its structural quirks, historical significance, and material limitations. A detailed assessment of the facade, windows, and interior columns will tell you what you can keep and what you have to replace, which has massive financial consequences.

Nailing the scope from the very beginning ensures every dollar in your pro forma is tied to an achievable, real-world plan.

Nailing Down Your Hard and Soft Project Costs

A calculator, financial documents, and a laptop on a desk with a banner stating 'HARD & SOFT COSTS'.

Any credible feasibility study lives or dies by its budget. Your project costs are the biggest variable you'll have to wrestle with, and they fall into two main buckets: hard costs and soft costs. Getting a handle on what goes into each is the first real step toward building a budget that won't crumble under pressure.

Hard costs are all the tangible, physical things you spend money on during construction. Think bricks, steel, drywall, and the labor to put it all together. These are the costs for everything you can literally see and touch, and they make up the lion's share of your construction budget.

Soft costs, on the other hand, are the less obvious—but just as vital—expenses. This category covers everything from your architect’s design fees and engineering plans to the legal paperwork, city permits, and the interest on your construction loan. I've seen more projects get derailed by underestimating these costs than almost any other factor.

Detailing the Hard Costs

To get a grip on hard costs, you have to start with a detailed breakdown of materials and labor. For a new commercial building, that means pricing out foundations, framing, roofing, HVAC systems, and all the interior finishes.

Adaptive reuse projects, like turning an old warehouse into loft apartments, throw a few curveballs. Here, your hard costs have to include things like selective demolition, critical structural repairs, asbestos abatement, and maybe even highly specialized work like restoring historic windows to meet preservation standards.

The best way to get reliable numbers is to bring a general contractor into the loop early. Hand them your preliminary drawings and scope of work to get an initial "cost per square foot" estimate. For instance, a contractor might give you a ballpark of $200 per square foot for a basic office upfit. But that number could easily jump to $275 per square foot or more for a high-end restaurant build-out that requires custom millwork and a full commercial kitchen.

You absolutely have to build in a contingency for things you can't control. A sudden spike in steel prices or a shortage of skilled electricians can blow a hole in the most carefully planned budget. A hard cost contingency of 5-10% isn't just a good idea; it's a non-negotiable part of any responsible financial model.

Unpacking the Often-Overlooked Soft Costs

Soft costs are the silent budget killers. While you can create a pretty straightforward list for hard costs, soft costs are more varied and can add up alarmingly fast. They typically represent 25-30% of total project costs, so getting this part wrong can be a fatal error in your analysis.

Let's pull back the curtain on the usual suspects in this category:

  • Professional Fees: This is your A-team—architects, structural and civil engineers, interior designers, and any specialized consultants you might need, like landscape architects or AV experts.
  • Permits and Approvals: The fees for building permits, zoning applications, utility tap-ins, and municipal impact fees can be surprisingly high and vary wildly from one city to another.
  • Financing and Legal: Don't forget the loan origination fees, interest carry on the construction loan, appraisal costs, and the legal fees for setting up your LLC, reviewing contracts, and closing the deal.
  • Insurance: Builder's risk insurance and general liability are significant line items you can't go without.

Think about an adaptive reuse project targeting Historic Tax Credits. Your soft costs will instantly expand to include a historic preservation consultant, fees for the extensive National Park Service documentation, and higher architectural fees to navigate the complex design requirements. If you miss those specialized costs, your feasibility study is fiction.

Many projects look fantastic on paper until the full weight of soft costs is factored in. Diligent tracking of these "invisible" expenses is what separates a successful development from a financial cautionary tale.

Building a Bulletproof Budget

To assemble a truly comprehensive budget, you need a detailed line-item spreadsheet that clearly separates hard and soft costs. Resist the temptation to lump items together. Instead of a single line for "Permits," break it down into "Building Permit Fee," "Zoning Variance Application," and "Sewer Connection Fee." This level of detail forces you to do your homework and find the actual costs instead of just plugging in a guess.

Finally, just like with hard costs, you need a separate contingency for the soft side. A 10% soft cost contingency can be a lifesaver when you run into an unforeseen legal snag or a drawn-out design review process with the city. By meticulously accounting for every expense—both the obvious and the hidden—your financial feasibility study transforms from an academic exercise into a powerful, real-world decision-making tool.

Building a Realistic Pro Forma and Revenue Model

A laptop displaying financial charts and data, alongside a 'Revenue Model' document and a small plant.

Alright, you've nailed down your costs. Now it's time to bring your project's financial story to life with the pro forma. This is more than just a spreadsheet; it's a dynamic financial model that maps out your development's performance over a 5- to 10-year horizon. This is where your hard-won cost estimates finally meet your revenue projections to show investors if the deal pencils out.

The pro forma is the grand central station for all your data—hard costs, soft costs, financing terms, revenue streams, and operating expenses—all flowing into one powerful narrative. It translates your architectural vision and market research into the language of finance, forecasting potential returns, cash flow, and profitability. I've seen great projects die because of a flimsy pro forma and complex deals get funded on the strength of a well-defended one.

Developing Defensible Operating Assumptions

Before you can even think about revenue, you have to get real about what it's going to cost to run the building once it’s stabilized. These operating expenses are the day-to-day costs that will chip away at your gross income. Underestimate them, and you’re setting yourself up for dangerously optimistic—and frankly, unbelievable—return projections.

Your operating assumptions have to be grounded in reality, not wishful thinking. So, let’s list out every anticipated expense.

  • Property Management Fees: Expect to pay 4-10% of effective gross income. This covers the day-to-day grind of managing the property, from chasing down rent to dealing with tenant issues.
  • Repairs and Maintenance: This is for the routine stuff—leaky faucets, HVAC servicing, landscaping. A solid rule of thumb is to budget 1-3% of the property's value every year.
  • Property Taxes: This is often one of your biggest line items. You can't just guess. You need to dig into local millage rates and assessment practices to get a real number.
  • Insurance: Property and liability insurance are absolutely non-negotiable. Get quotes from a commercial insurance broker based on your building's specifics.
  • Utilities: In commercial properties with triple-net (NNN) leases, tenants usually cover their own utilities. But for multifamily or gross lease deals, the owner is on the hook. You have to budget for water, sewer, trash, and common area electricity.

Remember to tailor these assumptions to your specific project. An adaptive reuse of a historic building might come with higher maintenance costs for preserving original materials or servicing specialized systems—that has to be in your model. Forgetting to budget for something as simple as annual window washing on a mid-rise can throw your net operating income (NOI) off track.

Projecting Revenue with Market Data

With expenses mapped out, let's shift to the top line: revenue. Your projections must be built on a foundation of current, verifiable market data. This is where you prove that people will actually pay the rents you need to charge.

Start by digging into comparable properties, or "comps," in your specific submarket. For a multifamily project, that means looking at the price per square foot for similar unit types—studios, one-bedrooms, etc. For commercial space, you're analyzing rental rates for similar office, retail, or industrial properties. Don't just look at what landlords are asking for; find out what leases are actually being signed for. There can be a big difference.

Another crucial metric is the absorption rate—the pace at which available units are getting leased up. If you're entering a market with high vacancy and slow absorption, you must model a longer lease-up period. That means more months of carrying costs before the property stabilizes and starts printing money.

Your pro forma is a story you're telling to investors and lenders. Every number, from your assumed rent growth to your vacancy rate, must be a defensible chapter in that story, backed by credible market evidence.

Don't forget to look for secondary income sources. For a residential building, this could be fees for parking, storage units, pet rent, or applications. In a commercial project, you might generate revenue from signage or by leasing rooftop space to a telecom company. These streams might seem small, but they add up and can really polish your overall return profile.

Finally, you have to consider the human element of your target market. For instance, projects in areas with lower financial literacy can face unique hurdles. The IMF's Financial Access Survey shows a clear link between financial literacy and the ability to adopt new financial services. This suggests that in some markets, you might even need to budget for tenant education to ensure long-term stability and on-time payments. To dig deeper into this, you can find insights from the IMF Financial Access Survey. Building a truly realistic model means looking beyond the numbers to the people who will actually live or work in your space.

Securing Financing And Leveraging Incentives

With a solid pro forma in hand, your project stops being just an idea and becomes a real investment opportunity. This is where the rubber meets the road—it’s time to secure the capital to bring your vision to life. Navigating the world of real estate financing can feel like a maze, but your financial feasibility study is the map that will guide you and, more importantly, convince lenders and investors to come along for the ride.

Think of your study as the project's official resume. It’s the first thing a lender will look at to gauge risk and decide if your numbers hold up under scrutiny.

Navigating The Capital Stack

Very few real estate deals get funded by a single check. Instead, you'll build a "capital stack," which is just a fancy way of saying you're layering different types of money from different sources. Imagine it as a pyramid: the most secure money sits at the wide base, and the riskiest—but often most profitable—sits at the peak.

  • Senior Debt: This is your main loan, usually a construction loan from a bank. It’s the biggest piece of the puzzle, typically covering 60-75% of your total project costs. Lenders will tear apart your feasibility study—from your cost estimates to your rent roll—before they sign off on this.

  • Mezzanine Debt: This is a secondary, more expensive loan that bridges the gap between your senior debt and the cash you're putting in. It's riskier for the lender, so it comes with higher interest rates. You might use this if you want to keep more of your own cash out of the deal.

  • Equity: This is the skin in the game. It’s the cash you or your partners contribute. You’re in the riskiest position here, but you also stand to gain the most if the project is a home run. Equity can come from your own pocket, a joint venture (JV) partner, or a pool of private investors.

The way you structure this stack has a massive impact on your bottom line. A project loaded with pricey mezzanine debt needs much stronger revenue to pencil out compared to one funded with a healthier slice of equity.

The Power Of Government Incentives

Beyond the usual bank loans and investor cash, government incentives can completely rewrite your project's financial story. These programs exist to encourage specific kinds of development, like breathing new life into a historic neighborhood or building much-needed affordable housing. For a developer, they can be a total game-changer.

One of the most powerful tools out there, especially for the adaptive reuse projects we're talking about, is the Federal Historic Tax Credit (HTC) program. This isn't a deduction; it's a direct, dollar-for-dollar credit against your federal tax bill, equal to 20% of your qualified rehabilitation expenses.

Don't think of incentives like Historic Tax Credits as just a nice little bonus. On many deals, they are the critical ingredient that makes an otherwise marginal project not just possible, but profitable.

Let's put that into perspective. On a $5 million historic renovation, the HTC could generate a $1 million tax credit. Developers often "sell" these credits to large investors who need to lower their tax liability, generating a huge chunk of upfront cash equity for the project. That infusion of capital can dramatically reduce the amount of debt you need to take on or the amount of cash you have to pull out of your own pocket.

Comparing Common Financing Sources and Incentives

To build a strong capital stack, you need to understand how traditional financing and government incentives can work together. Each plays a distinct role in getting your project funded and across the finish line.

Type Primary Function Example Impact on Feasibility
Senior Debt Provides the bulk of the project's capital for construction and stabilization. Traditional Bank Construction Loan The foundation of the capital stack; lower interest rates but stricter lending criteria.
Mezzanine Debt Fills the gap between senior debt and equity. Subordinated Loan from a Private Lender Increases leverage but adds significant interest costs, requiring stronger returns.
Investor Equity Provides the "at-risk" capital and secures ownership. Joint Venture (JV) Partnership Reduces the developer's cash requirement but dilutes ownership and future profits.
Historic Tax Credits Generates cash equity by monetizing a federal tax incentive. Federal 20% HTC Program Directly reduces the equity gap, making tough historic preservation deals viable.
New Markets Tax Credits Encourages investment in low-income communities. NMTC Allocation from a CDE Provides a significant subsidy, often enabling projects that otherwise wouldn't pencil.
TIF / Public Grants Provides direct public funding for infrastructure or specific project costs. Tax Increment Financing (TIF) District Can cover major costs like public improvements or environmental remediation, lowering the overall budget.

As you can see, these tools aren't mutually exclusive. The most successful projects often weave together multiple sources to create the most resilient and profitable financial structure possible.

Positioning Your Project For Approval

At the end of the day, lenders and investors hate surprises. They are fundamentally risk-averse. They need to see a clear, logical, data-driven story that shows how they will get their money back, plus a return. Your financial feasibility study is what tells that story.

A lender wants to see that you've sweat the details and built a realistic plan. This goes beyond just your numbers. Stable government policy, for example, is a critical but often overlooked factor. The Principal Financial Group's Global Financial Inclusion Index noted that while access to credit is getting better, policy confusion can hinder growth. This highlights just how crucial predictable incentive programs are for a project's financial health. You can read more about these findings in the 2025 research from Principal.

By digging into all the financing options and strategically layering in available incentives, you can build a capital stack that not only makes your project more attractive to funders but also drastically de-risks the entire venture from day one.

Analyzing Risk to Make a Confident Go/No-Go Decision

You’ve built the pro forma, lined up the financing, and the project looks fantastic—on paper. But the real world is rarely as clean as a spreadsheet.

This is where you move from forecasting to stress-testing. The final, critical step in any real-world financial feasibility study is to deliberately try and break your own model. You have to confront the risks head-on to make a confident go/no-go decision.

A static financial model gives you a single snapshot of a possible future. A proper risk analysis turns that snapshot into a full-length movie with multiple potential endings. It prepares you for the inevitable plot twists that come with development, like a sudden market downturn, construction delays, or unexpected cost surges.

Stress-Testing Your Model With Sensitivity Analysis

The first tool you’ll want to grab is sensitivity analysis. The entire process is built around asking one simple question: "What if?" It’s a systematic way to test how sensitive your key financial metrics—like your Internal Rate of Return (IRR) or cash-on-cash return—are to changes in your core assumptions.

Instead of working with just one set of numbers, you create a range of scenarios. Think of it as a base case, a best case, and a worst case. This shows investors you’ve thought through the entire spectrum of possibilities, not just the rosy one.

Here are a few critical variables I always test:

  • Construction Costs: What happens to your IRR if hard costs jump by 5%? What about 10%? In today’s world of supply chain issues and labor shortages, this isn’t just a theoretical exercise.
  • Lease-Up Velocity: What if it takes six months longer than you planned to reach stabilized occupancy? You need to see how that delay impacts your loan carry and initial cash flow.
  • Market Rents: Let’s say rents come in just $1.00 per square foot lower than your projections. At what point does the deal stop making sense? You need to know that number.
  • Exit Cap Rate: What if the market softens and your exit cap rate increases by 50 basis points when you plan to sell? This one variable can dramatically impact your final profit.

By plugging these different values into your pro forma, you can see exactly which assumptions pose the greatest threat to your project’s profitability. If a tiny tweak in one variable causes a massive swing in your returns, you've just found a major vulnerability that needs a solid mitigation plan.

Finding Your Tipping Point With Break-Even Analysis

While sensitivity analysis explores a range of outcomes, break-even analysis is all about identifying a single, crucial data point: the absolute minimum performance required for your project to survive.

It answers the gut-check question, "What is the lowest occupancy rate or rental rate we can hit and still pay our bills?"

This isn't about making a profit; it's about staying solvent. You’re calculating the exact point where your total revenues equal your total expenses, including that all-important debt service.

A break-even analysis strips away the optimism from your projections and reveals the project's financial floor. Knowing this number gives you a clear line in the sand—a benchmark you must exceed to keep the lights on.

For a commercial real estate project, we often express this as a break-even occupancy rate. For instance, you might run the numbers and find that you need to be 85% leased just to cover the mortgage, property taxes, insurance, and operating expenses. Anything below that, and you're losing money every single month. That insight is invaluable for setting leasing targets and understanding the real-world pressure of your loan.

This decision tree gives a high-level view of the funding paths you might consider, each leading to different outcomes for your capital stack and ownership structure.

Flowchart illustrating a project funding decision tree, guiding choices based on capital size and ownership share.

As the chart shows, a project's needs—from the sheer size of the capital required to how much ownership you're willing to dilute—will point you toward the most logical financing strategy, whether it’s traditional debt, partnerships, or specialized incentives.

Making the Final Call With Decision Criteria

After all the analysis, it’s time to make the call. Your risk assessment gives you the data, but you still need a clear framework to interpret it. The go/no-go decision ultimately boils down to whether the projected returns are worth the risks you're taking on.

Most experienced developers and investors I know rely on three primary metrics to make this final judgment:

  1. Internal Rate of Return (IRR): This is the annualized rate of return the project is expected to generate. A higher IRR is obviously better, but the key is to compare it against your "hurdle rate"—the minimum acceptable return you've set for a project with this specific risk profile.
  2. Net Present Value (NPV): NPV calculates the value of all future cash flows (both positive and negative) in today's dollars. It’s simple: if the NPV is positive, the project is expected to generate more value than it costs. That makes it a financially sound decision.
  3. Cash-on-Cash Return: This is a straightforward metric that measures the annual pre-tax cash flow you receive as a percentage of the total cash you invested. It gives you a clear picture of the return on your actual equity in the deal, which is critical for evaluating performance during the operational phase.

By stress-testing your assumptions and measuring the outcomes against these established criteria, you turn your financial study from a static report into a powerful, dynamic decision-making tool. It's this rigorous process that gives you the clarity and confidence to either walk away from a bad deal or move forward on a great one with your eyes wide open.

Common Questions About Real-World Feasibility Studies

Even with a clear road map, some questions always pop up—from first-time developers and seasoned pros alike. Getting a handle on these common queries helps take the mystery out of the process and really drives home why this upfront work is so critical. Let's dig into some of the most frequent questions I hear.

Feasibility Study vs. Business Plan: What's the Real Difference?

This is a classic, and the distinction is crucial. Think of a financial feasibility study as the investigative work you do before even thinking about breaking ground. Its entire job is to answer one fundamental question: "Does this project actually make financial sense?" It’s all about scrutinizing costs, potential revenue, and all the things that could go wrong to see if an idea is truly viable.

A business plan, on the other hand, comes after you've decided the project is a go. It’s the strategic playbook that answers, "Okay, how are we actually going to pull this off?" It gets into the weeds of operations, marketing, and the financial strategy for bringing the approved project to life.

In short, the feasibility study is the detective asking if a crime was committed; the business plan is the architect drawing up the blueprints for the new building.

What's the Price Tag for a Professional Financial Feasibility Study?

Honestly, it's all over the map and depends entirely on how big and knotty your project is.

  • Smaller Projects: If you're looking at a straightforward commercial upfit or a small handful of residential units, you're probably in the $3,000 to $15,000 range.
  • Mid-Sized Developments: For something more complex, like a mid-sized mixed-use building, the cost can climb to anywhere from $15,000 to $50,000.
  • Large-Scale Projects: When you get into massive, intricate developments with layered financing, multiple phases, or major public incentives, the cost can easily blow past $50,000.

It's tempting to see this as just another expense, but that's the wrong way to look at it. This is an investment. Spending this cash upfront can save you from a catastrophic financial loss on a project that was doomed from the start.

What Are the Biggest Mistakes People Make?

I see the same missteps time and again. The number one mistake, without a doubt, is overly optimistic revenue projections. People fall in love with their idea and assume rents or sales prices that just aren't supported by hard market data. Right behind that is underestimating soft costs—that’s a classic budget-killer.

The most dangerous trap is confirmation bias. It's human nature to look for data that confirms what you want to be true, instead of objectively assessing what is true. You have to constantly challenge your own assumptions and put your numbers through the wringer.

Using old market research or, even worse, skipping a thorough sensitivity analysis are also huge red flags. If your study doesn't include a believable "worst-case" scenario, it’s not finished. For a wider view, you can check out a comprehensive guide on conducting feasibility studies that also dives into market demand and technical issues.

Can I Just Use a Template for My Study?

Templates can be a great place to start. They give you a framework for organizing your costs, revenue, and key metrics, which helps make sure you don't forget a major category.

But let me be clear: a template is not a substitute for project-specific research and analysis. Every single real estate deal is a unique puzzle of site conditions, local market quirks, zoning laws, and construction variables. A generic spreadsheet can't capture any of that nuance.

So, use a template as your guide for structure, but make sure every single number you plug into it is customized, researched, and rigorously tested for your project. Your final report needs to be a bespoke document, not a fill-in-the-blanks homework assignment.


At Sherer Architects, LLC, we guide developers and investors through these critical questions every day. Our deep experience in commercial, adaptive reuse, and historic preservation projects means your financial study is built on decades of real-world design and construction knowledge. Let us help you build a solid foundation for your next project.

Learn more about our architectural services

Categories
Uncategorized

How to Calculate Construction Cost Per Square Foot Accurately

Calculating the cost per square foot of a commercial construction project is pretty straightforward in principle. You just add up every single project expense—from materials and labor to permits and design fees—and divide that grand total by the building's Gross Floor Area (GFA). But the devil, as they say, is in the details.

This figure is the foundational benchmark for budgeting almost any commercial project, giving everyone from investors to contractors a standardized way to compare apples to apples.

Understanding Per-Square-Foot Construction Costs

Architectural blueprints, calculator, ruler, and grass with 'COST PER SQ FT' text for construction planning.

Before you can build an accurate budget, you have to get a real feel for what 'construction cost per square foot' actually represents. It’s not just a number on a spreadsheet; it’s a vital sign that reflects a project's location, complexity, and overall quality. Think of it as the financial pulse of your build—a quick but powerful snapshot of the investment you're looking at.

This single metric is the bedrock of financial planning in commercial real estate. It creates a common language for developers, architects, and contractors to talk about budgets. Whether you're trying to figure out if a new office tower is feasible or pricing out an adaptive reuse project, the per-square-foot cost is the universal starting point for every important conversation.

What Drives the Cost Per Square Foot

That final dollar figure is the result of a ton of different variables. Every single decision, from the type of structural steel you use to the light fixtures in the lobby, has a price tag attached. Understanding what drives these costs is the first real step toward building an estimate you can stand behind.

The main factors that can make this number swing wildly are:

  • Building Type and Use: A simple, open-plan warehouse will always have a much lower cost per square foot than a sophisticated medical facility packed with specialized MEP (Mechanical, Electrical, and Plumbing) systems.
  • Quality of Finishes: The difference between standard-grade carpet and high-end terrazzo flooring can be massive. These choices can easily double the cost for certain parts of a project.
  • Project Complexity: A basic rectangular building on a flat, prepped lot is one thing. A uniquely designed structure on a tight urban site with challenging soil conditions is a whole different ballgame—and a much more expensive one.
  • Geographic Location: Labor rates in New York City are not the same as in Omaha. Material availability, shipping costs, and local regulations all vary significantly from one city to another, hitting your bottom line directly.

As a general rule, commercial construction costs can range anywhere from $240 to $870 per square foot nationally as of 2024. Healthcare facilities are often at the top end, running from $450 to $1,020 per square foot thanks to strict regulations and the need for highly specialized medical systems.

You'll also see major regional differences. The Northeast is almost always the most expensive region to build in, while the South tends to be the most cost-effective. These numbers show that you can't just slap a single, uniform rate on a project; you have to dig into the specifics. You can discover more insights about average commercial construction costs to see how your project stacks up.

The table below breaks down the key factors that influence your per-square-foot costs and the kind of impact you can expect from each.

Key Drivers of Construction Cost Per Square Foot

Factor Description Typical Impact on Cost
Building Type The intended use of the building (e.g., office, retail, warehouse, medical). High
Location The geographic region, city, and specific site of the project. High
Material Quality The grade of materials and finishes specified (e.g., standard vs. luxury). Medium to High
Project Complexity The intricacy of the design, structural system, and site conditions. Medium to High
Labor Rates Prevailing wages for skilled and unskilled labor in the local market. Medium
Site Conditions The existing state of the land, including soil quality, topography, and access. Low to Medium

Understanding these drivers is crucial because they directly inform how you'll put together a realistic budget.

Key Takeaway: The cost per square foot isn't a fixed price—it's a dynamic budgeting tool. It's an average built from countless individual costs, and its real value comes from understanding the pieces that make it up.

By breaking down these primary cost drivers first, you create a solid framework for the more detailed calculations to come. This turns a fuzzy concept into a financial plan you can actually work with. With this foundation in place, we can move on to categorizing the specific expenses.

Building Your Cost Framework from the Ground Up

A reliable estimate starts with a solid framework for organizing your expenses. To get an accurate cost per square foot, you need a practical system for categorizing every dollar—it's the single best way to prevent costly oversights down the road.

Let's move past generic lists and group your project costs into three core buckets. Think of this as your master checklist, something you can use to gather detailed quotes and pull from your historical data. This structured approach helps you build a defensible cost basis before you even touch a calculator.

The three primary categories are:

  • Hard Costs: The tangible, physical parts of the building.
  • Soft Costs: The intangible but essential services and fees.
  • Site Development Costs: All the work needed to get the land ready for construction.

Breaking Down Hard Costs

Hard costs are usually the most straightforward expenses. They represent the physical materials and labor that go directly into the building itself—the line items you can actually see and touch. This is the core of your construction budget.

For a typical commercial project, hard costs include things like:

  • Structure: Concrete foundations, structural steel, and framing.
  • Exterior: Roofing systems, windows, doors, and facade materials.
  • Interior Finishes: Drywall, flooring, paint, ceilings, and millwork.
  • MEP Systems: All mechanical, electrical, and plumbing infrastructure.
  • Specialty Equipment: Elevators, built-in kitchen equipment, or manufacturing machinery.

You'll source these costs from subcontractor bids and material supplier quotes. While they're the easiest to quantify, remember they're also highly susceptible to market volatility and inflation.

Accounting for Soft Costs

While hard costs build the structure, soft costs are what make the project possible in the first place. These are the indirect, often intangible expenses needed to plan, design, and manage the whole process. Overlooking them is a common and very expensive mistake.

Soft costs are the "brains" of the operation. They represent the professional services and administrative hurdles you must clear before a single shovel hits the ground and long after the last nail is hammered.

Key soft costs to budget for include:

  • Architectural & Engineering Fees: Payments to your design professionals.
  • Permits & Inspection Fees: Costs paid to local authorities for approvals.
  • Insurance: Builder's risk, general liability, and other necessary policies.
  • Legal & Accounting Fees: Professional services for contracts and financial oversight.
  • Project Management Salaries: If you have an in-house team managing the build.

These are often estimated as a percentage of total hard costs, but it’s always better to get direct proposals from each professional service provider to dial in your numbers.

Don't Forget Site Development

Site development costs cover everything required to prepare the land and hook it up to public services. For raw, undeveloped land, these expenses can be substantial and need to be accounted for separately from the building's direct hard costs.

To build a robust cost framework, it's essential to understand various pricing methodologies like cost-plus, unit pricing, and markup. Having a firm grasp on these concepts helps you better evaluate bids from excavation and landscaping contractors. You can explore a detailed guide to pricing in construction projects to sharpen your knowledge here.

Site development usually involves:

  • Earthwork: Excavation, grading, and soil compaction.
  • Utilities: Tapping into water, sewer, gas, and electrical lines.
  • Paving & Landscaping: Driveways, parking lots, sidewalks, and greenery.
  • Demolition: If an existing structure needs to be removed first.

These figures can vary wildly depending on the site's condition. A flat, clear lot will have minimal site costs, whereas a sloped, rocky site in a dense urban area will require a significant budget.

Finally, you have to factor in historical cost inflation. Material costs saw dramatic increases between 2018 and 2023, with escalation rates surging as high as 50-85 percent in 2023 alone. Labor costs followed different patterns but also saw steady increases. For instance, an industrial warehouse that costs $95-$139 per square foot in 2025 would have been substantially cheaper just two years prior due to these cycles. You can learn more about historical cost inflation trends to help you forecast more accurately.

Putting the Calculation into Practice with Real Scenarios

Theory is great, but the real test is applying these numbers to actual projects. Let’s dive into two very different commercial scenarios to see how this framework holds up in the wild. By comparing a brand-new build with an adaptive reuse project, you'll get a feel for how the core formula flexes to meet wildly different challenges.

First, it helps to visualize how the main cost buckets fit together. Think of it as a hierarchy of expenses that all funnel into your final number.

Flowchart illustrating construction cost breakdown into hard, soft, and site costs with examples.

As you can see, the hard costs, soft costs, and site costs all come together to form the total project budget—the number we'll use to get our final per-square-foot metric.

Example 1: New Suburban Office Building

Let's say we're putting up a two-story, Class A office building in a suburban business park. The first thing we need to nail down is the project's Gross Floor Area (GFA). This is crucial—it includes all the space within the building's exterior walls, not just the leasable tenant areas.

  • Building Footprint: 15,000 square feet
  • Number of Floors: 2
  • Total GFA: 30,000 square feet

With our GFA locked in, we can start plugging in some realistic numbers. A ground-up project like this on undeveloped land will have some serious site development costs, which we need to account for.

Let's Break Down the Costs:

  • Hard Costs: This is the big one—the money for bricks and mortar. It covers everything from the foundation and steel frame to the rooftop HVAC units and interior finishes. For a modern 30,000 sq. ft. office, a solid hard cost estimate is $7,500,000.
  • Soft Costs: These are all the professional services and administrative hurdles. We're talking architectural design, engineering, permits, legal fees, and insurance. A good rule of thumb is 25-30% of hard costs, so let's pencil in $2,250,000.
  • Site Development Costs: Building on a raw suburban lot means major site work. This isn't just a line item; it's a huge part of the budget that covers earthwork, running utilities, paving a massive parking lot, and landscaping. We'll allocate a hefty $1,500,000 for this.

Now, we just add it all up to get our total project cost.

Total Project Cost = Hard Costs + Soft Costs + Site Costs
$7,500,000 + $2,250,000 + $1,500,000 = $11,250,000

Finally, the moment of truth.

Cost per Square Foot = Total Project Cost / GFA
$11,250,000 / 30,000 sq. ft. = $375 per square foot

This single number becomes an incredibly powerful benchmark for the project's financial feasibility from day one.

Example 2: Urban Warehouse Adaptive Reuse

Now for something completely different. Imagine we're converting an old, 20,000-square-foot urban warehouse into a high-end retail space. This kind of adaptive reuse project brings its own unique financial puzzle, with a heavy emphasis on demolition, structural upgrades, and sometimes even historic preservation.

The GFA is easy since we're working within an existing shell: 20,000 square feet.

Here, the cost profile flips. Site development is minimal—we've got the existing footprint and utilities. The hard costs, however, are where the complexity lies. We have to budget for selective demolition, potential asbestos or lead paint abatement, and major structural work to bring the old building up to modern code.

Let's Break Down the Costs:

  • Hard Costs: The budget has to cover gutting the interior, beefing up the structure, installing brand-new MEP (mechanical, electrical, plumbing) systems, and adding premium retail finishes. A realistic budget here would be $4,000,000.
  • Soft Costs: Designing for an adaptive reuse project is often more complex and requires specialized consultants to navigate the existing conditions. We’ll budget $1,400,000 to cover these expert fees and associated costs.
  • Site Development Costs: We don't have to do much outside. Maybe some minor sidewalk repairs and utility tie-ins. A modest $100,000 should cover it.

Adaptive reuse projects often trade lower site development costs for higher hard costs related to demolition, remediation, and structural retrofitting. It's a different financial puzzle, but the same calculation principles apply.

Let's run the numbers for the total cost.

Total Project Cost = Hard Costs + Soft Costs + Site Costs
$4,000,000 + $1,400,000 + $100,000 = $5,500,000

And now for the final cost per square foot.

Cost per Square Foot = Total Project Cost / GFA
$5,500,000 / 20,000 sq. ft. = $275 per square foot

By walking through these two scenarios, you can see how the same simple formula gives you the power to analyze and compare vastly different projects. The magic isn't in the formula itself, but in building a detailed, realistic cost framework tailored to the specific DNA of each job.

How to Refine Your Estimate for True Accuracy

Your initial calculation is a great starting point, but let’s be honest—it’s just a draft. To turn that raw number into a budget that can withstand the pressures of a real project, you have to layer in some critical adjustments. This is where a good estimate evolves into a truly reliable financial forecast.

The process involves accounting for the variables that always come into play: location, time, and the inevitable unknowns. We'll walk through three essential refinements: regional cost adjustments, market escalation, and strategic contingency planning. Getting these right will give your budget the resilience it needs to hold up under scrutiny.

Adjusting for Regional Cost Differences

Construction costs are anything but uniform. The same office building that costs $350 per square foot in one city could easily run you $500 per square foot just a few hundred miles away. Why the huge gap? It all comes down to local labor rates, material availability, and even regional regulations.

To nail down a realistic local number, you need a location-based cost index. These indices give you multipliers that let you adjust a national average cost to your specific city or zip code. For example, if the national average index is 100 and your city's index is 115, you'd multiply your base estimate by 1.15. Simple, but crucial.

This isn’t a step you can afford to skip. Between 2020 and 2023, global construction markets saw massive cost swings. As of 2024, New York City remains the most expensive market in the world, averaging around $532 per square foot. That really drives home how vital it is to understand geographic disparities. You can dig deeper into global construction cost performance to see just how much markets can differ.

Factoring in Market Escalation

The price you calculate today is not the price you’ll pay six or twelve months from now. That’s a guarantee. The costs for materials, labor, and even fuel are always moving targets. Escalation is how you project these future cost increases to protect your budget from getting blindsided by market volatility.

To apply an escalation factor, you have to do some homework. Research current market trends for key commodities like steel, lumber, and concrete, and look at local labor wage forecasts. If industry analysts are predicting a 4% annual increase in construction costs and your project is on a one-year timeline, you should build that 4% right into your total estimate.

This is especially critical for long-term, multi-phase projects where the risk of inflation is much higher. Ignoring escalation is like planning a budget with yesterday's prices—it's a recipe for coming up short.

Planning for the Unexpected with Contingency

No project goes perfectly to plan. It's just the nature of the business. You might hit unforeseen rock during excavation, uncover hazardous materials in a demolition, or get hit with a week of non-stop rain. A contingency fund is your dedicated buffer, set aside specifically to cover these curveballs.

Contingency isn't "extra" money; it's a calculated buffer against risk. It’s the difference between a project that can absorb a surprise and one that gets derailed by it.

A standard contingency usually falls between 5% and 15% of your total hard and soft costs. The right percentage really depends on the project's complexity and risk profile:

  • Low-Risk Projects (5-7%): Think simple new builds on a clear site with a complete set of design documents.
  • Medium-Risk Projects (8-12%): This is more for renovations or projects with some design ambiguity or site challenges.
  • High-Risk Projects (13-15%+): Reserved for complex adaptive reuse, historic preservation, or builds with significant unknown site conditions.

By layering in these three refinements—regional adjustments, escalation, and contingency—you transform a basic estimate into a sophisticated financial tool. Once these costs are dialed in, they also become invaluable for spotting opportunities. You can even explore practical operational cost reduction strategies with Excel and AI to find more ways to optimize your project's financial performance. This rigorous process is what separates an amateur guess from a professional, defensible budget.

Communicating Costs and Managing Expectations

Three people discuss costs at a table, with one man explaining data on a tablet.

Running the numbers is only half the battle. I've seen perfectly good projects go sideways simply because the costs weren't communicated effectively. The real test comes down to how well you can explain those numbers to clients, investors, and stakeholders.

An accurate calculation is useless if it creates confusion or mistrust. Think of your cost estimate not as a final figure, but as a tool for collaboration. When you get this right, you build confidence and manage expectations from the very first conversation, turning a potential source of conflict into a foundation for a successful partnership.

Build Trust Through Transparency

The cornerstone of any solid client relationship is trust. In this business, that trust is built on absolute transparency. Vague, lump-sum estimates just don't cut it—they breed suspicion and invite questions.

Instead, always provide a clear, line-by-line breakdown that shows exactly where the money is going. Walk your stakeholders through the major cost buckets: hard costs, soft costs, and site development. Don't just show them the numbers; explain the why behind them. For instance, point out how much of the budget is allocated to high-performance MEP systems or specific exterior finishes. This connects the cost directly to the project's quality and long-term goals.

This level of detail does two critical things:

  • It justifies the numbers. By showing your work, you demonstrate that your estimate is based on solid research and real-world data, not just a guess.
  • It educates the client. Many clients simply don't understand the sheer complexity of construction costs. A detailed breakdown helps them see the true value they're getting for their investment.

Frame the Estimate as a Cost Range

Here’s a piece of advice that has saved me countless headaches: never present a single, rigid number in the early stages. A fixed price can set a dangerously firm expectation in a client's mind. The moment you give them a hard number, that becomes the benchmark, leaving zero room for the inevitable realities of construction.

Present your initial estimate as a cost range. So, instead of saying the project will cost $5,000,000, frame it as, "We're projecting a total cost in the range of $4.8 million to $5.2 million."

Pro Tip: A cost range immediately introduces the concept of variability and sets a realistic tone from day one. It tells the client you have a strong handle on the numbers, but that unforeseen factors can and will arise. This simple shift in language builds in crucial flexibility.

This approach provides a psychological buffer. It prepares the client for potential fluctuations and makes future conversations about change orders or unforeseen site conditions much, much smoother.

Justify the Contingency Fund

The contingency fund is probably the most misunderstood line item in any construction budget. Clients often see it as "extra" money or padding, which can lead to pushback. Your job is to reframe it as what it truly is: an essential risk management tool.

You have to explain that the contingency is there to protect the project from the unknowns inherent in any build. Use concrete examples they can easily grasp.

  • "This 10% contingency is our protection against things we can't see yet, like hitting unexpected rock during excavation or dealing with a sudden spike in steel prices."
  • "Without this fund, a single surprise could force us to make cuts elsewhere, potentially compromising the quality of the finishes or delaying the entire schedule."

When you justify contingency with real-world scenarios, it stops being a questionable expense and becomes a shared safety net protecting everyone's interests. It shows you’re not just an estimator but a strategic partner who anticipates and plans for risk.

Make the Per-Square-Foot Cost a Dynamic Tool

Finally, it’s vital to communicate that the cost per square foot is a dynamic budgeting tool, not an unchangeable price tag carved in stone. It's a benchmark, an average derived from countless variables that we can influence.

Explain that this number can shift based on decisions made throughout the design process. If the initial per-square-foot cost comes in higher than their target, you can use the detailed breakdown to explore options together.

For example, you could open a dialogue like this:

  • "Our current finish package is contributing $35 per square foot to the total. If we need to find some savings, we could explore alternative flooring and lighting that might save $5 per square foot without sacrificing the overall aesthetic."

This collaborative approach empowers the client, giving them a degree of control over the final cost. It reinforces your role as a problem-solver and turns a tense budget discussion into a productive workshop. When you communicate costs this effectively, you build the trust and alignment needed to guide any project to a successful conclusion.

Digging Deeper: Common Questions on Construction Costs

Even with a clear process, a few key questions always come up when you start running the numbers. Let's tackle some of the most common ones I hear from clients to help you nail down your budget.

What's The Real Difference Between Hard Costs and Soft Costs?

Think of it this way: Hard costs are everything that physically goes into the building—the tangible stuff. We're talking about steel, concrete, lumber, drywall, and all the labor needed to put it together. If you can walk up and touch it as part of the finished structure, it’s a hard cost.

Soft costs, on the other hand, are all the essential but non-physical expenses. This bucket includes things like architectural and engineering fees, city permits, legal services, and project insurance. They're absolutely critical to getting the project off the ground, but they don't become part of the actual building itself.

How Should I Handle Tenant Improvement Allowances?

A Tenant Improvement (TI) allowance is the budget you give a tenant to customize their space. When you're calculating your base building cost per square foot, you need to pull that TI number out completely.

Why? Because TI costs are all over the map. One tenant might need a simple open-plan office, while another wants a high-end restaurant kitchen. Including TIs in your core building cost will skew your numbers and make it impossible to compare your project apples-to-apples with other buildings.

Instead, calculate your base building cost first. Then, add the TI allowance (often quoted per square foot, like $50/sq ft) back in as a separate line item to see the full financial picture.

A Pro Tip: Keeping the base building cost separate from the TI cost gives you a clean, accurate metric for the core and shell. This is a much more reliable way to track costs and benchmark against other projects.

Can I Trust Those Online Construction Cost Calculators?

Honestly, not for anything serious. Online calculators are fine for a back-of-the-napkin guess at the very, very beginning. But they are far too generic for real-world budgeting.

These tools almost never account for the factors that truly drive costs:

  • Site Conditions: What if your site has terrible soil or a steep slope? The calculator won't know.
  • Design Complexity: A simple box costs less than a building with complex curves and unique features.
  • Local Market: Is there a local labor shortage? Are material costs spiking in your city?
  • Quality of Finishes: The difference between standard and high-end materials is massive.

Use them for a ballpark figure to see if a project is even in the realm of possibility, but never, ever use them to make a financial decision. A detailed, bottoms-up estimate is the only path to a budget you can actually rely on.

My Contractor's Bid Is Higher Than My Estimate. What Gives?

It’s completely normal for a contractor’s bid to come in differently than your own calculation—in fact, you should expect it. The key is to understand why.

Usually, the discrepancy comes down to a few things. First, their bid always includes their overhead and profit (O&P), which you might have overlooked. Second, they have boots-on-the-ground pricing from their subcontractors that is more current than any database you're using.

Finally, a good contractor might have spotted a potential construction challenge in the plans that you missed. Don't just look at the final number; ask for a detailed breakdown and compare it line-by-line with your estimate. That's how you uncover the differences and get to a truly accurate budget.


At Sherer Architects, LLC, we believe a well-managed budget is the foundation of a successful project. With decades of experience in commercial architecture, adaptive reuse, and historic preservation, we guide clients through every financial detail, ensuring your vision is realized beautifully and responsibly. Partner with us to bring structure to your life's work. Learn more at https://shererarch.com.

Categories
Uncategorized

The Architecture Process of Design From Blueprint to Reality

The journey from a promising idea to a finished building isn't a single, lightning-strike moment of inspiration. It’s a structured, collaborative process that carefully translates a client's vision into a tangible reality. Think of it as moving from an abstract concept to a highly detailed, buildable plan, with checkpoints all along the way to keep everything on track, on budget, and aligned with your goals.

Your Blueprint for Success: Understanding the Design Process

Many people imagine architectural design as one big creative sprint. A better way to think about it is like directing a movie. You start with a script (the pre-design phase), move to storyboards and concept art (schematic design), and only then do you create the final, detailed shot list for production (the construction documents). This deliberate progression is crucial for managing the immense complexity of a building project and heading off expensive problems before they start.

This guide is here to pull back the curtain on that entire process. We'll turn what can feel like an intimidating puzzle into a clear, step-by-step roadmap. When you understand what happens in each phase, you’re empowered to make smart, confident decisions that ensure the final building is exactly what you envisioned.

A Journey of Progressive Refinement

At its heart, the architectural design process is sequential. Each phase logically builds on the decisions and discoveries of the one before it. This is a critical feature, not a bug, because it prevents the kind of costly, eleventh-hour changes that can derail a project. It’s infinitely easier—and cheaper—to move a wall on paper during the early design stages than it is after the steel has been erected.

This methodical approach ensures that every critical element—from tricky site constraints and local zoning laws to material choices and the structural system—is thoughtfully considered and woven into one cohesive plan. The goal is to build the entire project perfectly on paper before a single shovel ever hits the ground.

The flowchart below shows this basic progression, moving from initial discovery and big-picture ideas to the nitty-gritty details needed for construction.

Flowchart illustrating the architecture design process in three stages: Predesign, Schematic Design, and Construction Documents.

As you can see, the early-stage work—all that discovery and conceptual thinking—forms the essential foundation for the technical precision required in the later phases.

Why a Structured Process Matters

Following a defined architectural process isn’t just about neat project management; it’s the very backbone of the industry. The global architectural services market hit a staggering $249.2 billion between 2020 and 2025, which speaks volumes about the consistent need for professional, well-managed design. And with construction output expected to jump by 42.0% by 2030, that reliance is only growing. You can dive deeper into these trends in IBISWorld's comprehensive global report.

This industry-wide commitment to a phased approach brings some major advantages to your project:

  • Financial Control: The process creates natural checkpoints for reviewing the budget and getting approvals before moving forward.
  • Risk Mitigation: Problems with zoning, engineering, or costs are flushed out early when they are easiest to solve.
  • Predictable Outcomes: You always know what deliverables to expect and have a clear sense of the timeline for each stage.
  • Stakeholder Alignment: It gets everyone—you, the architect, engineers, and future contractors—on the same page, working from a single, unified plan.

To give you a high-level overview, here are the standard phases you can expect in nearly any architectural project.

The Five Core Phases of Architectural Design

Design Phase Primary Goal Typical Timeline Allocation
1. Predesign Define the project's goals, scope, budget, and constraints. Feasibility studies. 5% – 15%
2. Schematic Design Develop the big-picture concept, including floor plans, massing, and aesthetics. 15% – 25%
3. Design Development Refine the design, selecting materials, systems, and detailing key components. 15% – 25%
4. Construction Docs Create the detailed technical drawings and specifications for bidding & building. 35% – 45%
5. Construction Admin Architect oversees construction to ensure it aligns with the design documents. Varies (Ongoing)

Think of this table as your project’s roadmap. Now, let’s break down each of these steps in detail so you can navigate your next project like a seasoned pro.

Phase 1: Laying the Groundwork with Predesign and Feasibility

Before a single line is ever drawn, the most critical work of the entire architectural process begins. This initial stage, often called predesign or feasibility, is pure discovery. Think of it as the foundational investigation before a single brick is laid—it’s where we gather the facts, understand the "why," and define the absolute boundaries of what's possible.

This phase is all about answering the big, fundamental questions: What are we actually building? Why are we building it here? And, most importantly, can it even be done? We’re not talking about aesthetics yet; this is about pure viability. We work right alongside you to nail down clear project goals, analyze the site's quirks and constraints, and map out a realistic budget, all while navigating the often-tricky maze of local zoning laws. This is where your vision first shakes hands with the hard realities of land, law, and finances.

Two architects discuss blueprints on a desk, analyzing site plans in a modern office.

Defining the Project Program

The main deliverable from this phase isn’t a drawing; it's the project program. This is essentially the project's detailed written brief, a master document that outlines every last requirement and objective.

To create it, we do a deep dive into your operational DNA. We ask pointed questions to understand not just the spaces you need, but precisely how they need to function and interact.

  • Quantitative Needs: How many offices do you need? What’s the target square footage for the retail floor? How many parking spots does the city require?
  • Qualitative Goals: What’s the feeling you want in the lobby? Should the office layout promote loud collaboration or quiet, focused work? What identity should the building project?
  • Adjacency Requirements: Which teams need to be right next to each other for peak efficiency? How do we intelligently separate public-facing areas from private, secure zones?

This program becomes our North Star. It’s the definitive checklist we’ll measure every future design decision against to make sure the final building doesn’t just look good, but works brilliantly.

Conducting a Thorough Feasibility Study

At the same time, we run a feasibility study to determine if the project is actually a sound investment. We put the idea under a microscope, examining it from every critical angle to spot any potential "deal-breakers" before you've committed serious capital.

A feasibility study is your project’s reality check. It rigorously tests the idea against real-world constraints, providing the data needed to make a confident go/no-go decision. This step can save clients hundreds of thousands of dollars by preventing them from pursuing a project that is fundamentally flawed.

For a commercial developer, this means a serious market analysis to confirm there's real demand. For an adaptive reuse project, it means a deep structural assessment to understand the old building’s bones and the true scope of repairs needed.

The study typically breaks down into three parts:

  1. Site Analysis: We dig into the property’s physical DNA—topography, soil conditions, access to utilities, and how the sun hits the lot. For a look at how similar foundational analysis is applied in other design fields, you can explore this guide on how to design landscape plans.
  2. Zoning and Code Review: We pore over local ordinances to figure out exactly what you can build, including tough limits on height, setbacks, and land use. This gets especially complicated with historic properties, where we have to balance preserving character with meeting modern safety codes.
  3. Preliminary Budgeting: We pull together a high-level cost estimate based on the program and our initial findings. This isn’t just construction—it includes all the "soft costs" like design fees, permits, and financing that are easy to forget.

By the end of the predesign phase, you won’t have a design for a building. You’ll have something far more valuable: clarity. You'll be armed with a detailed program, a realistic budget, and a comprehensive report confirming your vision is viable. It’s the solid ground we need to build everything that comes next.

Phase 2: Translating Vision into Form with Schematic Design

Okay, the foundational research from pre-design is done. Now for the exciting part. The schematic design phase is where your project's abstract vision starts to take on a real, tangible shape. This is where ideas leap off the page and become three-dimensional concepts. I like to think of this as the storyboarding stage for a film—we're creating the key scenes and visual narrative that will define the entire project.

Our main job here is to translate the written program—all those needs, wants, and requirements we defined—into broad-stroke design solutions. We'll be creating rough sketches, simple floor plans, and basic 3D "massing" models. These aren't detailed blueprints yet. They're conceptual tools to help us all see the building's overall form, feel its flow, and understand how it sits on the site and connects with its surroundings. We’re focused on the big picture, exploring a few different paths forward.

Hands sketch designs on paper while a tablet displays detailed architectural schematics, surrounded by models and blueprints.

From Bubbles to Buildings

The process often starts with something surprisingly simple: a "bubble diagram." It’s exactly what it sounds like—a drawing of circles and lines that maps out the relationships between spaces. Which rooms need to be next to each other? Which ones need to be separate? How will people move from one area to another? This basic exercise ensures the building's layout is driven by pure function first, not just aesthetics.

From there, those bubble diagrams evolve into more refined, scaled drawings. We establish the building's general footprint, nail down the location of major spaces, and map out the core circulation like hallways and stairs. For a new commercial building, we might be testing how a retail floor plan can maximize customer flow and visibility. For an adaptive reuse project, the puzzle is figuring out how to thread modern systems and layouts into a historic structure without destroying its character.

Key Deliverables in Schematic Design

During this phase, we produce a core set of documents to communicate the concept and get your feedback. These aren't for construction, but they are absolutely essential for making informed decisions.

  • Conceptual Site Plan: A bird's-eye view showing where the building sits on the property, along with parking, landscaping, and how people get in and out.
  • Basic Floor Plans: Simple layouts for each floor, showing the general arrangement of rooms and their approximate sizes.
  • Key Elevations and Sections: These are the first glimpses of what the building will look like. Elevations show the exterior from different sides, while sections slice through the building to show its height and volume.
  • Narrative Description: A straightforward written summary that explains the design concept and the thinking behind our major decisions.

Together, these documents give you a complete, holistic picture of the proposed design long before we get buried in the technical details.

The Most Important Decision Point

Schematic design is, without a doubt, the most critical checkpoint for you as the owner. This is your moment to give honest, thorough feedback. Does the layout actually work for your business operations? Does the look and feel align with your brand? Is the scale of the building right for the neighborhood?

Your approval at the end of this phase is the green light. Making a huge change here—like rethinking the entire floor plan—is relatively easy and inexpensive. Trying to make that same change after the engineers have started their detailed work can lead to major budget overruns and painful schedule delays.

This phase typically accounts for 15% to 25% of the total architectural fee, and for good reason—it sets the direction for everything that follows. We'll often present two or three distinct concepts for you to review. This allows you to compare different approaches and choose the one that truly hits the mark.

When you sign off on a schematic design, you're locking in the project's soul. It gives the entire team the confidence to move forward into the more technical phases of design.

Phase 3: From Broad Strokes to a Builder's Blueprint

With your approval of the schematic design, we shift gears in a big way. The process moves from the big, exciting ideas of what the building will be to the nitty-gritty reality of exactly how it gets built.

Think of it like this: schematic design was the beautiful concept painting. Now, we’re drafting the full set of engineering blueprints for a high-performance engine. Every single bolt, wire, and connection has to be specified, coordinated, and drawn with absolute precision.

This phase is where the technical heavy lifting happens, and it's typically divided into two key stages: Design Development (DD) and Construction Documents (CDs). This is where we build the entire project on paper before a single shovel hits the dirt. It's no surprise that the bulk of the design fee—often 55% to 70%—is invested right here.

Design Development: Fleshing Out the Details

The Design Development (DD) stage acts as the crucial bridge connecting the approved concept to the final buildable plans. We take the conceptual floor plans and elevations and start layering in the real-world systems and materials that make a building function.

This is a period of intense collaboration. Our architectural team works hand-in-glove with our specialized consultants. Structural engineers nail down the steel or concrete frame, mechanical engineers map out every inch of HVAC ductwork, and electrical engineers plot the pathways for power and data.

Here’s a look at what we’re focused on during DD:

  • Finalizing Materials: We make firm decisions on the major building components—from the exterior brick and window systems down to the specific flooring and ceiling types for each room.
  • Integrating the Guts: This is where we coordinate the structural, mechanical, electrical, and plumbing (MEP) systems, making sure they all fit together without clashing.
  • Adding Detail to Drawings: The initial sketches are transformed into much more detailed drawings, showing how walls are assembled, how key elements connect, and clarifying critical dimensions.
  • Writing the Specs: We start drafting the "spec book," a formal document that describes the quality, performance, and installation requirements for everything in the building.

At its core, this stage is all about problem-solving and refinement. We are essentially building a highly detailed, virtual version of the building to iron out all the wrinkles ahead of time.

How Technology Gives Us a Sharper Pencil

Modern technology has completely changed how this detailed work gets done. With Building Information Modeling (BIM), the entire project team—architects, engineers, and consultants—collaborates on a single, shared 3D model in real time.

This approach allows us to run "clash detection," a digital process that can flag where a plumbing line might try to run through a steel beam. Finding these issues on a screen, long before they become expensive on-site rework, can reduce errors by as much as 20-30% on complex projects.

Construction Documents: The Final Set of Instructions

Once the Design Development phase is complete and you’ve signed off, we move into the final and most intensive stage: creating the Construction Documents (CDs). This is the culmination of all our work, resulting in the comprehensive set of drawings and specifications that will become part of a legally binding contract.

The Construction Documents aren't just drawings; they are the definitive, legal instructions for the contractor. Their purpose is twofold: to secure a building permit from the city and to give contractors the exact information they need to provide an accurate bid and build the project correctly.

This set of documents is incredibly detailed, deliberately leaving zero room for interpretation. It specifies everything from the exact type of screw for a particular wall assembly to the precise finish on a door handle.

This meticulous level of detail is essential for controlling costs and ensuring quality. A bulletproof set of CDs guarantees that every bidding contractor is pricing the exact same building, allowing for true, apples-to-apples comparisons.

As we finalize the plans, creating compelling visuals for final approvals or marketing becomes key. This is where we explore the top programs for architectural rendering to produce photorealistic images that truly bring the vision to life.

By the end of this phase, the design is locked in. The documents we produce are the final, unambiguous roadmap that will guide your project from paper to physical reality.

Phase 4: From Paper to Permit to Physical Construction

With a complete set of construction documents in hand, the project is ready to leap off the page and into the real world. This is the moment where all the meticulous planning, design work, and technical detailing face their ultimate test.

This phase is all about execution. It involves a critical sequence of events: selecting a builder, securing the legal permissions to build, and overseeing the construction itself. Each step is essential to turn your vision into a physical reality and protect your investment along the way.

A male construction engineer wearing a hard hat and safety vest holds blueprints on a construction site, looking up.

Finding the Right Builder: Bidding and Negotiation

First things first: we need to select the general contractor who will actually build your project. The best way to do this is through a formal bidding process. We issue the construction documents we’ve prepared to a hand-picked list of pre-qualified contractors.

The detail in these documents is crucial. It ensures every contractor is pricing out the exact same scope of work, which gives you a true apples-to-apples comparison.

There are a couple of ways to approach this:

  • Competitive Bid: This is the most common path. We invite several contractors to submit sealed bids, and the project usually goes to the lowest qualified bidder. It’s a great way to ensure price transparency.
  • Negotiated Bid: Sometimes, it makes sense to select a preferred contractor early on and work with them directly to negotiate a fair price. This can create a more collaborative partnership from the get-go.

As your architect, we run this entire process for you. We send out the documents, field contractors' questions to make sure everyone is on the same page, and then analyze the bids that come back. We look beyond just the price, weighing their qualifications and experience before giving you our final recommendation.

Navigating the Gauntlet of Permitting

At the same time we’re managing the bidding, we submit the "permit set" of drawings to the local building department. Depending on the project, we may also need to submit to zoning boards or historic preservation commissions.

This is a formal review where officials check that our design complies with all building codes, life safety regulations, energy standards, and local ordinances. It can be an intricate and sometimes slow-moving process, but it’s an absolute must for building legally and safely.

The permitting stage is where having an experienced architect really pays off. We act as your expert advocate, speaking the technical language of city officials, quickly addressing their comments, and navigating the bureaucracy to get the approvals you need as efficiently as possible.

Once the permit is issued, the contractor can finally break ground. But our job is far from over.

Protecting Your Vision: Construction Administration

With a builder on board and permits in hand, construction begins. Our role now shifts into oversight, a phase known as Construction Administration (CA). Our main goal here is to make sure the building is constructed exactly as specified in our documents. It’s how we protect the integrity of the design and the quality of your final product.

Here’s what our hands-on involvement looks like during construction:

  • Regular Site Visits: We’re on-site regularly to observe the progress and quality of the work, checking that it aligns with the design intent.
  • Reviewing Submittals: Before any materials are ordered or installed, the contractor sends us shop drawings and product samples. We meticulously check these against our specifications to make sure they're right.
  • Answering RFIs: Questions always come up on a job site. We respond quickly to contractor Requests for Information (RFIs) to clarify design details and solve problems before they cause delays.
  • Approving Payment Applications: We review the contractor's monthly invoices, confirming that the work they’re billing for has actually been completed to the right standard before you release payment.
  • Managing Change Orders: If a change is needed, we manage all the paperwork. We ensure costs are fair and that any adjustments are properly integrated into the project without compromising the design.

This active oversight is your best assurance that you’re getting the building you paid for—one that is safe, functional, and completely true to the vision we developed together.

Even with the best team, construction projects are complex and can present unexpected hurdles. Below are some of the most common issues clients run into and how a proactive approach can help you sidestep them.

Common Pitfalls in the Design and Construction Process

Common Pitfall Potential Impact Mitigation Strategy
Incomplete or Vague Construction Documents Inaccurate bids, frequent change orders, construction delays, and budget overruns. Invest in a thorough and highly detailed set of construction documents from the start. Clarity on paper prevents confusion in the field.
Unrealistic Budget Expectations Project stalls or requires significant "value engineering" (cuts) that compromise the original vision. Engage in transparent cost discussions early and often. Conduct preliminary cost estimates at key milestones in the design process.
Poor Contractor Selection Subpar workmanship, missed deadlines, communication breakdowns, and potential legal disputes. Pre-qualify bidders based on experience, reputation, and financial stability, not just the lowest price. We help vet potential partners.
Delayed Decision-Making Halts construction progress, creates a domino effect of schedule delays, and increases costs. Establish clear communication channels and decision-making authority before construction begins. Trust the expert team you've assembled.
Ignoring a Contingency Fund Unforeseen issues (like hidden structural problems in a renovation) can derail the project's finances completely. Always budget a contingency fund (10-15% of construction costs is standard) to cover unexpected but necessary expenses.

Being aware of these potential challenges is the first step in avoiding them. Our role as your architect is to anticipate these issues and guide you through a process designed to deliver a smooth and successful project from start to finish.

How Historic Buildings Change the Game

When you’re dealing with an existing or historic structure, the standard architectural playbook gets tossed out the window. Instead of a blank canvas, you start with a complex, living document—the building itself. Our first job is to act like forensic investigators, treating the building as our most important client.

It’s less about inventing something from whole cloth and more about a thoughtful conversation with the past. We're skillfully weaving modern needs into a rich, historic fabric, letting the original structure guide the new design.

Starting with a Deep Dive

This specialized approach kicks in right from the very beginning, even before design. We can't talk about new floor plans until we've completed a meticulous conditions assessment. Think of it as part architectural archaeology, part structural engineering.

We use tools like 3D laser scanning to capture hyper-accurate measurements of every nook and cranny. At the same time, we're digging through city archives, old photographs, and historical records to piece together the building's original story and how it was built. This intensive upfront work is the foundation for everything that follows.

Uncovering the Building's Story

The goal of this initial phase is to learn the building's "bones" and its unique history. We’re identifying the irreplaceable, character-defining features that absolutely must be preserved. We're also on the hunt for hidden structural problems or outdated systems that need a modern solution. This mapping of the existing conditions is non-negotiable for a successful historic project.

With adaptive reuse, every constraint is an opportunity in disguise. An old brick wall isn't an obstacle; it's a future centerpiece. A weathered timber beam isn't just a problem to solve; it's the soul of the new space. The real art is turning these "found" conditions into celebrated features.

Balancing Past and Present

During the design development phase, the work becomes a delicate balancing act. We have to thread today's building codes, accessibility standards, and your specific needs through the historic framework without damaging its soul.

This often leads to some really creative problem-solving. It might mean hiding state-of-the-art HVAC systems inside old service chases or designing a custom fire-suppression system that leaves historic plasterwork untouched.

Sustainability and preservation are natural partners. At its core, adaptive reuse is a powerful act of conservation—it saves a building from the landfill and dramatically reduces waste. This aligns perfectly with the current push for green building, a trend driving major growth in the $79.06 billion U.S. architectural services market. As a bonus, these thoughtful, sustainable projects are increasingly commanding premium prices. You can explore more on how the economy is shaping architecture at AIA.org.

Finally, getting the project approved adds another layer of complexity. We shift into an advocacy role, presenting our designs to historic preservation commissions. Our job is to show them exactly how the project honors the building’s past while giving it a vibrant, viable future.

Common Questions About the Design Process

If you're new to working with an architect, you probably have a lot of questions. That’s completely normal. Most of our clients come to us wondering about the same things: how long this will all take, how much it will cost, and what their role in the process will be.

Let's break down some of those common questions to give you a clearer picture of the road ahead.

How Long Does the Design Process Take?

This is the classic "it depends" answer, but for good reason. The timeline is tied directly to your project's size and complexity. For example, a straightforward interior renovation for a small retail space might breeze through the design phases in a few months.

On the other hand, designing a new multi-story building from the ground up can easily take more than a year before you ever break ground.

A few key things really drive the schedule:

  • Project Scope: Bigger, more intricate buildings simply demand more time for design, engineering, and coordination.
  • Permitting & Approvals: Every city and county is different. Some have notoriously slow review boards that can add months to your pre-construction timeline. We factor this in from the start.
  • Decision-Making: The project moves at the speed of your decisions. Quick, clear feedback from you and your team is one of the best ways to keep everything on track.

When Is the Best Time to Hire an Architect?

The short answer? As early as you possibly can.

Ideally, you'd bring an architect on board before you've even bought the property or signed a lease. This is the pre-design or feasibility stage, and it’s the single most effective way to manage your risk.

An architect's initial feasibility study can save you from a multi-million-dollar mistake. Their first job is to confirm that what you want to build is legally, physically, and financially possible before you commit serious capital.

Having an expert in your corner from day one means they can perform critical due diligence, like analyzing the site and digging into zoning codes. This early research ensures you're not investing in a dead-end property or a project that can't get off the ground. It sets the entire endeavor on a solid foundation, making the rest of the process much smoother and more predictable.


Ready to transform your vision into a landmark building? The team at Sherer Architects, LLC is here to guide you through every step with expertise and dedication. Contact us today to discuss your project.

Categories
Uncategorized

Material board for interior design: The Ultimate Guide to Elevate Spaces

A material board is a designer’s secret weapon. It’s a carefully curated collage of physical samples that brings a project to life, showcasing the actual colors, textures, and finishes you've selected. Think of it as the bridge between a brilliant idea and the finished space—it lets clients and the design team see and, more importantly, feel the materials before a single order is placed.

Why Material Boards Still Matter in a Digital World

A designer works on a laptop showing a room design, surrounded by color and material samples.

With stunningly realistic 3D renderings and immersive virtual walkthroughs at our fingertips, it's fair to ask if physical material boards are becoming obsolete. The short answer is no. They remain an absolutely essential part of the design process for one very human reason: they communicate what a screen simply cannot.

Digital tools are fantastic for showing scale, layout, and how light will play in a room. But they just can't capture the true sensory experience of a space. No render can perfectly replicate the subtle gleam of a glazed tile as you walk past it, the specific hand-feel of a commercial-grade textile, or the cool, solid weight of a quartz countertop. These tactile details are everything when it comes to a client truly understanding and signing off on the vision.

The Anchor in a Hybrid Design Workflow

The modern material board isn't at odds with digital design; it's the perfect partner. It acts as the physical anchor in a hybrid workflow, grounding all those beautiful digital images in reality. This integrated approach is no longer a trend—it's standard practice, combining the speed of technology with the irreplaceable value of physical touch.

The numbers back this up. Today, somewhere between 68–75% of design firms in North America and Europe use physical sample boards right alongside their digital tools. That’s a huge jump from 2018, when only 54% of firms were doing so, with many relying solely on digital presentations.

In a global interior design market valued at over USD 137 billion, where material prices can be incredibly volatile, having tangible samples is crucial for accurate budgeting and getting confident client approvals.

A material board is more than a presentation tool; it's a contract of trust. When a client touches and approves a physical sample, it eliminates ambiguity and sets clear expectations for the final outcome, protecting both the client and the designer.

Beyond Aesthetics to Practical Execution

A great material board is definitely a showstopper, but its job goes far beyond just looking pretty. It's a critical working document for actually getting the project built.

  • Client Confidence: It gives clients the power to make informed decisions with genuine confidence. This drastically cuts down the risk of expensive changes or disappointment after everything is installed.
  • Budget Alignment: Presenting real materials opens the door for honest conversations about cost. It helps clients see the value and investment tied to each finish, making budget talks much more transparent.
  • Procurement Accuracy: A clearly labeled board is the go-to reference for ordering. It minimizes errors and makes sure the exact products you specified are the ones that show up on-site.
  • Stakeholder Communication: It creates a single, unified vision for everyone involved—from contractors and architects to specialty vendors—ensuring the whole team is on the same page.

For a deeper look into the tech side of things, it's worth exploring the debate between photorealistic AI room design and manual methods. But at the end of the day, no matter how advanced our technology gets, the human need to connect with the physical world isn’t going anywhere. The material board honors that connection, cementing its place as an enduring and powerful tool in any designer’s arsenal.

Physical vs Digital Material Boards: A Hybrid Approach

Instead of choosing one over the other, the most effective strategy combines the strengths of both physical and digital boards. This hybrid model provides a comprehensive, flexible, and compelling presentation that covers all the bases—from initial concept to final sign-off.

Attribute Physical Board Digital Board Hybrid Advantage
Tactile Experience Excellent. Allows clients to feel texture, weight, and sheen. None. Relies on visual representation only. Grounds digital visuals with real-world sensory feedback.
Color Accuracy High. Shows true color under actual lighting conditions. Variable. Dependent on screen calibration and settings. Digital concepts are verified by true-to-life physical samples.
Accessibility Limited. Requires in-person meetings or shipping. Excellent. Instantly shareable with anyone, anywhere. Share digital boards for quick feedback, present physical boards for key decisions.
Scalability Poor. Can be cumbersome to create multiple versions. Excellent. Easily duplicated and modified for different schemes. Quickly iterate digitally, then build one final physical board for approval.
Contextualization Limited. Shows materials in isolation. Good. Can be shown within 3D renderings of the space. Use renderings to show scale and layout, and the physical board to confirm finishes.
Durability & Portability Moderate. Can be heavy and samples can get damaged. High. No physical wear and tear; stored in the cloud. A digital record serves as a permanent, easily accessible backup.

Ultimately, leveraging both formats creates a powerful, persuasive narrative. The digital board sells the big-picture vision, while the physical board closes the deal by making it real.

Building the Strategic Foundation for Your Board

Overhead view of an interior design material board with color swatches, samples, and 'design strategy' note.

Before you even think about ordering a single sample, the real work of creating a compelling material board for interior design begins. It all starts with strategy. This early planning is what turns a simple collection of finishes into a powerful tool—one that solves real problems, tells a story, and directly supports the project's business goals.

We have to move past vague aesthetic labels like "modern" or "industrial." Those don't mean much on their own. Instead, a successful board is built on a solid framework of well-defined criteria that will guide every single choice you make down the line.

Translating Vision into a Material Brief

The first, and arguably most important, step is to create a 'material brief.' Think of this as the constitution for your project. It's a practical document that spells out the non-negotiables and desired outcomes before you start falling in love with specific products.

Imagine you're tackling an adaptive reuse project—turning an old textile mill into a boutique hotel. The material brief wouldn't just say "rustic charm." It would get granular. It would specify performance requirements like commercial-grade durability for the high-traffic lobby flooring, specific acoustic ratings for guest room partitions, and the fire codes all finishes must meet.

Your material brief needs to articulate:

  • Performance Metrics: What do these materials need to do? We're talking slip resistance, cleanability, light reflectance values (LRV), and commercial wear ratings.
  • Sustainability Goals: Does the client mandate a certain percentage of recycled content? Are we aiming for low-VOC emissions or a specific certification like Cradle to Cradle?
  • Sensory Qualities: How should the space feel? Warm and inviting, or crisp and energetic? This is where you define the tactile experience, guiding your texture and finish selections.
  • Budgetary Constraints: Get real about the numbers from day one. Establishing a working budget for key categories prevents the team from specifying materials that are dead on arrival.

This document becomes your North Star, ensuring your final material board is a direct, thoughtful response to the project's unique challenges.

Balancing Aesthetics with Functionality

With a solid brief in hand, the curation can finally begin. This isn't just about finding pretty things; it's about finding the right things that tick all the boxes you just established. Every material has to earn its spot on the board by serving both the aesthetic vision and the hard functional requirements of the space.

For example, on a historic preservation project, you're constantly balancing character with performance. You might select a reclaimed heart pine for the flooring to match the building’s original era, but you’d pair it with a modern, low-sheen, high-durability finish that can actually handle commercial foot traffic. It’s a decision that respects history while meeting today's operational demands.

A strategically built material board tells a story of thoughtful problem-solving. It shows clients and stakeholders that you’ve considered not just how the space will look, but how it will perform, age, and serve its users for years to come.

This disciplined approach has a great side effect: it makes the sourcing process so much smoother. With a clear brief, you can request samples with precise specifications, cutting down on the endless back-and-forth with reps. It stops the team from getting attached to a beautiful tile that doesn't meet the required fire code or blows the budget.

When it's time to assemble everything, a professional backing is essential for a polished presentation. Many designers find that lightweight yet sturdy foam board options provide a clean, excellent foundation for arranging samples. Ultimately, this foundational phase elevates your material board from a simple mood board to a critical project tool that drives decisions and sets the stage for a successful build-out.

Getting Your Hands on the Right Materials

Once you’ve nailed down the strategy, it's time for the fun part: bringing your vision to life by gathering the actual materials. This phase is where logistics, relationships, and a good design eye all come together. Sourcing isn't just about clicking "order sample" online; it's about building a network of people you can count on and learning how to ask for exactly what you need to get it right the first time.

Your starting point is always your network of suppliers, manufacturers, and local artisans. For those of us working on commercial or historic preservation projects, these relationships are gold. A fabric rep who knows you well won't just dump the latest catalog on your desk. They'll actually understand your project's specific demands—like needing a certain durability rating for lobby seating or hitting a specific fire code—and will point you to the right options from the get-go.

These connections don't happen overnight, but the payoff is huge. Make a point to show up at local industry events, schedule coffee with your reps even when you don't have a project on the books, and always be upfront about your timelines and budget. A good relationship can mean getting that oversized sample you desperately need, a heads-up on new product launches, or critical intel on stock levels and lead times that can make or break a schedule.

How to Ask for Samples (and Actually Get What You Want)

When you're requesting samples, vagueness is your worst enemy. Asking for "a light wood flooring sample" is a surefire way to end up with a pile of useless options, wasting everyone's time. Your request needs to be as specific as the brief you wrote for the project.

Always be sure to specify:

  • The Details: Give them the full product name, the SKU or reference number, and the exact colorway or finish you're after.
  • Performance Needs: Spell out any non-negotiables. Think "must meet commercial wear layer standards" or "requires a Class A fire rating."
  • The Right Size: Don't leave this to chance. Be clear if you just need a small chip for color matching or a much larger piece to show the full pattern repeat or texture.

This level of detail means the samples that land on your desk are already pre-qualified, making the next step of curating the board so much more efficient.

Getting the Scale and Proportion Just Right

One of the most common rookie mistakes I see is using samples that are completely out of scale. A tiny 2×2 inch carpet square tells you absolutely nothing about how a broadloom product will feel across a massive hotel lobby. The goal here is to choose sample sizes that give an honest impression of the material's impact in the final space.

Your material board is a miniature version of the project. If the scale is off on the board, you’re setting your client up with skewed expectations of the finished room. A large-format tile absolutely needs a large sample to be understood.

Choosing the right sample size is key to building a board that's both beautiful and informative. It’s a bit of an art, but having some go-to guidelines helps keep everything in balance.

Here’s a quick reference I use to make sure the samples are scaled properly and tell the right story.

Recommended Sample Sizes for Common Materials

Material Type Recommended Minimum Size (cm/in) Reasoning
Flooring (Tile, Wood, LVT) 30 x 30 cm (12 x 12 in) This size is large enough to show texture, pattern variations, and the natural color shifts you see in materials like wood.
Carpet 45 x 45 cm (18 x 18 in) Anything smaller fails to capture the true scale of the pattern and the actual feel of the pile under your hand.
Wallcovering A3 size or 30 x 42 cm (12 x 17 in) You absolutely need this much space to see a full pattern repeat and judge the texture from a realistic distance.
Upholstery Fabric 25 x 25 cm (10 x 10 in) You need a piece big enough to drape and fold so you can see how it moves and how light plays with its texture.
Paint 20 x 25 cm (8 x 10 in) Painted Swatch A tiny paint chip is useless. A larger painted board shows the true color and sheen away from the influence of existing wall colors.
Laminates & Veneers 15 x 20 cm (6 x 8 in) This is a great size to show off wood grain, finish, and color while still fitting neatly on a crowded board.

By getting the scale right, you're presenting a more accurate, professional, and convincing design concept.

Of course, the final mix of materials will look very different depending on the project. A residential board might have 8–10 key samples, with 30–40% being engineered wood products. Flip to a commercial or hospitality job, and you'll see a heavy emphasis on fire-rated and high-performance laminates, often making up 45–55% of the finishes. In fact, firms that standardize their board templates for these larger projects have seen a 12–18% reduction in ordering mistakes and a 6–9% decrease in material waste. You can dive deeper into material trends in home and commercial furnishings to see how these numbers are evolving.

Taming the Sample Chaos

As those boxes of samples start rolling in, your studio can descend into chaos pretty quickly. A well-organized material library—whether it’s a whole room or just a smart system of labeled bins—is absolutely critical for your sanity and efficiency. The minute a sample arrives, label it with the core info: supplier, product name, and SKU. No exceptions.

This library becomes a living, breathing archive for your firm. When a new project kicks off, you’ll have a curated collection of go-to materials right at your fingertips, which makes that initial hunt so much faster. It’s what stops you from having that frantic, last-minute panic trying to find "that perfect tile we used two years ago," ensuring every choice you make is deliberate and perfectly aligned with your project's goals.

Assembling a Professional and Persuasive Board

You’ve sourced and curated a perfect collection of samples. Now comes the fun part: assembly. But don’t be fooled—a pile of beautiful materials isn’t enough to win over a client or, just as importantly, guide a construction team. The real magic of a material board for interior design is in its composition. It's how you arrange every single element to tell a clear, compelling story that transforms your design concept into a tangible, persuasive argument.

The goal is to create a visual hierarchy, guiding the viewer's eye through the design just as you would guide them through the finished space. Think like a composer. Start with your "hero" materials—the dominant finishes like flooring or a key wall treatment. Lay those down first; they’re the foundation of your design. From there, you can begin to layer in the secondary and accent materials, carefully arranging them to show exactly how they’ll interact.

Mastering Layout and Composition

There’s no single right way to lay out a board, but the most effective ones all share a common DNA: they’re logical. The key is to organize materials in a way that reflects their real-world application and scale. This intuitive flow helps clients and stakeholders get the design instantly, often without you having to say a word.

A classic and highly effective technique is to arrange samples spatially. Think of the board as a cross-section of the room. Place flooring materials along the bottom, wall finishes (paint, wallcovering, tile) in the middle, and any ceiling or feature lighting finishes toward the top. Upholstery fabrics and accent metals can then be grouped together nearby, representing the furniture and fixtures that will populate the space. It’s a simple trick that creates an intuitive map of your design.

Consider a few different approaches to your layout:

  • The Grid: This is a clean, buttoned-up approach where samples are cut to uniform sizes and arranged in a structured grid. It works beautifully for corporate or minimalist projects where precision and order are part of the design language.
  • The Layered Vignette: For a more organic, artful composition, you can create a small "scene" where samples overlap. Imagine draping a luxe fabric swatch over a piece of wood flooring, right next to the tile it will abut. This helps clients visualize the textural interplay in a much more tangible way.
  • Proportional Representation: The size of your sample should hint at its dominance in the space. The primary carpet sample should take up more real estate on the board than a tiny swatch for a single accent pillow. This visual cue helps manage expectations and communicates scale.

The most persuasive material boards are the ones that feel balanced and intentional. Every sample needs a reason to be there, and its placement should reinforce its relationship to every other material on the board.

Choosing the Right Foundation and Adhesives

The physical backing of your board says a lot about your professionalism. A neutral, sturdy base is non-negotiable. Heavy-duty foam core or Gatorboard in white, grey, or black are the industry go-to's for a reason. They're light enough to carry to a meeting but rigid enough that they won’t warp under the weight of heavy samples like stone or tile.

Just as important is how you stick everything down. Nothing tanks a presentation faster than a tile sample clattering onto the conference table. For heavy items, use a high-strength, fast-grabbing construction adhesive or a quality double-sided mounting tape. For lighter fabrics and papers, a clean spray adhesive or rubber cement applied neatly to the back prevents buckling and keeps everything looking crisp.

The sourcing process is the critical first step before you even think about adhesives, as this diagram shows.

Diagram of the material sourcing process showing three steps: network, specify, and organize with icons.

A great board is the culmination of methodical networking, precise specification, and diligent organization—it all starts long before you reach for the glue.

The Critical Role of Labeling and Documentation

A beautiful board without documentation is just a pretty picture; it’s not a working tool. Every single sample must be meticulously labeled. This is the step that elevates your presentation from a visual aid to an actionable specification document that the entire project team will rely on for pricing, procurement, and installation.

Your labeling system has to be clean, consistent, and easy for anyone to decipher. My team has always had success with a simple key system:

  1. Assign a unique code to each sample on the board. Think F-01 for flooring, WC-01 for wallcovering, P-01 for paint.
  2. Place a small, discreet label with that code next to its corresponding sample on the physical board.
  3. Create a separate specification sheet (or "key") that lists each code alongside all the vital product information.

This spec sheet is the board's essential partner. It’s what makes the design buildable. At a minimum, it should include:

  • The unique reference code (e.g., F-01)
  • A clear description ("White Oak Engineered Hardwood")
  • Manufacturer/Supplier name
  • The specific product name, number, or SKU
  • Color name and/or finish code
  • Dimensions or size information

This two-part system keeps the board itself looking clean and professional while providing all the granular detail needed to execute your vision. It eliminates guesswork and ensures that the materials you and your client fell in love with are the exact ones that get ordered and installed, protecting the integrity of your design right through to the finish line.

Advanced Material Strategies for Commercial Projects

When you step into the commercial design world, the material board evolves. It’s no longer just a creative exercise; it’s a technical document that has to work a lot harder. For projects like corporate offices, hotels, or bringing an old building back to life, the board must satisfy a whole different set of masters: building codes, sustainability goals, and long-term performance.

A commercial board is less about a particular taste and more about making a case. Every single sample has to earn its spot by proving it can handle heavy traffic, meet tough safety standards, and contribute to the health of the people inside. This is where a designer’s deep product knowledge is put to the test, turning a simple presentation tool into a document that manages risk and protects the client’s investment.

Weaving Sustainability and Wellness into the Narrative

Let's be clear: sustainability isn't an add-on anymore. It’s a core requirement for most commercial clients, driven by everything from corporate ESG (Environmental, Social, and Governance) goals to what their own tenants are demanding. Your material board is ground zero for showing them you get it.

This goes way beyond just pointing to bamboo flooring. You need to back up your selections with hard numbers. So instead of just showing a nice carpet sample, the spec sheet should call out its exact percentage of recycled content, its Cradle to Cradle certification, or its low-VOC (Volatile Organic Compound) emissions. Pulling data from an Environmental Product Declaration (EPD) turns a pretty choice into a powerful, defensible one.

A truly smart material board doesn't just show finishes. It shows choices that create healthier indoor air and support a more responsible supply chain. That's a language that speaks directly to clients who are laser-focused on their ESG metrics.

If you’re presenting to a client chasing a WELL or LEED certification, the board and its spec sheets are your evidence. Make it easy for them. Clearly tag materials that help earn specific credits, such as:

  • Acoustic Performance: Highlighting materials that kill noise bleed in an open office.
  • Light Reflectance Value (LRV): Calling out paints and surfaces that bounce daylight around, cutting down on electricity bills.
  • Material Transparency: Featuring products that come with health disclosures and a clear list of ingredients.

The Special Cases: Adaptive Reuse and Historic Preservation

Working with existing and historic buildings is its own beast. Here, the material board has to create a conversation between the old and the new. It's a delicate dance—you have to respect the building's history while getting it ready for a modern, functional future.

Take an adaptive reuse project, like turning an old warehouse into a buzzy tech office. Your board might pair the original, polished concrete floor with slick, high-performance acoustic felt panels. The story you're telling is one of contrast and complement. The new stuff doesn't hide the building's character; it celebrates it.

For a true historic preservation job, the work is even more detailed. Finding period-appropriate finishes that also meet today's codes is a real skill. Your board might need to showcase things like:

  • A custom-milled wood trim that’s an exact match for the original, but sourced from a sustainably managed forest.
  • A historically accurate paint color, but one that’s formulated with modern, durable, low-VOC chemistry.
  • A new tile that perfectly replicates an original encaustic pattern but also has a commercial-grade slip-resistance rating.

Communicating Technical Compliance with Clarity

For any commercial project, the board has one job that trumps all others: proving compliance. Looks don't matter if a material fails a fire code inspection. Your presentation has to make it crystal clear that all the technical boxes have been checked.

This means putting the critical performance specs right on your board’s key or the attached spec sheet. Don’t make the client or the contractor go digging for it. Think of your documentation as the single source of truth.

Key Technical Specs to Call Out:

  • Fire Ratings: State the ASTM E84 classification (Class A, B, or C) for every wall and ceiling finish. In public spaces, this is absolutely non-negotiable.
  • Slip Resistance: Note the DCOF (Dynamic Coefficient of Friction) rating for all flooring. You need to show it’s appropriate for where it’s going—a lobby has different needs than a commercial kitchen.
  • Durability Ratings: Include the wear layer thickness for LVT or the AC (abrasion class) rating for laminates to prove they can handle the expected foot traffic.
  • Accessibility Standards: Confirm that your specified materials and transitions meet ADA (Americans with Disabilities Act) guidelines.

When you bake these strategies into your process, your material board becomes so much more than a design pitch. It becomes a comprehensive, bulletproof plan that tackles the real-world complexities of commercial work. It gives clients the confidence that their investment isn't just beautiful—it's safe, sustainable, and built to last.

Answering Your Top Questions About Material Boards

Even after years in the field, pulling together the final material board can bring up some tricky last-minute questions. It’s the point where the creative vision meets the hard reality of budgets, sourcing, and client psychology. Let's tackle some of the most common hurdles I see designers face.

How Many Material Options Should I Put on a Board?

My rule of thumb? One board, one story. Your goal is to present a single, fully resolved design direction, not a collection of possibilities that leaves the client feeling overwhelmed. When you present too many choices on one board, it can dilute your vision and actually make it harder for the client to say "yes."

If you truly have two distinct concepts you want to explore—say, a warm, classic palette versus a cool, modern one—then create two separate, complete boards. Each one should feel like a finished thought. For a typical residential project, you might have 8-12 core materials working together. A commercial board, on the other hand, might be more focused, zeroing in on a smaller set of high-performance finishes that need to work across a large space.

Your job is to be the expert. Presenting a single, confident vision is far more effective than offering a buffet of options. It guides your client toward a clear decision and shows you’ve already done the hard work of editing.

What's the Best Way to Label Samples on a Physical Board?

Labels are all about clarity and professionalism. You want a system that looks clean on the board but connects to a wealth of detail behind the scenes. I find the best method is to use small, neatly printed tags next to each sample.

On the tag itself, keep it simple: a reference code (F-1 for Flooring 1, P-2 for Paint 2), the material name, the manufacturer, and the specific color or product code. That reference code is your secret weapon. It directly links each physical sample to your detailed specification sheet, which should always accompany the board. That spec sheet is where you’ll list everything needed for procurement—vendor contacts, pricing, lead times, the works.

Should I Charge a Separate Fee for Creating a Material Board?

In most cases, no. Creating the primary material board is a fundamental part of the design development phase. It’s how we communicate our vision and get final sign-off on the specs. As such, the time and effort are almost always baked into your overall design fee, whether that's hourly or a flat rate for the project.

The exception? Revisions and scope creep. If a client asks for multiple, extensive revisions or wants to see entirely new concepts that go far beyond what you originally agreed to, it's absolutely fair to charge for that extra work. This is when you’d bill for your additional time sourcing materials and assembling new boards, based on the hourly rate outlined in your contract.


At Sherer Architects, LLC, we know a well-crafted material board is more than just a presentation tool—it's the foundation of a successful project, ensuring the vision and reality align from day one. Our deep experience in commercial, adaptive reuse, and historic preservation projects means every material choice is strategic, sustainable, and beautiful. If you're ready to bring structure to your vision and create enduring results, explore our services and see how we work.

Categories
Uncategorized

A Guide to Material for Interior Design in Commercial Spaces

Choosing the right material for interior design is arguably the most critical decision in any commercial or adaptive reuse project. It’s a choice that shapes everything—from the budget and timeline all the way to the building's long-term performance and how people feel inside it. This isn't just about picking pretty finishes; it's a strategic move that hinges on finding the perfect balance between durability, cost, and sustainability.

Why Material Selection Defines Project Success

A person holds a fan of wood and color material samples next to a model house, indicating design choices.

Think of a building's interior materials as its core vocabulary. Long before the first piece of furniture arrives, these materials are already communicating the space's purpose, its level of quality, and even the brand's identity. For developers and contractors, these decisions happen early, but their effects are felt through every single phase of the project, from managing construction logistics to writing the final maintenance manual.

Get a material choice wrong, and you could be looking at budget blowouts, frustrating schedule delays, and finishes that wear out far too soon. It’s a surefire way to chip away at the project's return on investment. But when you get it right, the space doesn't just look incredible on opening day—it's built to handle the real-world demands of its users for years to come.

The Impact of Early Decisions

Every single material choice sends ripples through the project. For example, that stunning custom-milled wood paneling for a feature wall might be the perfect aesthetic touch, but if its long lead time isn't meticulously planned for, it can throw the entire construction schedule into chaos. On the other hand, specifying a durable yet elegant flooring for a high-traffic lobby is a direct investment in lowering future maintenance headaches and costs.

This kind of forward-thinking is what's driving major market trends. The global interior design market hit an impressive USD 138.63 billion in 2024, and a huge part of that growth is from the demand for materials that are both beautiful and built to perform. In fact, sustainable materials were used in 65% of new builds, a massive jump from just 45% back in 2020. This isn't just a fad; it's a fundamental shift toward creating spaces with durability and environmental responsibility at their core.

Core Material Categories at a Glance

To start making sense of the thousands of options out there, it helps to organize materials into a few core categories. Each one serves a distinct purpose, and knowing how they work together is the key to creating a design that feels intentional and cohesive.

Here's a quick look at the main families of materials you'll be working with.

Material Category Primary Function Common Examples
Flooring Provides the primary walking surface; sets the foundation for durability, acoustics, and style. Luxury Vinyl Tile (LVT), Polished Concrete, Carpet Tile, Terrazzo, Hardwood
Wall Finishes Defines the vertical planes of a space; adds texture, color, and protection. Paint, Wallcoverings (Vinyl, Fabric), Wood Paneling, Tile, Acoustic Panels
Ceiling Systems Hides building systems (HVAC, electrical); controls acoustics and reflects light. Acoustic Ceiling Tile (ACT), Gypsum Board, Exposed Structure, Metal or Wood Grids
Millwork & Casework Includes custom-built wood or laminate elements for function and aesthetics. Reception Desks, Cabinetry, Built-in Shelving, Wall Paneling, Trim
Fabrics & Textiles Adds softness, color, acoustic absorption, and comfort to furniture and windows. Upholstery, Drapery, Cubicle Curtains, Decorative Textiles
Specialized Systems Materials designed to meet specific code requirements or performance needs. Fire-rated Wall Assemblies, Acoustic Baffles, Moisture-resistant Backers

As you can see, the success of a design project often comes down to mastering the details within each of these categories. For instance, understanding the nuances of Choosing Upholstery Fabric can be the difference between furniture that lasts for a decade and furniture that looks worn out in a year.

Ultimately, mastering the selection of any material for interior design is about expertly balancing these elements. The goal is always to create a space that is not only beautiful but also functional, safe, and truly built to last.

Getting to Know the Core Material Categories

Choosing the right materials for a commercial interior isn't like picking items off a shelf. It's about understanding how each category works as a tool to solve specific problems within a space. Think about the lobby of a new corporate headquarters: the floor has to stand up to hundreds of people walking through every day, while the walls need to look professional and be a breeze to clean.

Every single material choice pulls its weight, shaping how the environment performs and feels. Let's walk through the essential categories, not as a list of products, but as an integrated toolkit for creating a high-functioning design.

Flooring: The Foundation of Every Space

Flooring is the unsung hero of any commercial interior. It takes a constant beating—from relentless foot traffic to heavy rolling carts—and it's a huge factor in acoustics, safety, and how easy the space is to clean. The choice is never just about looks; it’s about matching the material's performance to how the area will actually be used.

Polished concrete, for example, is incredibly tough and gives off a modern, industrial vibe that’s perfect for a busy art gallery or retail store. The trade-off? It’s terrible with acoustics, bouncing sound all over the place and creating a loud, echo-y room. On the flip side, commercial carpet tile is a fantastic sound absorber, making it the go-to for open-plan offices or conference rooms where you need to keep noise under control.

A few key players in commercial flooring include:

  • Luxury Vinyl Tile (LVT): The chameleon of flooring. It's tough, water-resistant, and can convincingly mimic natural wood or stone without the high price tag or demanding upkeep.
  • Commercial Carpet Tile: A top choice for office environments. It dampens sound, feels comfortable underfoot, and you can easily swap out a single tile if it gets stained or damaged. That’s a huge long-term maintenance win.
  • Polished Concrete: Delivers a minimalist aesthetic and will last forever. You just have to be mindful of the acoustics and make sure it's sealed properly to avoid stains.
  • Terrazzo: A classic composite that’s poured in place or precast. It offers incredible design flexibility and is so durable you’ll often find it in high-traffic hubs like airports and government buildings.

Wall Finishes: Setting the Tone and Standing Up to Wear

Wall finishes are what create the visual and tactile feel of a room. They can be simple and practical or intricate and decorative, but in a commercial project, durability and maintenance always come first. A wall in a packed corridor has a much tougher job than one tucked away in a private executive office.

These days, low-VOC (volatile organic compound) paints are the standard for ensuring healthy indoor air quality—a must-have for employee well-being and any project aiming for green building certifications. For areas that get a lot of scuffs and bumps, like hospital corridors or school hallways, you need more than just paint. High-impact wall panels or tough vinyl wallcoverings provide a necessary layer of protection.

A material’s function is dictated by its environment. A delicate fabric wallcovering might be stunning in a low-traffic boardroom, but it would be a maintenance nightmare in a restaurant's main dining area, where cleanability and stain resistance are paramount.

Ceilings: The Unseen Performance Hero

It’s easy to forget about the ceiling, but it’s a critical surface for managing acoustics, integrating lighting, and hiding all the "guts" of the building—the mechanical, electrical, and plumbing (MEP) systems. In a busy open office, a good ceiling system can mean the difference between a productive workspace and a noisy, chaotic one.

Acoustic Ceiling Tiles (ACT) are the common workhorse here. They’re specifically designed to absorb sound and cut down on echo. Plus, their modular grid makes it easy to get to the systems hidden above for maintenance. In other designs, you might see an exposed ceiling structure for an industrial-chic look, but that almost always means you have to add other acoustic elements, like suspended baffles or panels, to make up for the loss of a sound-absorbing surface.

Millwork, Fabrics, and Specialized Systems

Beyond the big three, several other material categories add layers of function and polish to a project.

  • Custom Millwork: This covers all the built-in elements, like reception desks, cabinetry, and striking feature walls. The materials you choose here—from rich wood veneers and durable laminates to sleek solid surfaces—directly shape both the look and the longevity of these high-touch pieces. For a deeper dive into the options, an expert guide on the best materials for kitchen cabinets offers great insights that apply to all types of commercial casework.

  • Performance Fabrics: When it comes to upholstery and drapery in commercial spaces, fabrics are chosen for their report card. We look at durability ratings (like Wyzenbeek double rubs), stain resistance, and fire retardancy to make sure they can handle the demands of public use.

  • Acoustic and Fire-Rated Systems: These are the specialists. They're materials designed to meet specific building codes and solve particular problems. Think of fire-rated drywall assemblies that create safe exit corridors or dedicated acoustic panels placed just right to perfect the sound in an auditorium. Each of these categories gives designers another set of tools to solve the functional puzzles that come with every project.

How to Evaluate Materials with Performance in Mind

Choosing an interior material based only on how it looks is like buying a car for its paint job without ever popping the hood. A beautiful finish that chips, fades, or completely fails within a year isn't just a design mistake; it's a financial drain. To sidestep these costly errors, you need a solid framework for vetting materials where performance is the star of the show.

This means shifting your focus from the initial price tag to the long-term value and resilience of every single surface. It's about asking tougher questions, looking beyond the small sample swatch, and digging into the technical data that predicts how a material will actually behave out in the real world. Think of it as running a thorough background check on every candidate for your project.

This chart shows just how much of a project's material budget is dedicated to the big three categories. As you can see, flooring is a huge piece of the pie.

Bar chart displaying interior materials market share: Flooring 60%, Walls 45%, and Ceilings 25%.

The fact that flooring commands such a large market share—a whopping 60%—tells you everything you need to know. It's a massive investment, making a rigorous performance evaluation absolutely essential for getting it right.

Durability and Life-Cycle Cost

The first two pillars of any solid material evaluation are durability and life-cycle cost. They go hand in hand. Durability is simply a material’s ability to stand up to daily abuse—scratches, impacts, fading, and stains. For a chaotic hotel lobby or a busy school hallway, a flooring material with a high abrasion resistance rating isn't a "nice-to-have"; it's a must.

But durability is only half the equation. The life-cycle cost is what uncovers the true price of a material over its entire lifespan. This isn't just the upfront purchase price; it includes installation, ongoing maintenance, and the eventual cost of removal and replacement.

That cheaper carpet might save you a few bucks today, but what if it needs professional deep cleaning twice as often as a premium option? And what if you have to replace it in five years instead of fifteen? Suddenly, its life-cycle cost balloons, making the "more expensive" option the smarter financial choice.

Smart material selection is an exercise in financial forecasting. By prioritizing life-cycle value over upfront cost, you are making a direct investment in the long-term profitability and operational efficiency of the building.

Decoding Fire and Safety Ratings

Technical standards can feel a bit overwhelming, but they are your best friends when it comes to ensuring occupant safety and meeting building codes. Fire ratings are completely non-negotiable, especially in commercial spaces and multi-family residential projects.

The main standard you'll run into is the ASTM E84 test, which measures a material's surface burning characteristics. This test spits out two numbers you absolutely need to know:

  1. Flame Spread Index: This measures how quickly fire will race across a material's surface. Lower numbers are always better and safer.
  2. Smoke Developed Index: This tells you how much smoke a material will pump out when it burns. In a fire, smoke is often more dangerous than the flames, so a lower number here is critical for visibility during an evacuation.

These ratings are sorted into classes, from Class A (the most fire-resistant) to Class C. For places like exit corridors, stairwells, and other critical escape routes, building codes will almost always demand Class A materials. Treat these ratings as a material's official safety report card—and never, ever specify a product without checking it first.

Understanding Acoustic Performance

Noise is one of the biggest—and most overlooked—factors impacting occupant satisfaction and productivity. Whether you're designing an open-plan office, a bustling restaurant, or an apartment building, how you manage sound will make or break the experience.

Two key ratings will guide your choices here:

  • Noise Reduction Coefficient (NRC): This rating, scaled from 0 to 1, tells you how much sound a material absorbs. For example, a material with an NRC of 0.75 will absorb 75% of the sound that hits it. Soft, porous materials like acoustic ceiling tiles and thick carpets have high NRC ratings, which makes them perfect for taming echo and ambient noise.

  • Sound Transmission Class (STC): This rating measures how well a material or an entire wall assembly blocks sound from passing through it. A higher STC rating means better sound insulation between rooms. This is the rating you care about for spaces that demand privacy, like conference rooms, private offices, or adjacent apartments.

For example, you'd use a ceiling tile with a high NRC to quiet the chatter inside an office, but you'd need the wall separating two tenants to have a high STC rating to ensure conversations stay private.

To help visualize how different materials stack up, here’s a quick comparison of common commercial flooring options.

Performance Snapshot for Commercial Flooring

This table gives you a comparative look at popular commercial flooring choices, weighing them against key performance metrics that matter on the ground.

Flooring Type Durability Rating Typical Maintenance Average Life-Cycle Cost Acoustic Performance
Luxury Vinyl Tile (LVT) High Low (Sweep, Mop) $$ Moderate
Polished Concrete Very High Very Low (Sealant) $$$ Poor (Echo)
Carpet Tile Moderate to High Medium (Vacuum, Spot Clean) $$ Excellent
Epoxy Flooring Very High Low (Sweep, Mop) $$$ Poor (Echo)
Hardwood Moderate High (Refinishing) $$$$ Moderate
Porcelain Tile Very High Low (Grout Cleaning) $$$ Poor (Echo)

As you can see, there’s no single "best" option—the right choice always depends on the specific demands of the space. A high-traffic retail store might lean toward polished concrete for its sheer resilience, while a corporate office would benefit immensely from the acoustic comfort of carpet tile.

By understanding these core performance metrics, you can move beyond aesthetics and select materials that create an environment that not only looks great but also functions beautifully for years to come.

Balancing Sustainability with Historic Preservation

When you're choosing a material for interior design these days, you're often juggling two big ideas: sustainability and historic preservation. These aren't just buzzwords. They're a real shift in how we think about the spaces we build, pushing us to create interiors that are both responsible and respectful.

It’s about more than just how a space looks. It’s about building healthy, efficient environments that honor their own history. On one side, we’re pushed to pick materials that are better for the planet and the people in the building. On the other, we have a duty to protect the character and story of an older structure. The real magic happens when you find that sweet spot where both of these goals can live together.

Weaving Sustainability into Your Material Palette

Sustainable design is just another way of saying you’re making smart, intentional choices that pay off down the road. It's about investing in the long-term health and value of a property, not just checking a box.

Think about it this way: specifying low-VOC (volatile organic compound) paints and adhesives isn't just an abstract "green" choice—it's a direct investment in better indoor air quality for the people who will work or live there. Choosing countertops made from recycled glass or insulation from reclaimed denim is a tangible way to shrink a project's carbon footprint. These are the kinds of decisions that help projects earn green building certifications like LEED (Leadership in Energy and Environmental Design) or the WELL Building Standard, which tenants and investors are actively looking for.

The market is definitely listening. The global demand for eco-friendly interior materials has been growing at 8.5% annually since 2020. Today, sustainable options like FSC-certified timber make up 28% of all interior materials used worldwide—a massive jump from just 12% in 2015. With 82% of consumers saying they'd pay more for sustainable interiors, this isn’t a niche trend; it’s reshaping the entire industry. You can dig deeper into this shift in the global forecast for interior design.

Sustainable material selection isn't just an environmental choice; it's a strategic business decision. It enhances occupant well-being, increases a building's marketability, and can lead to significant operational savings over time through improved energy efficiency and durability.

Respecting History in Adaptive Reuse Projects

Adaptive reuse projects throw a unique challenge into the mix: how do you bring in modern, high-performance materials without completely stripping away a building's soul? The goal is to create a conversation between the old and the new. You want modern additions to complement the original architecture, not shout over it.

This takes a delicate touch and a real appreciation for the building's past. The first step is usually a "materials audit"—taking stock of what's already there. Can those incredible exposed brick walls, old timber beams, or terrazzo floors be saved and celebrated? These are irreplaceable features that tell the building’s story.

Strategies for Harmonizing Old and New

When you do need to introduce new materials, the key is to be thoughtful. You don't always have to find a perfect historical replica. In fact, sometimes a crisp, modern material is the perfect thing to make the texture and patina of a historic finish truly pop.

Here are a few strategies that work:

  • Source Historically Appropriate Materials: If you're replacing something like wood trim or flooring, do a little digging. Finding out what materials were used originally and sourcing reclaimed wood or a similar species can go a long way in maintaining authenticity.
  • Create a Clear Visual Distinction: Instead of a clumsy attempt to mimic an old finish, let the new material be honestly modern. A sleek steel and glass partition, for instance, can look stunning next to a century-old brick wall. The contrast is what makes it work.
  • Integrate Systems Thoughtfully: Do your best to hide modern systems like HVAC and electrical conduits. If they have to be exposed, treat them like clean, sculptural elements that contrast with the historic fabric instead of trying to blend in.

By balancing these considerations, you can select a material for interior design that not only performs well but also helps create a richer, more meaningful building. It’s this thoughtful approach that ensures the final space is safe, functional, and deeply connected to its own unique history.

A Practical Guide to Material Specification and Sourcing

Overhead shot of a desk with color swatches, laptop, documents, and a smartphone, for material sourcing.

A brilliant design concept is only as strong as its execution. Once you've selected the right material for interior design, the next hurdle is turning that vision into reality without costly mistakes. This is where meticulous specification and smart sourcing become the twin pillars of a successful project, making sure what you designed is exactly what gets built.

Think of the specification document as the project's legal rulebook. It’s a precise, highly detailed set of instructions that leaves zero room for a contractor or supplier to make their own judgment calls. A vague spec is an open invitation for things to go wrong.

Crafting a Bulletproof Specification

A weak specification might just say "White Oak Flooring." A strong one, however, provides a complete blueprint that leaves nothing to chance. It spells out every critical attribute to guarantee quality and consistency across the entire job.

A truly effective specification document should always include:

  • Manufacturer and Product Name: Pinpoint the exact brand, product line, model number, and color code. For instance, "Interface Carpet Tile, Style: Human Nature Collection, Color: HN840 Stone."
  • Performance Criteria: Restate the required fire ratings, acoustic ratings (NRC/STC), and durability metrics. For example, "Must meet ASTM E84 Class A Flame Spread Index."
  • Dimensions and Finishes: Specify sizes, thicknesses, finishes, and sheen levels. For wood, this means detailing the cut (like "rift sawn") and the grade.
  • Installation Instructions: Always reference the manufacturer’s specific installation guidelines. This is key to ensuring a correct application and keeping the warranty intact.

This level of detail is your best defense against the dreaded "or equal" substitution. If a contractor suggests an alternative, your spec sheet gives you a clear, objective checklist to see if it truly measures up.

Navigating the Sourcing Landscape

With your specifications locked in, it's time to source the materials. This involves deciding where to buy everything—a choice that directly impacts your project's budget and timeline. The two main avenues are buying directly from manufacturers or going through distributors.

Each path has its own trade-offs.

Sourcing Channel Pros Cons
Manufacturer Direct Often a lower unit cost, direct line to technical support, and deeper product knowledge. May have high minimum order quantities; can be slower for smaller projects.
Distributor Can consolidate orders from multiple brands, often holds local stock for faster delivery, more flexible on order size. Unit cost may be slightly higher; technical support is one step removed from the source.

Choosing the right partner is about more than just comparing price tags. You have to vet your suppliers. Ask for project references, check their financial stability, and confirm their logistical capabilities. A low-cost supplier who can't deliver on time can end up costing you far more in project delays than you ever saved on materials.

Your supply chain is an extension of your project team. A reliable supplier who communicates clearly about lead times and stock levels is an invaluable asset for keeping a complex construction schedule on track.

The Art of Value Engineering

Finally, let's talk about value engineering. This isn't just code for "finding cheaper stuff." Real value engineering is a systematic process of reducing costs without gutting the design's core performance or aesthetic integrity.

It's about making smart substitutions, not just downgrades. For example, instead of swapping out the high-traffic lobby flooring for something less durable, you might find savings by choosing a more standard—but equally tough—wall base in secondary corridors.

The key is to protect the materials in high-impact areas where quality really matters, while seeking efficiencies in less critical zones. A good supplier can be a fantastic partner here, often suggesting alternative materials with similar performance data at a better price point. This collaborative approach helps bring your project in on budget without compromising its long-term success.

Answering Your Key Questions About Interior Materials

Even when you've got a solid plan, the reality of picking the right material for interior design always brings up a fresh set of questions. Trying to juggle budgets, technical specs, and what happens five years down the road can feel like spinning plates. This is where we get practical and tackle the most common hurdles that developers, contractors, and owners run into.

Think of this as the straight-talk section—clear, direct answers to help you move forward with confidence.

How Do I Balance a Tight Budget with High-Quality Materials?

This is the classic dilemma, isn't it? The secret isn't just about spending less; it's about spending smarter. You have to shift your thinking from the upfront price tag to the long-term life-cycle value. A cheaper material that needs constant repairs or a full replacement in a few years isn't a bargain—it's a liability.

The key is to be strategic. You can’t afford top-tier everything, so focus your budget on the areas that take the most abuse. We're talking about main corridors, lobbies, and reception desks. These high-traffic zones are where durable, resilient materials are absolutely non-negotiable. An investment here will pay for itself over and over.

This is where good old-fashioned value engineering comes in, but not the slash-and-burn kind. It's not about downgrading everything. It's about finding specific spots where a less expensive but equally tough alternative can do the job without wrecking the design. For example, a high-quality luxury vinyl tile (LVT) can beautifully mimic natural stone, giving you a similar look with way better durability and a much friendlier price. Always get multiple quotes and build relationships with suppliers—they can often suggest creative solutions that protect both your wallet and your vision.

What Are the Most Common Mistakes in Material Specification?

After decades in the field, I can tell you the costliest mistakes almost always come down to three things: specs that are too vague, not checking stock and lead times, and skipping the on-site sample review. Any one of these can blow up your budget, throw your schedule off by months, and leave you with a final look that falls flat.

Writing "white oak" on a spec sheet is asking for trouble. Is that rift sawn? What grade? What kind of finish? A professional specification is incredibly detailed because it has to be. Without that precision, you're leaving the final look up to chance.

Vague specifications are the root cause of miscommunication and unmet expectations. A detailed, unambiguous specification document is your single best tool for ensuring the design vision is executed precisely as intended.

Just as critical is confirming availability. That tile you fell in love with might have a six-month backorder, a delay that can bring an entire project to a grinding halt. And finally, never sign off on a material based on how it looks in a showroom. A sample that looks perfect under fluorescent lights can look completely wrong in the actual space. Get physical samples on-site and look at them at different times of day. See how the morning sun or the evening's artificial light changes the color and texture before you commit.

How Do My Material Choices Affect Green Building Certifications?

Your material choices are fundamental to hitting green building targets like LEED (Leadership in Energy and Environmental Design) or the WELL Building Standard. These aren't just feel-good labels; they are rigorous systems that award points for specific attributes that make a building healthier and more sustainable.

For a certification like LEED, what you specify has a direct impact on your score across several categories:

  • Recycled Content: Using materials made from post-consumer or post-industrial waste is a straightforward way to earn points.
  • Regional Sourcing: Choosing materials extracted and made within a certain radius of your project cuts down on transportation emissions.
  • Sustainable Harvesting: For wood products, looking for the FSC-certified label is a must. It guarantees the wood comes from a responsibly managed forest.
  • Low-Emitting Materials: This is a big one. Specifying low-VOC (volatile organic compound) paints, adhesives, and flooring is essential for credits in the Indoor Environmental Quality section.

The WELL standard digs even deeper into human health, scrutinizing materials for specific harmful chemicals and encouraging the use of biophilic design—think natural wood, stone, and plants—to boost occupant well-being. Your material specification sheet essentially becomes your scorecard for these programs.

How Do I Ensure Materials Are Maintained Properly After Handover?

A project isn't truly successful until you know it will still look great years from now. The work doesn't stop when the last contractor leaves. The single best practice is to put together a comprehensive handover manual for the client or their facilities team.

Think of it as the building's owner's manual. It needs to be simple, clear, and detailed, giving the facilities crew everything they need to properly care for every single finish you've selected.

Your manual should absolutely include:

  1. Manufacturer Cleaning Instructions: Don't paraphrase. Include the official spec sheets for everything from the flooring to the wallcoverings.
  2. Product Recommendations: List the approved cleaners, and just as important, call out what not to use. The wrong chemical can permanently damage a finish.
  3. Maintenance Schedules: Lay out a simple calendar for routine care (daily, weekly) and deeper maintenance (quarterly, annually).
  4. Warranty Information: Put all the warranty documents and supplier contacts in one place so they're easy to find when needed.

One last thing: do a final walkthrough with the facilities team. Show them how to care for any particularly unique or sensitive materials. This one-hour investment can prevent thousands of dollars in damage later on, protecting the owner's investment and ensuring your design stands the test of time.


At Sherer Architects, LLC, we believe that thoughtful material selection is the foundation of enduring architecture. Our expertise in commercial projects, adaptive reuse, and historic preservation ensures every choice balances performance, budget, and a deep respect for the building's character. If you're ready to create a space that is beautiful, functional, and built to last, contact Sherer Architects, LLC today to discuss your project.