SHERER ARCHITECTS

Categories
Uncategorized

A Guide to Construction Contract Administration

Construction contract administration is, simply put, the process of making sure what was designed and agreed upon is actually what gets built. Once the contracts are signed and the shovels hit the ground, this is the crucial phase where an architect or a designated administrator oversees the project to ensure it sticks to the plan—protecting the owner's interests every step of the way.

It’s about managing the relationship and the legal agreement between the owner and the contractor throughout the entire construction process. This isn’t just about shuffling papers; it’s the active, on-the-ground management that ensures the project is delivered on time, within budget, and to the quality standards laid out in the blueprints.

The Conductor of Your Construction Project

A project conductor in a hard hat points to a building under construction with blueprints.

Think of the person handling construction contract administration as the conductor of an orchestra. The architectural plans and specifications are the musical score, and all the different players—the owner, the general contractor, the subcontractors—are the musicians.

Each musician is a master of their own instrument, but without a conductor to interpret the score and keep everyone in sync, you’d get noise instead of music. The contract administrator ensures every trade performs their part correctly and at the right time. They don't micromanage the "how" (like telling a violinist how to hold their bow), but they verify the "what"—making sure the final result perfectly matches the requirements of the contract documents. This oversight is what closes the gap between the design vision and the built reality.

Why This Process Matters More Than Ever

In today's booming construction market, having this kind of structured oversight is non-negotiable. The global market is massive and growing, expanding from $15.78 trillion in one year to $16.45 trillion the next. As projects become more complex, the need for skilled, professional administration only grows.

This isn’t just an extra layer of bureaucracy; it's a strategic shield for your project that provides real, tangible benefits.

  • Protecting Your Investment: It’s the ultimate accountability check, ensuring you get exactly the quality and scope of work you paid for.
  • Maintaining Quality Control: Through regular site visits and detailed reviews of materials and shop drawings, the administrator serves as your eyes and ears on the job site.
  • Preventing Costly Disputes: By documenting everything and making impartial decisions based on the contract, potential issues are resolved long before they can escalate into messy, expensive conflicts.

A well-administered contract transforms the potentially adversarial relationship between owner and contractor into a collaborative partnership focused on a shared goal: a successfully completed building. It replaces assumptions with accountability.

This table provides a scannable overview of the primary responsibilities in CCA, helping you quickly grasp its scope and importance.

Core Functions of Construction Contract Administration

Function Primary Goal Key Activities
Document Management Ensure all parties work from the correct, most current set of plans and documents. Processing RFIs, managing submittals and shop drawings, distributing contract updates.
Quality Assurance Verify that work conforms to the contract documents, plans, and specifications. Conducting regular site observations, reviewing materials, and inspecting work quality.
Financial Oversight Keep the project on budget and ensure fair and timely payment for completed work. Reviewing and certifying contractor pay applications, processing change orders, tracking costs.
Schedule Monitoring Facilitate on-time project completion by tracking progress against the master schedule. Attending project meetings, reviewing progress reports, identifying potential delays.
Risk Mitigation Proactively identify and resolve issues before they become major problems or disputes. Facilitating communication, mediating conflicts, documenting decisions and changes.

Ultimately, these functions work together to provide a comprehensive system of checks and balances that keeps the project on track from start to finish.

The Legal Foundation

At its core, construction contract administration is about upholding the legal documents that bind the project together. The contract is the rulebook—it sets out everyone's responsibilities, defines the timeline, and dictates the payment terms.

To get a feel for the complexity, it's worth understanding the different types of architectural contracts and how they lay the groundwork for a project. By actively managing every clause in that agreement, the administrator gives the owner peace of mind and sets the stage for a successful build, from groundbreaking all the way to final handover.

The Key Players: Understanding Roles and Responsibilities

A construction project is like a three-legged stool, with each leg representing one of the core players: the Owner, the Architect, and the General Contractor. For the project to stay upright and stable, each leg has to be strong and do its job. Get this part wrong, and the whole thing wobbles.

This isn't just about titles on a business card. It’s a well-established system of checks and balances that fosters accountability and, when it works right, true collaboration. When everyone knows their role and respects the boundaries, what could easily become a contentious process turns into a partnership aimed at one thing: getting the project built successfully.

The Owner: The Vision and the Wallet

The Owner is the one who initiates the project, holds the vision, and, crucially, pays the bills. They are the ultimate decision-maker, and their role is far from passive once the shovels hit the ground. A disengaged owner is a recipe for delays and misunderstandings.

Think of the owner as the project's fuel. Their key responsibilities are all about keeping the engine running:

  • Providing Timely Information: When the team needs an answer on a design choice or a scope question, the project can't wait. Quick, clear decisions are essential.
  • Making Prompt Payments: Nothing grinds a project to a halt faster than late payments. Paying the contractor on time, as laid out in the contract, is fundamental to maintaining momentum and goodwill.
  • Giving Necessary Approvals: From signing off on granite samples to authorizing a change order, the owner’s approval is the green light that allows work to proceed.

The Architect: The Impartial Administrator

In the world of construction contracts, the Architect often wears a second hat: that of the Contract Administrator. This is a unique and vital position. The architect serves as the owner's trusted agent, but they must also act as an impartial interpreter of the contract documents. They’re not there to tell the contractor how to do their job, but to observe that the job is being done according to the design.

The Architect’s role as administrator is to be the objective link between the owner’s vision and the contractor’s execution. They ensure fairness and adherence to the contract, protecting all parties by holding the project to the agreed-upon standards.

This dual function is what makes the system work. Here’s what it looks like in practice:

  • Observing Progress: The architect conducts regular site visits to see how the work is progressing and check if it aligns with the plans and specifications.
  • Certifying Payments: They review the contractor’s payment applications, verifying that the amount requested lines up with the actual work completed on site.
  • Interpreting Documents: If there's a disagreement or confusion about what a drawing means, the architect is the one to provide clarification based on the original design intent.
  • Managing Changes: When changes are needed, the architect processes the paperwork (the change orders) to make sure any shifts in scope, cost, or schedule are formally documented and approved by everyone.

The Contractor: The Master Builder

The General Contractor is the one who turns the two-dimensional drawings into a three-dimensional building. They are the experts in the how—the means, methods, techniques, and sequencing of construction. The job site is their domain.

The contractor’s focus is squarely on execution and safety:

  • Construction Means and Methods: They are responsible for figuring out the best way to build the project, from managing subcontractors to choosing the right equipment.
  • Site Safety: The contractor has sole responsibility for job site safety. This means ensuring a safe environment for every single person on site, period.
  • Project Schedule and Budget: They are on the hook for getting the project built on time and within the agreed-upon budget, managing all the moving parts to hit those targets.

When these three roles are clearly defined and respected, you get a powerful, self-regulating system. The owner provides the vision and resources, the architect ensures that vision is being followed faithfully, and the contractor brings it all to life. That’s the foundation of good construction contract administration.

Navigating the Project Lifecycle Step by Step

Effective construction contract administration isn't a single action, but a journey that unfolds across the entire project. Think of it as the project’s operating system, guiding everything from the first planning meeting to the final handover and ensuring every milestone is met with precision and accountability.

This process is best understood as four distinct phases, each with its own mission-critical tasks. Knowing what to expect at each stage helps you anticipate challenges, manage expectations, and keep a firm hand on the tiller of your investment. Let’s walk through what this looks like on the ground.

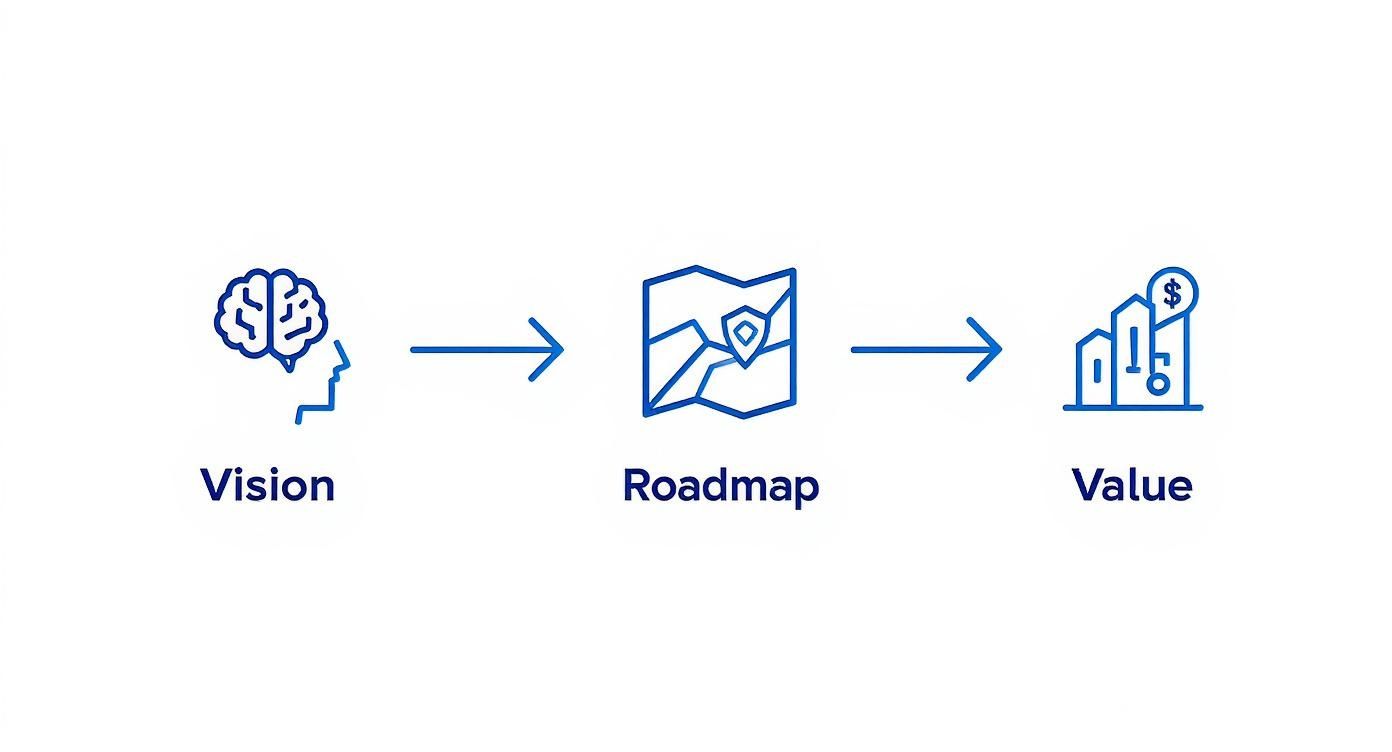
This simple diagram shows the fundamental flow of responsibility in a typical construction project.

A process flow diagram illustrates construction roles: Owner (Step 1), Architect (Step 2), and Contractor (Step 3).

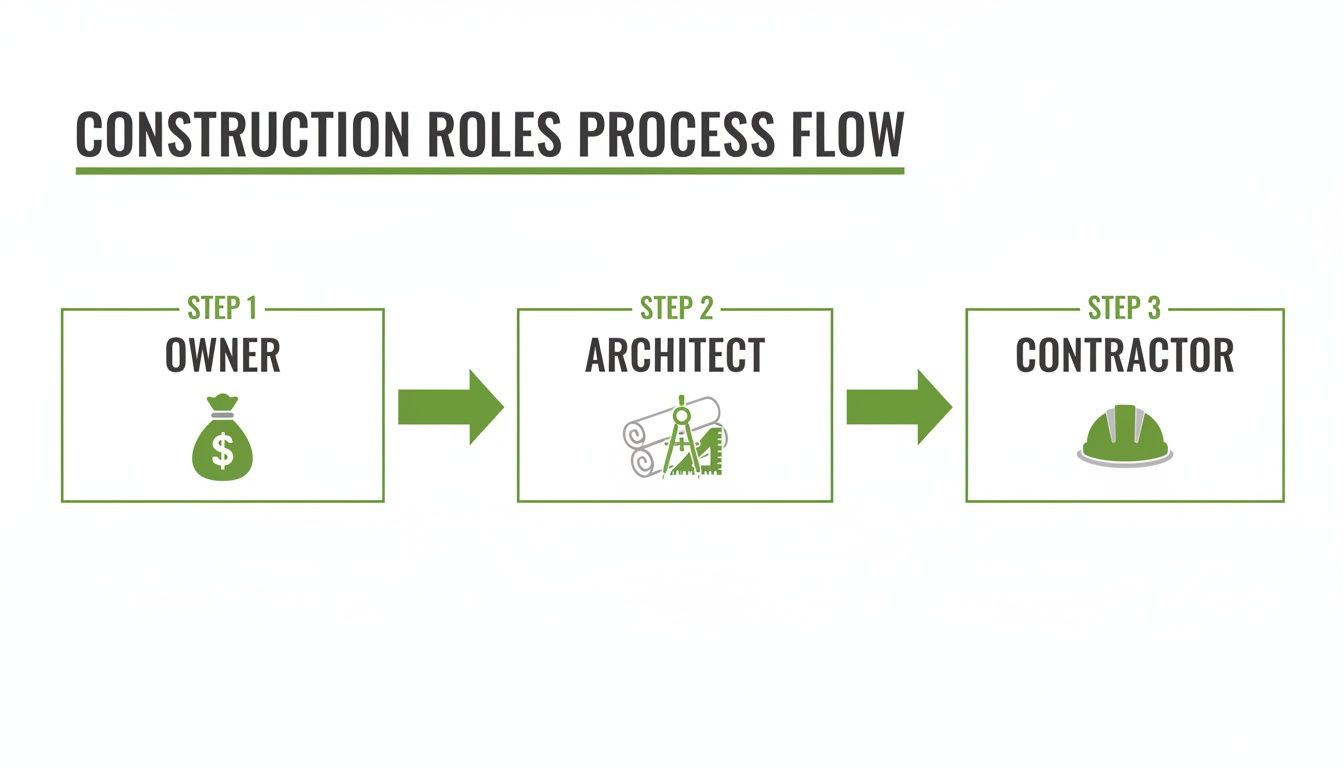
As you can see, the Owner kicks things off, the Architect translates that vision into the official contract documents, and the Contractor builds according to those plans.

Phase 1: The Pre-Construction Kickoff

Long before a single shovel hits the ground, the entire project team gathers for a pre-construction meeting. This is the bedrock of the project. Here, we set the rules of engagement, align on goals and schedules, and establish how we're all going to communicate. The whole point is to start with absolute clarity to head off confusion down the road.

A crucial document comes out of this phase: the Schedule of Values, submitted by the contractor.

What is a Schedule of Values?
It’s essentially a detailed, itemized breakdown of the total contract price, assigning a dollar value to every part of the work. This document becomes the basis for every payment application, allowing the contract administrator to accurately track progress and approve payments. A clean, logical Schedule of Values is often the first sign of a well-organized contractor.

This initial phase sets the tone for everything that follows, creating a collaborative framework for the owner, architect, and contractor.

Phase 2: The Active Construction Phase

Once construction starts, the project enters its most dynamic—and demanding—phase. Now, the contract administrator's role shifts into high gear. The focus is on constant monitoring, meticulous documentation, and clear communication to keep the project on schedule and on budget.

This is where the real work of construction contract administration happens day in and day out. Key activities include:

  • Processing Submittals: The contractor will submit shop drawings, material data, and physical samples for review. The architect, acting as the administrator, meticulously checks these against the contract documents to confirm everything meets the specified quality and design intent.
  • Managing Requests for Information (RFIs): When a contractor hits a snag or finds a discrepancy in the plans, they issue an RFI. The administrator’s job is to chase down a clear, timely answer from the design team so work doesn't grind to a halt.
  • Handling Change Orders: Let's be honest, no project goes exactly to plan. When changes are needed, the administrator manages the formal process, making sure any adjustments to the scope, cost, or schedule are properly documented, justified, and approved by the owner before the work proceeds.

This phase is also where financial pressures really mount. With intense market competition, contractor profit margins can be razor-thin. Recent data shows that smaller commercial projects often see better margins at 10.6%, while larger ones average just 8.4%. This context is important—it highlights the cost pressures contractors are under and underscores why fair, efficient payment and change order processes are so critical. You can explore more on this in Turner & Townsend's global construction cost analysis.

Phase 3: Reaching Substantial Completion

Substantial Completion is arguably the single most important milestone in the project. It’s the official point where the building is complete enough for the owner to move in and use it for its intended purpose. It doesn't mean every last detail is perfect, but all the big stuff—like major systems—is operational, and the space is safe and functional.

Getting here is a formal process:

  1. The contractor declares they believe the project has reached Substantial Completion.
  2. The architect performs a thorough inspection to verify this claim.
  3. If the architect agrees, they issue a Certificate of Substantial Completion.

This certificate is a big deal legally. It officially marks the end of the construction period, which starts the clock on all warranties and formally transfers responsibility for the property (like utilities and insurance) from the contractor back to the owner.

Phase 4: Final Project Closeout

The final phase is all about tying up loose ends to officially close the books on the project. After Substantial Completion, the architect and owner will walk the site and create a punch list—a detailed list of all the minor fixes or incomplete items the contractor needs to address.

This could be anything from a paint touch-up to adjusting a finicky door or installing a final piece of hardware. The contractor works their way through this list, and once everything is done to the architect’s satisfaction, the final payment is released.

Closeout also involves the critical handover of all project documentation to the owner, which typically includes:

  • Warranties for all materials and equipment
  • Operation and maintenance (O&M) manuals for building systems
  • Final "as-built" drawings that show exactly how the project was constructed, including any changes made along the way

With the final payment made and all documents in hand, the contract is fulfilled, and the project is truly complete. This structured, four-phase approach is what provides the control and oversight needed to turn a blueprint into a successful building.

Managing Risk with Proactive Administration

Think of construction contract administration as your project’s most powerful defense mechanism. It’s far more than just shuffling papers or checking off boxes; it’s a strategic form of project insurance. The architect, acting in this capacity, doesn’t just react to problems—they actively anticipate and neutralize threats before they ever have a chance to derail your budget, schedule, or the final quality.

This isn’t about being reactive. It's about a constant, forward-looking process of identifying what could go wrong—from a budget creep to a timeline slip—and using the right administrative tools to stop it in its tracks. It's about protecting your investment with genuine foresight.

Countering Common Project Threats

Every construction project, no matter its size, faces a predictable set of potential hurdles. An experienced contract administrator knows exactly what these hazards look like and has a proven playbook for dealing with them. This isn't about hoping for the best; it’s about preparing for reality.

Here’s a look at the most common risks and how we tackle them head-on:

  • Budget Overruns: We meticulously review every single pay application, cross-referencing it against the Schedule of Values to ensure you only pay for work that is verifiably complete and correct. We also put all change order requests under a microscope to confirm their validity and fairness, preventing scope creep from silently inflating your costs.

  • Schedule Delays: Through consistent monitoring of the contractor's schedule and regular site observations, we can spot the early warning signs of a project falling behind. From there, we step in to facilitate communication and resolve bottlenecks—whether it’s a late material delivery or a coordination jam between subcontractors—to keep things moving.

  • Quality Issues: The submittal and shop drawing review process is one of our most critical quality control checkpoints. We confirm that every material, fixture, and piece of equipment meets the exact standards defined in the contract documents before it gets installed. This simple step prevents incredibly costly and time-consuming rework down the line.

Proactive administration completely reframes the conversation. Instead of asking, "What went wrong?" after a crisis, a good administrator is constantly asking, "What could go wrong?" and putting measures in place to make sure it doesn't.

To make this process even more robust, we can use modern tools for things like ai contract review. This technology helps quickly flag non-standard clauses or potential liabilities, adding another valuable layer of protection.

Common Risks and Corresponding Administrative Solutions

To make this crystal clear, here’s a table connecting common project risks with the specific administrative tools used to mitigate them. This is how we turn abstract worries into concrete, actionable solutions.

Project Risk Key Administrative Tool How It Protects the Owner
Scope Creep & Unauthorized Changes Strict Change Order Management Ensures every change is documented, justified, and fairly priced before approval.
Paying for Incomplete/Incorrect Work Pay Application Certification Verifies that billings accurately reflect the work completed on-site, preventing overpayment.
Substandard Materials or Workmanship Submittal & Shop Drawing Review Confirms all materials and methods align with design intent before installation.
Unforeseen Site Conditions Request for Information (RFI) Process Provides a formal channel to clarify uncertainties quickly, avoiding costly assumptions.
Project Falling Behind Schedule Regular Progress Monitoring Identifies potential delays early, allowing for corrective action before they cascade.
Disputes Over Contract Terms Detailed Meeting Minutes Creates a clear, agreed-upon record of all decisions and discussions.

This systematic approach demystifies risk management, giving you a clear line of sight into how your interests are being protected at every stage.

Responding to External Pressures

Beyond the typical on-site challenges, today's projects are often impacted by major external forces. Diligent oversight becomes even more critical when factors outside the immediate project team—like the state of the labor market—come into play.

Right now, labor shortages are a serious challenge. The global construction industry is feeling the pressure, with North America alone needing to recruit roughly 500,000 additional skilled workers to meet current demand. This has a direct impact on projects, as contractors may be forced to rely on less experienced teams, which can unfortunately lead to lower-quality work and safety issues.

In this kind of environment, the administrator’s role in verifying quality is no longer just a best practice; it's an essential countermeasure. Meticulous site observations and a rigorous submittal review process are what ensure the integrity of your building isn't compromised by a stretched-thin workforce.

Ultimately, by viewing contract administration through a risk-management lens, we transform a standard process into your most reliable tool for achieving a predictable, high-quality outcome.

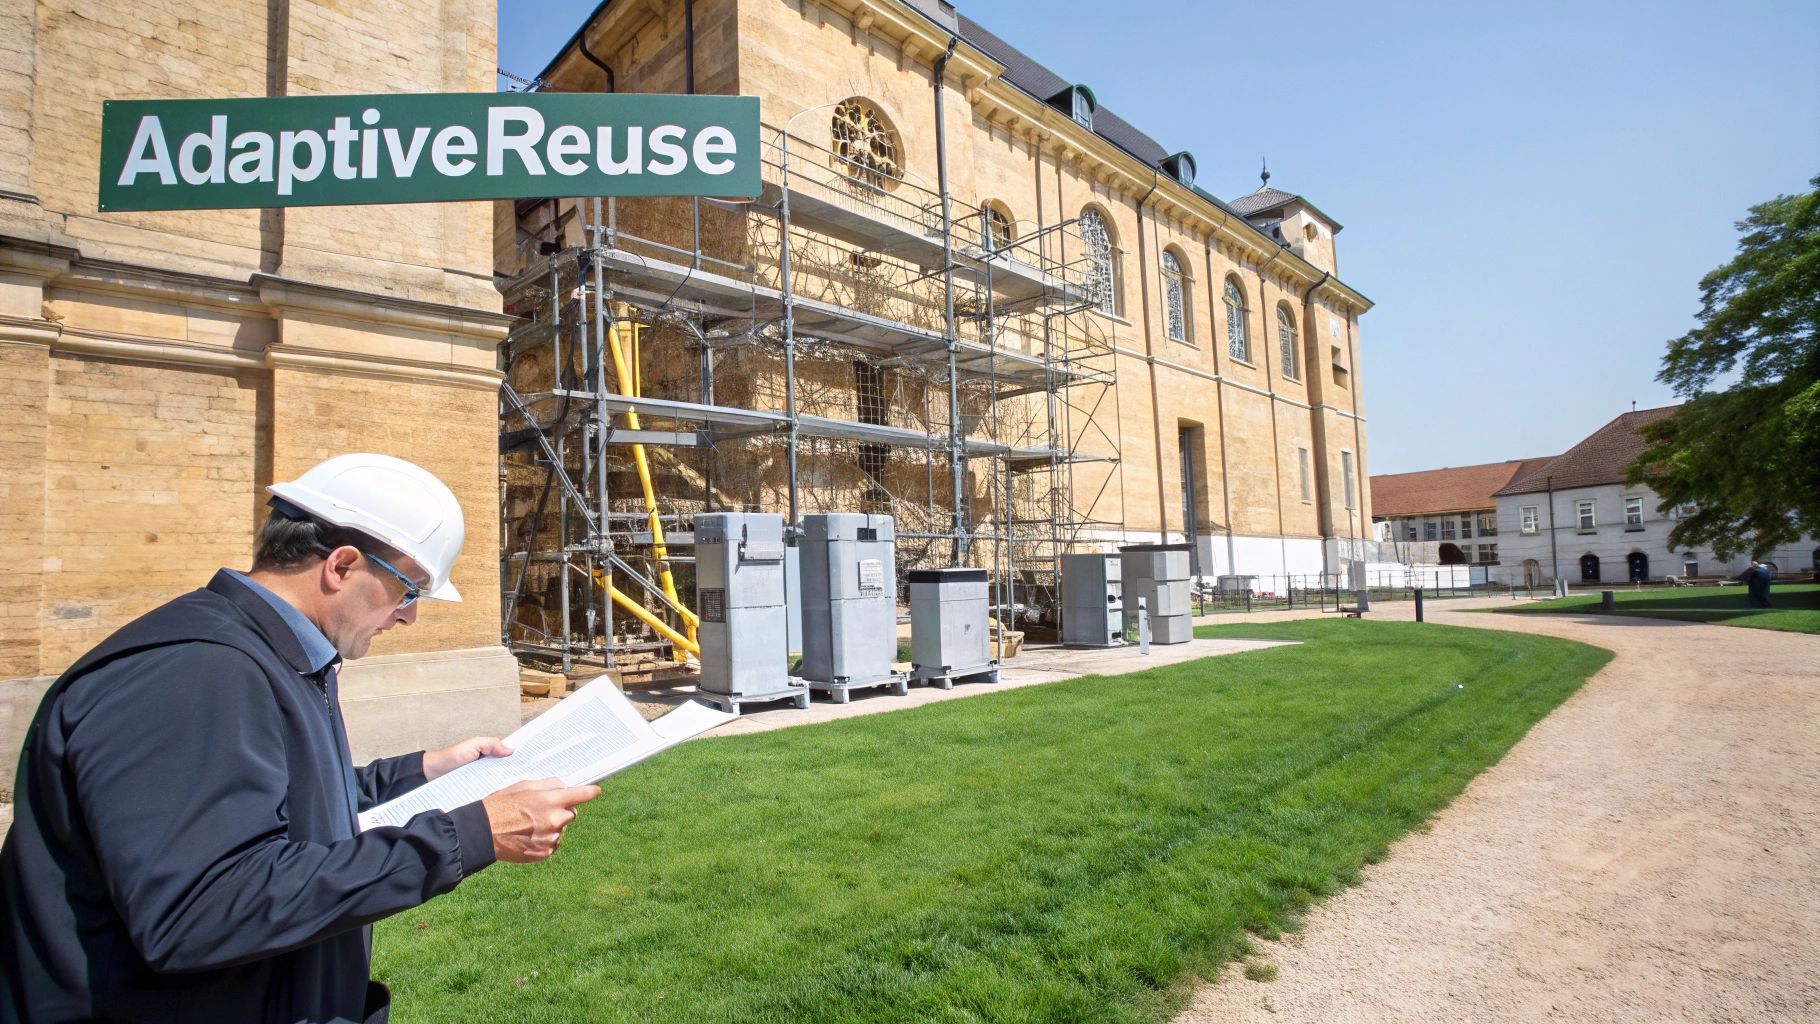
Navigating Complex Adaptive Reuse Projects

Managing a standard construction project has its challenges. But when you step into the world of adaptive reuse and historic preservation, you’re not just building something new—you’re in a constant dialogue with the past. The rulebook changes completely.

In these projects, the building itself is practically a key stakeholder, one filled with secrets and surprises that no set of blueprints could ever fully capture. The unexpected isn't just a risk; it's a guarantee. This is where an expert hand in contract administration becomes absolutely essential. It’s less about just checking boxes on a drawing and more about managing a live process of discovery, where unforeseen conditions are the norm, not the exception.

A man in a hard hat reviews construction plans in front of a historic building undergoing adaptive reuse.

Anticipating the Unforeseen

Unlike a new build on a clean, predictable site, renovating a historic structure means peeling back layers of history. What you find behind a wall can completely derail the original scope, from discovering termite-ridden structural beams to realizing the century-old plumbing system is beyond repair and needs to be replaced entirely.

A seasoned contract administrator sees this coming. They work with the team to build contingencies right into the contract and, more importantly, establish clear, pre-agreed-upon protocols for how to handle these discoveries when they happen. This proactive mindset prevents the project from grinding to a halt in a state of panic. It turns a potential crisis into a manageable, documented problem that everyone knows how to solve.

The goal is to create a framework where surprises don’t immediately spark disputes. Instead, they trigger a fair and transparent process for evaluation, problem-solving, and resolution.

The Art of the Change Order in Historic Projects

In adaptive reuse, change orders aren't just for when an owner wants to add a new feature; they are the fundamental tool for responding to the building's hidden conditions. Navigating this process requires a delicate balance of fairness, meticulous documentation, and genuine creativity.

When an unforeseen issue pops up, a skilled administrator orchestrates a methodical response:

  1. Immediate Documentation: Before anything is touched, the condition is thoroughly photographed, measured, and documented in detail. This creates an objective record.
  2. Collaborative Evaluation: The administrator gets the owner, contractor, and relevant engineers in a room (or on a call) to assess the problem and brainstorm practical solutions.
  3. Transparent Quoting: The contractor provides a clear, itemized quote for the necessary work. The administrator then carefully vets it for fairness and accuracy.
  4. Formal Approval: A formal change order is drafted and issued, capturing the new scope, associated costs, and any impact on the schedule. Once signed, it officially amends the contract.

This rigorous process protects the owner from getting hit with inflated costs while making sure the contractor is compensated fairly for legitimate work that was impossible to foresee.

In historic preservation, the contract administrator often acts like a diplomat. They have to negotiate between the non-negotiable demands of modern building codes, the historical integrity of the structure, and the owner’s budget, finding a path forward that respects all three.

A Case Study in Discovery

Picture this: we’re overseeing the renovation of a beautiful 1920s commercial building. During interior demolition, the contractor uncovers a nasty surprise. A shoddy renovation back in the 1970s had removed a critical load-bearing wall, replacing it with a dangerously undersized beam. The ceiling above had been slowly sagging for decades.

Work stops immediately. Our team, acting as the contract administrator, gets on-site with structural engineers to document the finding. We then sit down with the owner and present clear, understandable options. We could go with a costly but straightforward steel beam replacement, or we could explore a more creative (and less expensive) solution involving reinforced columns that could be cleverly integrated into the new floor plan.

By carefully managing the RFI and change order process, we helped the owner make an informed decision that was structurally sound, budget-conscious, and actually enhanced the building’s historic character. The unforeseen problem was solved without conflict, and the project moved forward with minimal delay. This is construction contract administration at its most valuable—turning a potential disaster into a well-managed, successful outcome.

Your Blueprint for a Successful Project

If there’s one thing to take away from this guide, it’s that great construction contract administration isn't just about paperwork. It’s about building a proactive, collaborative partnership—the kind of solid foundation every project needs to finish on time, on budget, and to the quality you expect. This isn’t some final hurdle; it's the active stewardship of your vision from the first day on-site to the final handover.

Think back to our conductor analogy. The architect's role in administration is to make sure every trade, every material delivery, and every stakeholder is playing their part in perfect harmony. That leadership is what turns a potentially chaotic process into a well-orchestrated performance, delivering a final building that truly reflects the original design intent.

A well-administered contract is far more than a legal safety net. It's your project's single most important blueprint for success. It swaps ambiguity for accountability and turns risk into manageable, predictable outcomes.

This is the structured oversight that bridges the gap between a brilliant design on paper and a profitable, beautifully built reality. It gives you the control and certainty you need to protect your investment at every single stage.

These principles aren't just theory; they are fundamental to how we manage projects at Sherer Architects. We've seen time and again that expert administration unlocks the full potential of a building, whether it's a new commercial development or a sensitive historic preservation project. Our team is here to provide the diligent oversight that delivers certainty, value, and most importantly, peace of mind to owners and developers.

If you’re ready to bring this level of clarity and control to your next project, reach out to us at Sherer Architects. Let's talk about how our expert administration services can help you build with confidence.

Frequently Asked Questions

It’s natural to have questions when you’re navigating the complexities of a construction project. Let's clear up a few of the most common ones we hear from owners and developers about construction contract administration.

What Is the Difference Between Project Management and Contract Administration?

It's a great question, and the distinction is crucial. Think of it like this: project management is the big picture, while contract administration is the fine print.

A project manager, often the general contractor, is focused on the "what" and "when"—coordinating subcontractors, managing the overall schedule, and handling the day-to-day logistics of getting the job done.

Contract administration, on the other hand, is a specialized role typically handled by the architect. We act as your eyes and ears on-site, focusing on the "how." Our job is to make sure the work being done exactly matches what was agreed upon in the contract documents, from materials to workmanship. We observe progress and certify payments, but we don't tell the contractor how to do their job.

Who Is Responsible for Paying for a Change Order?

This really boils down to one thing: what caused the change? A good contract administrator is an impartial referee here, digging into the specifics to determine who should foot the bill.

Here’s a quick rundown of how it usually works:

  • Owner-Requested Changes: If you decide you want marble countertops instead of granite, or want to add a new room, that cost is on you.
  • Unforeseen Conditions: This is the stuff no one could have reasonably predicted. Think hitting solid rock during excavation or finding hidden structural rot in a historic renovation. These are generally considered owner-paid costs.
  • Errors or Omissions: If a change is needed because something was missed or drawn incorrectly in the plans, the design professional may be responsible for the cost.

How Does Administration Work on Fast-Track Projects?

On a fast-track project—where construction kicks off before the design is 100% complete—contract administration goes from important to absolutely essential. Things are moving at lightning speed, so you need intense, real-time coordination.

On a fast-track job, the administrator becomes the central nervous system for information. We have to ensure the crew is always building from the most current set of drawings and that every single design tweak is tracked for its impact on cost and schedule. It’s a high-stakes, dynamic process that demands an incredibly responsive and experienced team.


Protecting your investment and ensuring a predictable, high-quality outcome all comes down to effective administration. At Sherer Architects, LLC, we provide the expert oversight needed to guide your project to a successful completion. Contact us to learn how we can bring clarity and control to your next build.

Categories
Uncategorized

A Practical Guide to the Commercial Renovation Cost Estimator

A solid preliminary cost estimate is one of the most important tools you can have at the start of a commercial renovation. It's not about nailing down every last penny; it's about checking your vision against reality and getting everyone on the same page before you sink serious money into detailed designs.

This early number moves you from guesswork to a real financial framework.

Laying the Groundwork for Your Renovation Budget

Before you can even think about a line-item spreadsheet, you need to build that financial framework. A well-thought-out preliminary estimate is the first real test of your project's viability. It's what you'll use to talk to lenders and ensure all the stakeholders are aligned on what's possible. This is where you translate the big ideas—the core goals and absolute must-haves—into clear parameters that will shape every decision down the road.

This initial planning forces you to confront the major cost drivers head-on. Take market dynamics, for example. The global commercial renovation service market is currently valued at USD 1,598 million and is expected to climb to USD 2,621 million by 2032. This isn't just a number; it tells a story. Property owners are increasingly choosing to modernize old buildings instead of building new, which directly impacts material costs and the availability of skilled labor in your area. You can dig into the full commercial renovation service market analysis to see how these trends might affect your project.

From Vision to Financial Feasibility

Think of this initial budget as setting the boundaries of the sandbox you'll be playing in. It's less about perfect precision and more about establishing a realistic range. You'll define the scope in broad strokes—what's non-negotiable versus what would be nice to have if the budget allows. This process is crucial for preventing huge miscalculations later, especially on tricky projects like adaptive reuse or historic renovations where surprises are practically guaranteed.

A preliminary budget is your first reality check. It forces an honest conversation between what you want to do and what you can afford to do, keeping scope creep in check from day one.

Before you get bogged down in the details, it helps to understand the big-picture variables that will influence your costs.

Initial Renovation Cost Factors at a Glance

This table breaks down the primary factors that set the stage for your budget before you ever start calculating specific line items.

Cost Factor Description Typical Budget Impact
Project Scope The overall size, complexity, and intended use of the space (e.g., office, retail, restaurant). High
Building Condition The age and state of the existing structure, including MEP systems, roof, and foundation. High
Location Geographic area, which affects labor rates, material costs, and permit fees. Medium to High
Quality of Finishes The level of materials and finishes, from standard "builder-grade" to high-end custom fixtures. Medium to High
Regulatory Requirements Zoning laws, building codes, accessibility standards, and historic preservation rules. Low to High

Understanding these elements gives you a solid foundation for building a more detailed and accurate estimate.

This journey from an idea to a structured plan is a process of refinement.

Diagram showing the three-step renovation budget process: Vision, Feasibility, and Planning.

As the graphic shows, a vision has to be tested for feasibility before it can become a real plan. By getting a handle on these high-level cost drivers early, you can build a financial strategy that’s both ambitious and grounded in reality. That’s how you set your project up for success.

Getting a Handle on Hard Costs vs. Soft Costs

When you start mapping out a commercial renovation budget, the first and most crucial step is to split your costs into two buckets: hard costs and soft costs. It’s a simple concept, but one that trips up a lot of people.

Think of it this way: hard costs are for all the tangible, physical stuff. The steel, concrete, drywall, and windows—everything you can physically point to in the finished space. Soft costs are the less visible, but absolutely essential, services and fees that bring the project to life. This includes things like architectural drawings, city permits, and engineering fees.

It’s incredibly common to get laser-focused on the construction itself and completely underestimate the mountain of administrative and professional services required. To get a true financial picture and avoid nasty surprises down the road, you have to understand the difference between hard costs vs soft costs. Separating them is the foundation of a reliable cost model.

Pinpointing Your Project Hard Costs

Hard costs are the direct expenses of the physical build-out. They are usually the most straightforward to itemize because they cover the actual labor and materials that go into the renovation.

Let's say you're converting an old warehouse into a sleek, modern office. Your hard cost line items would be things like:

  • Demolition and Site Prep: The cost to tear out old interiors, deal with any hazardous materials (like asbestos), and get the "canvas" ready.
  • Structural Work: This covers any new steel beams, concrete repairs for the floor, or the lumber needed for framing out new walls.
  • Building Envelope: All things related to the exterior—new energy-efficient windows, façade restoration, insulation, and roof repairs or replacement.
  • MEP Systems: This is a big one. It stands for Mechanical (your HVAC system), Electrical (all the wiring, lighting, and panels), and Plumbing (pipes, drains, and fixtures).
  • Interior Finishes: This is the fun stuff that makes the space look complete: drywall, paint, flooring, custom cabinetry, doors, and hardware.

These are the costs typically managed by your general contractor. They represent the lion's share of your budget, usually making up 70-80% of the total project expense.

The Sneaky Soft Costs You Can’t Ignore

Soft costs, or indirect costs, are all the fees for services that are critical to the project but aren't part of the actual construction. Don't make the mistake of overlooking them—they can easily account for 20-30% of your total budget and sink an otherwise well-planned project.

Imagine you're turning a historic building into a high-end restaurant. The soft costs here would be significant.

A project's success is often determined by how well the soft costs are managed. These are the expenses that require foresight, planning, and professional coordination long before the first hammer swings.

So, what falls into this category?

  • Professional Fees: This is a wide net that catches fees for architects, engineers (structural, MEP, civil), interior designers, and any special consultants you might need, like for acoustics or lighting.
  • Permits and Inspections: The money you pay to the city for building permits, zoning reviews, and all the required inspections throughout the construction process.
  • Legal and Accounting: You'll need lawyers to review contracts and accountants to manage the financial side of the project.
  • Insurance: Builder's risk, general liability, and other policies are non-negotiable to protect the property, the workers, and you from the unexpected.
  • Financing Costs: If you're taking out a loan, this includes loan application fees, appraisal costs, and the interest that accrues during construction.
  • Pre- and Post-Construction Services: Think of costs for initial feasibility studies, land surveys, and even the final professional cleaning and system commissioning before you open the doors.

For that restaurant project, you’d also have soft costs for kitchen design consultants, health department approvals, and maybe even a liquor license application. These business-specific expenses are easy to miss but are absolutely vital. The only way to get a realistic view of your total investment is to build a line item for every single one of them.

Getting Real with Per-Square-Foot Costs

A construction planning setup with blueprints, a laptop, calculator, and "HARD & SOFT COSTS" on a wooden table.

Everyone loves a good per-square-foot (PSF) number—it's fast, simple, and seems to answer the big question. But I've seen too many projects get into trouble by treating this number as gospel. It’s not a price tag; it's a starting point for a much deeper conversation.

Think of PSF costs as a rough map of the territory. They're incredibly helpful for those early, back-of-the-napkin feasibility checks. But their real value only comes when you start layering in the unique details of your project. A quick office refresh in the suburbs is a different world from a gut job on a historic downtown building, and the PSF cost will reflect that. The trick is knowing why and how to adjust.

Finding Your Baseline with Cost Ranges

Before we get into the nitty-gritty adjustments, let's get a feel for the general landscape. The costs can swing wildly depending on how deep you're planning to go. Here are some realistic buckets to start with:

  • Basic Cosmetic Updates ($50 – $95 per square foot): This is the facelift. We're talking fresh paint, new carpet tiles, updated light fixtures, and other minor touch-ups. You're breathing new life into the space without touching its bones or major systems.

  • Moderate Renovations ($95 – $175 per square foot): Now you're making more substantial changes. This could mean moving some non-load-bearing walls around, doing a serious overhaul of the restrooms, making targeted upgrades to the HVAC, and bringing in higher-quality finishes.

  • Full-Gut Renovations ($175 – $300+ per square foot): This is where you strip the interior down to the studs. You’re replacing all the major MEP (mechanical, electrical, plumbing) systems, possibly making structural changes, and installing high-end, custom finishes from the ground up. If you're building out a restaurant or a medical clinic, your project will almost certainly start in this range because of all the specialized systems involved.

These ranges are just your jumping-off point. The real work is figuring out where your project falls and what factors might push it to the high or low end—or even blow past these numbers entirely.

What Makes Per-Square-Foot Costs Swing?

An average is just an average. The art of building a good commercial renovation cost estimator lies in understanding the project's unique DNA. From my experience, four major drivers will have the biggest impact on your final number.

Building Class and Condition
Are you starting with a clean slate in a modern, Class A building? Or are you dealing with a Class C property that's seen better days? The latter might be hiding some nasty surprises—think hazardous material abatement, ancient wiring that’s a code nightmare, or structural gremlins that need fixing before you can even think about finishes. The age and health of the existing building are absolutely critical.

Location and Labor Rates
Construction is a local game. The cost of labor and materials in a major metro area like New York or San Francisco is in a completely different league than in a small Midwestern town. It’s not just about the city, either; labor availability and demand can create cost differences from one county to the next.

Level of Finishes
This one is straightforward but has a massive impact. The difference between standard commercial-grade carpet and polished concrete or imported tile is huge. Prefabricated cabinetry versus custom-built millwork is another classic example. The look and feel you're aiming for will show up directly on the bottom line.

Remember, a per-square-foot estimate is a tool, not a guarantee. Its value comes from understanding the specific project details that can make that number go up or down, ensuring your initial budget is grounded in reality.

Intended Use
What is this space going to be? A typical office has far simpler needs than a restaurant, which requires a full commercial kitchen, specialized fire suppression and ventilation, grease traps, and complex plumbing. A medical clinic is another beast altogether, with needs for specific layouts, sterile surfaces, and even lead-lined walls for X-ray rooms. These special uses dramatically ramp up the complexity and the cost.

Looking Beyond the Basic Numbers: Project-Specific Cost Drivers

Architect drawing on blueprints with a ruler, tablet showing a 3D house model, and 'Cost Per SF' document.

Here's a hard-earned lesson: a standard cost template will only get you so far. The real accuracy in any commercial renovation estimate comes from digging into the unique quirks and conditions of your specific project. These are the adjustment factors that can quickly inflate a budget, and every savvy developer knows to look for them.

Relying solely on baseline per-square-foot numbers is a rookie mistake, and a costly one at that. Learning to spot these potential cost drivers early on is what separates a smooth, well-managed project from one that careens off the financial rails.

The Financial Realities of Adaptive Reuse

Transforming an old warehouse into apartments or a historic bank into a trendy restaurant—what we call adaptive reuse—is an exciting way to breathe new life into a property. But be warned: these projects are notorious for hiding expensive secrets. You aren't just building; you're performing major surgery on an old structure, and you never know what you'll find once you open it up.

Here’s what we often uncover:

  • Surprise Structural Issues: That beam might look solid, but once you start demolition, you could find decades of hidden decay, compromised steel, or a failing foundation.
  • Hazardous Material Abatement: Older buildings are a minefield for asbestos, lead paint, and other toxins. Removal is heavily regulated and expensive, and it's a non-negotiable cost.
  • Completely Outdated Infrastructure: The original plumbing and electrical systems are almost never up to modern standards. A full MEP (mechanical, electrical, plumbing) overhaul is usually a given, and it’s a massive capital expense.

In an adaptive reuse project, your contingency fund isn't just a "nice-to-have" safety net. It's a fundamental part of your budget. You should go into it expecting to find at least one major problem and have the cash ready to deal with it.

Navigating the Nuances of Historic Preservation

Working on a designated historic property is a completely different ballgame. It comes with its own set of financial and logistical hurdles. The goal isn't just to update the space—it's to do so while preserving its soul, which means playing by a strict set of rules from preservation boards.

Costs can escalate quickly here because of:

  • Period-Correct Materials: You can't just grab materials off the shelf. You'll be sourcing or custom-fabricating everything from specific brick styles to wood windows and plaster moldings. This is both slow and expensive.
  • Specialized Labor: Your average contractor isn't qualified for this work. You'll need to find and pay for skilled artisans who specialize in things like historic masonry repair or window restoration. Their expertise comes at a premium.
  • Lengthy Approval Processes: Getting sign-off from historic review boards can add months to your timeline. That delay translates directly into higher soft costs like insurance, financing, and project management fees.

Mandatory Building Code Upgrades

A major renovation almost always triggers a requirement to bring the building—or at least the renovated areas—up to current building codes. These aren't suggestions; they are legal mandates that can blow a hole in your budget if you haven't planned for them.

This is a huge factor in the U.S., where the commercial remodeling industry is a behemoth, projected to hit $39.9 billion in revenue in 2025. A big piece of that spending is driven by mandatory upgrades. For instance, MEP systems are seeing annual inflation of 5.1% as codes push for greater efficiency and safety. You can dive deeper into the commercial remodeling industry's economic impact to see how these forces shape the market.

Common code-driven expenses include:

  1. ADA Compliance: This might mean adding ramps, widening every doorway, overhauling restrooms for accessibility, or even installing a new elevator.
  2. Fire Safety Systems: You could be on the hook for installing a full fire sprinkler system, upgrading alarms, or redesigning egress routes—all complex and invasive jobs.
  3. Energy Efficiency Standards: Many cities now require renovations to meet tough new energy codes, forcing you to upgrade insulation, install high-performance windows, or replace the entire HVAC system.

Many renovation complexities can seem minor at first but have a cascading effect on your budget.

Common Cost Escalation Scenarios

Scenario Potential Cost Impact Mitigation Strategy
Unforeseen Asbestos 10-15% budget increase Conduct a thorough hazardous materials survey before finalizing the budget. Build a specific abatement line item and a healthy contingency.
Historic Window Replacement 2x-4x cost of standard windows Engage a historic preservation consultant early. Explore repair/restoration options before committing to full, custom-fabricated replacements.
Triggered Sprinkler Requirement $5 – $10 per square foot Involve a fire protection engineer during the initial scope definition to determine if your renovation will trigger a full system requirement.
Required ADA Bathroom Overhaul $25,000 – $50,000+ per restroom Review ADA requirements with your architect at the schematic design phase. Don't assume existing restrooms can be easily modified.

Understanding these scenarios helps you anticipate, rather than react to, major budget shocks.

If you ignore these variables, your initial estimate is fundamentally flawed. A truly reliable cost estimator doesn't just look at the new paint and flooring; it digs deep into the building’s bones, its history, and the local regulations to paint a financial picture you can actually trust.

Building a Resilient Budget with Contingency

Let's be realistic: no commercial renovation ever goes exactly as planned. I've seen it time and time again. A budget that looks perfect on paper can fall apart the moment you open up a wall and find something unexpected. That’s why a professional budget isn't just a plan; it’s a financial tool built to withstand the realities of construction.

To make your budget truly resilient, you need to build in a financial cushion. This comes in two forms: contingency and escalation. It's crucial to understand the difference. Contingency is your defense against project-specific surprises, while escalation protects you from market-wide price hikes that are completely out of your control.

The Role of a Contingency Fund

Think of contingency as your project’s internal shock absorber. It’s a dedicated pot of money, a set percentage of your total costs, specifically for dealing with unforeseen issues that pop up during the build. This isn't a slush fund for adding nice-to-have features on the fly. It's strictly for tackling problems.

What kind of problems?

  • Discovering termite damage or dry rot hiding behind drywall.
  • Finding out the existing electrical system is a tangled, non-compliant mess.
  • Hitting bedrock or an old, undocumented foundation during minor excavation work.

The industry rule of thumb is to set aside 5% to 15% of your total project cost for contingency. But that's just a starting point. A simple cosmetic refresh in a modern building might only need a 5% buffer. But if you’re renovating a century-old historic property? You’d be wise to push that closer to 20%. The older the building, the more secrets it holds.

Preparing for Escalation Costs

While contingency covers the 'known unknowns' within your project, escalation handles the 'unknown unknowns' of the wider market. It’s a separate fund to cover price increases for materials and labor that happen between when you budget and when you actually buy. In a volatile economy, this can make or break a project.

We've seen this play out dramatically in recent years. Office fit-out costs have surged, with 75% of markets reporting raw material price jumps and half struggling with labor shortages. A high-end buildout for a law firm, for example, can run 16% more than a standard office simply due to the cost of premium finishes. You can dig into these global office fit-out cost trends to see just how much pressure budgets are under.

This is precisely why a separate escalation fund, often 2% to 5% for a year-long project, has become standard practice.

A budget without a properly calculated contingency is not a budget—it's a wish list. It ignores the fundamental reality of construction and leaves your project dangerously exposed to financial risk.

Building these financial buffers into your estimate from the very beginning is what separates an amateur guess from a professional financial plan. It turns a fragile spreadsheet into a robust tool that can absorb real-world shocks without derailing your entire vision.

Knowing When to Bring in a Professional

Overhead view of a clipboard, calculator, hard hat, and text 'Contingency Buffer' on wood and grass.

That cost estimator spreadsheet you’ve been working on is a fantastic tool for getting your initial thoughts organized. But let’s be honest—it has its limits. There’s a definite point where a DIY calculation stops being a helpful guide and starts becoming a potential liability.

Knowing when you’ve hit that wall is key. It’s the moment your project goes from a back-of-the-napkin idea to a real-world venture that needs funding, permits, and a team to build it.

Key Triggers for Bringing in the Pros

Certain project milestones demand a level of detail and defensibility that only an architect or professional estimator can deliver. If you wait too long to make the call, you risk painful redesigns, budget overruns, and serious financing delays.

It’s time to bring in an expert when you find yourself in one of these situations:

  • You're Seeking Financing: Lenders aren’t going to fund a project based on your personal spreadsheet. They need to see a detailed, professional cost breakdown that proves the project is financially sound.
  • You're Ready for Contractor Bids: To get realistic, apples-to-apples bids from general contractors, you need to provide them with a comprehensive and professionally vetted scope of work. Otherwise, you’re just guessing.
  • You're Facing Complex Regulations: Is your project in a historic district? Does it involve significant zoning changes or major code upgrades? An expert is essential to navigate the red tape and accurately price the compliance work.

Bringing a firm like Sherer Architects on board early turns cost estimation from a guessing game into a strategic financial roadmap. It sets your project up for a successful, profitable outcome right from the start.

It’s About More Than Just the Numbers

Hiring a professional isn't just about getting a more accurate estimate; it's about adding strategic value that protects your investment. Their expertise goes way beyond simple arithmetic.

While estimators use sophisticated tools like manufacturing quoting software for precision, their real contribution comes from experience and strategic insight.

An experienced architect brings a lot more to the table:

  1. Value Engineering: They are masters at finding smart ways to reduce costs without compromising the final product. This could mean substituting a specific material or tweaking a design element you hadn’t considered.
  2. Cost-Saving Alternatives: With their deep industry knowledge, they can suggest innovative construction methods or materials that might deliver the same result for less money.
  3. Navigating the Code: A good architect anticipates code-related costs that most people would miss entirely, saving you from expensive change orders down the line when the building inspector shows up.

Engaging an expert early ensures your budget isn't just a number—it's a realistic, defensible plan built on a foundation of real-world experience.

Frequently Asked Questions

Navigating the financial side of a renovation can be tricky, especially when you're just getting started. Let's tackle some of the most common questions we hear from property owners and developers about estimating commercial renovation costs.

What Is the Biggest Mistake People Make When Estimating Renovation Costs?

By far, the most common and costly mistake is underestimating soft costs. It’s completely natural to focus on the tangible construction expenses—the steel, the concrete, the drywall—but the indirect costs often get missed.

Things like architectural fees, city permits, engineering reviews, legal consultations, and insurance can easily add up to 20-30% of the total project cost. When you overlook these in your initial budget, you create a huge financial gap that can put the whole project at risk before a single hammer swings.

How Much Should I Budget for Contingency?

A good rule of thumb is to start with a 10% contingency fund, calculated from your total hard and soft costs. But this isn't a hard-and-fast rule; it really needs to be tailored to your project’s specific risks.

For instance, your contingency might look very different depending on the job:

  • A simple cosmetic update in a modern, well-documented building? A 5% contingency might be perfectly fine.
  • A complex historic renovation on an old structure full of unknowns? You'll want to be much more conservative, perhaps setting aside 15% to 20%.

Think of contingency as your project's insurance policy against the unexpected. The higher the risk of surprises—like uncovering hidden structural damage or hazardous materials—the more robust that policy needs to be.

Can I Use an Online Calculator for an Accurate Estimate?

Online calculators are a fantastic starting point. They're great for getting a quick, back-of-the-napkin number to see if an idea is even financially feasible.

But they can't replace a professional estimate. These tools simply can't factor in the critical details that make or break a budget, like your specific site conditions, the current local labor market, or the unique complexities of an adaptive reuse project.

When you need a budget you can confidently take to a lender or use for contractor bids, you absolutely need a detailed, line-item estimate prepared by an experienced architect or professional estimator.


Ready to move beyond ballpark figures and build a real financial plan for your renovation? The team at Sherer Architects, LLC has decades of experience turning complex commercial renovation, adaptive reuse, and historic preservation projects into profitable realities. Contact us today to discuss your vision.

Categories
Uncategorized

8 Practical Construction Value Engineering Examples for 2025

In commercial and adaptive-reuse projects, maximizing value isn't just about cutting costs. It's about optimizing performance, lifecycle durability, and long-term profitability. Value engineering (VE) is the systematic process of analyzing function to identify and eliminate unnecessary costs without sacrificing quality, reliability, or aesthetic integrity. It is a proactive, creative, and collaborative approach that challenges assumptions and unlocks smarter, more efficient ways to build.

While often perceived as simple cost-cutting, true VE focuses on enhancing the overall project value, from initial design through to long-term operation. This strategic process extends beyond material swaps to encompass broader design choices. For example, focusing on aspects like maximizing natural light through strategic glazing is just one way of making design decisions that drive ROI by improving tenant well-being and reducing energy consumption over the building's life.

This guide moves beyond theory to provide tangible construction value engineering examples that project owners, developers, and contractors can implement. We will dissect eight powerful VE strategies, breaking down the problem, the proposed alternative, and the critical takeaways for your team. You will discover how to identify opportunities for significant improvements in cost, schedule, and performance, turning common design challenges into profitable and sustainable outcomes.

1. Substitution of Materials – High-Performance Concrete

A classic construction value engineering example involves substituting conventional concrete with High-Performance Concrete (HPC) or Self-Consolidating Concrete (SCC). This strategic shift focuses on lifecycle value over initial material cost. While HPC has a higher per-unit price, its superior strength, durability, and placement efficiency often lead to significant savings in labor, time, and long-term maintenance.

HPC is engineered for specific performance characteristics, such as high compressive strength, low permeability, and enhanced resistance to chemical and environmental degradation. SCC, a type of HPC, flows easily into complex formwork without mechanical consolidation, drastically reducing labor time and improving finish quality.

Strategic Analysis & Impact

The value proposition of HPC/SCC extends far beyond simple material replacement. It redefines structural possibilities and project timelines.

  • Cost & Time Impact: Initial material costs can be 15-30% higher. However, labor costs for placement and finishing can decrease by up to 50% with SCC. Faster formwork cycling and earlier strength gain can shorten the overall project schedule by weeks or even months on large-scale projects.
  • Performance Impact: The dense, impermeable nature of HPC extends the structure's service life, particularly in harsh marine or industrial environments. This reduces future repair costs, making it a powerful tool for lowering the total cost of ownership.
  • Design Impact: Higher strength allows for smaller-profile structural elements like columns and beams. This can increase usable floor space, a direct value-add for commercial and adaptive reuse projects where every square foot counts.

Key Insight: The most effective use of this VE measure is when it's considered during the initial design phase. Retroactively substituting HPC can be challenging, but planning for it allows engineers to optimize the entire structural system around its unique properties.

Implementation & Takeaways

Successfully implementing HPC or SCC requires a shift in mindset from first-cost to lifecycle value analysis.

  • Collaborate Early: Involve your structural engineer and a knowledgeable concrete supplier during the design development stage. Their expertise is crucial for mix design and logistical planning.
  • Focus on Placement Efficiency: The primary savings often come from labor reduction and speed. Ensure the construction team is trained on the specific handling and quality control procedures for SCC to maximize these benefits.
  • Model Lifecycle Costs: For owners and developers, a lifecycle cost analysis (LCCA) is essential. It will clearly demonstrate how the higher initial investment in HPC generates long-term returns through reduced maintenance and increased durability, justifying the upfront expenditure. The American Concrete Institute (www.concrete.org) provides extensive resources on HPC standards and applications.

2. Modular Construction and Prefabrication

A powerful construction value engineering example is the shift from traditional stick-built methods to modular construction and prefabrication. This strategy involves manufacturing building components, from entire rooms to facade panels, in a controlled factory setting. These modules are then transported to the construction site for assembly, fundamentally changing the project delivery model from sequential to parallel processing.

This approach minimizes on-site variables like weather delays and skilled labor shortages while maximizing quality control. Companies like Factory OS are pioneering this technology for multi-family housing, and hotel chains like Marriott have successfully deployed prefabricated bathroom pods to accelerate project completion and ensure consistent quality across properties.

A large crane lifts a modular building section while another is on a truck, at a construction site.

Strategic Analysis & Impact

Adopting modular construction is a strategic decision that impacts the entire project lifecycle, from financing and design to final assembly and turnover. It is less a material swap and more a fundamental process re-engineering.

  • Cost & Time Impact: While direct material costs can be similar, the primary value comes from schedule compression. Projects can see a 30-50% reduction in overall duration because site preparation and foundation work occur simultaneously with factory module fabrication. This leads to significant savings in general conditions, financing costs, and faster revenue generation.
  • Performance Impact: Factory production enables superior quality control, tighter building envelopes, and reduced material waste by up to 90%. This results in more energy-efficient buildings with lower long-term operating costs and predictable performance.
  • Design Impact: This method thrives on standardization. It is ideal for projects with repetitive units like hotels, dormitories, or multi-family housing. The design must be locked in early, which imposes discipline but also ensures cost and schedule certainty.

Key Insight: The greatest barrier to modular adoption is logistical planning, not manufacturing. Success hinges on meticulously coordinating module transportation, site access for large cranes, and just-in-time delivery to avoid on-site storage issues.

Implementation & Takeaways

Implementing a modular or prefabricated strategy requires a paradigm shift towards early collaboration and detailed pre-planning.

  • Engage Manufacturers Early: Bring a modular manufacturer like Factory OS or a specialized facade fabricator into the design process from the very beginning. Their input is critical to optimizing designs for factory production and transport.
  • Design for Manufacturing and Assembly (DfMA): The architectural and engineering teams must design with the manufacturing process in mind. This includes standardizing MEP connections, module interfaces, and structural connection points to streamline both factory work and on-site assembly.
  • Prioritize Logistics Planning: Develop a comprehensive logistics plan that covers transportation routes, delivery sequencing, and site staging. This plan is as critical as the architectural drawings and is essential for realizing the schedule benefits of this VE approach.

3. Value Engineering in HVAC System Design – Right-Sizing Equipment

A fundamental construction value engineering example in mechanical systems is the precise "right-sizing" of HVAC equipment. This strategy challenges the common, yet costly, practice of oversizing systems as a conservative safety measure. Instead, it focuses on meticulous load calculations to match equipment capacity directly to the building's actual thermal demands, optimizing both upfront capital and long-term operational costs.

Oversized HVAC units are not just more expensive to purchase; they operate inefficiently. They cycle on and off too frequently (short-cycling), which prevents them from effectively dehumidifying the air, increases component wear, and consumes excess energy. Right-sizing ensures the system runs for longer, more stable cycles, providing better comfort and performance at a lower operational cost.

Strategic Analysis & Impact

The value of right-sizing is realized through a holistic improvement in cost, performance, and sustainability. It's a shift from a "bigger is better" assumption to a data-driven, efficiency-focused approach. When considering Value Engineering in HVAC System Design, optimizing equipment choices and integrating advanced systems, such as implementing energy recovery ventilator technology, can significantly enhance overall system value and energy efficiency.

  • Cost & Time Impact: Initial equipment costs can be reduced by 15-25% by avoiding oversized, higher-capacity units. Long-term energy savings can be substantial, with documented cases like the University of Pennsylvania reducing energy use by 35% after a right-sizing initiative.
  • Performance Impact: Right-sized systems provide superior dehumidification and more consistent temperature control, directly improving occupant comfort and indoor air quality. This also reduces mechanical strain, leading to a longer equipment service life and fewer maintenance issues.
  • Design Impact: Proper sizing requires early coordination between the architect and mechanical engineer. It forces a more integrated design process where building envelope performance (insulation, windows, air tightness) is directly tied to mechanical system selection, leading to a more efficient building overall.

Key Insight: Right-sizing isn't about under-sizing; it's about precision. It relies on accurate energy modeling and load calculations (like ASHRAE's Manual J for residential or similar commercial standards) that account for all variables, including solar gain, occupancy patterns, and lighting loads.

Implementation & Takeaways

Successful implementation moves beyond rule-of-thumb estimates to embrace detailed engineering analysis. This data-first approach de-risks the project and locks in future savings.

  • Insist on Detailed Load Calculations: Do not accept sizing based on square footage alone. Mandate that your MEP engineer performs comprehensive load calculations using industry-standard software and methodologies from ASHRAE.
  • Leverage Energy Modeling: Use energy modeling software during the design phase to simulate how different system sizes will perform under actual expected conditions. This helps visualize the operational cost impact of various equipment choices.
  • Integrate Envelope and Systems: The best results are achieved when envelope improvements are coordinated with HVAC sizing. A better-insulated, tighter building requires a smaller, less expensive HVAC system, creating a cascading value effect.

4. Elimination of Architectural Non-Essentials

One of the most direct construction value engineering examples is the strategic elimination or modification of non-essential architectural elements. This process involves a critical review of decorative features that add significant cost but provide little to no functional or structural value. The goal is to preserve the core design intent and aesthetic appeal while optimizing the budget.

Common targets for this VE analysis include elaborate facade articulation, premium finish materials in non-critical areas, complex rooflines, and ornamental details that drive up material and labor costs. By scrutinizing these components, teams can reallocate funds to higher-impact areas or achieve substantial direct savings without compromising the building's overall quality or brand identity.

Strategic Analysis & Impact

This VE approach requires a delicate balance between cost control and design integrity. When done collaboratively, it can refine a project's focus and enhance its financial viability.

  • Cost & Time Impact: This strategy can reduce overall project costs by 5-15% or more, depending on the initial design's complexity. Simplifying intricate facade details or storefront systems can significantly reduce labor hours and shorten the schedule for building envelope construction.
  • Performance Impact: While primarily a cost-saving measure, eliminating complex geometries can sometimes improve building performance. Simpler forms can lead to a more continuous and effective thermal envelope, reducing thermal bridging and improving long-term energy efficiency.
  • Design Impact: The key challenge is maintaining aesthetic appeal. This is achieved by focusing on form, proportion, and color rather than expensive ornamentation. For example, switching from a costly imported stone rainscreen to a high-quality insulated metal panel system can achieve a modern look while dramatically cutting costs.

Key Insight: This is not about making a building bland; it's about making smart design choices. The most successful applications occur when architects, owners, and contractors collaborate early to define which elements are "mission-critical" to the design vision and which are "nice-to-haves" that can be value-engineered.

Implementation & Takeaways

Implementing this strategy effectively hinges on open communication and a shared understanding of project priorities from the outset.

  • Prioritize Design Elements: Early in the design phase, collaboratively rank architectural features based on their importance to the brand, user experience, and street appeal. This creates a clear hierarchy for VE discussions.
  • Use High-Value Alternatives: Instead of eliminating a feature, find a more cost-effective way to achieve a similar effect. Use high-quality ceramic tile that mimics granite, or use architectural precast concrete panels to replicate the look of cut stone at a fraction of the cost.
  • Leverage Mockups: Before committing to a large-scale material change, create physical or digital mockups. This allows stakeholders to visualize the alternative and ensure it aligns with the aesthetic goals, preventing costly dissatisfaction later. The National Institute of Building Sciences (www.nibs.org) offers extensive guidance on value methodology in design.

5. Constructability Review and Sequence Optimization

One of the most impactful construction value engineering examples shifts focus from what is being built to how it is being built. A constructability review involves a comprehensive analysis of construction methods, sequencing, and logistics during the design phase. By bringing construction professionals into the design process early, teams can identify and eliminate inefficiencies before they become costly rework or schedule delays on site.

This proactive approach, often formalized through methods like Integrated Project Delivery (IPD) or Early Contractor Involvement (ECI), integrates practical field knowledge into architectural and engineering plans. The goal is to ensure the design is not only sound but also efficient to build, considering factors like site access, material handling, labor availability, and safety.

Strategic Analysis & Impact

Integrating build-ability analysis early in the design process is a fundamental value engineering strategy that prevents problems rather than solving them. Its value is measured in reduced risk and enhanced efficiency.

  • Cost & Time Impact: Early involvement of construction experts can reduce overall construction costs by 5-15%. This is achieved by minimizing change orders, optimizing schedules, and improving labor productivity. For example, large-scale mixed-use developments have seen schedule improvements of over 18 months by using an ECI approach to streamline sequencing.
  • Performance Impact: A design optimized for construction leads to higher quality. Clash detection using Building Information Modeling (BIM) prevents MEP (Mechanical, Electrical, Plumbing) conflicts, reducing the need for field modifications that can compromise system integrity. This results in fewer defects and a better-performing final asset.
  • Risk Impact: This process directly mitigates project risk. Identifying potential logistical bottlenecks, safety hazards, or sequencing conflicts during design allows the team to plan solutions in a controlled environment, rather than reacting under pressure during construction. Healthcare projects using IPD have reportedly reduced costly change orders by as much as 90%.

Key Insight: The value of a constructability review is directly proportional to how early it is implemented. Bringing a general contractor or construction manager on board during schematic design provides the greatest opportunity to influence key decisions that lock in cost and schedule efficiencies.

Implementation & Takeaways

Successful implementation requires a commitment to collaboration and the use of modern planning tools. It's a procedural shift that prioritizes integrated expertise over siloed design and construction phases.

  • Establish a Collaborative Structure: Formalize the involvement of the construction team from the project's inception. Use an IPD or ECI contract structure to align the goals of the designer, contractor, and owner.
  • Leverage BIM Technology: Utilize BIM for 4D sequencing simulations and advanced clash detection. This allows the entire team to visualize the construction process step-by-step, identifying potential conflicts and optimizing the schedule before breaking ground. Providers like Autodesk offer powerful tools for this analysis.
  • Conduct Regular Workshops: Schedule dedicated constructability review workshops at key design milestones (e.g., 30%, 60%, and 90% design completion). These sessions should focus on specific building systems, site logistics, and trade sequencing. The Associated General Contractors of America (AGC) offers resources on best practices for these collaborative processes.

6. Foundation System Optimization – Spread Footings vs. Deep Foundations

A pivotal construction value engineering example is the rigorous analysis and optimization of a building's foundation system. This strategy challenges initial assumptions by comparing deep foundations, such as driven piles or drilled piers, against shallow foundations like spread footings. A comprehensive geotechnical investigation can reveal that a less expensive shallow foundation is viable, or that a targeted hybrid approach is more efficient than a uniform deep system.

This VE analysis hinges on understanding the specific soil-bearing capacity and settlement characteristics of a site. Rather than defaulting to a conservative and costly deep foundation system, the goal is to precisely match the foundation solution to the actual ground conditions and structural loads, potentially saving a significant portion of the substructure budget.

Excavated ground showing different soil layers with a grassy field and house in the background, illustrating foundation choice.

Strategic Analysis & Impact

The value of foundation optimization goes directly to the project's bottom line, as the foundation can be one of the single largest cost centers. It's a clear example of how upfront investment in analysis yields major downstream savings.

  • Cost & Time Impact: A switch from deep to shallow foundations can reduce foundation costs by 10-30% or more. A commercial development in Texas, for instance, saved an estimated $2.1M by shifting from pilings to spread footings after a detailed soil study. The construction schedule can also be accelerated by avoiding the time-consuming mobilization and installation of pile-driving equipment.
  • Performance Impact: The goal is to achieve the required structural performance for the lowest cost, not to compromise it. A properly designed shallow foundation on suitable soil is just as reliable as a deep one. The key is ensuring the geotechnical data is accurate to prevent long-term settlement issues.
  • Design Impact: Optimizing the foundation allows for more efficient load path distribution. On a shopping center project, a hybrid approach used robust drilled piers only under heavy column loads while employing simpler spread footings for lighter wall loads, reducing overall material and labor costs without sacrificing stability.

Key Insight: This value engineering opportunity is lost if not pursued early. Commissioning a comprehensive geotechnical boring program before the structural design is finalized is the most critical step. Waiting until later makes redesigning the entire structural load path prohibitively expensive and complex.

Implementation & Takeaways

Successful foundation optimization is a direct result of early and expert-led geotechnical due diligence.

  • Invest in Geotechnical Data: Don't skimp on the initial soil investigation. A thorough report from a qualified geotechnical engineer provides the essential data needed to explore all viable foundation alternatives with confidence.
  • Engage Experts Early: Involve the geotechnical engineer and structural engineer in collaborative design meetings from the schematic phase. This allows them to evaluate multiple options and align the structural grid with the most favorable soil conditions.
  • Evaluate Hybrid Systems: The best solution isn't always "all or nothing." Analyze if a combination of deep and shallow foundations can be used to address variable soil conditions or differing structural loads across the building footprint, optimizing cost-effectiveness. The American Society of Civil Engineers (ASCE) provides extensive guidelines and standards for foundation design and soil analysis.

7. Structural Steel Value Engineering – Grade Selection and Connection Optimization

A powerful construction value engineering example in steel-framed projects is the strategic optimization of steel grades and connection designs. This approach moves beyond simply choosing the cheapest material and instead focuses on a holistic view of the entire steel package, from raw material to fabrication and final erection. By selecting higher-strength steel grades and simplifying connection details, teams can reduce tonnage, labor, and project timelines.

While higher-grade steel may have a greater cost per ton, its increased strength allows for smaller, lighter structural members. This reduction in overall weight has a cascading effect, saving on material, transportation, and erection costs. Similarly, optimizing connections to favor simpler, standardized, and repeatable designs significantly cuts down on complex and expensive fabrication labor.

Steel beams and columns at a construction site with a large building, featuring 'OPTIMIZED STEEL' text.

Strategic Analysis & Impact

This VE measure is a system-based analysis that creates value by integrating design, fabrication, and erection considerations. It is not just about material cost but the total installed cost.

  • Cost & Time Impact: Material savings from reduced tonnage can be significant, often in the 12-18% range for the structural steel package. More impactful are the time savings; for instance, a stadium project that simplified its bolted connections was able to reduce fabrication and erection time by three months, creating immense value in schedule compression.
  • Performance Impact: Using higher-grade, lighter members does not compromise structural integrity. In fact, it can improve it by reducing the building's overall dead load, which can lead to smaller foundation requirements and better seismic performance.
  • Design Impact: Lighter, smaller-profile steel members can increase clear spans and create more open, flexible interior spaces. This is a crucial benefit in commercial office and adaptive reuse projects where maximizing usable floor area is a primary driver of financial return.

Key Insight: The most significant savings are unlocked when the structural engineer, general contractor, and steel fabricator collaborate during the design phase. A fabricator's input on connection design is invaluable, as they can identify details that are difficult or time-consuming to produce with their specific equipment and processes.

Implementation & Takeaways

Implementing this strategy requires proactive collaboration and a focus on the total cost of the steel system, not just the per-ton price.

  • Engage the Fabricator Early: Bring your steel fabricator onto the design team as early as possible. Their practical knowledge of efficient connection types (e.g., bolted vs. welded, standardized shear tabs) can prevent costly and time-consuming details from being locked into the design.
  • Leverage BIM and Modeling: Use Building Information Modeling (BIM) and advanced structural analysis software to run multiple scenarios. This allows the team to precisely compare the total cost and schedule impact of different steel grades and connection strategies.
  • Standardize Everything Possible: Work with the design team to standardize connection details and member sizes across the project as much as feasible. Repetition is the key to fabrication efficiency and can dramatically reduce both cost and the potential for errors. The American Institute of Steel Construction (www.aisc.org) offers extensive design guides and standards for optimizing steel structures.

8. Mechanical System Integration – Combined Systems and Heat Recovery

A powerful construction value engineering example moves beyond individual components to optimize entire building systems. This approach integrates multiple mechanical systems to reduce equipment redundancy, improve energy efficiency, and enhance occupant comfort. Instead of designing heating, ventilation, and air conditioning (HVAC) as separate, isolated units, this strategy creates a synergistic system where outputs from one process become inputs for another.

Common applications include combined heating and cooling hydronic loops, heat recovery ventilation (HRV) systems that capture energy from exhaust air, and integrated building automation systems (BAS) that intelligently manage system operations. While initial design complexity increases, the long-term benefits in operational savings and reduced capital costs are substantial.

Strategic Analysis & Impact

Integrating mechanical systems is a holistic strategy that transforms a building's energy profile and operational budget. The value is found in eliminating waste and maximizing efficiency across the entire mechanical infrastructure.

  • Cost & Time Impact: Initial capital costs for integrated equipment and advanced controls can be higher. However, this is often offset by reducing the total amount of equipment needed, potentially saving 15-20% on mechanical systems. For example, a shared geothermal loop eliminates the need for individual chillers and boilers for each building zone.
  • Performance Impact: The primary benefit is a significant reduction in energy consumption, often between 20-30%. An HRV system in a corporate headquarters can recover over 65% of the heat from exhaust air, drastically cutting annual heating costs. This directly lowers operational expenses and improves the building's environmental footprint.
  • Design Impact: This approach requires more upfront coordination and dedicated space for centralized equipment. However, it can also reduce the need for bulky rooftop units or extensive ductwork, freeing up valuable architectural space and improving aesthetics.

Key Insight: The success of mechanical system integration hinges on early collaboration and sophisticated energy modeling. Engaging a mechanical engineer specializing in sustainable design during the schematic phase is critical to identifying opportunities and accurately quantifying the long-term return on investment.

Implementation & Takeaways

Implementing integrated systems requires a forward-thinking project team committed to performance over siloed design.

  • Engage Experts Early: Bring your mechanical engineer and controls specialist into the design process from day one. Their expertise is essential for evaluating complementary system opportunities, such as linking a building’s data center cooling loop to its domestic hot water system.
  • Leverage Energy Modeling: Use detailed energy modeling software to validate design choices and provide clear data on projected savings. This analysis is crucial for securing owner buy-in and justifying any initial cost premiums.
  • Prioritize Commissioning and Training: Integrated systems are more complex. Thorough commissioning before occupancy is non-negotiable to ensure all components work together as designed. Operator training and clear maintenance protocols are vital for achieving and sustaining peak performance. For guidance on standards, organizations like ASHRAE (www.ashrae.org) offer extensive resources.

8-Point Construction Value Engineering Comparison

Measure Implementation Complexity 🔄 Resource Requirements ⚡ Expected Outcomes 📊 Ideal Use Cases 💡 Key Advantages ⭐
Substitution of Materials – High-Performance Concrete 🔄 Moderate–High: specialized mix design, strict QC, possible equipment mods ⚡ Higher material cost (+20–30%), experienced suppliers, trained crews 📊 Improved strength/durability, extended service life (100+ yrs), reduced lifecycle costs and placement time 💡 High-rise, marine structures, parking structures, harsh environments ⭐ Higher strength & durability; faster placement (SCC); smaller structural elements
Modular Construction and Prefabrication 🔄 High upfront planning & coordination; factory workflows required ⚡ Capital for factories, transport logistics, standardized tooling and interfaces 📊 30–50% schedule reduction; 20–30% labor savings; better quality control; less waste 💡 Repetitive residential, hotels, healthcare, large-volume or fast-track projects ⭐ Faster delivery, predictable budgets, superior factory QC
Value Engineering in HVAC Design – Right-Sizing 🔄 Moderate: detailed load calculations and control integration ⚡ Modeling tools, HVAC design expertise, advanced controls and commissioning 📊 15–25% equipment cost reduction; 20–30% annual energy savings; improved IAQ 💡 Offices, institutional buildings, retrofits, occupancy-variable spaces ⭐ Improved efficiency, performance, and lower operating costs
Elimination of Architectural Non-Essentials 🔄 Low–Moderate: design choices and stakeholder alignment ⚡ Minimal: alternative finishes, samples, potential mockups 📊 10–20% savings on architectural scope; faster construction; lower maintenance 💡 Retail, hotels, corporate offices, projects needing cost-controlled aesthetics ⭐ Cost reduction while retaining acceptable aesthetics and simpler maintenance
Constructability Review & Sequence Optimization 🔄 Moderate–High: collaborative IPD, BIM workflows, early contractor involvement ⚡ BIM software, contractor time, workshops and collaborative processes 📊 5–15% cost reduction; 10–20% schedule acceleration; fewer change orders 💡 Complex projects, healthcare, infrastructure, mixed-use developments ⭐ Reduced rework, improved coordination, better risk management
Foundation System Optimization 🔄 Moderate: geotechnical investigations and comparative analysis ⚡ Geotechnical borings, specialist engineering, possible ground improvement 📊 10–30% foundation cost savings; faster build with suitable shallow solutions 💡 Sites with variable soils; commercial and multi‑story developments ⭐ Significant cost savings and optimized construction schedule/equipment
Structural Steel VE – Grade & Connection Optimization 🔄 Moderate: structural analysis and fabricator collaboration ⚡ Access to premium-grade steel, skilled fabricators, modeling tools 📊 12–18% reduction in steel costs; reduced weight, shipping and fabrication time 💡 High-rises, bridges, stadiums and large steel-framed projects ⭐ Smaller members, faster installation, standardized/efficient connections
Mechanical System Integration – Combined Systems & Heat Recovery 🔄 High: complex systems coordination, controls and commissioning ⚡ Integrated equipment, advanced controls, commissioning and operator training 📊 15–20% equipment cost reduction; 20–30% energy efficiency improvement 💡 Corporate campuses, healthcare, net‑zero targets, large mixed-use buildings ⭐ Lower OPEX, reduced footprint, improved resilience and energy recovery

From Examples to Execution: Implementing a Value-First Mindset

The diverse array of construction value engineering examples detailed in this article, from optimizing foundation systems to integrating high-performance HVAC, share a common thread. They reveal that true value engineering is far more than a last-minute cost-cutting exercise; it is a proactive, strategic mindset woven into the fabric of a project from its earliest conception.

The transition from examining these examples to executing them requires a fundamental shift in perspective. Instead of asking, "How can we make this cheaper?" the value-first approach asks, "How can we achieve the essential function for the lowest lifecycle cost without sacrificing quality, durability, or performance?" This question transforms the project dynamic from a sequence of siloed tasks into a collaborative, value-seeking mission.

Recapping the Core Principles of Effective VE

Throughout the examples, several critical themes emerged as non-negotiable pillars of successful value engineering implementation:

  • Early and Continuous Collaboration: The most impactful VE opportunities are identified long before ground is broken. Integrating contractors, engineers, and architects in the schematic design phase, as seen in the foundation and structural steel optimization examples, prevents costly redesigns and unlocks synergistic solutions.
  • Lifecycle Cost Analysis (LCA) is Paramount: Initial savings are only part of the equation. As the HVAC right-sizing and high-performance concrete examples demonstrated, a higher upfront investment can yield substantial long-term returns through reduced energy consumption, lower maintenance, and increased durability. True value is measured over the building's entire lifespan.
  • Function Over Form (Without Sacrificing Design): The principle of eliminating non-essential architectural elements is not about creating bland, utilitarian structures. It's about rigorously questioning every component's purpose and cost-benefit ratio to ensure the budget is allocated to features that deliver the highest functional and aesthetic return for the owner and end-users.

Your Actionable Roadmap to Implementing Value Engineering

Moving from theory to practice is the ultimate goal. For developers, owners, and contractors looking to leverage these principles, the path forward involves a structured, intentional approach. It’s not about applying a single tactic but about building a systemic process.

Strategic Insight: Value engineering should be a scheduled, non-negotiable part of the pre-construction process. Treat VE workshops with the same importance as budget reviews or zoning meetings to formalize their role in project delivery.

To put these ideas into action, consider the following steps:

  1. Assemble an Integrated Team Early: Break down traditional silos. Bring your general contractor, key subcontractors (like mechanical and structural), and design team to the table during the conceptual phase.
  2. Define Project Functions Clearly: Before exploring alternatives, ensure all stakeholders agree on the essential functions of each building system and space. What must it do? What performance criteria are non-negotiable?
  3. Mandate a Lifecycle Perspective: Require that major decisions, especially those concerning the building envelope, MEP systems, and structural components, are evaluated using LCA. Look beyond the initial bid price.
  4. Empower Your Team to Challenge Assumptions: Foster a culture where every team member feels empowered to question the status quo and propose innovative alternatives. The best construction value engineering examples often come from a fresh perspective challenging a long-held assumption.

By embracing this proactive and collaborative framework, you transform value engineering from a reactive tactic into a powerful strategic tool. It becomes the engine that drives innovation, enhances project feasibility, and ultimately maximizes the long-term profitability and performance of your real estate assets. This is not just about building cheaper; it’s about investing smarter, building better, and creating enduring value that stands the test of time.


Ready to apply a value-first mindset to your next commercial or adaptive-reuse project? The team at Sherer Architects, LLC specializes in integrating creative design with practical, performance-driven value engineering to maximize your return on investment. Explore our portfolio and see how we turn ambitious concepts into functional, cost-effective realities at Sherer Architects, LLC.

Categories
Uncategorized

construction project management best practices: Quick Tips

The landscape of commercial construction, adaptive reuse, and historic preservation presents more complex challenges than ever. From volatile material costs to intricate code compliance and demanding timelines, successful projects require more than just a solid blueprint; they demand an absolute mastery of process. To navigate these obstacles and deliver enduring, profitable, and sustainable results, project managers must implement a suite of proven strategies that drive efficiency and mitigate risk. This guide is built to deliver precisely that.

We are detailing 10 crucial construction project management best practices that transform complex challenges into predictable, successful outcomes. This is not a theoretical overview. We will move beyond the basics, offering actionable insights, specific implementation details, and real-world examples to help you optimize every project phase, from initial preconstruction planning to the final handover. You will learn how to integrate modern methodologies like Building Information Modeling (BIM) and Lean Construction, and refine foundational skills in risk management, cost control, and stakeholder communication.

Whether you are renovating a historic landmark, upfitting an existing commercial space, or developing a new multi-use hub, these principles are the foundation of modern project success. The goal is to provide a clear, comprehensive roadmap that empowers commercial developers, property owners, and contractors to build smarter, eliminate waste, and achieve superior project results. Each practice outlined below is designed for immediate application, providing the tools needed to control costs, maintain schedules, and ensure the highest standards of quality and safety.

1. Building Information Modeling (BIM)

Building Information Modeling (BIM) is a revolutionary approach to construction project management that moves beyond traditional 2D blueprints. It involves creating and managing a digital 3D model of a project's physical and functional characteristics. This intelligent model serves as a shared knowledge resource, integrating data from architects, engineers, contractors, and other stakeholders into a single, cohesive environment.

This digital twin allows teams to visualize the entire project in three dimensions, simulate construction sequencing, and identify potential issues long before breaking ground. By embedding layers of information into the model, from structural specifications to MEP (mechanical, electrical, and plumbing) systems, BIM facilitates unprecedented collaboration and data-driven decision-making. This practice is crucial for complex commercial projects and especially valuable in adaptive reuse, where integrating new systems into an existing structure presents unique challenges.

Why BIM is a Top Best Practice

BIM has become an indispensable tool in modern construction for several key reasons. Its primary benefit is proactive clash detection. By layering different discipline models (e.g., structural, HVAC, plumbing) on top of one another, teams can instantly identify where pipes might run through beams or where ductwork conflicts with electrical conduits. Resolving these clashes digitally during the design phase is exponentially cheaper and faster than discovering them on-site, preventing costly rework and schedule delays.

Furthermore, BIM enhances cost estimation accuracy, streamlines prefabrication processes, and improves long-term facility management. The detailed model provides a clear basis for material takeoffs and informs maintenance schedules for the building's entire lifecycle.

Key Insight: The true power of BIM lies in its role as a "single source of truth." When all stakeholders work from the same integrated model, communication breakdowns are minimized, and alignment is maximized from preconstruction through to operations.

How to Implement BIM Effectively

  • Establish a BIM Execution Plan (BEP): Before the project begins, create a formal BEP that outlines goals, roles, responsibilities, and the level of detail required for the model at each project stage.
  • Invest in Training: Ensure all team members, from designers to on-site supervisors, are properly trained on the chosen BIM software (like Autodesk Revit or Trimble Connect) and understand the project's specific protocols.
  • Start Small: If your organization is new to BIM, pilot the process on a smaller, less complex project to build internal expertise and refine your workflows before applying it to a large-scale development.
  • Utilize a Centralized Platform: Implement a cloud-based common data environment (CDE) where all stakeholders can access, update, and collaborate on the latest version of the model in real time.

For a visual overview of how BIM transforms construction, watch this short video:

2. Integrated Project Delivery (IPD)

Integrated Project Delivery (IPD) is a project delivery approach that contractually unites the owner, designer, and contractor as a single collaborative entity. This model fundamentally shifts the project dynamic from siloed responsibilities to shared risk and reward, aligning all key stakeholders around a common set of project goals from the earliest stages of conception.

Unlike traditional design-bid-build methods where parties operate independently, IPD fosters a team-oriented environment built on trust, transparency, and mutual respect. This structure is particularly effective for complex commercial and adaptive reuse projects, where early input from construction experts can inform design decisions, leading to significant cost savings and schedule efficiencies. Successful examples, like projects for Stanford University and Intermountain Healthcare, have demonstrated IPD's power to deliver projects under budget and ahead of schedule.

Why IPD is a Top Best Practice

The primary advantage of IPD is its ability to optimize project outcomes by leveraging collective expertise. By involving the contractor during the design phase, constructability issues are identified and resolved on paper, not in the field. This early collaboration prevents the costly change orders and disputes that often plague traditional projects, fostering an environment of proactive problem-solving rather than reactive blame.

Furthermore, IPD’s shared risk/reward model incentivizes innovation and efficiency. When all parties have a financial stake in the project's success, they are motivated to find creative solutions, reduce waste, and improve overall value. This alignment is a cornerstone of modern construction project management best practices, ensuring decisions are made for the good of the project, not just for an individual entity.

Key Insight: IPD transforms the contractual relationship from a potential source of conflict into a framework for collaboration. By tying financial success directly to project outcomes, it ensures every key stakeholder is pulling in the same direction.

How to Implement IPD Effectively

  • Utilize a Multi-Party Agreement: Use specialized contracts, such as those from the American Institute of Architects (AIA) or ConsensusDocs, that clearly define the shared risk/reward structure, decision-making processes, and liability limitations for the core team.
  • Establish a Co-location "Big Room": Whenever possible, create a shared physical or virtual space where the owner, designers, and builders can work together daily. This proximity accelerates communication, decision-making, and problem resolution.
  • Implement Lean Construction Principles: IPD works best when paired with Lean methodologies like the Last Planner® System. These tools help manage workflow, reduce waste, and improve the reliability of project schedules through collaborative planning.
  • Foster a Culture of Transparency: Adopt an open-book accounting policy where all project costs are visible to the core team. This transparency builds trust and enables more informed, data-driven decisions about the budget.

To learn more about the principles and contracts, explore the resources from the Lean Construction Institute.

3. Lean Construction Methodology

Lean Construction applies principles from lean manufacturing to the construction industry, creating a new paradigm focused on maximizing value and systematically eliminating waste. This methodology goes beyond simply managing tasks; it refines the entire project delivery process to improve workflow, enhance productivity, and ensure predictable outcomes. It's a holistic approach that fosters collaboration and continuous improvement among all project stakeholders.

Instead of a traditional top-down, "push" system, Lean Construction utilizes "pull" planning, where work is scheduled based on downstream demand. This philosophy is particularly effective in complex commercial builds and adaptive reuse projects where coordinating multiple trades and navigating unforeseen site conditions requires exceptional efficiency and communication. Major firms like Turner Construction have successfully integrated lean initiatives to streamline their operations and deliver superior results.

A sign on an easel saying 'ELIMINATE WASTE' at a construction site with building materials.

Why Lean Construction is a Top Best Practice

The core advantage of Lean Construction is its relentless focus on waste reduction, which extends beyond just materials. It targets eight key areas of waste: defects, overproduction, waiting, non-utilized talent, transportation, inventory, motion, and extra-processing. By minimizing these inefficiencies, projects see significant improvements in both schedule and budget performance.

A cornerstone of this practice is the Last Planner System® (LPS), a collaborative scheduling technique that dramatically improves workflow reliability. By empowering the "last planners" (foremen and team leads) to make commitments about upcoming work, the LPS ensures that schedules are realistic and achievable. This proactive approach prevents the cascading delays that plague many conventional construction projects.

Key Insight: Lean Construction transforms project management from a command-and-control system into a collaborative, commitment-based culture. This shift empowers on-site teams, improves morale, and aligns everyone toward the common goal of delivering value to the client.

How to Implement Lean Construction Effectively

  • Implement the Last Planner System®: Start by creating a master schedule, then break it down into phase schedules and weekly work plans. Involve trade foremen in look-ahead planning to identify and remove constraints before they impact work.
  • Conduct Daily Huddles: Hold brief, 10-15 minute stand-up meetings each morning on-site. These huddles allow teams to coordinate daily tasks, discuss progress, and quickly address any impediments to maintain workflow.
  • Use Visual Management: Set up visual boards on-site to display schedules, progress updates, and key performance indicators. This makes information accessible to everyone and promotes transparency and accountability.
  • Map Your Processes: Before making changes, map out your current workflows to identify specific points of waste and inefficiency. This provides a clear baseline for measuring the impact of your lean initiatives.

4. Effective Risk Management Planning

Effective risk management is a systematic process of identifying, analyzing, and responding to potential threats that could impact a construction project's objectives. This practice moves beyond reactive problem-solving by creating a structured framework to anticipate issues related to budget, schedule, safety, and quality. It involves developing a comprehensive plan before work begins, detailing potential risks and the strategies to mitigate them.

This forward-thinking approach is essential for any construction endeavor, but it is particularly critical in adaptive reuse projects where unforeseen conditions, like hidden structural defects or hazardous materials, are common. By establishing a clear process for risk assessment, teams can quantify potential impacts and develop proactive response strategies, turning uncertainty into a manageable variable. This is a core component of successful construction project management best practices.

Why Effective Risk Management is a Top Best Practice

Proactive risk management is a cornerstone of project success because it prevents minor issues from escalating into major crises. Its primary advantage is enhanced project predictability and control. By systematically identifying potential threats, from geotechnical risks in a high-rise foundation to permit delays in a highway project, project managers can allocate resources more effectively and set realistic stakeholder expectations.

This process directly protects the project's financial health by establishing contingency reserves based on quantified risk exposure rather than guesswork. It also improves safety outcomes by identifying and mitigating job site hazards before they can cause accidents. For a deeper understanding of proactive strategies, refer to this guide on "Managing Risk in Project Management".

Key Insight: The goal of risk management isn't to eliminate all risk, which is impossible. Instead, it's about shifting from a reactive "firefighting" mode to a proactive state where the team is prepared to handle disruptions efficiently and with minimal impact.

How to Implement Risk Management Effectively

  • Create a Comprehensive Risk Register: Early in the planning phase, conduct a workshop with all key stakeholders to brainstorm potential risks. Document each one in a risk register, assigning an owner, a probability score, an impact score, and a preliminary response plan.
  • Allocate Appropriate Contingency: Based on the risk analysis, set aside a contingency budget (typically 5-20% of the total project cost) specifically to cover the costs of managing identified risks should they occur.
  • Establish Risk Triggers: For high-priority risks, define specific early warning signs or "triggers." These triggers will signal that a risk is about to materialize, allowing the team to implement its response plan before the full impact is felt.
  • Conduct Regular Risk Reviews: Risk is not static. Hold monthly or bi-weekly meetings to review the risk register, update the status of existing risks, identify new ones, and remove those that have passed.

5. Comprehensive Project Scheduling and Planning

Comprehensive project scheduling and planning is the practice of creating a detailed, realistic, and dynamic roadmap for a construction project. It goes beyond a simple timeline, employing sophisticated techniques like the Critical Path Method (CPM) to identify the sequence of tasks that directly impact the project's completion date. This best practice involves breaking down the entire project into manageable components, assigning resources, and establishing clear dependencies and milestones.

A man reviews a project schedule on a tablet, with blueprints and documents on a wooden table.

This detailed planning establishes a clear sequence for all activities, from permitting and site prep to final inspections. It serves as the primary tool for guiding project execution, tracking performance against benchmarks, and managing resource allocation. For complex undertakings like fast-track commercial builds or the intricate sequencing required in adaptive reuse projects, a robust schedule is not just a guide; it's the project's central nervous system.

Why Comprehensive Scheduling is a Top Best Practice

Effective scheduling is a cornerstone of construction project management best practices because it provides visibility and control. By using techniques like CPM, project managers can identify which activities have zero "float" or slack, meaning any delay in these tasks will directly delay the entire project. This allows for proactive management, enabling teams to focus resources and mitigation efforts where they are most needed to prevent costly overruns.

Furthermore, a well-developed schedule facilitates resource leveling, ensuring that labor and equipment are used efficiently without being over-allocated or left idle. It provides a clear, data-driven basis for communicating progress to stakeholders and justifying any necessary adjustments to the project plan, making it an indispensable tool for maintaining budget and timeline discipline.

Key Insight: A project schedule is more than a calendar; it's a dynamic management tool. The most successful projects treat the schedule as a living document, constantly updated to reflect real-world progress and used to forecast outcomes and make informed decisions.

How to Implement Comprehensive Scheduling Effectively

  • Develop a Work Breakdown Structure (WBS): Start by breaking the entire project scope down into smaller, more manageable work packages. This hierarchical decomposition forms the foundation for accurate task and duration estimates.
  • Involve the Entire Team: Engage subcontractors, superintendents, and lead tradespeople in the scheduling process. Their hands-on experience is invaluable for creating realistic duration estimates and identifying potential sequencing challenges.
  • Build in Realistic Contingencies: No project goes exactly as planned. Incorporate schedule buffers or contingency time for high-risk activities or phases known for potential delays, such as permitting or material procurement.
  • Maintain and Update Regularly: The schedule is only useful if it's accurate. Implement a strict routine for updating progress (e.g., weekly) and re-forecasting completion dates. Use software like Procore, Microsoft Project, or Oracle Primavera P6 to manage these updates efficiently.

6. Rigorous Quality Management and Control

Rigorous quality management and control is the systematic process of ensuring all aspects of a construction project meet or exceed established standards and client expectations. This practice moves beyond simple end-of-phase inspections to embed quality into every step of the process. It involves a proactive framework of quality planning, quality assurance (process-oriented), and quality control (product-oriented) to prevent defects before they occur.

This comprehensive approach ensures that materials, workmanship, and final deliverables adhere to design specifications, building codes, and safety regulations. In complex projects like hospital construction, rigorous quality control is non-negotiable for patient safety and regulatory compliance. Similarly, in adaptive reuse projects, it is vital for ensuring that new systems integrate seamlessly and safely with the historical structure, preserving integrity while meeting modern performance standards.

Why Rigorous Quality Management is a Top Best Practice

Effective quality management is fundamental to a project's long-term success and reputation. Its core benefit is the prevention of defects and costly rework. By identifying and correcting non-conformance issues early through systematic inspections and process controls, teams can avoid the significant schedule delays and budget overruns associated with fixing problems after work is completed. This is a cornerstone of effective construction project management best practices.

Furthermore, a strong quality program enhances safety, increases the building's lifespan, and improves stakeholder satisfaction. Documenting quality processes provides a clear record of compliance and performance, which is invaluable for commissioning, facility management, and mitigating potential liability claims down the line.

Key Insight: Quality is not just a final inspection; it's a culture built on proactive planning and continuous verification. Shifting focus from finding defects to preventing them transforms quality control from an expense into a value-generating investment.

How to Implement Quality Management Effectively

  • Define Clear Acceptance Criteria: Before construction begins, work with stakeholders to develop and document specific, measurable, and objective quality standards for all major project components.
  • Implement a "First Work in Place" Protocol: Inspect the very first installation of any repeatable task (e.g., the first window, the first section of ductwork) to ensure it meets standards. Once approved, this serves as the benchmark for all subsequent work.
  • Use a Digital Quality Management System: Leverage mobile apps and software to create standardized inspection checklists, document issues with photos and notes in real-time, and track corrective actions through to completion.
  • Conduct Regular Quality Training: Ensure all team members and subcontractors understand the project's specific quality standards, expectations, and their individual responsibilities for achieving them.

7. Proactive Safety and Health Management

Proactive Safety and Health Management is a foundational best practice that moves beyond mere compliance to foster a deeply ingrained culture of safety. This approach involves systematically identifying potential hazards, assessing risks, and implementing preventative control measures long before an incident can occur. It prioritizes leading indicators like safety training and regular inspections over lagging indicators like injury rates.

This comprehensive system includes detailed safety planning during preconstruction, daily on-site safety meetings, thorough incident investigations, and empowering every team member to take ownership of site safety. For complex adaptive reuse projects, where workers encounter unknown conditions within existing structures, a proactive safety program is not just beneficial, it is essential for mitigating unique and unforeseen risks.

A yellow hard hat and clipboard on a table at a construction site with blurred workers and 'ZERO INJURIES' text.

Why Proactive Safety is a Top Best Practice

A robust safety program is the cornerstone of successful construction project management. Its most significant benefit is the prevention of workplace injuries and fatalities, which protects a project's most valuable asset: its people. This focus cultivates a positive work environment, improves morale, and enhances worker productivity and retention.

Furthermore, a strong safety record directly impacts the bottom line by reducing insurance premiums, minimizing the risk of costly OSHA fines, and preventing schedule disruptions caused by accidents. Companies like Turner Construction have demonstrated through their "Building L.I.F.E. (Living Injury Free Every day)" program that a zero-injury culture is an attainable goal that also yields significant financial and reputational rewards.

Key Insight: The most effective safety programs shift the mindset from reaction to prevention. By implementing a near-miss reporting system, teams can identify and correct systemic issues before they escalate into serious incidents, creating a cycle of continuous improvement.

How to Implement Proactive Safety Effectively

  • Develop a Site-Specific Safety Plan (SSSP): Before mobilization, create a detailed SSSP that identifies project-specific hazards, outlines emergency procedures, and assigns clear safety responsibilities to all personnel.
  • Conduct Daily Toolbox Talks: Start each day with a brief safety meeting to discuss the day's tasks, associated hazards, and relevant control measures. This keeps safety top-of-mind for every worker on site.
  • Empower All Personnel: Establish a clear "Stop Work Authority" policy that empowers any individual on site, regardless of their role, to halt an operation if they perceive an immediate danger.
  • Track Leading Indicators: Focus on metrics that predict future performance, such as the number of safety observations conducted, training hours completed, and hazards corrected, rather than only reacting to accidents after they happen.

8. Stakeholder Communication and Engagement

Effective stakeholder communication and engagement is the practice of systematically identifying, analyzing, and managing the expectations of every individual and group invested in a project's outcome. This goes far beyond simple project updates; it involves creating a structured framework for transparent dialogue with everyone from investors and tenants to regulatory bodies, community groups, and the project team itself.

This strategic approach ensures all participants are aligned on goals, timelines, and budgets. In complex commercial and adaptive reuse projects, where stakeholders often have competing interests, a proactive communication strategy is the glue that holds the project together. It transforms potential adversaries into partners by managing expectations, resolving conflicts before they escalate, and fostering a collaborative environment.

Why Stakeholder Communication is a Top Best Practice

Mastering stakeholder engagement is one of the most critical construction project management best practices because it directly mitigates non-technical risks. A primary benefit is proactive conflict resolution. By establishing clear channels for feedback and addressing concerns head-on, project managers can prevent minor disagreements from escalating into major disputes that cause delays and legal challenges, a common issue in public infrastructure projects with extensive community oversight.

Furthermore, strong communication builds trust and secures buy-in, which is essential for smooth decision-making and navigating the permitting process. It ensures that everyone understands the "why" behind project decisions, leading to greater support and fewer roadblocks from start to finish.

Key Insight: Project success is often defined not just by being on time and on budget, but by satisfying stakeholder expectations. A formal communication plan is the tool that ensures these expectations are clearly defined, understood, and managed from day one.

How to Implement Stakeholder Communication Effectively

  • Develop a Formal Communication Plan: At the project's outset, create a detailed plan that identifies all stakeholders, their interests, and the preferred frequency and format for communication (e.g., weekly emails, bi-weekly meetings).
  • Establish a Single Point of Contact: Designate a specific person to manage communications with each key stakeholder group to avoid mixed messages and ensure consistency.
  • Maintain Meticulous Documentation: Document all major decisions, meeting minutes, and change orders in writing and distribute them through a centralized platform to ensure everyone has access to the same information.
  • Be Transparent and Prompt: Address concerns and conflicts as soon as they arise. Provide honest, regular updates on schedule and budget performance, even when the news isn't positive, to maintain credibility and trust.

9. Cost Management and Budget Control

Cost Management and Budget Control is the disciplined process of planning, estimating, tracking, and controlling project costs from inception to completion. This practice ensures a project is completed within its approved budget, safeguarding profitability and financial viability. It involves establishing a detailed cost baseline, continuously monitoring actual expenditures against planned spending, and implementing formal processes to manage any changes or variances.

This financial oversight is more than just accounting; it’s a proactive management function. For large-scale commercial builds or complex adaptive reuse projects, where unforeseen conditions can quickly escalate expenses, rigorous cost control is the bedrock of project success. By integrating cost data with project schedules and scope, managers gain a holistic view of financial health, enabling them to make informed decisions that prevent budget overruns.

Why Cost Management is a Top Best Practice

Effective cost management is fundamental to delivering value and achieving a positive return on investment. Its primary benefit is preventing scope creep and budget overruns. A structured change order process ensures that any proposed modification to the project scope is thoroughly evaluated for its cost impact before approval. This prevents small, unmanaged changes from accumulating and eroding the project’s contingency and profit margins.

Furthermore, disciplined cost tracking provides early warning signs of financial distress. By comparing actual costs to the budget on a weekly or bi-weekly basis, project managers can identify negative trends long before they become critical. This foresight allows for timely corrective actions, such as value engineering or re-sequencing work, to bring the project back on track.

Key Insight: Proactive cost management is not about cutting corners; it's about making strategic financial decisions. A well-managed budget provides the stability needed to focus on quality, safety, and delivering the project as promised without constant financial crises.

How to Implement Cost Management Effectively

  • Develop a Detailed Cost Baseline: Create a granular, line-item budget during preconstruction, using historical data and multiple estimates for validation. This baseline becomes the benchmark against which all future costs are measured.
  • Implement a Strict Change Order Process: Establish a formal, multi-step approval workflow for all change orders. No work should proceed on a change until its cost impact is fully approved in writing by the client and relevant stakeholders.
  • Utilize Earned Value Management (EVM): For complex projects, use EVM to integrate cost, schedule, and scope performance. This powerful technique, championed by the Project Management Institute (PMI), provides objective metrics to forecast final project costs and completion dates.
  • Track Costs and Variances Religiously: Use construction-specific accounting software to track every dollar spent. Hold weekly meetings to review budget-versus-actual reports and analyze any variances to understand their root cause.

10. Effective Subcontractor and Supply Chain Management

Effective Subcontractor and Supply Chain Management is the strategic process of selecting, contracting, coordinating, and managing all third-party vendors, from specialty subcontractors to material suppliers. This practice goes beyond simple procurement; it is about building a high-performing, reliable network that functions as a seamless extension of the project team. A well-managed supply chain is critical for controlling costs, maintaining the project schedule, and ensuring quality workmanship.

This comprehensive approach involves rigorous prequalification of partners, developing clear and fair contracts, and establishing robust communication channels to monitor progress and resolve issues. In complex commercial and adaptive reuse projects, where specialized skills and materials are often required, managing these relationships effectively can be the difference between a profitable, on-time project and one plagued by delays, cost overruns, and disputes.

Why Subcontractor and Supply Chain Management is a Top Best Practice

This discipline is one of the most vital construction project management best practices because projects are rarely completed by a single entity. The primary benefit is risk mitigation. A thoroughly vetted subcontractor is less likely to default or produce substandard work, and a resilient supply chain with backup suppliers protects the project from material shortages or sudden price spikes. This proactive management prevents bottlenecks that can halt progress across the entire job site.

Furthermore, strong partnerships foster collaboration and innovation. When subcontractors are treated as valued partners, they are more likely to offer cost-saving suggestions and go the extra mile to meet project goals. This leads to better quality, more efficient workflows, and a positive on-site culture, which ultimately translates to a superior final product for the client.

Key Insight: Your project is only as strong as its weakest link. Treating your subcontractors and suppliers as integral partners, rather than just vendors, builds a foundation of trust and reliability that is essential for navigating the complexities of modern construction.

How to Implement Effective Vendor Management

  • Establish Rigorous Prequalification Criteria: Before inviting bids, develop a formal process to vet potential partners on their financial stability, safety record (e.g., EMR score), past project experience, and references.
  • Use Clear and Comprehensive Contracts: Utilize detailed contracts that explicitly define the scope of work, payment schedules, quality standards, and communication protocols to prevent misunderstandings down the line.
  • Implement Performance Monitoring: Regularly track subcontractor and supplier performance using key metrics like schedule adherence, quality of work, and safety compliance. Monthly scorecards can help identify issues early.
  • Maintain Open and Consistent Communication: Hold regular coordination meetings and maintain a central, written log of all communications, change orders, and decisions to ensure everyone is aligned. Prompt payment of invoices is also crucial for maintaining good faith.

Construction Project Management: 10 Best Practices Comparison

Approach / Practice Implementation Complexity 🔄 Resource Requirements ⚡ Expected Outcomes 📊 Ideal Use Cases 💡 Key Advantages ⭐
Building Information Modeling (BIM) High — steep learning curve, interoperability challenges 🔄 High — software, hardware, training, data infrastructure ⚡ Very high — better coordination, 20–30% less rework 📊⭐ Complex, multi-discipline projects; lifecycle/facility management 💡 Clash detection, accurate estimates, centralized data ⭐
Integrated Project Delivery (IPD) High — complex contracts and cultural change 🔄 Medium–High — facilitation, legal support, collaborative systems ⚡ High — cost reduction (5–15%), improved schedule/quality 📊⭐ Projects needing early stakeholder alignment and innovation 💡 Shared risk/reward, fewer disputes, aligned incentives ⭐
Lean Construction Methodology Medium — requires continuous cultural change 🔄 Medium — training, supply-chain coordination, implementation tools ⚡ High — waste down 20–30%, productivity up 10–25% 📊⭐ Repetitive workflows, contractors focused on waste reduction 💡 Eliminates non-value work, improves flow and productivity ⭐
Effective Risk Management Planning Medium — ongoing analysis and expertise required 🔄 Medium — risk workshops, analysts, contingency reserves ⚡ High — fewer surprises, protected profitability and schedule 📊 High-risk projects (infrastructure, international, geotechnical) 💡 Early mitigation, contingency planning, improved confidence ⭐
Comprehensive Project Scheduling & Planning Medium — time-intensive, detailed dependencies 🔄 Medium — schedulers, tools (CPM), historical data ⚡ High — accurate durations, early delay warnings 📊 Complex sequences, fast-track, mega-project scheduling 💡 Critical path visibility, resource optimization, milestones ⭐
Rigorous Quality Management & Control Medium — inspection regimes and documentation load 🔄 Medium — inspectors, testing, QA systems and training ⚡ High — reduced rework, regulatory compliance, customer satisfaction 📊⭐ Healthcare, data centers, safety-critical builds 💡 Defect reduction, consistent standards, warranty risk down ⭐
Proactive Safety & Health Management Medium — program setup and cultural adoption 🔄 Medium — training, PPE, audits, safety staff ⚡ Very high — prevents injuries, lowers incident-related costs 📊⭐ High-hazard sites, large crews, regulatory scrutiny 💡 Injury prevention, lower insurance costs, compliance ⭐
Stakeholder Communication & Engagement Low–Medium — process and cadence management 🔄 Low–Medium — communication platforms, reporting effort ⚡ High — fewer misunderstandings and disputes, better alignment 📊 Public projects, multi-stakeholder programs, complex owners 💡 Builds trust, speeds decision-making, reduces change orders ⭐
Cost Management & Budget Control Medium — detailed tracking and change control 🔄 Medium–High — cost systems, EVM, estimators, accountants ⚡ High — early overrun detection, maintained profitability 📊 Fixed-price projects, portfolios, mega-project financial control 💡 Budget discipline, forecasting, variance management ⭐
Subcontractor & Supply Chain Management Medium — vetting, contracting and performance monitoring 🔄 Medium — prequalification, backup suppliers, KPIs ⚡ High — timely deliveries, consistent workmanship, fewer delays 📊 Projects dependent on many vendors or JIT delivery 💡 Reduced supply risk, stronger vendor relationships, quality control ⭐

Integrating Best Practices for Enduring Success

Navigating the intricate landscape of modern construction, especially within the demanding realms of commercial projects and adaptive reuse, requires more than just a competent team and a set of blueprints. The difference between a project that merely meets specifications and one that delivers enduring value lies in the deliberate, systematic integration of proven methodologies. The ten construction project management best practices we've explored are not isolated tactics to be deployed ad-hoc; they are interconnected pillars that form a resilient framework for project delivery.

From the digital-first approach of Building Information Modeling (BIM) that creates a single source of truth, to the collaborative ethos of Integrated Project Delivery (IPD) that aligns all stakeholder incentives, these principles work in concert. A comprehensive project schedule is not just a timeline; it's a dynamic tool that informs your cost management strategy and highlights potential risks before they materialize. Similarly, a Lean Construction mindset, focused on eliminating waste, directly enhances both your quality control and safety management programs by fostering a culture of continuous improvement and meticulous attention to detail.

From Knowledge to Action: Your Next Steps

Merely understanding these concepts is the first step. The true challenge and reward come from weaving them into the operational fabric of your organization. It's about moving from a reactive to a proactive stance, transforming potential liabilities into predictable outcomes and profitable assets.

Actionable Takeaways to Implement Now:

  • Audit Your Current Process: Select one recently completed project and evaluate it against these ten best practices. Where were the gaps? Did a lack of proactive risk planning lead to budget overruns? Could better stakeholder communication have streamlined the permitting phase?
  • Prioritize a Pilot Program: You don't need to implement everything at once. Choose one or two high-impact practices to pilot on your next project. For example, introduce a more rigorous preconstruction planning phase using BIM or implement daily huddle meetings to improve subcontractor communication and flow, a core tenet of Lean.
  • Invest in Technology and Training: The right tools are force multipliers. Whether it’s adopting project management software that facilitates transparent communication or investing in training for Lean methodologies, empowering your team with the right resources is critical for successful implementation.

The Holistic Advantage in Modern Construction

Ultimately, mastering these construction project management best practices is about building a cohesive, predictable system. It’s a commitment to a philosophy where proactive planning mitigates unforeseen challenges, where transparent communication builds trust, and where rigorous quality control ensures the final product is not just built to code, but built to last.

This integrated approach is the key to unlocking true project potential, especially in complex adaptive reuse or historic preservation scenarios where every decision carries significant weight. By shifting from a collection of disparate tasks to a unified strategy, you cultivate a project environment defined by efficiency, accountability, and excellence. This commitment doesn't just get projects done; it builds a reputation for delivering exceptional results on time and on budget, turning every build into a cornerstone of enduring success.


Ready to see how an integrated, architect-led approach can transform your next commercial or adaptive reuse project? The team at Sherer Architects, LLC builds these best practices into every design and management decision, ensuring your vision is realized with precision and expertise. Contact us today to discuss how we can bring your project to life.

Categories
Uncategorized

Renovation vs Remodeling What Developers Need to Know

When you get down to it, the real difference between renovation and remodeling comes down to one thing: intent. A renovation is all about restoring or updating a space that’s already there. A remodeling project, on the other hand, transforms it by changing its very structure or function. Knowing which path you’re on from the start is crucial, as it dictates whether you're simply refreshing a property or completely altering its DNA.

Defining Renovation and Remodeling

Split image: green house exterior with lawn and interior room with blueprint, text 'CORE DIFFERENCES'.

While most people use these terms interchangeably, in the world of commercial development, they carry serious legal and financial weight. Getting this distinction right is the first step toward creating an accurate project scope, building a realistic budget, and successfully navigating the maze of building codes and permits.

Think of a renovation as bringing a space back to a good state of repair. It’s essentially a major cosmetic upgrade—you’re improving the look and feel of a space without messing with its core design. These projects are all about refreshing and restoring what you already have.

Remodeling, however, is about fundamentally changing a building’s character or purpose. This nearly always means altering the structure itself, whether that’s moving walls, combining two offices into one, or even raising a ceiling. You’re not just updating the space; you’re creating something entirely new from the old framework.

At a Glance Comparing Renovation and Remodeling

This "refresh vs. transform" dynamic shows up in smaller-scale projects, too. For example, understanding the distinctions between hardwood floor refinishing and resurfacing is a perfect micro-level illustration. A renovation is like refinishing—you're working with the existing material—while a remodel often requires a much bigger overhaul.

Here’s the simplest way I explain it to clients: Renovation means 'to make new again,' while remodeling means 'to change the model.' One restores the past, and the other redefines the future of the space.

For a quick reference, here's a breakdown of how these concepts stack up in practice. This table helps clarify the key differences developers need to consider when planning their next move.

Factor Renovation Remodeling
Primary Goal Restore, repair, or update a space. Transform the layout, structure, or purpose.
Structural Impact Minimal to none; works within the existing layout. Significant; often involves moving walls or altering systems.
Typical Cost Lower upfront cost, mostly cosmetic. Higher upfront cost due to complexity.
Project Examples Painting, installing new fixtures, replacing flooring. Combining rooms, adding a bathroom, reconfiguring an office.

Ultimately, this high-level view is a great starting point for weighing your options and aligning your project's scope with its intended outcome.

Understanding the Scope of Each Approach

To really get to the heart of renovation versus remodeling, you have to look past the dictionary definitions and see what they mean on a job site. The difference isn't just about semantics; it dictates everything from the first sketch to the final certificate of occupancy. Getting this right from the start is critical, especially in today's market.

The global home renovation market was valued at an eye-watering USD 1,994.02 billion in 2024 and is expected to climb to USD 2,659.60 billion by 2032. That kind of growth underscores why developers and owners need to be crystal clear on whether their project is a straightforward renovation or a much more involved remodel. You can dig into the numbers and what’s driving them in the full report from Fortune Business Insights. Knowing this landscape helps you make smarter, more strategic decisions.

What Renovation Looks Like in Practice

Renovation is all about bringing something back to good condition. Think restoration, cosmetic fixes, and material upgrades. The building's bones—its structure and its purpose—stay exactly the same. You're focused on refreshing what's already there, giving it a new lease on life without changing its fundamental layout.

Some classic commercial renovation jobs include:

  • Restoring a historic facade, which might involve repairing old brickwork and applying a fresh coat of paint to match its original look.
  • Swapping out old, drafty windows for new, energy-efficient units that fit into the existing openings.
  • Upgrading all the lighting in a building to modern LEDs to cut down on energy bills and improve the atmosphere.
  • Refinishing the original hardwood floors or ripping out worn-down carpet in an office lobby.

Notice a pattern? The blueprint doesn't change. These are all surface-level jobs intended to boost a property's appearance, functionality, or efficiency within its existing footprint.

The key distinction for developers is this: Renovation refreshes a space, while remodeling redefines its purpose. One polishes what exists; the other creates something entirely new.

The Transformative Nature of Remodeling

Remodeling, on the other hand, is about fundamentally changing a space’s structure or function. It's a true transformation that redefines how a building is used. You go down this path when the current layout just isn't working anymore for the owner or the market. It’s a far more complex undertaking that demands serious planning, engineering, and construction expertise.

Real-world remodeling projects are where things get interesting. We're talking about major changes like:

  • Carving up a single-tenant office floor into a buzzing multi-suite co-working space, which means putting up new walls and running new plumbing and electrical.
  • Knocking down load-bearing walls to create a wide-open retail floor, a move that requires a structural engineer to ensure the building stays standing.
  • Completely reconfiguring a building's interior, like turning an old warehouse into residential lofts. This is a classic example of adaptive reuse.
  • Adding a brand-new bathroom or kitchen to a commercial space that never had one before.

These projects do more than just update the look; they reinvent the property's design and what it can be used for. They aren't just cosmetic fixes—they are strategic moves designed to unlock new value. This inherent complexity is what truly separates a remodel from a simple renovation.

Comparing the Critical Factors for Developers

For any developer, deciding between a renovation and a remodel comes down to a hard-nosed look at a few key factors. While both can boost a property's value, they take you down completely different paths when it comes to scope, cost, schedule, and red tape. Getting these distinctions right is everything if you want to hit your financial and strategic goals.

This isn't just about aesthetics; it's about market reality. The remodeling sector has exploded, now making up over 56% of all residential building construction companies. That's a huge jump from its 38-39% share during the mid-2000s housing boom, showing a massive shift in how property owners are thinking about asset improvement. You can dig into this industry transformation in the full analysis from the National Association of Home Builders.

Scope and Complexity

The most obvious difference between a renovation and a remodel is the sheer scope of the project. A renovation works within the building's existing footprint, focusing on updates and surface-level improvements. It’s a fairly contained process with a predictable outcome.

A remodel, on the other hand, is a whole different beast. It changes a building's structure or function, which almost always creates a domino effect on other systems.

  • Renovation Scope: Think of projects like painting, swapping out fixtures, or putting in new floors. These are self-contained jobs. The work is clear, and any surprises are usually minor, like finding some drywall damage behind old cabinets.
  • Remodeling Scope: Now, imagine moving a wall. That isn’t just about demolition. You're now rerouting electrical wiring, reconfiguring HVAC ductwork, and patching up the floor. You'll likely need a structural engineer to make sure you're not compromising the building's integrity.

This distinction is crucial. A renovation spruces up a space’s individual parts, while a remodel re-engineers the whole system.

The real difference in scope is this: Renovation is about the what—the materials and finishes. Remodeling is about the where—the layout and structure. It’s this jump from component-level tweaks to system-level changes that defines a remodel's complexity.

Cost and Investment ROI

From a financial perspective, these two approaches serve very different investment strategies. Renovations are known for their lower upfront costs and a faster, though often smaller, return on investment. They're perfect for a quick flip or refreshing a commercial space between tenants.

Remodeling requires a much bigger pile of cash. But that major investment is meant to unlock significant long-term value by fundamentally changing the property’s use, capacity, or position in the market.

Financial Factor Renovation Remodeling
Upfront Cost Lower and more predictable. Budgets are mostly for materials and labor. High and often variable. Costs include demolition, structural work, and system upgrades.
Return on Investment Quick ROI from better aesthetics and immediate rental or sale appeal. Slower, long-term ROI based on unlocking new revenue streams or a higher valuation.
Financing Often funded from operating budgets or smaller, straightforward loans. Usually requires substantial construction loans backed by detailed financial models.

A simple lobby renovation might run $20,000 and help you land a new tenant right away. But a remodel—say, converting that same building's ground floor from offices to retail space—could cost $500,000 while potentially doubling your annual rental income.

Timeline and Disruption

In development, time is money, and the schedules for these two project types are worlds apart. Renovations are generally quick and cause minimal disruption, often allowing other parts of the building to stay open for business.

Remodeling projects, by their very nature, are long and disruptive. The scale of the work often means the entire space—or sometimes the whole building—has to be emptied out for a long time.

  • Renovation Timeline: A commercial office refresh (new paint, carpet, lights) might take just 2-4 weeks.
  • Remodeling Timeline: A full gut remodel of that same office floor to create an open-plan layout could easily stretch to 4-6 months or more once you factor in design, permitting, and construction.

That extra time on the clock directly impacts your holding costs and lost rental income, which has to be baked into your financial model from day one. The short, low-impact schedule of a renovation is one of its biggest draws for developers looking for a fast turnaround.

Permits and Building Codes

Finally, the regulatory hurdles are a huge differentiator. Dealing with permits and codes is just part of the game, but the level of scrutiny is completely different for a renovation versus a remodel.

Renovations often fly under the permit radar. Since you're not messing with the building's structure or use, many cosmetic jobs need only simple, over-the-counter permits, if any at all. You won't need a permit just to paint or replace flooring.

Remodeling is a whole other story. Any project that touches structural elements, changes how a space is used (like from residential to commercial), or modifies plumbing, electrical, or HVAC systems will trigger a full-blown permitting process. This means submitting architectural plans, engineering reports, and getting through multiple inspections to prove you’re up to code. Mess this up, and you're looking at expensive stop-work orders and fines, which is why having an expert guide you through it is non-negotiable.

A Decision Framework for Your Next Project

Deciding between a renovation and a remodel isn't just a matter of semantics—it's a strategic call that hinges entirely on your goals for the asset. Are you looking for a short-term boost or a long-term transformation? Getting this right from the start is crucial, so let's break down which path aligns with different commercial real estate objectives.

To get a sense of the market, it helps to look at where the money is going. The U.S. remodeling industry is projected to hit $164.5 billion in 2025, and a lot of that is concentrated in specific areas. Kitchens account for 38% of projects and bathrooms 26%, which tells us that the focus is often on high-impact spaces that redefine function and appeal. You can dig deeper into these trends with IBISWorld's comprehensive remodeling industry report.

Choose Renovation When Your Goal Is Preservation or Refreshment

Think of renovation as the right move when you need to maintain or moderately improve a property without changing its fundamental purpose. It’s about working with the existing structure to make it better, more appealing, and ready for its current use—a tactical play focused on quick returns and minimal disruption.

You should lean toward renovation in a few common scenarios:

  • Refreshing a property between tenants. When a long-term commercial lease is up, a quick renovation—fresh paint, new flooring, and upgraded lighting—can make the space feel new again and attract prospects with very little downtime.
  • Making cosmetic upgrades for a quick sale. If you're prepping a building for the market, targeted updates like modernizing a lobby or improving the landscaping can deliver a huge cosmetic impact for a relatively low cost, seriously boosting curb appeal.
  • Complying with historic preservation rules. For designated historic buildings, the name of the game is restoration, not alteration. Renovations let you repair original features and meet preservation guidelines, which can often unlock valuable tax credits.

This diagram breaks down the key decision factors—cost, timeline, and permits—that really separate renovation from remodeling.

A diagram titled 'Renovation vs Remodeling' showing a 'Tree' node branching to cost, timeline, and permits.

As you can see, renovations typically mean lower costs and faster turnarounds, while remodeling demands a bigger investment and a more involved permitting process.

Choose Remodeling When Your Goal Is Transformation or Repositioning

Remodeling is your answer when the property's current layout or purpose just isn't cutting it anymore. This is a strategic, long-term play to unlock new value by completely changing how the building is used. You aren't just sprucing it up; you're redefining the asset itself.

A remodel makes sense when you need to make a major shift:

  • Repositioning an asset in the market. Is that old downtown office building underperforming? Remodeling it into residential lofts (a classic adaptive reuse project) fundamentally changes its market position and opens up entirely new revenue streams.
  • Accommodating a long-term tenant's custom needs. A high-value tenant might need you to completely reconfigure a space—think knocking down walls for an open-plan tech office or installing specialized infrastructure. A remodel is what it takes to secure that kind of long-term income.
  • Fundamentally increasing net operating income (NOI). When you need to seriously boost a property's financial performance, a remodel can get you there by adding leasable square footage, turning common areas into income-generating spaces, or justifying much higher rental rates.

A developer renovating an old office lobby is making a tactical move to attract tenants for its existing use. In contrast, a developer remodeling that same building into residential lofts is making a strategic play to capture an entirely new market segment.

At the end of the day, the renovation vs. remodeling debate comes down to your investment horizon and your strategic intent. A renovation protects and enhances the value you already have, while a remodel creates entirely new value from the ground up.

Navigating Adaptive Reuse and Historic Properties

An old brick industrial building undergoing renovation with scaffolding, a tall chimney, and an 'ADAPTIVE REUSE' sign.

The lines between renovation and remodeling get particularly interesting when you're dealing with special assets like historic buildings or structures being repurposed. These projects come with their own unique set of challenges and opportunities, demanding a crystal-clear understanding of your goals and the regulatory landscape right from the start.

For commercial developers, this is where the renovation vs. remodeling distinction isn't just academic—it's a critical factor that shapes everything from financial viability to historical compliance.

Adaptive Reuse: A Masterclass in Remodeling

Adaptive reuse is really remodeling dialed up to eleven. Think of it as taking a building with an outdated purpose—an old industrial warehouse, a defunct textile mill—and completely transforming it into something new. That warehouse might become creative lofts, or the mill could be reborn as modern apartments.

This process is the ultimate expression of changing a building's purpose. You're not trying to restore what was; you're creating something entirely different to meet today's market needs. This naturally involves a massive overhaul of the building's systems, layout, and sometimes even its core structure to support its new life.

The real trick is striking a balance between the old and the new. Developers have to modernize all the essential systems—HVAC, plumbing, electrical—to meet current codes, all while preserving the architectural character that makes the property so unique in the first place. This often means complex structural work, like reinforcing old timber beams or carving new window openings into thick masonry walls, putting it squarely in the remodeling camp.

Historic Preservation: The Art of Renovation

On the flip side, historic preservation is almost always an exercise in pure renovation. When a property has a historic designation, the main objective is to restore and maintain its original character, not fundamentally change it. All work has to follow strict guidelines set by preservation authorities.

These projects are all about repair, not replacement. The focus is on the meticulous restoration of original features—fixing ornate plasterwork, refinishing original hardwood floors, or tracking down period-accurate materials for any repairs. The building's structure and layout are essentially untouchable to preserve its historical integrity.

For developers, here's the key takeaway: Adaptive reuse is a strategic remodel designed to unlock new economic value by changing a building's purpose. Historic preservation is a highly regulated renovation aimed at protecting cultural value by keeping it as it was.

One of the biggest drivers for taking on these demanding projects is financial. Historically accurate renovations can qualify for significant federal and state tax credits, which can often offset 20% or more of the total project costs. These incentives are directly tied to meeting preservation standards, making renovation the only way to go. If you try to remodel a designated historic property, you're not just facing regulatory headaches—you're likely forfeiting those valuable financial benefits.

When you're dealing with the complexities of older or significant structures, a good practical guide to listed building renovation is an indispensable resource. Knowing the rules is the first step toward a successful project. In the end, the choice comes down to a simple question: does the building's value lie in what it could become, or in what it has always been?

Assembling the Right Professional Team

Expert team of engineers reviewing architectural blueprints and construction plans outdoors.

Any successful project—whether it's a straightforward renovation or a complete remodel—hinges on the quality of the professionals you bring on board. The specific skills you need are directly tied to your project's scope. It's the work that dictates the team, not the other way around.

A simple renovation might just need a solid general contractor and their go-to subcontractors. But once you step into a major remodel, you’re looking at a coordinated team, usually led by an architect who can wrangle structural engineers, MEP (mechanical, electrical, plumbing) specialists, and the construction crew.

A common mistake is hiring a team based on price alone. An experienced architect or contractor who understands local permitting can save you thousands in delays and rework, making their expertise a sound investment from day one.

Building Your Renovation Team

For renovations, the name of the game is craftsmanship and execution. Your team will likely be smaller and more focused on restoring or upgrading what's already there.

  • General Contractor: This person is your project manager, responsible for scheduling trades and making sure the work is done right.
  • Specialized Artisans: If you're working on a historic property, you may need specialists in things like plaster restoration or period-specific millwork.
  • Painters and Finishers: High-quality cosmetic work is key to a successful renovation, so skilled finishers are essential.

Assembling Your Remodeling Team

Remodeling demands a team that gets the big picture—building systems, codes, and structural design. This is a highly collaborative effort right from the start.

  • Architect: This is the visionary who creates the new design, draws up the construction documents, and steers the project through the permitting maze.
  • Structural Engineer: You absolutely need a structural engineer for any project that involves moving load-bearing walls, building an addition, or altering the building’s frame.
  • MEP Engineers: These experts design and integrate the new electrical, plumbing, and HVAC systems needed to support the new layout and its intended use.
  • General Contractor: They take the architect’s plans and make them a reality, managing everything from demolition to the final construction phase.

When you're vetting potential partners, their portfolio is your best friend. Look for projects with a similar scope and complexity to yours. A contractor who’s fantastic at cosmetic renovations might not have the chops to manage a full-scale commercial remodel.

Be sure to ask pointed questions about their knowledge of local codes, how they handle surprises on the job, and their communication style. A well-defined contract that clearly outlines the scope, timeline, and payment schedule isn’t just a good idea—it’s non-negotiable for protecting your investment and ensuring a successful outcome.

Frequently Asked Questions

Even with a solid plan, the real-world differences between a renovation and a remodel can bring up some tricky questions. Getting these details right is what separates a smooth project from a costly one. Let's tackle a couple of the most common questions we hear from developers.

How Do Renovation and Remodeling Affect Property Insurance?

The impact on your insurance policy is drastically different for each type of project, and it all comes down to risk.

A renovation usually falls under a standard builder's risk policy or a simple endorsement to your existing property insurance. Because you’re not messing with the building's core structure, the risk is fairly low. The main goal is to protect new materials and cover liability for the cosmetic work being done.

A remodeling project is a whole other beast. Since it involves structural changes—like moving load-bearing walls—it requires a much more robust course of construction insurance. This isn't just about covering the new work; it's about protecting the entire structure from potential damage. Moving one wall can have a ripple effect you didn't see coming.

Key Takeaway: You absolutely must notify your insurance provider before a single hammer swings, especially for a remodel. If you don't, you risk voiding your coverage entirely. That could leave you on the hook for major structural failures or system damages, a financial disaster no developer wants to face.

Does Renovation or Remodeling Offer Better Property Valuation?

Both can boost a property's value, but they play different games. Think of it as a short-term gain versus a long-term transformation.

  • Renovation: This is your path to a quick, reliable bump in valuation. Cosmetic updates—a modern lobby, fresh fixtures, new flooring—have an immediate impact on appraisals and tenant appeal. It makes the property look good now, which is perfect if you're aiming for a quick sale or lease. The ROI is usually pretty predictable.

  • Remodeling: This is the long game. The upfront investment is significantly higher, but so is the potential reward. A well-executed remodel, like turning an outdated office building into sought-after residential lofts, completely changes the property's function and earning power. This can lead to a massive increase in its long-term valuation, though it comes with more risk and a longer timeline to see that return.

A renovation polishes what you have, while a remodel creates something entirely new. In the end, the project that adds the most value is the one that best meets what the market is looking for.


At Sherer Architects, LLC, we help developers navigate the maze of renovation, remodeling, and adaptive reuse every day. Whether you're bringing a historic landmark back to life or giving a commercial building a new purpose, our team has the deep experience needed to create lasting value. Let's start putting the pieces of your next project together. Visit us at https://shererarch.com to learn more.

Categories
Uncategorized

commercial building renovation checklist: Your 2025 guide

Embarking on a commercial building renovation is a significant investment of time, capital, and vision. Whether you're revitalizing a historic landmark, adapting a warehouse for a new purpose, or modernizing an office tower, a successful outcome hinges on meticulous planning and foresight. Without a structured approach, projects can quickly derail due to unforeseen structural issues, regulatory hurdles, or budget overruns. This definitive commercial building renovation checklist is designed to guide property owners, developers, and facility managers through every critical phase, transforming a complex endeavor into a manageable process.

This guide provides more than just a simple to-do list; it offers a strategic framework. We will break down the entire renovation journey into actionable steps, organized by project phase: from initial due diligence and design to procurement, construction, and final closeout. You will gain a clear understanding of the essential inspections, compliance checks, and planning tasks required to mitigate risk and maximize your return on investment. The checklist covers crucial areas such as structural assessments, environmental testing, MEP (Mechanical, Electrical, and Plumbing) system upgrades, and ADA compliance, ensuring no critical detail is overlooked.

For specialized projects, such as adaptive reuse or historic preservation, this level of detailed planning is not just beneficial, it is absolutely essential. By following this comprehensive blueprint, you can navigate the intricacies of your project with confidence, ensuring the final result not only meets but exceeds expectations. This checklist is your tool for turning a building's potential into a profitable, sustainable, and enduring asset.

1. Structural Assessment and Engineering Inspection

Before a single wall is moved or a new floor plan is drafted, a comprehensive structural assessment is the non-negotiable first step in any commercial building renovation checklist. This process involves a meticulous evaluation by licensed professional engineers to determine the integrity of the building’s core components, including its foundation, load-bearing walls, columns, beams, and roof system. The assessment identifies existing weaknesses, potential safety hazards, and determines if the structure can safely support proposed changes, such as adding a floor, removing walls, or installing heavy new equipment.

Structural Assessment and Engineering Inspection

This foundational step dictates the entire scope, timeline, and budget of a renovation. Ignoring it can lead to catastrophic failures, costly project delays, and significant unforeseen expenses. The primary goal is to establish a baseline of structural health, ensuring the building is safe, code-compliant, and capable of handling its intended future use.

Why This Step Is Critical

A structural inspection isn't just a formality; it's a critical risk management tool. For example, a developer renovating a historic downtown Chicago building discovered significant foundation settling during their initial assessment, requiring a $2 million stabilization project before any aesthetic work could begin. In another case, an inspection of a San Francisco commercial property revealed that its seismic bracing was dangerously outdated, necessitating a full-scale retrofit to meet current safety standards. These findings, while expensive, prevented potential disasters and ensured the long-term viability of the assets.

Actionable Implementation Tips

To ensure a thorough and effective assessment, follow these specific steps:

  • Engage a Specialist: Hire a licensed structural engineer with documented experience in commercial renovations, especially with buildings of a similar age and construction type as your project.
  • Document Everything: Insist on a detailed report that includes photographic evidence, floor plan markups, and clear descriptions of any identified issues, from minor cracks to significant deficiencies.
  • Plan Proactively: Schedule the structural work to be completed before any other major renovation tasks. Addressing foundational or framing issues after interior work has started can lead to rework and exponentially higher costs.
  • Seek a Second Opinion: If the initial inspection reveals major structural concerns with high-cost remedies, consider getting a second assessment from another qualified engineering firm to verify the findings and explore alternative solutions.

2. Environmental and Hazardous Materials Testing

Parallel to the structural assessment, identifying and evaluating hazardous materials is a critical due diligence step in any commercial building renovation checklist. This process involves certified environmental professionals conducting thorough inspections to detect substances like asbestos, lead paint, mold, PCBs in older electrical equipment, and other toxic materials. These hidden dangers, common in buildings constructed before modern regulations, pose significant health risks to workers and future occupants if disturbed during renovation. The assessment ensures regulatory compliance and protects all stakeholders from exposure.

Neglecting this phase can lead to immediate work stoppages, steep fines from agencies like the EPA and OSHA, and costly remediation projects that derail budgets and timelines. The primary objective is to identify, quantify, and plan for the safe removal or encapsulation of all hazardous substances before demolition or construction begins, ensuring a safe environment and a predictable project path.

Why This Step Is Critical

Environmental testing is a crucial risk mitigation strategy that prevents health crises and financial disasters. For instance, a firm renovating a Manhattan office tower discovered widespread asbestos-containing insulation during its assessment, triggering a complex $1.2 million abatement plan that had to be completed before interior fit-out could start. Similarly, a developer converting a Boston warehouse found legacy PCBs in old electrical transformers, requiring specialized, high-cost removal and disposal. Before any demolition or intrusive work, professional asbestos testing is an absolute necessity, especially in older commercial buildings, to ensure safety and compliance.

Actionable Implementation Tips

To manage environmental risks effectively, incorporate these steps into your pre-renovation process:

  • Hire Certified Assessors: Engage a qualified environmental consulting firm to perform a Phase I Environmental Site Assessment (ESA) and, if necessary, a more intrusive Phase II ESA for material sampling and testing.
  • Budget a Contingency: Allocate a contingency of 10-15% of the total construction budget specifically for the discovery and remediation of unknown hazardous materials. This foresight prevents budget overruns.
  • Use Licensed Contractors: If hazardous materials are found, only work with licensed and insured abatement contractors who follow strict safety protocols and provide documentation of proper disposal.
  • Document All Certificates: Maintain a comprehensive file of all testing results, remediation plans, and clearance certificates. These documents are essential for regulatory compliance and future property transactions.

3. Permits, Zoning, and Code Compliance Review

Navigating the labyrinth of municipal regulations is a fundamental component of any commercial building renovation checklist. This step involves a comprehensive review to ensure the project strictly adheres to all local building codes, zoning ordinances, and planning requirements. It’s a meticulous process of securing the necessary permits, understanding land-use restrictions, and confirming that all proposed designs meet current standards for safety, accessibility (ADA), and energy efficiency. Failure to manage this stage proactively can result in significant financial penalties, stop-work orders, or even mandated demolition of non-compliant work.

This regulatory due diligence is not a box to be checked at the end but an integral part of the initial planning phase. It defines the legal boundaries of what can be built, influencing everything from the building’s layout and materials to its intended use. Properly managing permits and compliance from the outset protects the project from costly surprises and ensures a smooth path from design to occupancy.

Why This Step Is Critical

Regulatory compliance is a critical gatekeeper for project viability. For instance, a Denver office tower renovation faced an 18-month review process simply to ensure its exterior modifications complied with strict historic district guidelines. In another scenario, a Seattle retail space renovation required the unexpected installation of a new ADA-compliant elevator, adding nearly $500,000 to the budget to meet modern accessibility codes. These examples highlight how early engagement with regulatory bodies can uncover mandatory requirements that profoundly impact project timelines and costs.

Actionable Implementation Tips

To effectively navigate the complex regulatory landscape, implement the following strategies:

  • Engage a Local Expert: Hire an experienced permitting consultant or architect who has a deep understanding of and strong relationships within the local jurisdiction's building and planning departments.
  • Start the Process Early: Begin permit applications and code reviews long before final construction documents are complete. This proactive approach allows time for feedback and revisions without delaying the project start.
  • Maintain Meticulous Records: Keep organized digital and physical copies of all submissions, correspondence, and approvals from regulatory agencies. This documentation is crucial for tracking progress and resolving any disputes.
  • Plan for Multiple Reviews: Budget time and resources for potential inspector comments and multiple submission rounds. It is rare for a complex commercial project to be approved on the first submission without requests for clarification or changes.

4. HVAC System Evaluation and Upgrade Planning

A building's heating, ventilation, and air conditioning (HVAC) system is its respiratory system, directly impacting occupant comfort, operational costs, and indoor air quality. As part of a comprehensive commercial building renovation checklist, a thorough HVAC evaluation is essential to determine if existing equipment can meet the demands of the renovated space. This process assesses the system's capacity, efficiency, and compliance with modern standards, such as those set by ASHRAE, to decide whether a retrofit, upgrade, or complete replacement is necessary.

This evaluation goes beyond a simple check-up; it aligns the building’s climate control with its future use, occupancy levels, and energy goals. An outdated or improperly sized system can lead to exorbitant utility bills, poor air circulation, and tenant dissatisfaction, undermining the entire value proposition of a renovation project.

Why This Step Is Critical

Neglecting the HVAC system during a renovation is a recipe for long-term financial and operational headaches. For instance, a Los Angeles corporate headquarters that upgraded to a modern Variable Refrigerant Flow (VRF) system during its renovation saw a 35% reduction in energy consumption and significantly improved zoned temperature control. In another case, a Chicago medical office building upgraded to a high-efficiency system with demand-controlled ventilation, ensuring it met stringent healthcare air quality standards while lowering operating costs. These upgrades are not just about comfort; they are strategic investments in the building's performance and marketability.

Actionable Implementation Tips

To ensure your HVAC strategy aligns with your renovation goals, follow these targeted steps:

  • Conduct a Detailed Energy Audit: Before committing to any new equipment, perform a professional energy audit to identify inefficiencies in the current system and building envelope. This data provides a crucial baseline for planning effective upgrades.
  • Consider Modern Technologies: Evaluate advanced options like Variable Refrigerant Flow (VRF) systems for their superior zoning flexibility and energy efficiency, especially in buildings with diverse occupancy needs.
  • Integrate Building Automation: Plan for the integration of a Building Automation System (BAS) to provide centralized, intelligent control over the HVAC system, optimizing performance and simplifying management.
  • Research Financial Incentives: Proactively investigate available utility rebates, federal tax credits, and local green building incentives for installing high-efficiency systems. These can significantly offset the initial capital investment.

5. Electrical System Upgrade and Panel Capacity Assessment

Modern commercial operations place immense power demands on buildings, often far exceeding what their original electrical systems were designed for. An electrical system upgrade and panel capacity assessment is a critical evaluation of the existing infrastructure, including service panels, wiring, circuits, and overall capacity. This process determines if the system can safely and efficiently power modern equipment, technology loads, and future operational needs while complying with current safety codes.

This assessment is a cornerstone of any effective commercial building renovation checklist because it prevents power-related failures, ensures tenant safety, and future-proofs the property. Neglecting this step can result in overloaded circuits, frequent outages, fire hazards, and the inability to support essential business technology, from high-density server rooms to electric vehicle (EV) charging stations.

Why This Step Is Critical

An insufficient electrical system can cripple a modern business. For instance, a San Francisco tech office undergoing a renovation discovered its existing panels could not handle the projected server load, requiring a complete electrical overhaul before tenant fit-out could begin. Similarly, an Austin retail center invested in upgrading its service panels and distribution specifically to accommodate 40 new EV charging spaces, a move that significantly increased its marketability and tenant appeal. These upgrades are not just about maintenance; they are strategic investments in the building’s functionality and value.

Actionable Implementation Tips

To ensure your building’s electrical system is robust and ready for the future, follow these implementation steps:

  • Conduct a Professional Load Study: Hire a licensed commercial electrician to perform a detailed load calculation. This study analyzes your current and projected power needs to accurately determine the required panel and service capacity.
  • Plan for a Surplus: Don't just build for today's needs. Size your new electrical service and panels to handle at least a 20-30% surplus capacity to accommodate future growth, new technologies, or changes in tenancy.
  • Coordinate with Utilities Early: If a service upgrade is needed, contact the local utility company at the very beginning of your project. Lead times for new transformers or service drops can be several months long and can significantly impact your renovation timeline.
  • Consider Smart Technology: Install smart panels that offer real-time energy monitoring and management. This technology can help optimize consumption, identify potential issues proactively, and provide valuable data for sustainability reporting.

6. Plumbing, Water, and Sewage System Inspection

Often hidden behind walls and beneath floors, a building’s plumbing and sewage systems are critical infrastructure that can harbor expensive, project-derailing problems. A thorough inspection evaluates the entire network, including water supply lines, drain-waste-vent (DWV) systems, fixtures, water heaters, and the building's connection to municipal services. This assessment is essential for identifying leaks, corrosion, blockages, inadequate capacity, and serious code compliance issues that must be addressed in any commercial building renovation checklist.

This evaluation goes beyond simply checking for drips; it safeguards against catastrophic water damage, ensures occupant health and safety, and identifies opportunities for significant long-term operational savings. Ignoring the condition of aged plumbing is a high-stakes gamble that can lead to slab leaks, sewage backups, and the costly destruction of newly finished interiors.

Why This Step Is Critical

A comprehensive plumbing inspection is a crucial risk mitigation step. For instance, the renovators of a historic Philadelphia building discovered severe corrosion in its underground cast iron drain lines only after a video inspection, a finding that prompted a full replacement to prevent an inevitable system failure. In a different project, a Miami commercial building proactively upgraded to low-flow fixtures during its renovation, a move that reduced its overall water consumption by an impressive 45% and generated substantial utility savings. These examples highlight how a detailed assessment can prevent disaster and unlock value.

Actionable Implementation Tips

To ensure a comprehensive and effective plumbing system evaluation, follow these specific steps:

  • Utilize Modern Diagnostics: Insist on a video camera inspection (CCTV) to assess the internal condition of main sewer and drain lines, which is the only way to identify hidden cracks, root intrusion, or significant corrosion.
  • Prioritize Modern Materials: When replacing old galvanized or cast-iron pipes, plan the transition to modern, durable materials like PEX for supply lines and PVC for drain lines to improve longevity and performance.
  • Install Water-Efficient Fixtures: Mandate the installation of WaterSense-labeled low-flow fixtures, such as 1.28 gallons per flush (GPF) toilets and 1.5 gallons per minute (GPM) faucets, to reduce operational costs.
  • Research Local Rebates: Investigate municipal or utility-sponsored rebate programs for installing water-efficient fixtures or systems, which can help offset the initial investment costs.

7. Roof Condition Assessment and Replacement Planning

An often-overlooked yet vital component of any commercial building renovation checklist is a thorough roof condition assessment. This process involves a detailed inspection of the entire roofing system, including its structure, membrane, drainage, flashings, and penetrations. Conducted by certified professionals, this evaluation determines the roof's remaining useful life, identifies existing or potential failure points, and assesses its capacity to support new elements like HVAC units or solar panels. The integrity of the roof is directly tied to the building's overall health, energy efficiency, and operational continuity.

Roof Condition Assessment and Replacement Planning

A proactive assessment prevents minor issues from escalating into catastrophic failures. A failing roof can lead to extensive interior water damage, structural rot, mold proliferation, and business interruption, turning a manageable repair into a multi-million-dollar remediation project. Therefore, this step is essential for protecting the building asset, managing long-term capital expenditures, and ensuring a watertight, energy-efficient building envelope.

Why This Step Is Critical

The roof is a building's first line of defense against the elements, and its condition has significant financial implications. For instance, a Boston office tower invested in a reflective "cool roof" and subsequently reduced its annual cooling costs by over $80,000. In Denver, a routine inspection of a commercial property uncovered severe substrate rot hidden beneath the membrane, a critical finding that necessitated a complete replacement but averted a potential roof collapse. These examples highlight how a professional assessment can reveal opportunities for massive energy savings or prevent disastrous structural failures.

Actionable Implementation Tips

To execute a comprehensive and effective roof assessment, consider the following actions:

  • Hire Certified Inspectors: Engage roofing professionals who follow established standards, such as those from the National Roofing Contractors Association (NRCA) or ASTM International, to perform the inspection.
  • Budget for Longevity: When planning a replacement, budget for a high-performance system with a 20-year or longer lifespan rather than opting for short-term, less durable patches that will require frequent attention.
  • Evaluate Energy-Efficient Options: Consider modern solutions like reflective TPO/PVC membranes or green roofs. These can significantly lower HVAC energy consumption and help with stormwater management, offering a strong return on investment.
  • Plan for Future Loads: If you anticipate adding solar panels or new rooftop mechanical units in the future, ensure the assessment and any subsequent replacement plan account for the additional structural load requirements.

8. Interior Layout and Space Planning Optimization

Strategic redesign of interior spaces is a critical component of any modern commercial building renovation checklist, moving beyond simple aesthetics to maximize efficiency, functionality, and tenant appeal. This process involves a thoughtful reconfiguration of offices, common areas, restrooms, and circulation patterns to align with contemporary workplace standards. It focuses on creating environments that support open floor plans, foster collaboration, and offer the flexibility to adapt to future business needs.

Interior Layout and Space Planning Optimization

Effective space planning directly impacts operational efficiency, employee productivity, and the building's overall rental value. Today's most successful designs often incorporate wellness features, diverse work settings, and multi-purpose spaces that cater to a dynamic workforce. This step transforms an outdated building into a competitive asset that attracts and retains high-value tenants.

Why This Step Is Critical

Poor layout can stifle productivity and create a negative perception of a commercial space, regardless of its location or other amenities. For example, a Seattle tech company reconfigured its office layout to introduce "neighborhoods" of varied workspaces, resulting in a 40% increase in collaborative seating and improved cross-departmental innovation. Similarly, a New York professional services firm that redesigned its floor plan to include dedicated wellness rooms and quiet focus zones saw a measurable increase in employee satisfaction and retention. These case studies prove that investing in intelligent space planning yields tangible business returns.

Actionable Implementation Tips

To ensure your space planning efforts deliver maximum value, follow these specific strategies:

  • Conduct User Surveys: Before designing, engage with current or potential tenants to understand their specific needs, pain points, and desires for the space. This data is invaluable for creating a user-centric design.
  • Leverage 3D Visualization: Work with commercial interior designers who use 3D modeling and virtual tours. These tools help stakeholders visualize the final layout, make informed decisions, and approve designs with confidence before construction begins.
  • Plan for Future Flexibility: Incorporate adaptable systems like modular walls, mobile furniture, and integrated technology infrastructure. This allows tenants to easily reconfigure the space as their teams and operational needs evolve.
  • Prioritize Diverse Work Settings: Design a variety of environments to support different tasks, including private "focus pods" for deep work, open collaborative zones for teamwork, and social areas that encourage community.

9. Accessibility and ADA Compliance Retrofitting

Ensuring full compliance with the Americans with Disabilities Act (ADA) is a legal necessity and a fundamental component of any modern commercial building renovation checklist. This process involves a comprehensive audit and subsequent retrofitting to guarantee that individuals with disabilities can access and use the facility safely and comfortably. Modifications often include adding accessible parking, installing ramps or elevators, reconfiguring restrooms, updating signage with tactile and Braille characters, and ensuring clear, unobstructed paths of travel.

Beyond mere legal obligation, prioritizing accessibility enhances the building's value by expanding its appeal to a broader market of tenants and customers. Inclusive design is not an afterthought but a core principle that demonstrates social responsibility and improves the overall user experience, making the property more competitive and desirable.

Why This Step Is Critical

Failing to address ADA compliance can result in significant legal and financial consequences, including federal lawsuits, steep fines, and mandated, costly retrofits under tight deadlines. For instance, a historic San Francisco building successfully integrated a modern accessible elevator that met ADA guidelines while preserving the property's unique architectural character. In another project, a Chicago office tower had to add 15 fully compliant accessible parking spaces, complete with proper signage and surface treatments, to avoid ongoing litigation. These proactive retrofits not only ensure legal safety but also create a welcoming environment for all.

Actionable Implementation Tips

To effectively integrate accessibility and ensure full compliance, follow these specific steps:

  • Engage an ADA Consultant: Hire a specialist consultant to conduct a detailed accessibility audit of the entire property before design work begins. Their expertise is invaluable in identifying non-compliant elements.
  • Plan Holistically: Instead of addressing issues in a piecemeal fashion, develop a comprehensive accessibility plan that ensures a consistent and seamless accessible route throughout the building.
  • Prioritize Key Areas: Focus first on primary entrances, parking, and accessible routes to essential services like restrooms and main tenant spaces. First impressions of accessibility are crucial.
  • Document Meticulously: Keep detailed records of all compliance efforts, including audit reports, design modifications, permits, and final inspection certifications. This documentation is vital for demonstrating due diligence.

10. Budget Allocation, Contingency Planning, and Cost Management

Effective financial management is the backbone of any successful commercial building renovation checklist, moving beyond a simple cost estimate to a dynamic strategy for control and foresight. This process involves creating a comprehensive budget that meticulously separates hard costs (labor, materials, construction) from soft costs (design fees, permits, legal counsel). Crucially, it incorporates a robust contingency fund and implements rigorous cost control mechanisms from start to finish. This financial framework ensures that every dollar is accounted for, preventing the common budget overruns that can derail a project.

The goal is not just to set a budget but to actively manage it. This proactive approach anticipates unforeseen issues, provides a financial cushion for surprises common in renovations, and uses tools like value engineering to optimize spending. According to the Project Management Institute (PMI), failing to manage costs is one of the primary reasons projects fail, making this step indispensable for protecting your investment.

Why This Step Is Critical

Without disciplined budgeting and contingency planning, a renovation is vulnerable to financial instability. For instance, a Portland mixed-use building developer allocated a 15% contingency fund, which proved essential when asbestos was discovered behind drywall, requiring a $300,000 remediation that was not in the original scope. Similarly, a Denver office building renovation kept its $50 million total budget on track by successfully phasing the project, allowing tenant operations to continue and generate revenue during construction. These examples highlight how strategic financial planning directly mitigates risk and ensures project viability.

Actionable Implementation Tips

To establish a resilient financial plan for your renovation, implement these strategies:

  • Secure Professional Estimates: Hire a quantity surveyor or professional cost estimator to develop a detailed, data-driven budget early in the design phase.
  • Fund a Realistic Contingency: Allocate a contingency reserve of 15-25% of total hard costs, especially for older buildings where unknown conditions are more likely.
  • Implement Cost Tracking: Use project management software to track all expenses in real-time. Conduct regular "budget vs. actual" analyses to identify and address variances immediately.
  • Establish a Change Order Protocol: Institute a formal approval process for all change orders. No additional work or cost should be incurred without written sign-off from key stakeholders, preventing scope creep and unauthorized spending.

10-Point Commercial Renovation Checklist Comparison

Service Implementation Complexity 🔄 Resource & Speed ⚡ Expected Outcomes 📊 Ideal Use Cases 💡 Key Advantages ⭐
Structural Assessment and Engineering Inspection High – detailed analysis, possible invasive tests 🔄🔄🔄 Licensed structural engineers, testing equipment; moderate–high time/cost ⚡ Clear scope, safety verification, repair prioritization 📊 Major renovations, historic buildings, suspected settlement/seismic issues 💡 Prevents major failures; ensures code compliance; accurate budgeting ⭐⭐⭐⭐
Environmental and Hazardous Materials Testing Moderate–High – staged sampling and lab analysis 🔄🔄🔄 Certified environmental consultants, lab fees, possible remediation; can delay schedule ⚡ Identification of hazards, regulatory compliance, disposal plan 📊 Older buildings, prior industrial use, pre-demolition surveys 💡 Protects health & liability; avoids regulatory fines; informs remediation scope ⭐⭐⭐⭐
Permits, Zoning, and Code Compliance Review High – iterative approvals and design revisions 🔄🔄🔄 Permit expediting, legal/planning consultants; time‑intensive bureaucracy ⚡ Legal compliance, permit acquisition, reduced stop-work risk 📊 Projects with zoning changes, historic districts, ADA/energy updates 💡 Prevents work stoppage/fines; ensures long‑term marketability ⭐⭐⭐
HVAC System Evaluation and Upgrade Planning Moderate – technical assessment + retrofit planning 🔄🔄 Mechanical engineers, contractors, possible phased installs; moderate–high cost ⚡ Improved IAQ, energy savings, automation readiness 📊 Energy retrofits, increased occupancy, pandemic-era IAQ upgrades 💡 Lowers operating costs; enhances comfort; rebate eligibility ⭐⭐⭐⭐
Electrical System Upgrade and Panel Capacity Assessment Moderate–High – code-driven upgrades and coordination 🔄🔄🔄 Licensed electricians, utility coordination, new equipment; potential outages ⚡ Adequate power capacity, safety improvements, future-proofing 📊 Tech-heavy tenants, EV infrastructure, increased load demands 💡 Reduces fire risk; enables expansion; supports renewables ⭐⭐⭐⭐
Plumbing, Water, and Sewage System Inspection Moderate – camera inspections and possible excavations 🔄🔄 Plumbers, video inspection tools, potential disruptive replacements; variable cost ⚡ Leak detection, improved water efficiency, reduced damage risk 📊 Older piping systems, high water use facilities, slab concerns 💡 Prevents major water damage; reduces utilities; improves health/safety ⭐⭐⭐
Roof Condition Assessment and Replacement Planning Moderate – seasonal constraints and structural checks 🔄🔄 Roofing inspectors, material costs, weather-dependent scheduling; can be high cost ⚡ Extended envelope life, energy savings (cool/green roofs), leak prevention 📊 Buildings with aging membranes, solar installation plans, drainage issues 💡 Prevents water damage; enables solar/green solutions; improves efficiency ⭐⭐⭐⭐
Interior Layout and Space Planning Optimization Moderate – design coordination and phased implementation 🔄🔄 Interior designers, FF&E, possible structural work; moderate disruption ⚡ Increased usable space, tenant satisfaction, higher rentability 📊 Tenant relocations, flexible workspace needs, coworking conversions 💡 Boosts productivity and revenue; adaptable layouts; improves tenant retention ⭐⭐⭐
Accessibility and ADA Compliance Retrofitting High – may require structural changes and detailed specs 🔄🔄🔄 ADA consultants, construction (ramps/elevators), possible high capital cost ⚡ Legal compliance, broader market access, improved inclusivity 📊 Public buildings, medical offices, jurisdictions enforcing ADA upgrades 💡 Reduces legal risk; expands tenant pool; social responsibility benefits ⭐⭐⭐
Budget Allocation, Contingency Planning, and Cost Management Moderate – ongoing oversight and change control 🔄🔄 Cost estimators, PM software, contingency funds; time for monitoring ⚡ Predictable finances, minimized overruns, phased affordability 📊 Complex renovations, older buildings with unknowns, multi‑phase projects 💡 Controls costs; enables phased delivery; improves stakeholder transparency ⭐⭐⭐⭐

Bringing Your Vision to Life with an Expert Partner

Navigating the complexities of a commercial building renovation requires more than just a list of tasks. It demands a strategic, integrated approach where every decision, from the initial due diligence to the final post-occupancy review, builds upon the last. Throughout this comprehensive commercial building renovation checklist, we have explored the critical pillars that underpin a successful project. We’ve seen that a thorough structural assessment is not just about safety, but about unlocking a building’s potential. We’ve detailed how proactive code compliance and ADA retrofitting are not burdens, but opportunities to create inclusive, future-proofed spaces.

The true takeaway is that these elements are not isolated silos. An HVAC upgrade plan directly impacts your electrical capacity assessment. Your interior space planning is fundamentally constrained or enabled by the initial structural and MEP evaluations. Overlooking the interconnectedness of these domains is the single most common source of budget overruns, schedule delays, and compromised final outcomes. A checklist provides the "what," but a seasoned expert provides the "how" and "why," ensuring each piece fits together seamlessly.

The Power of Integrated Project Management

The most significant value of this commercial building renovation checklist lies in its ability to highlight the sheer scope and technical expertise required. It underscores the critical need for a central, guiding partner who can oversee and integrate these disparate disciplines.

  • Financial Foresight: Effective budget allocation and contingency planning are not static activities. They must be dynamically managed as new information from environmental testing or engineering inspections comes to light. An expert partner anticipates these shifts and helps you make informed financial decisions.
  • Regulatory Navigation: Zoning laws, historic preservation guidelines, and building codes are a complex, ever-changing web. An architect specializing in commercial renovations acts as your advocate and navigator, securing approvals and ensuring every aspect of the design meets or exceeds legal requirements.
  • Specialized Execution: While an architect orchestrates the overall vision, specialized tasks require dedicated experts. For intricate electrical system upgrades, for example, it is crucial to find a reliable commercial electrical contractor who can execute the design plan safely and efficiently. An experienced lead partner will have a network of these trusted specialists to bring onto the project.

Ultimately, a successful renovation is a story of transformation. It’s about taking a structure with history, limitations, and potential and reimagining it for a new purpose. It’s about creating value where none was apparent, revitalizing a community asset, and building a physical space that powers your business or investment goals for decades. Mastering the items on this checklist is the first step, but partnering with a team that has lived and breathed these projects is what turns a good plan into an exceptional reality. The right partner transforms a daunting list of requirements into a clear, manageable roadmap to success.


Ready to turn your renovation plans into a tangible, high-value asset? The team at Sherer Architects, LLC specializes in guiding property owners and developers through every phase of the commercial renovation process. Contact us today to discuss how our expertise can bring clarity and confidence to your next project. Sherer Architects, LLC

Categories
news

architects design process: From Concept to Construction

When you’re developing a commercial property, the architect's design process isn't just about drawing up plans. It’s a strategic, six-phase roadmap that systematically turns a concept into a tangible, profitable asset. For anyone with a stake in commercial real estate—developers, investors, or future tenants—getting a handle on this journey is crucial for managing risk and making sure the final building hits its financial and operational targets.

Demystifying the Architectural Roadmap

Think of the architects design process as the project's central nervous system. It’s far more than just sketching; it's a disciplined framework that ensures every single decision, from the initial site analysis to the final doorknob, is intentional and directly supports the project's business goals. This structured approach coordinates everyone involved—engineers, contractors, and investors—and provides clear checkpoints for approvals, budget reviews, and strategic adjustments along the way.

The infographic below lays out this journey, showing how a simple idea progresses through distinct stages to become a valuable property.

Infographic about architects design process

As you can see, each phase logically builds on the one before it. This step-by-step progression is designed to eliminate guesswork and give stakeholders a firm grip on the project's direction.

The Value of a Structured Process

Following a well-defined process isn't just about good project management—it’s about profitability. The global architectural services market was valued at a massive $360.8 billion in 2022 and is expected to climb to $549.6 billion by 2032. What's really telling is that roughly 70% of an architectural firm's revenue is generated in the early design and planning stages. This highlights just how critical these initial phases are to the financial success of the entire construction lifecycle.

A structured design process is your best defense against the classic project killers: scope creep, budget overruns, and mismatched expectations. It breaks down the immense complexity of construction into a predictable and manageable series of steps.

Before we dive into the details of each stage, here's a quick overview of what to expect.

The Six Phases of the Architectural Design Process

Phase Primary Goal Key Outcome for Stakeholders
1. Programming Define what the building needs to do and be. A clear project scope, budget, and list of requirements.
2. Schematic Design Explore initial design concepts and spatial relationships. Basic floor plans, sketches, and a general sense of the building's look and feel.
3. Design Development Refine the design and specify major systems and materials. Detailed drawings and specifications for stakeholder review and cost analysis.
4. Construction Documents Create the detailed technical "instruction manual" for construction. A complete set of drawings and specs for bidding, permitting, and building.
5. Bidding & Approvals Select a contractor and obtain necessary permits. A signed construction contract and official permission to start building.
6. Construction Administration Oversee the construction to ensure it matches the design. A completed, quality-checked building ready for occupancy.

This table provides a high-level roadmap of the journey from an idea to a finished building, highlighting the critical decision points for stakeholders at each step.

A Roadmap for All Building Types

This six-phase framework is incredibly versatile and applies to nearly any commercial project you can imagine. Whether you’re developing a sleek new office tower, retrofitting a historic warehouse, or planning a sprawling industrial park, the fundamental principles hold true. The process can also be adapted for specific construction methods, like understanding the nuances of a custom steel building design process.

Ultimately, this roadmap provides three essential benefits:

  • Clarity: It forces everyone to agree on the project's goals and requirements right from the start.
  • Accountability: Roles and responsibilities are clearly defined for every person involved.
  • Risk Mitigation: Potential problems with the design, budget, or regulations are spotted early, when they're easiest to fix.

By understanding and embracing this process, you can steer your next commercial real estate project with confidence, knowing you have a proven system for turning architectural vision into measurable financial value.

Building the Strategic Foundation with Programming

Before a single line is drawn, every great building starts with a conversation. This foundational phase is called Programming, or sometimes Pre-Design, and it’s where we essentially write the business plan for the building itself. It's a critical deep-dive where the architect and key stakeholders get together to figure out the project's "why" long before we get to the "what."

Think of it like developing a recipe before you even touch a mixing bowl. You wouldn't start baking without knowing the ingredients (who will use the space and how), the measurements (how much space they need), and the instructions (the budget and timeline). Programming is all about getting that recipe perfect to eliminate the guesswork.

During this phase, the architect acts more like an investigator, gathering and analyzing all the crucial data needed to create a comprehensive project brief—the official architectural program.

Key Discovery Areas in Programming

To build this solid foundation, architects dig into a few key areas:

  • Stakeholder Interviews: We sit down with everyone who has a stake in the project—developers, investors, department heads, and even potential future tenants—to truly understand their goals, day-to-day operational needs, and what success looks like to them.
  • Site Analysis: This involves getting to know the property inside and out. We look at the topography, where the access points are, how the sun moves across the site, and what existing infrastructure is in place. This helps us spot both big opportunities and potential roadblocks.
  • Zoning and Code Research: Here, we dive headfirst into the maze of local regulations, land-use laws, and building codes. The goal is to get a crystal-clear picture of what's legally possible to build on that specific piece of land.
  • Budget and Schedule Alignment: It’s all about a reality check. We work to establish financial parameters and a project timeline that actually make sense for the owner’s business goals and the current market.

You could argue this is the single most important part of the entire architectural design process. Why? Because it ensures every single design decision made later on is directly tied to clear, measurable business objectives.

For commercial real estate developers and investors, the Programming phase is your point of maximum leverage. The decisions made here have the biggest impact on project ROI and long-term operational efficiency for the lowest relative cost.

The Final Deliverable: An Architectural Program

The outcome of all this work isn't a drawing; it's a document. The architectural program is a detailed report that spells out the entire scope of the project. It usually includes a list of all required spaces, their approximate sizes, how they need to relate to each other functionally, and, of course, the overall project goals and budget.

This document becomes the strategic roadmap for the rest of the design journey. Getting it right from the start is the best way to prevent expensive changes down the road and ensures the architectural vision is perfectly aligned with the business vision from day one.

Turning Ideas into Concepts in Schematic Design

Once the programming phase has laid the strategic groundwork, the real fun begins. We move from the 'what' and 'why' to the 'how'—this is the Schematic Design phase, where abstract needs start to take on a physical form. It's easily the most creative and visually exciting part of the whole process.

Architect sketching schematic designs on a tablet

Think of the program as a detailed recipe. Schematic design is like making the first rough draft of the dish. The architect starts sketching, building simple 3D "massing" models (which often look like digital blocks), and drawing up basic floor plans. The goal isn't to get bogged down in details but to get the big-picture relationships right.

Exploring the Core Design Questions

During this phase, the design team is wrestling with the fundamental questions that will define the entire project. It's all about establishing a clear direction by exploring:

  • Spatial Relationships: How do the different spaces connect? Where are the main hallways and stairwells that people will use to move through the building?
  • Site Integration: How does the building actually sit on the property? We're looking at its orientation to the sun, the best views, and where people will enter and exit.
  • Scale and Form: What will be the building's overall size and shape? What will it generally look like from the outside?

This stage is all about iteration. The architect will likely sketch out several different concepts and present them to you and other stakeholders. This back-and-forth is critical; it ensures the design is heading in a direction everyone agrees with before a ton of time is spent fleshing it out.

The Role of Technology in Creative Exploration

New technology is making this creative loop faster than ever. The tools of the trade, especially architecture design software, are evolving constantly. For instance, new AI-powered tools are popping up that can take a single hand sketch and generate multiple detailed renderings almost instantly. This kind of tech, like the toolkit developed by SRI International, lets architects test more ideas in less time, helping them navigate complex projects and stay focused on the creative solutions.

Schematic Design is the first major go/no-go moment for stakeholders. This is your chance to validate the project's core direction and make high-impact choices before committing serious money to the next phases.

Key Deliverables and Stakeholder Decisions

The Schematic Design phase wraps up with a package of drawings that gives everyone a clear picture of the proposed design. It’s not the final blueprint by any means, but it’s more than enough to get stakeholder buy-in.

This package usually includes:

  • A Site Plan: Shows exactly where the building will be placed on the property.
  • Basic Floor Plans: Outlines the general layout and flow of the rooms inside.
  • Key Elevations: Drawings of the main exterior walls to show the building's look and feel.
  • Preliminary Building Sections: A few cross-section views to show things like floor-to-ceiling heights.

For anyone involved in the commercial real estate side, this is your moment. You'll confirm the concept fits market needs, aligns with the financial projections, and properly reflects the intended brand. Giving the green light on the schematic design means you're ready to start digging into the details.

Refining the Details During Design Development

Once the schematic design gets the green light, we move into what's known as Design Development, or DD. If the schematic was the broad-stroke sketch of the building, DD is where we start adding the color, texture, and real-world details. This is the critical stage where abstract ideas get hammered into a tangible, buildable reality.

Architects and engineers collaborating over detailed building plans

This whole phase is an exercise in intense coordination. The architectural team now works hand-in-glove with the engineers to weave the building’s essential systems into the design. Think of it like giving the building its vital organs—the structural frame is the skeleton, the plumbing is its circulatory system, the electrical wiring its nervous system, and the HVAC its respiratory system. They all have to fit and function together perfectly.

For commercial real estate stakeholders, the decisions made during Design Development have a direct and significant impact on three key areas: initial construction costs, long-term operational expenses, and the overall quality and marketability of the final asset.

From Concepts to Concrete Specifications

During DD, the level of detail skyrockets. Those general ideas about materials and systems from the last phase? They now become specific, researched selections. We stop talking in generalities and start defining exactly how this building will be constructed and what it will be made of.

Here’s a look at what’s happening on the ground:

  • Material Selection: We go from "a brick exterior" to choosing a specific brick from a particular manufacturer, right down to its color, texture, and the mortar that will hold it together.
  • System Integration: The engineers are finalizing their layouts. They’re figuring out where every structural beam, every foot of ductwork, and every plumbing line goes, running clash detection to make sure they don’t all try to occupy the same space.
  • Detailed Drawings: Floor plans are sharpened with precise dimensions. The building elevations are updated to show the exact models of windows and doors we've selected.
  • Interior Finishes: This is where we lock in the final choices for flooring, wall coverings, lighting fixtures, and all the other interior elements that shape the user experience.

The Stakeholder's Role in DD

As the owner or developer, your input here is crucial. The decisions get more technical, but they are all fundamentally tied to your budget and the building's future performance.

For example, the architect might present two HVAC options. One has a lower initial cost, but the other, more expensive system could deliver substantial energy savings over the building’s life, directly boosting your net operating income. That's a classic DD-phase decision.

The same goes for the exterior. Choosing a more durable, low-maintenance cladding might cost more upfront but will slash long-term repair and upkeep costs, protecting the asset's value. The architect’s job is to present these options clearly, often with cost-benefit analyses, to help you make the best investment decisions.

The goal is to walk away from the Design Development phase with a comprehensive set of drawings and specifications so detailed that a contractor can put a firm budget to it. This package represents a clear, coordinated vision of the final building, ensuring everything is aligned before we dive into the massive effort of creating construction documents.

4. Crafting the Blueprint: The Construction Documents Phase

After the whirlwind of decisions and coordination in Design Development, the process gets laser-focused. This is the Construction Documents (CD) phase, where every single choice we’ve made is translated into a precise, legally-binding set of instructions for the builder.

If the last phase was about refining the vision, this one is all about creating the instruction manual.

Think of it this way: DD gave us a detailed recipe, but the CDs are the full-scale culinary textbook. There’s absolutely no room left for guesswork. This final package consists of dozens—sometimes hundreds—of drawings, all paired with a massive specification book that details every last material, product, and installation method.

This isn't just about making a guide; it’s one of the most important risk management steps in the entire project. These documents become the backbone of the construction contract, giving contractors the exact information they need to provide solid, apples-to-apples bids. Getting this right prevents a world of hurt—and a lot of expensive change orders—down the road.

The Complete Instruction Manual

The ultimate goal here is creating construction drawings and specifications that are so clear, anyone can build from them. The final CD set is a masterclass in coordination, weaving together the work of the architects and every engineering consultant into a single, seamless package.

This comprehensive set typically breaks down into a few key parts:

  • Architectural Drawings: These are the nitty-gritty plans, elevations, sections, and schedules. They specify everything from the exact construction of a wall to the model number of the door handles.
  • Structural Drawings: This is the complete plan for the building’s skeleton. It includes every foundation detail, beam size, and steel connection point.
  • MEP Drawings: The full schematic for the building’s circulatory and nervous systems—Mechanical, Electrical, and Plumbing. This shows all the ductwork, wiring conduits, and pipe runs.
  • Project Specifications: Often called the "spec book," this is a detailed written document that goes hand-in-hand with the drawings. It outlines quality standards, installation requirements, and performance criteria for every single component in the building.

The level of detail in these documents evolves significantly from the early sketches. What starts as a simple outline becomes a fully articulated set of instructions.

Document Evolution Through Design Phases

Document Type Schematic Design (SD) Design Development (DD) Construction Documents (CD)
Floor Plan Shows basic room layout and overall dimensions. Adds wall thicknesses, door/window locations, and key fixture placements. Includes precise dimensions, wall type tags, and detailed notes for construction.
Building Section A simple cut-through showing floor heights and overall massing. Details structural elements, ceiling heights, and major MEP systems. Fully detailed with material callouts, insulation, and assembly connections.
Specifications A brief outline of major materials and systems. A more detailed spec book defining key products and quality standards. A comprehensive, legally binding volume for every material and installation.

As you can see, each phase layers on more information, moving from broad strokes to microscopic detail, ensuring the final set of documents is ready for the real world of construction.

How Modern Teams Get It Done

Pulling this all together is a monumental task, often requiring large teams of specialists working in perfect sync. The way architects work has changed, too. A 2020 industry survey showed just how much, with 39.1% of architects in a hybrid model and 34.8% working fully remote. This has only pushed the industry to get better at using technology to manage these complex workflows and keep everyone on the same page.

A complete and thoroughly coordinated set of Construction Documents is a project's best insurance policy. It ensures that the final asset delivered by the contractor perfectly matches the vision approved by the stakeholders, both on time and on budget.

Once this exhaustive set is complete, it goes through a final round of intense internal review. After it’s been checked and double-checked for accuracy and coordination, it’s ready for the next big milestone: submission to the local building department to secure the permits needed to finally break ground.

From Blueprint to Reality: Bidding, Approvals, and Construction

With the exhaustive construction documents finally in hand, the architect’s role shifts gears. We move from the world of pure design into the physical reality of building. This final leg of the journey is all about execution, and it’s where your architect becomes your chief advocate and quality enforcer on the ground.

This is where the rubber meets the road—transforming stacks of paper into a tangible, valuable asset.

Architects reviewing construction progress on a build site

First up is the Bidding and Approvals stage. The architect will guide you through the maze of selecting a contractor, making sure you get competitive bids that are actually comparable—an apples-to-apples review based on the detailed plans. At the same time, they'll be quarterbacking the submission of these documents to local authorities to secure all the necessary building permits. This is a non-negotiable legal step before a single shovel can hit the dirt.

Keeping the Project on Track with Construction Administration

Once you’ve hired a contractor and have the permits, the architect’s job transitions into Construction Administration. Don't mistake this for micromanaging the builder. Think of it as having your expert representative right there on the site, protecting your interests.

The architect’s focus now is to:

  • Guard the Design Intent: They make regular site visits to see the work firsthand and make sure it’s being built exactly as specified in the drawings.
  • Solve Problems on the Fly: Construction is unpredictable. When unexpected issues pop up, the architect is there to find solutions that won't compromise the design or blow the budget.
  • Vet Materials and Methods: They review "submittals"—the specific materials, fixtures, and shop drawings the contractor proposes to use—to confirm everything meets the project's quality standards.
  • Approve Payments: Before you cut a check, the architect reviews the contractor’s payment applications to verify that the work you’re paying for has actually been completed to spec.

This phase is arguably your most important quality control mechanism. It’s the safety net that protects your investment and ensures the final building is what you signed up for.

An architect's presence during construction isn't just another line item on the budget; it's an investment in risk management. Their job is to catch mistakes before they become expensive, solve problems, and champion quality, making sure the final asset is delivered exactly as envisioned.

By serving as the central hub for communication and clarification, the architect smooths out the construction process, heads off costly errors, and defends the project's vision from groundbreaking to the final walkthrough. This is what brings the entire architectural journey to a successful, tangible, and profitable conclusion.

Common Questions About the Architect's Design Process

Even with a solid roadmap, you're bound to have questions, especially if you're new to the architect's design process. Let's walk through some of the most common things we hear from commercial real estate stakeholders to give you a clearer picture of the journey ahead.

How Long Does the Design Process Take?

There’s no single answer to this one—it all comes down to the project's scale and complexity.

For a straightforward commercial interior fit-out, you might be looking at 2-4 months for the design phases. If you're planning a medium-sized new build, it’s more realistic to expect 6-12 months of design work before a shovel ever hits the ground.

Large, intricate projects can easily stretch into several years. The biggest variables are the speed of client approvals, how quickly the local jurisdiction moves on permits, and the sheer level of detail required. The best way to keep a project on schedule is to establish a rock-solid program upfront and make firm decisions during the early phases.

What Is the Owner’s Most Important Role?

Your most critical role is to be an active, decisive partner, especially in the early stages of Programming and Schematic Design. Kicking things off with a clear vision, a realistic budget, and a well-defined list of needs is what sets the entire project up for success. When we get into schematic design, your timely feedback is what prevents us from going down paths that lead to expensive changes later on.

As the owner, you are the ultimate decision-maker. Your ability to provide clear, consolidated direction is the single biggest factor in moving a project forward efficiently and ensuring we hit the target.

Simply put, your clarity and decisiveness are what fuel the project's momentum and protect your budget.

How Does BIM Improve the Design Process?

Think of Building Information Modeling (BIM) as creating a single, intelligent 3D digital twin of the project. This isn't just a pretty picture; it’s a game-changer for coordination.

BIM allows the entire team—architects, engineers, and consultants—to work within the same model. We can spot and resolve clashes digitally, like a plumbing line running through a structural beam, long before they become costly rework orders on the construction site.

For you, the owner, this means you get a much better feel for the space through realistic renderings and virtual walkthroughs. This clarity makes decision-making easier and more confident. It also leads to more accurate cost estimates from the get-go and gives you a valuable digital asset for managing the facility long after the doors open.


Navigating the architectural design process is a complex undertaking, but the right partner makes all the difference. At Sherer Architects, LLC, we guide clients through every stage with rigorous research and decades of experience, turning your vision into an enduring, valuable asset. Learn more about our collaborative approach.

Categories
news

Finding a Commercial Architect Near Me

Before you even think about Googling “commercial architect near me,” there's some critical homework to do. The first, most important step is to get crystal clear on what you actually need. This isn't just about a wish list—it's about creating a detailed project brief that will act as your roadmap.

Taking the time to do this up front will save you a world of headaches, time, and money later on. It’s what allows you to find the right firm, fast.

Laying the Groundwork for Your Search

A modern commercial building with large windows and clean architectural lines

Starting a commercial project without a solid plan is a recipe for disaster. Before you start contacting architects, you need to sit down and document your vision, your budget realities, and exactly how the space needs to function. This groundwork is what enables an architect to give you a realistic proposal and decide if they’re even the right fit for the job.

Define Your Core Project Needs

To build a useful brief, start by answering a few fundamental questions. This initial thinking frames the entire conversation and gets everyone on the same page from the get-go.

Try to outline the following:

  • Primary Function: What is this space for? Be specific. Is it a bustling retail store, a quiet medical office, a high-traffic restaurant, or a purely functional industrial warehouse? Each has vastly different needs.
  • Essential Features: What are the absolute non-negotiables? Think about things like a mandatory loading dock, a specific number of private offices versus open-plan space, or a customer-facing reception area that needs to make a great first impression.
  • Square Footage: What’s your best estimate for the size you’ll need? Make sure you account for your current operations, your team, and any plans for future growth.

As you're getting started, digging into resources on planning for office expansion can be a huge help in sharpening your project's scope.

A well-prepared project brief is the single most important tool for ensuring a successful outcome. It aligns expectations, clarifies goals, and helps architects provide meaningful, accurate feedback from the very first conversation.

The architectural industry itself is seeing healthy growth. In the United States, industry revenue is expected to grow by 1.7% in 2025, hitting an estimated $65.7 billion. This growth is being driven by a whole range of projects, from private businesses to large-scale government work.

How to Find the Right Local Architects

A group of professionals reviewing architectural blueprints on a construction site

Okay, you've got a solid project brief. Now for the fun part: finding the right firm to bring it to life.

While typing "commercial architect near me" into a search bar is a start, it’s not how you find the best talent. The most sought-after architects are often discovered through industry connections and a bit of old-fashioned legwork. A multi-pronged approach is your best bet for uncovering the local experts you might otherwise overlook.

The real goal here is to find firms that don't just design buildings, but specialize in your type of building—be it a bustling retail space, a sterile healthcare facility, an industrial warehouse, or a delicate historic renovation.

Tap Into Professional Networks and Industry Directories

Your search should start with professional organizations. Think of these as curated lists where every member has already been vetted for credentials and licensing, giving you a baseline of quality from the get-go.

  • The American Institute of Architects (AIA): The AIA's firm directory is an essential tool. You can filter by location and, more importantly, by specialty. This is how you find professionals who are committed to a high standard of practice.
  • Local Business Groups: Don’t forget your own backyard. Your local Chamber of Commerce or other business associations are fantastic sources for word-of-mouth referrals. Ask other business owners in your circle who they hired and what the experience was really like.

A personal referral from a trusted colleague is often the most reliable way to find a great partner. They can provide candid insights into an architect's communication style, problem-solving skills, and ability to stay on budget.

Look Around Your Own Community

Sometimes, the best leads are right in front of you. Get out and pay attention to the commercial projects popping up around town, especially the ones that catch your eye.

Take a look at the sign on the construction site fence—it’s a simple trick, but it lists the architect, general contractor, and other key players. This gives you an immediate list of firms trusted with projects similar in scope and scale to yours.

Commercial real estate brokers are another excellent resource. They live and breathe the local market and can almost always recommend architects they’ve seen deliver great results on past deals. Their firsthand experience is incredibly valuable.

Digging into Architect Portfolios and Experience

An architect reviewing detailed blueprints on a large drafting table

You’ve got your shortlist. Now comes the crucial part: a deep dive into each architect's portfolio. A slick website can make anyone look good, but it’s the portfolio that reveals the real story of their experience and capability. You’re not just window shopping for pretty buildings; you’re looking for hard evidence that they can handle your specific type of project and get it done right.

Think of it as forensic accounting for architects. Critically evaluating their past work is the single most effective way to separate the true contenders from the rest.

Look for More Than Just a Pretty Façade

An architect's portfolio is more than a gallery of finished projects. It’s a testament to their problem-solving abilities. As you click through their work, you need to be asking the right questions to see past the glossy photos.

  • Does the Scale Match? If you're planning a 50,000-square-foot office complex, you need to see more than just small retail renovations in their portfolio. Look for projects that mirror the size and complexity of what you have in mind.
  • Do They Know Your Turf? Can you spot projects in your city or county? This isn't just about local pride; it’s a huge clue that they understand the local zoning codes, permitting headaches, and review boards you’ll inevitably face.
  • What's Their Special Sauce? Are you aiming for a green building? Look for LEED certifications. Are you renovating a historic property? You need to see successful adaptive reuse projects. Find proof of the specialized skills your project demands.

The best portfolios don’t just show the ribbon-cutting ceremony. They show the "before and after" photos or detailed case studies. That’s where you see a firm's real talent for transforming a difficult space and working through real-world challenges.

The architectural services market is booming, hitting a global size of around $376.08 billion in 2023. All that growth means you have plenty of options, but it also makes it even more important to find a firm with a proven, relevant track record. You can get a better sense of industry trends by reading the architectural services market analysis from Grand View Research.

To keep your evaluation process organized, it helps to use a simple checklist. This ensures you're comparing each firm using the same standards, making your final decision much clearer.

Architect Evaluation Checklist

Evaluation Criteria Architect A Architect B Architect C
Relevant Project Type
Similar Project Scale
Local Project Experience
Specific Expertise (e.g., LEED)
Positive Client References
Clear Communication Style
Overall Portfolio Quality

By the time you're done, your review should give you confidence that the commercial architect you choose not only gets your vision but has the on-the-ground experience to make it a reality.

How to Run a Productive Interview with an Architect

A strong portfolio gets an architect in the door, but the interview is where you decide if they're the right fit for your project. This conversation is your chance to look past the glossy photos and assess the things that truly make a project successful: communication style, problem-solving skills, and simple chemistry.

Think of it less as an interrogation and more as the start of a potential partnership. A great architect will interview you just as much as you interview them. They should be genuinely curious about your business, your goals, and your vision. The questions they ask are often more telling than the answers they give.

Questions That Get to the Heart of a Partnership

Sure, you need to talk about timelines and fees, but don't stop there. The real goal is to understand how they work.

Here’s what you should be digging into:

  • Communication: How will we stay in touch? Who is my main point of contact? Will I get weekly updates, or do I have to chase them down for information?
  • Problem-Solving: This is a big one. Ask them to tell you a story about a project that went off the rails. What was the challenge, and how did they work with the client and contractor to fix it?
  • Budget & Cost Control: How do you keep projects from going over budget? What's your process for handling change orders when we decide to add or alter something mid-stream?
  • The Team: Who will actually be drawing up my plans and managing my project day-to-day? It's crucial to know if you'll be working with the senior partner you're meeting today or a junior designer.

An architect’s ability to talk you through how they handle conflict is way more valuable than a perfect portfolio. Every single construction project hits a snag. You need a partner who can stay calm and find a solution, not just point fingers.

After the initial interview, many firms offer preliminary consultation services to hash out the project's feasibility and scope. This is a fantastic, low-commitment way to see how they think and if you genuinely work well together before signing a major contract.

Ultimately, you should walk away from the interview feeling confident not just in their technical skills, but in their ability to be a trusted guide. This isn't just about hiring a drafter; it's about finding the right long-term partner for your vision.

Making Sense of Architect Fees and Contracts

Let's talk about the money side of things. Getting a handle on how an architect gets paid is crucial for a smooth project. The fee structure isn't just an arbitrary number; it’s a direct reflection of your project's scope and complexity. Nailing this down early on prevents those awkward conversations and financial surprises later.

When you start talking numbers, you'll likely encounter a few standard ways architects bill for their work. There’s no single "best" way—the right model really depends on the specifics of your project.

Common Architect Fee Structures

Think of these as different tools for different jobs. Each one makes sense in certain situations.

  • Percentage of Construction Cost: This is the go-to for most large-scale, ground-up construction. The architect’s fee is simply a percentage of the final construction cost, usually somewhere in the 5-15% range.
  • Fixed Fee: If your project is straightforward with a crystal-clear scope—like a small interior renovation or a standard tenant fit-out—a fixed fee is perfect. It gives both you and the architect cost certainty from day one.
  • Hourly Rate: This is ideal for the early stages of a project, like initial consultations or feasibility studies when you're not quite sure what the full scope will be. You pay for the architect's time as you use it.

Choosing the right fee structure is just as important as finding an architect whose design vision clicks with yours.

This decision tree gives you a good visual for the key checkpoints when you're trying to figure out if a local commercial architect is the right fit.

Infographic about commercial architect near me

As you can see, a great partnership really boils down to asking the right questions and making sure your vision and theirs are in sync.

Beyond the fee, the contract is your project’s constitution. It must clearly outline the full scope of services, key milestones, payment schedules, and how any changes or additional work will be handled. A vague contract is an invitation for future conflict.

The demand for skilled architectural services is on the rise. In fact, the global market is projected to hit $215.13 billion in 2025. This growth is driven by the increasing complexity of modern commercial projects, which demand deep expertise from start to finish. You can dig into more details about the architectural services market from The Business Research Company. A solid, detailed contract is your best tool to ensure you get every bit of the expert service you’re paying for.

Questions You're Probably Asking About Hiring a Commercial Architect

If you're thinking about hiring a commercial architect, you've probably got a few big questions swirling around. That’s completely normal. Most business owners I talk to want to get a handle on the major pieces of the puzzle—namely cost and timeline—before they dive in. Let's clear those up so you know what to expect.

How Much Is This Going to Cost?

This is usually the first question, and the honest answer is: it depends. Architect fees aren't a flat rate because every project is unique. However, they generally fall into one of three buckets:

  • Percentage of Construction Cost: This is the most common model. Fees typically run between 5% and 15% of the total construction budget. A straightforward warehouse will be on the lower end, while a complex medical facility will be on the higher end.
  • Fixed Fee: If the project scope is crystal clear from day one, a fixed fee can be a great option. It gives you a predictable number for your budget.
  • Hourly Rate: This is often used for the very early stages, like feasibility studies or initial consultations, before the full scope of the project is defined.

How Long Will My Project Take?

The second major question is always about the timeline. A good architect will tell you that the schedule is driven by three distinct phases, and only one of them involves actual construction.

  • The Design Phase: This is where we go from ideas to detailed blueprints. How quickly this moves along often depends on you—your decisiveness and feedback are key.
  • The Approval Phase: This can be the real wild card. Getting plans through city planning departments, zoning boards, and permit offices can sometimes take months. Having a local architect who knows the system and the people involved is a huge advantage here.
  • The Construction Phase: This is when the contractor takes over and starts building.

An architect does so much more than just draw plans. Think of them as your project's primary advocate. They’re the one who wrangles the engineers, deciphers complicated building codes, and keeps an eye on construction to make sure the final building matches the vision and meets quality standards.

They are the central point of contact, turning your business goals into a physical space while managing all the details that make a project successful.


At Sherer Architects, LLC, we're here to walk you through every step, from answering these initial questions to seeing your project through to completion. Learn more about our commercial architecture services and how we bring clarity and expertise to the table.