SHERER ARCHITECTS

Categories
Uncategorized

What Is Life Cycle Cost Analysis A Project Owner’s Guide

When you’re making a big purchase—whether it’s a major piece of equipment or a multi-million dollar building—it's easy to get fixated on the price tag. But that initial number is just the tip of the iceberg. Life cycle cost analysis (LCCA) is the practice of looking below the surface to understand the true cost of an asset over its entire life, from the day you buy it to the day you're done with it.

It's about shifting your mindset from "How much does it cost now?" to "How much will it cost me in total?"

Seeing Beyond The Sticker Price

Two cars parked in a driveway next to a house and wooden fence, with "TOTAL COST" text.

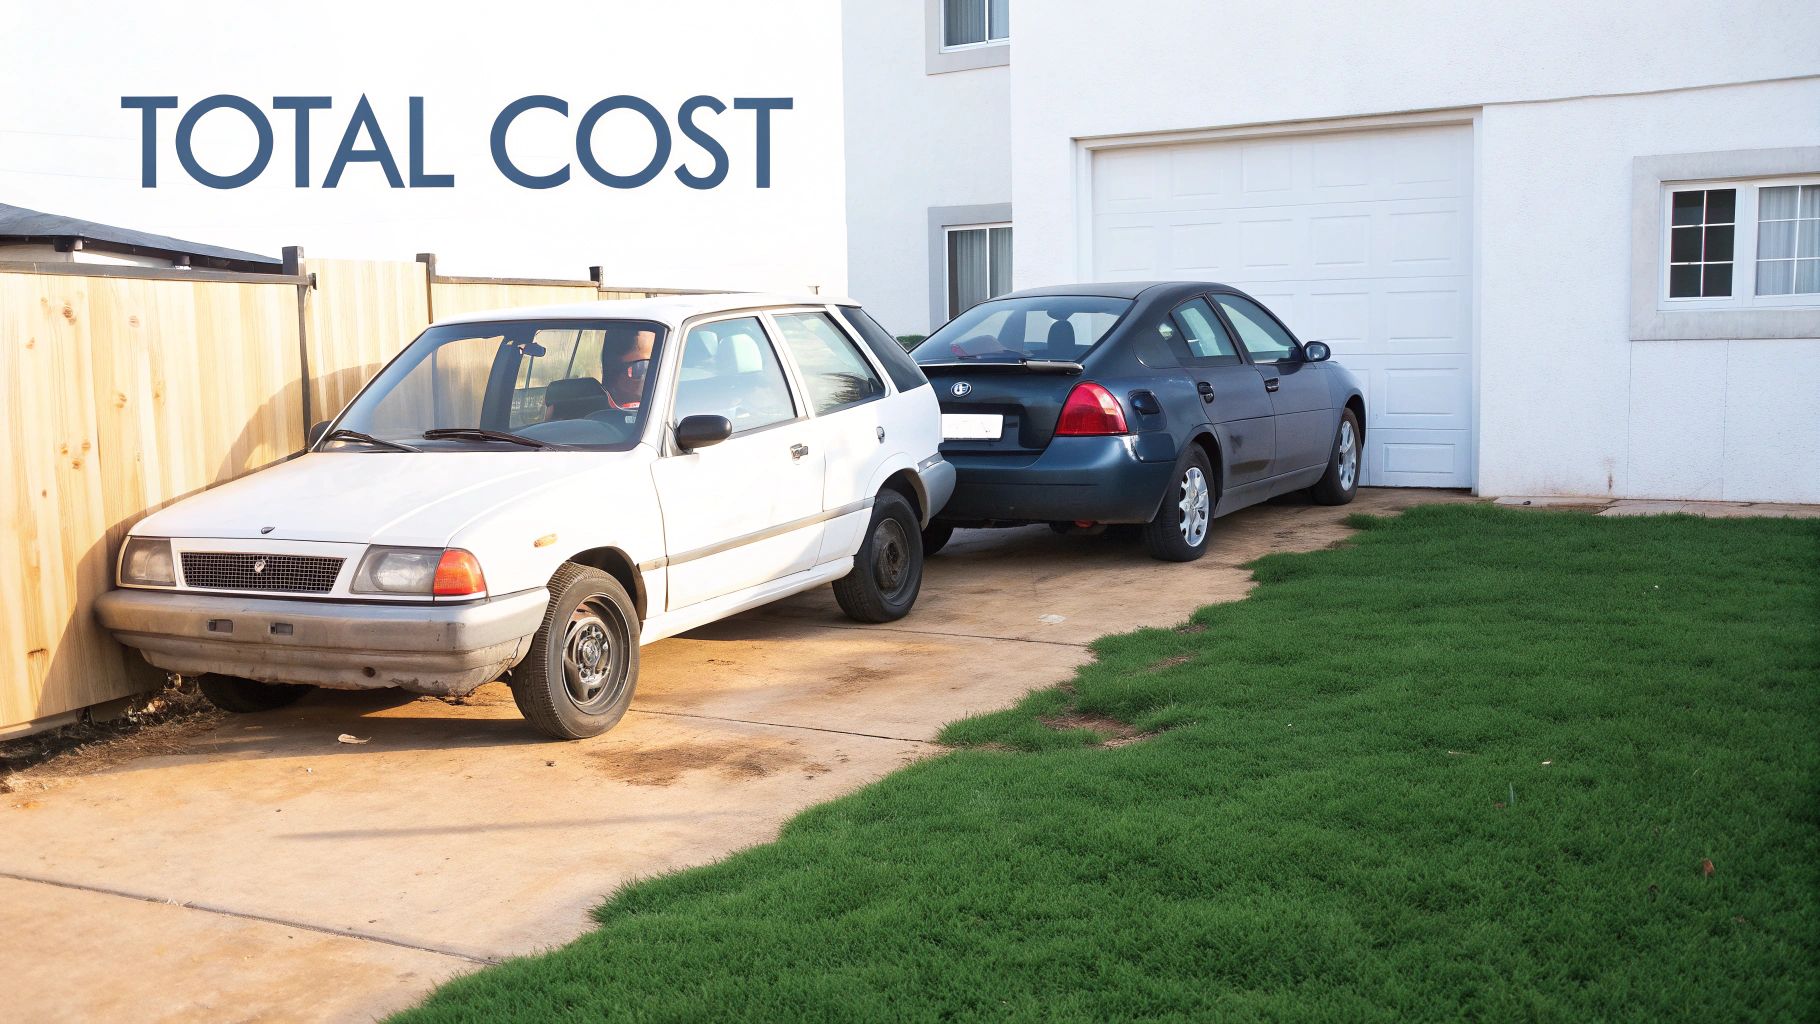
Think of it like buying a car. You have two options for your company fleet. Car A is cheap off the lot, but it’s a notorious gas-guzzler with a reputation for needing frequent, expensive repairs. Car B costs 25% more upfront, but it sips fuel and is known for its bulletproof reliability.

If you only look at the sticker price, Car A seems like the obvious choice. But an LCCA acts like a financial crystal ball. It forces you to account for all the other costs you'll incur over the next ten years: fuel, insurance, routine maintenance, and the likely cost of major repairs.

Suddenly, Car B—with its minimal running costs—starts to look like the far smarter financial decision. That’s the core of LCCA: it gives you the complete picture so you can make decisions based on long-term value, not just short-term savings.

The True Cost of Ownership

This all-encompassing view is often called the Total Cost of Ownership (TCO). It's a cornerstone concept in smart project management, especially in fields like commercial real estate where decisions have consequences that last for decades. TCO provides a structured way to think about every direct and indirect cost tied to an asset.

When we apply this to a building, what are we actually looking at? It’s so much more than the construction contract. The analysis pulls in a whole spectrum of expenses:

  • Initial Costs: This is the upfront investment—design fees, land acquisition, permits, and the actual construction.
  • Operating Costs: These are the daily and monthly bills required to keep the lights on, like energy, water, and janitorial services.
  • Maintenance Costs: The budget needed for routine upkeep and predictable repairs to keep everything from the HVAC to the elevators running smoothly.
  • Replacement Costs: The big-ticket items you know you'll have to replace down the road, like a new roof or a chiller system.
  • Disposal Costs: Any expenses associated with demolishing or decommissioning the building at the end of its useful life, minus whatever you can get back from salvaged materials.

Thinking through these future costs is a critical part of reducing total cost of ownership and is essential for making sound financial decisions.

Why The Price Tag Is Only Part of The Puzzle

To get a clearer view of this shift in perspective, let's compare the two approaches directly.

Initial Cost Vs Life Cycle Cost: A Comparison

Factor Initial Cost Focus (Short-Term View) Life Cycle Cost Analysis (Long-Term View)
Time Horizon Immediate purchase price Entire operational lifespan (e.g., 30-50 years)
Cost Scope Acquisition, design, and construction All costs: initial, operating, maintenance, replacement, and disposal
Decision Driver Lowest upfront bid Best long-term value and lowest total expense
Typical Outcome Potential for high long-term operational and repair costs Optimized performance, reliability, and financial predictability
Key Question "What's the cheapest way to build this now?" "What's the most cost-effective solution over the long run?"

As the table shows, focusing only on the initial bid is a common but costly mistake. It often pushes project teams toward cheaper materials and systems that become a constant financial headache. Poor energy performance, frequent breakdowns, and shorter lifespans can completely wipe out any upfront savings.

A short-term view on cost savings often creates long-term financial liabilities. The goal of LCCA is to identify the option that provides the lowest total cost over a designated period, ensuring the best possible value for the investment.

This isn't just a theoretical exercise; the real-world impact is massive. A study by the American Society of Civil Engineers (ASCE) found that prioritizing low initial costs can lead to long-term expenses that are 2-3 times higher for major projects.

For example, an asphalt highway might be cheaper to lay down than a concrete one, but its heavy maintenance and resurfacing needs can inflate the total cost by more than 50% over its lifetime. It’s a classic case of a small saving today creating a much bigger bill tomorrow.

Why You Can't Afford to Ignore Life Cycle Costing

Let's get practical. Life cycle cost analysis isn't just an academic exercise; it's the financial engine behind buildings that are truly sustainable, profitable, and built to last. Think of it less as an accounting task and more as a strategic crystal ball, giving developers and owners the confidence to make smart, value-driven decisions that will pay off for decades.

It fundamentally changes the conversation. Instead of just asking, "What's the cheapest way to build this today?" it prompts the far more important question: "What investment will deliver the best possible value over the entire life of this asset?"

Turning a Potential Liability Into a High-Performing Asset

A building is a living, breathing financial entity. Without a long-term game plan, what looks like a great deal on day one can quickly morph into a money pit, bleeding cash through sky-high energy bills, constant system failures, and unplanned, expensive repairs.

LCCA flips that script entirely. By mapping out future costs, you can make strategic upfront investments in materials and systems that reduce operational headaches and boost performance for the long haul.

This is especially true for the big-ticket items that can make or break a building's operating budget:

  • HVAC Systems: That high-efficiency HVAC unit might have a bigger price tag, but the massive energy savings it delivers year after year can easily pay for the difference—and then some.
  • Lighting Solutions: Modern LED lighting combined with smart controls costs more to install than basic fixtures. But the dramatic drop in electricity use and the near-elimination of replacement costs make it a clear financial winner.
  • Building Envelope: Spending more on high-performance windows and superior insulation feels like a big expense during construction, but it slashes heating and cooling costs for the entire life of the building.

By putting real numbers to these decisions, LCCA builds an undeniable, data-driven case for quality. It ensures your project becomes a valuable asset, not a constant drain on your resources.

The Financial Case for Sustainability

Today, everyone's talking about sustainability and energy efficiency, and LCCA is where the rubber meets the road. It provides the financial proof that "green" design isn't just about feeling good—it's about being smart with your money. To get a top certification like LEED, you have to demonstrate long-term performance, and LCCA is the tool that quantifies it.

Life cycle cost analysis provides the financial backbone for sustainable design. It proves that green buildings aren't just good for the planet—they are fundamentally good for the bottom line.

This isn't just theory. According to the Whole Building Design Guide (WBDG), energy consumption alone can eat up 40% of a building's total life cycle cost. It's a staggering figure. We've seen this play out in the real world for years; buildings put up before LCCA was standard practice often suffered from crippling operational costs. In one powerful example, VA hospitals managed to cut their 25-year costs by 25% just by using LCCA to choose better HVAC systems. You can explore more WBDG resources on facility performance to see just how impactful this can be.

Better Predictability and a Stronger ROI

When you map out future costs, you bring a powerful dose of predictability to your project. LCCA helps owners budget intelligently for major replacements down the line—you'll know that roof is coming due in year 20 or the boiler will need replacing in year 25. This foresight prevents nasty financial surprises and makes managing the asset much smoother.

Ultimately, this all leads to a much stronger Return on Investment (ROI). A building with lower, more predictable operating costs is simply more profitable. It can command higher rents, attracts better tenants, and holds a much higher resale value. LCCA helps transform a construction project into a high-performing investment, proving that the smartest move is always to look beyond the initial price tag.

How to Perform a Life Cycle Cost Analysis

Thinking about a life cycle cost analysis might seem complicated, but it's really just a logical process. It breaks down what feels like a massive financial puzzle into a series of manageable, clear-cut steps. The goal is to move beyond guesswork and get to concrete, data-driven decisions that show you the true long-term value of your options.

The whole methodology is built around one core idea: translating all future costs into today's dollars. This allows for a true apples-to-apples comparison between different choices, giving you a clear picture of what you'll really spend over the life of a building or a system.

Establish the Ground Rules

Before you even think about crunching numbers, you have to define the scope of your analysis. This is the foundation. Without it, you're just comparing apples and oranges. It’s all about getting everyone on the same page by answering a few key questions.

First, what alternatives are you actually comparing? Are you deciding between two different HVAC systems? Three types of roofing materials? Or are you making the much bigger call between renovating an existing building and starting from scratch? Define each option clearly.

Next, you need to set the study period. This is the timeframe you’ll use to compare the costs. It needs to be long enough to capture major replacement cycles and give you a realistic view of the asset's service life. For most major public or federal projects, a 40-year study period is the standard.

Identify and Gather All Cost Data

With the framework in place, it's time to go on a data-gathering mission. This is where you dig in and identify every single cost tied to each alternative over the entire study period. If you miss a cost category here, you can completely skew the results and end up making the wrong call.

Here’s a look at the different types of costs you'll need to track down and estimate.

Key Cost Categories In A Life Cycle Cost Analysis

Cost Category Description Example
Initial Costs The upfront investment to get the asset up and running. Purchase price, shipping, site prep, installation fees, and initial staff training.
Operating & Maintenance The recurring expenses to keep the asset functioning day-to-day. Energy bills, water usage, janitorial services, routine maintenance, and predictable repairs.
Replacement Costs Major, planned capital expenses to replace key components at their end-of-life. Replacing a commercial chiller after 20 years or a roof membrane after 25 years.
Residual Value The estimated salvage or resale value of the asset at the end of the study period. Selling used equipment or the scrap value of materials. This is treated as a credit.

The goal here is simple: be thorough. A solid LCCA accounts for every dollar spent—or saved—from the day you buy something to the day you get rid of it. This detailed accounting is what turns a gut feeling into a smart financial projection.

For instance, government agencies running an LCCA on infrastructure projects use formulas that add all these factors up. A typical federal analysis might look like this: LCC = Initial Costs + Replacements – Residual Value + Energy + Maintenance. It even accounts for less obvious things, like user delay costs during road repairs, which can be 15-25% of the total project cost. You can dive deeper into these calculations by reviewing federal guidelines for pavement analysis.

The diagram below shows how following this methodical process leads to smarter, more sustainable decisions.

A diagram illustrates the LCCA benefits process: strategic decisions, cost reduction, and sustainable asset.

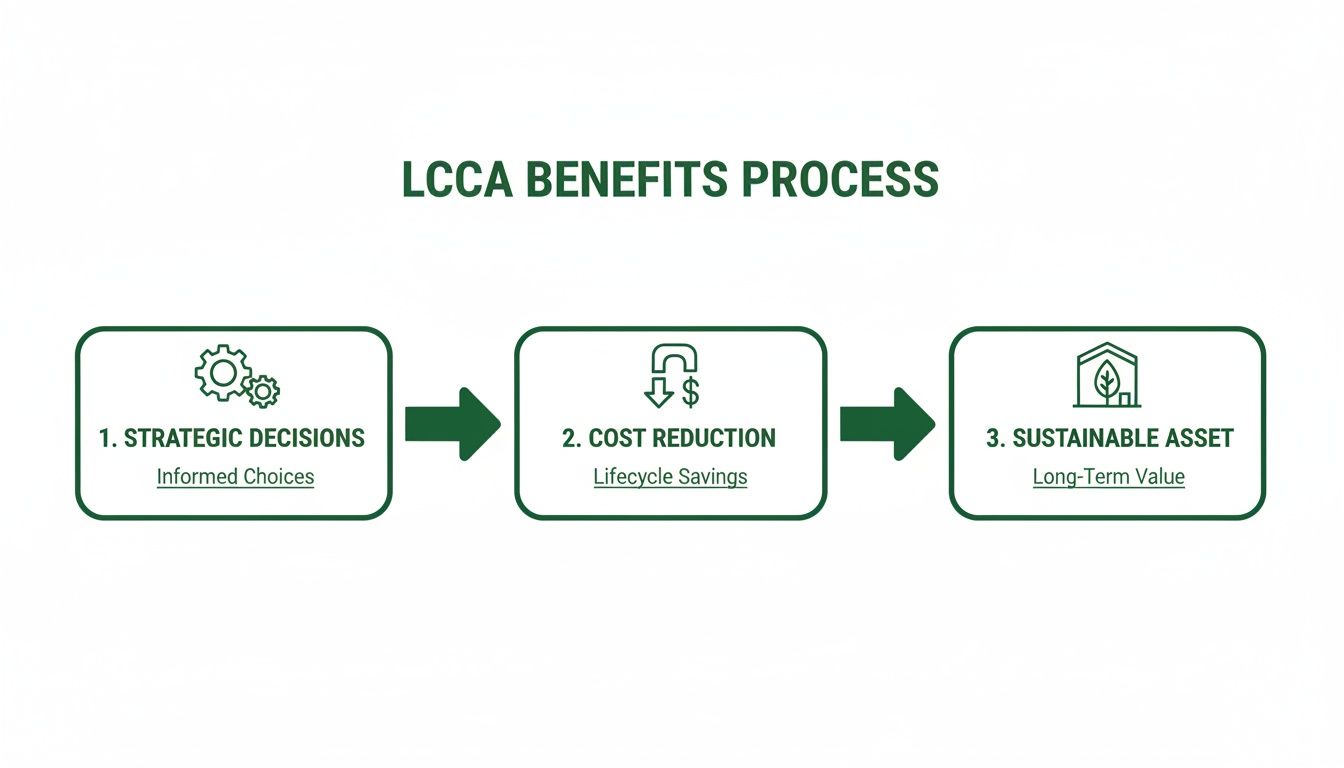
As you can see, a structured LCCA process is the bridge between initial ideas and strategic, cost-effective asset management for the long haul.

Discount Future Costs to Present Value

This is easily the most critical—and most misunderstood—part of the whole analysis. You can't just add up all the costs over 40 years and call it a day. Why not? Because of the time value of money. A dollar in your hand today is worth more than a dollar you'll get ten years from now. That's because of inflation and the potential to earn interest on the money you have now.

To make a fair comparison, you have to convert every future cost into its equivalent value in today's dollars. This is done with a financial calculation called discounting, which gives you the Net Present Value (NPV) of each expense.

Here’s an analogy. If you know you have to pay a $1,000 maintenance bill ten years from now, you could invest a smaller amount today—say, $700—and let it grow over time to cover that future expense. That $700 is the Net Present Value of that future cost.

By discounting every future expense—from the annual energy bill to that big roof replacement in year 20—you can finally add them all up. This gives you a single, comparable number for each of your alternatives. The option with the lowest total NPV is your most cost-effective choice over the long run, giving you the hard data you need to make the right financial move for your project.

LCCA in Action: A Real-World Scenario

Theory is one thing, but seeing a life cycle cost analysis play out in a real-world decision is where the lightbulb really goes on. Let's walk through a classic dilemma for a commercial building owner: choosing the right roofing system for a property they just acquired.

This simple comparison shows exactly how the "cheaper" option today can easily become a major financial headache down the road.

Two houses with different roofs and green grass, overlooking a city skyline.

Imagine the owner needs to replace a failing roof on a 10,000-square-foot building. They've got two quotes and need to make the smartest financial move over a 40-year study period—a pretty standard timeframe for analyzing a major building system like a roof.

Setting Up the Comparison

The choice boils down to two very different materials, each with its own unique cost structure and performance profile.

  • Option A: The Standard TPO Roof. This is a common thermoplastic polyolefin (TPO) system. It's reliable and, more importantly, budget-friendly upfront. It has an estimated service life of about 20 years.
  • Option B: The Premium Metal Roof. This is a high-quality, standing-seam metal roof. The initial sticker price is significantly higher, but it’s built to last for 50+ years and even offers energy savings thanks to its reflective surface.

Just looking at the initial bids, the TPO roof seems like a no-brainer. But an LCCA forces you to look beyond that first invoice and consider every single cost over the next four decades.

Crunching the Numbers

Let's break down the lifetime costs for each option. For this example, we’ll keep it simple and use today’s dollars, but a formal analysis would discount all future costs back to their Net Present Value (NPV).

Option A: TPO Roof (20-Year Lifespan)

  • Initial Installation Cost: The contractor’s bid comes in at $100,000.
  • Annual Maintenance: Routine inspections and minor repairs are estimated at $1,000 per year. Over 40 years, that’s $40,000.
  • Major Replacement Cost: Here's the kicker. Since this roof only lasts 20 years, it will have to be completely torn off and replaced at the 20-year mark. Assuming costs are similar, that’s another $100,000 hit.

Option B: Premium Metal Roof (50+ Year Lifespan)

  • Initial Installation Cost: The upfront investment is much steeper at $180,000.
  • Annual Maintenance: Metal roofs are incredibly durable and need far less upkeep, estimated at just $300 per year. Over 40 years, that adds up to only $12,000.
  • Energy Savings: That reflective surface isn't just for looks. It’s projected to cut cooling costs by $2,000 annually. Over 40 years, that’s a whopping $80,000 in savings, which we treat as a credit.
  • Replacement Cost: With a 50+ year lifespan, this roof will easily outlast our 40-year study period. That means the replacement cost is $0.

This long-term mindset applies to almost every component of a building. Take insulation, for example. An LCCA would compare the initial price against long-term thermal performance and energy savings when evaluating insulation alternatives like spray foam vs. blown-in. It’s the same principle, just a different system.

The Final Verdict

Okay, let's put it all together and see which option truly provides the best long-term value over our 40-year window.

Cost Component Option A (TPO Roof) Option B (Metal Roof)
Initial Cost $100,000 $180,000
Total Maintenance $40,000 $12,000
Replacement Cost $100,000 $0
Energy Savings $0 -$80,000
Total Life Cycle Cost $240,000 $112,000

The results couldn't be clearer. Despite costing 80% more upfront, the premium metal roof’s total life cycle cost is less than half that of the "cheaper" TPO system.

This is the power of LCCA in a nutshell. It forces a crucial mental shift from focusing on the short-term price tag to understanding long-term value. By running this analysis, the building owner avoids a costly mistake and makes a strategic investment that saves a projected $128,000. This is how you use data to build more profitable, sustainable, and resilient buildings.

Finding The Right Data And Tools

A life cycle cost analysis is only as good as the numbers you feed it. While the math itself is straightforward, the real work lies in sourcing accurate costs and realistic service life estimates. This is what transforms a vague guess into a financial forecast you can actually bank on.

Think of it like cooking a gourmet meal. The recipe might be simple, but the quality of your ingredients makes all the difference. In LCCA, your data is the raw ingredient—get it wrong, and the final result will be disappointing, no matter how well you follow the steps.

Where to Find Credible Cost Data

To build a solid LCCA, you need reliable data for everything from initial material and labor costs to the expected lifespan of a boiler. The best place to start is with established industry benchmarks. You don't have to reinvent the wheel.

Here are a few of the go-to resources we use:

  • RSMeans Data: This is pretty much the gold standard for construction cost data in North America. RSMeans offers incredibly detailed cost info on materials, labor rates, and equipment, making it essential for nailing down those initial and replacement cost estimates.
  • Government Resources: You’d be surprised what you can find from agencies like the Department of Energy (DOE) and the National Institute of Standards and Technology (NIST). They publish mountains of data on the energy performance and expected service life for all sorts of building systems.
  • Manufacturer Specifications: When you're looking at a specific piece of equipment, like a high-efficiency HVAC unit or a particular roofing system, the manufacturer is your best friend. They provide the nitty-gritty details on performance, maintenance needs, and expected lifespan.

Using these sources gives your LCCA a strong, evidence-based foundation and lends a ton of credibility to your final numbers.

Software That Does The Heavy Lifting

Look, nobody wants to manually calculate the Net Present Value for 30 years of operating expenses in a spreadsheet. It’s tedious and a recipe for human error. This is where specialized software comes in to save the day (and your sanity).

The screenshot below shows the homepage for the Building Life-Cycle Cost (BLCC) programs, which were developed by NIST.

This is a fantastic example of a tool designed to take the pain out of the process. It's used by everyone from federal agencies to private developers to automate those complex discounting calculations and get a clear picture of long-term cost-effectiveness.

Handling The Inevitable Uncertainty

Even with the best data in the world, you can't predict the future. Inflation might spike, energy prices could swing wildly, or a brand-new system might fail years ahead of schedule. A good LCCA doesn't ignore this; it confronts it head-on.

The goal isn’t to predict the future with perfect accuracy. It’s to make an informed, defensible decision based on the best information we have today, while fully understanding the potential risks.

To manage this uncertainty, one of the most critical steps is to run a sensitivity analysis. This just means you re-run the numbers using different assumptions. What if the discount rate is higher? What if energy savings are 15% lower than you projected?

If your preferred option still looks like the winner across a range of different scenarios, you can move forward with much greater confidence. It’s also crucial to keep your assumptions transparent. Documenting your data sources and clearly stating your logic ensures everyone involved understands exactly how you got from A to B.

Integrating LCCA Into Your Next Project

Knowing what a life cycle cost analysis is is one thing; actually weaving it into your project workflow is where the real magic happens. This isn't about tacking on another complicated step. It's a fundamental shift in how you make decisions, steering every choice toward the long-term financial health of the building right from the get-go.

If there’s one rule to follow, it’s this: start early. The real power of an LCCA is unlocked during the initial design and planning stages. If you wait until later, you’ve already missed the best opportunities to make a difference.

A Roadmap for Action

Bringing LCCA into your process isn't a solo effort. It demands collaboration and a forward-thinking attitude, grounded in a clear, proactive approach to gathering information and making smart calls.

Here’s a practical way to get started:

  1. Assemble the Right Team Early: Get your architect, engineers, and contractors in the same room from day one. Their combined experience is absolutely essential for pulling together realistic cost data and service life estimates for everything from the HVAC system to the roofing materials.

  2. Define Your Goals and Study Period: What are you trying to achieve with this building, financially and operationally? Once you know that, agree on a study period that makes sense—it should be long enough to see at least one major replacement cycle for the building's key components.

  3. Use LCCA as a Communication Tool: Don't present the analysis as a way to slash the budget. Frame it as a strategy to optimize value. Use the numbers to clearly show clients and investors how a slightly higher upfront cost can generate massive long-term savings and a much healthier ROI.

A well-executed life cycle cost analysis completely changes the conversation with stakeholders. It shifts the focus from short-term budget headaches to long-term asset value, backing up higher-quality investments with hard, undeniable financial data.

Fostering a Lifecycle Costing Mindset

Ultimately, making LCCA a habit is about nurturing a new perspective. It’s about seeing that every single choice made during design and construction sends financial ripples decades into the future.

This way of thinking allows you to look past the initial price tag and focus on creating buildings that are more sustainable, resilient, and profitable over their entire lives.

By making LCCA a standard part of your development process, you’re not just building better buildings—you’re building a powerful competitive advantage. You deliver projects that meet today's budget and perform beautifully for years, solidifying your reputation for delivering exceptional, lasting value.

Frequently Asked Questions About LCCA

Even after breaking it all down, it's natural to have a few questions when you start applying a concept like life cycle cost analysis in the real world. Here are some of the most common ones we hear from owners and developers, along with some straightforward answers.

What’s the Difference Between LCCA and TCO?

You'll often hear these two terms pop up in the same conversation, and it’s easy to see why—they're two sides of the same coin.

Think of Total Cost of Ownership (TCO) as the big-picture goal. It’s the total, all-in cost of owning something, from the day you buy it to the day you get rid of it.

Life Cycle Cost Analysis (LCCA) is the specific method you use to figure out that TCO. It's the structured, nuts-and-bolts process—the financial modeling that includes discounting future costs to their present value so you can make a true apples-to-apples comparison. TCO is the destination; LCCA is the map you use to get there accurately.

How Long Should the Study Period Be for an LCCA?

There’s no magic number here; the right timeframe really depends on what you're analyzing. But there are some solid rules of thumb that can point you in the right direction.

For a whole building or a major piece of public infrastructure, a 40-year period is often a good, robust standard. When you're looking at individual components, the trick is to set a timeframe that’s long enough to see at least one full replacement of the shorter-lived option you're considering.

Example: Let's say you're comparing a standard roof with a 15-year warranty against a premium roof built to last 30 years. You need to run the analysis for at least 30 years. Anything less, and you’d miss the massive cost of tearing off and replacing that first roof—a detail that completely changes the financial outcome.

Is LCCA Just for New Buildings?

Not at all. Actually, LCCA is an incredibly valuable tool for renovations and adaptive reuse projects. It’s what gives you the hard financial data to justify making smart upgrades to an existing building.

For instance, should you keep patching up that old, inefficient HVAC system, or does it make more financial sense to replace it? LCCA lays it all out. It pits the high ongoing energy and maintenance bills of the old unit against the upfront investment and long-term savings of a new one. This is how you build a rock-solid business case for sustainable upgrades, proving exactly when it’s time to invest in efficiency for the long haul.


At Sherer Architects, LLC, we build life cycle cost analysis right into our design process. It’s how we make sure every project, from a brand-new commercial build to a complex historic renovation, delivers the greatest possible value over its entire lifetime. Explore how our architectural expertise can optimize your next investment.

Categories
Uncategorized

Your guide to construction quality control checklist

In commercial construction, adaptive reuse, and historic preservation, success is measured not just by completion, but by endurance and performance. The gap between a good project and a great one often lies in the rigor of its quality control. A generic checklist won't suffice; what's needed is a dynamic, phase-by-phase framework that anticipates challenges and verifies compliance at every critical juncture. This guide provides a definitive construction quality control checklist, breaking down the eight most crucial inspection and verification stages.

We'll move beyond the obvious, offering actionable steps and practical examples for each critical point. You will learn how to verify everything from concrete strength and structural steel certifications to the integrity of your building envelope. This comprehensive approach ensures that every component, from foundation to finish, meets exacting standards. It’s about building a systematic process that catches issues early, long before they become expensive problems or safety hazards.

This meticulous oversight is vital throughout the project lifecycle. A key milestone that exemplifies the non-negotiable nature of detailed quality checks before handover is the practical completion inspection, which serves as a final, exhaustive review of all works. By implementing these detailed checks from day one, you can mitigate risks, prevent costly rework, and ensure your final structure is safe, compliant, and built to last. This checklist is your roadmap to delivering a project that stands as a testament to quality, durability, and meticulous planning.

1. Concrete Quality Testing and Strength Verification

Concrete is the literal foundation of most commercial and adaptive-reuse projects, making its integrity non-negotiable. This critical point on any construction quality control checklist involves a systematic process of testing concrete materials before, during, and after placement. The goal is to verify that the concrete mix meets or exceeds the specified design strength, durability, and workability requirements outlined in the project's structural plans and building codes.

This process ensures the structural safety and long-term performance of the building. It mitigates risks associated with structural failure, costly rework, and potential liability. For high-rise construction, bridge projects, or structures in seismic zones, stringent concrete testing is a fundamental requirement mandated by law and engineering best practices.

Key Testing Procedures

Verification relies on standardized tests, primarily those governed by ASTM International and the American Concrete Institute (ACI).

  • Slump Test (ASTM C143): Performed on-site just before the pour, this test measures the consistency and workability of fresh concrete. It immediately indicates if the water-cement ratio is correct, preventing issues like segregation or poor finishability.
  • Compressive Strength Test (ASTM C39): This is the most crucial test. Cylindrical samples are taken from the concrete batch on-site, cured under controlled conditions (ASTM C192), and then crushed by a specialized machine at specific intervals (typically 7, 14, and 28 days). The results confirm if the concrete has achieved its required design strength (e.g., 4,000 psi).
  • Air Content Test (ASTM C231/C173): For exterior concrete exposed to freeze-thaw cycles, this test verifies the volume of microscopic air bubbles entrained in the mix. Proper air entrainment provides space for freezing water to expand, preventing surface spalling and internal cracking over time.

Implementation and Best Practices

Successful concrete quality control requires proactive planning and meticulous documentation. Major contractors on large-scale commercial projects, such as a new corporate campus or a multi-level parking garage, often retain independent, third-party testing laboratories. This practice ensures unbiased, verifiable results and adds a layer of accountability.

Key Insight: Don't wait for a problem. Establish clear acceptance and rejection criteria with the structural engineer and concrete supplier before the first truck arrives on site. This protocol should detail the exact steps to take if a test fails, preventing costly delays and disputes.

To effectively integrate this into your workflow:

  • Schedule in Advance: Coordinate with the testing lab well before scheduled pour dates to ensure personnel are available. Factor in the lab's turnaround time for 28-day strength test reports.
  • Document Everything: Every test result, batch ticket, and sample location must be logged immediately. This creates a traceable record of quality for every structural element.
  • Address Failures Promptly: If a 7-day or 28-day test fails to meet the minimum strength, immediately notify the project engineer. A documented corrective action plan, which may involve further testing (like core drilling) or structural remediation, must be implemented and approved.

2. Structural Steel Inspection and Material Certification

For projects relying on a steel skeleton, from towering skyscrapers to expansive industrial facilities, the integrity of every beam, column, and connection is paramount. This essential point on a construction quality control checklist involves a rigorous verification process to ensure all structural steel meets the exact specifications for grade, dimension, and material properties. It encompasses the entire lifecycle of the steel, from the foundry to its final placement.

Man in a high-vis vest performing quality control, writing on a clipboard at a steel construction site.

This process is critical for ensuring the structure can safely bear its intended loads and resist environmental forces. Proper certification and inspection prevent the use of substandard or incorrect materials, which could lead to catastrophic structural failure. For government contracts, bridge projects, or buildings in high-seismic areas, these verification steps are non-negotiable and mandated by codes from bodies like the American Institute of Steel Construction (AISC).

Key Testing Procedures

Verification is based on certified documentation and physical inspections, adhering to standards from ASTM International and the American Welding Society (AWS).

  • Mill Test Reports (MTRs): This is the birth certificate for steel. The MTR is a quality assurance document provided by the steel mill that certifies a material’s chemical analysis and mechanical properties. It must be reviewed and matched against the project specifications (e.g., verifying Grade 50 steel) before the steel is fabricated or shipped to the site.
  • Welding and Bolting Inspections: Certified Welding Inspectors (CWIs) must visually and, if required, non-destructively test welds to ensure they are free of defects and meet design requirements (AWS D1.1). Similarly, high-strength bolted connections must be inspected to confirm proper bolt tensioning using methods like turn-of-nut or direct tension indicators.
  • Dimensional and Damage Inspection: Upon delivery, every piece of steel must be inspected for shipping damage, such as bends or twists, and measured to confirm its dimensions align with the approved shop drawings. Any discrepancies must be documented and resolved immediately.

Implementation and Best Practices

Effective steel quality control is about traceability and proactive verification, not reactive problem-solving. Major commercial projects, like a new hospital wing or data center, often employ third-party special inspectors to provide an independent layer of oversight for all steel fabrication and erection processes, ensuring unbiased compliance.

Key Insight: Implement a "gatekeeping" system. No steel member should be offloaded or erected until its corresponding Mill Test Report has been received, reviewed, and approved by the project engineer. This simple protocol prevents uncertified material from ever entering the building's structural system.

To effectively integrate this into your workflow:

  • Request MTRs Early: Make the submission and approval of MTRs a prerequisite for payment to the steel fabricator. This ensures documentation is a priority.
  • Tag and Track: Establish a system for tagging each steel member with a unique identifier that links it back to its MTR and its specific location in the structure as shown on the erection drawings.
  • Inspect Upon Arrival: Designate a specific laydown area for steel delivery inspections. Check for transit damage, surface contaminants like excessive rust or oil, and verify piece marks against the shipping manifest and drawings before accepting the material.

3. Formwork and Shoring Safety Verification

Formwork and shoring are the temporary skeletons that support concrete and other materials until they can support themselves. This point on a construction quality control checklist involves the rigorous inspection and certification of these temporary systems to ensure they can safely handle immense construction loads without failure. The goal is to prevent catastrophic collapses, protect workers, and ensure the final structural elements are formed to the correct dimensions and specifications.

This process is a critical safety and quality assurance measure, particularly in multi-story construction or projects involving heavy concrete beams and decks. A failure in formwork not only poses a direct threat to life but also leads to significant project delays, budget overruns, and severe structural defects in the finished product. Verification is mandated by OSHA and is a cornerstone of responsible project management.

Key Inspection Procedures

Verification requires adherence to engineered designs and industry standards, primarily guided by OSHA regulations and ACI guidelines.

  • Design and Drawing Review: Before installation, the project’s structural engineer or a designated qualified person must review and approve the formwork design drawings. This step confirms the system is engineered to support the anticipated dead and live loads, including the weight of wet concrete, workers, and equipment.
  • Pre-Pour Inspection: A competent person must conduct a thorough visual inspection of the erected formwork system just before the concrete pour. This checklist-driven inspection verifies that all components (shores, braces, connectors) are installed correctly, plumb, and according to the approved design.
  • Monitoring During and After Pour: Continuous monitoring is essential as the concrete is placed. Observers watch for any signs of deflection, settlement, or distress in the formwork. Post-pour inspections ensure the system remains stable as the concrete begins to cure and transfer its load.

Implementation and Best Practices

Effective formwork verification is a collaborative effort between the general contractor, the concrete subcontractor, and the project engineer. On complex projects, like a new hospital wing or an elevated bridge deck, a specialized formwork engineering firm is often engaged to design and certify the system.

Key Insight: Treat formwork as a temporary structure with the same engineering rigor as the permanent one. A detailed removal (stripping) schedule, approved by the project engineer, is just as critical as the installation plan. Removing supports too early can lead to structural failure, even days after the pour.

To effectively integrate this into your workflow:

  • Engage a Qualified Designer: For anything beyond simple slab-on-grade work, ensure the formwork system is designed by a qualified professional engineer specializing in temporary structures.
  • Conduct Pre-Pour Meetings: Hold a specific meeting with the site superintendent, concrete crew, and inspector to review the formwork design, inspection checklist, and emergency procedures.
  • Document All Inspections: Every pre-pour and post-pour inspection must be documented with a signed-off checklist, notes, and photographs. This creates a clear record of due diligence and compliance.
  • Control the Stripping Process: Adhere strictly to the engineer-approved schedule for removing forms and shoring. This timing is based on concrete strength test results, not just the calendar, to ensure the structure can safely bear its own weight.

4. Rebar Placement and Installation Verification

Reinforcing steel, or rebar, is the skeletal system within concrete structures, providing the tensile strength that concrete lacks. Verifying its correct placement is a crucial step in any construction quality control checklist, as improper installation can compromise the entire structural integrity of a building, leading to cracks, premature failure, or even collapse. This inspection process ensures that the size, spacing, positioning, and concrete cover of the rebar precisely match the structural engineer's design specifications.

This verification is non-negotiable for ensuring the long-term durability and safety of concrete elements like foundations, columns, beams, and slabs. It directly prevents issues such as corrosion from inadequate concrete cover and structural weakness from incorrect splicing or spacing. For projects like high-rise residential buildings or highway bridge decks, meticulous rebar inspection is a fundamental prerequisite before any concrete is poured.

Rebar grid being measured with a tape measure on a construction site, ensuring proper spacing for concrete.

Key Testing Procedures

Verification is a visual and manual inspection process guided by industry standards from the American Concrete Institute (ACI) and the Concrete Reinforcing Steel Institute (CRSI).

  • Placement and Spacing Check: Using a tape measure, inspectors confirm that the spacing between bars (both horizontal and vertical) matches the design drawings. They also verify the correct number of bars and their specified sizes (e.g., #5 rebar at 12 inches on-center).
  • Concrete Cover Verification: Inspectors measure the distance from the rebar to the edge of the formwork. This "cover" is critical for protecting the steel from moisture and corrosion. Specialized tools like plastic rebar chairs or dobies are checked to ensure they are correctly sized and placed to maintain this required distance.
  • Lap Splice and Tie Inspection: Where two bars overlap to create a continuous line of reinforcement, the length of this "lap splice" is measured to ensure it meets the minimum length specified in the plans. Inspectors also confirm that the rebar is securely tied with wire to prevent shifting during the concrete pour.

Implementation and Best Practices

A successful rebar inspection program hinges on a formal pre-pour sign-off process. For major projects, such as marine structures with enhanced corrosion protection requirements or government-funded infrastructure, a third-party special inspector is often mandated to perform and certify the rebar installation before the concrete contractor is allowed to proceed.

Key Insight: Treat the pre-pour rebar inspection as a mandatory "hold point" in the construction schedule. No concrete should be ordered or poured until the structural engineer or their designated inspector has formally signed off on the rebar placement. This single checkpoint prevents irreversible and costly mistakes.

To effectively integrate this into your workflow:

  • Schedule a Formal Inspection: Coordinate the inspection with the project superintendent, structural engineer, and third-party inspector for a specific time after all rebar is tied but before the concrete pour is scheduled.
  • Document with Photos: Take detailed, dated photographs of the rebar placement, including close-ups with a tape measure visible. This creates a permanent visual record of compliance for the project archives.
  • Resolve Deviations Immediately: If any discrepancies are found, such as incorrect spacing or insufficient cover, they must be corrected on the spot. The inspector must then re-verify the corrected areas before granting approval for the pour.

5. Electrical Installation and Safety Compliance Inspection

An electrical system is the central nervous system of any modern commercial building, making its proper installation a paramount safety and operational concern. This point on a construction quality control checklist involves a rigorous, multi-stage inspection process to verify that all electrical systems are installed according to project plans, specifications, and, most importantly, prevailing electrical codes like the National Electrical Code (NEC). It covers everything from wiring and conduit to panels, grounding, and final system testing.

This process is critical for preventing fire hazards, ensuring occupant safety, and guaranteeing the reliable performance of all building systems. For facilities with specialized needs like hospitals or data centers, which have stringent power reliability and redundancy requirements, meticulous electrical inspection is not just a best practice; it is a fundamental requirement for functionality and accreditation.

Key Testing Procedures

Verification ensures that the installed system is safe, functional, and compliant. Inspections are often performed by local building officials, but a thorough internal QC process is essential.

  • Rough-in Inspection: This occurs before walls and ceilings are closed. Inspectors verify proper installation of outlet boxes, correct wire sizing and type for each circuit, secure conduit runs, and appropriate support and protection of wiring. This is the last chance to easily correct issues within walls.
  • Panel and Service Inspection: This focuses on the main electrical service, distribution panels, and subpanels. It includes verifying correct breaker installation, proper conductor termination and torque settings, clear and accurate panel labeling (circuit directories), and confirming that grounding and bonding systems are installed per NEC requirements.
  • Final Inspection and System Testing: After all devices (lights, switches, receptacles) are installed, a final inspection is conducted. This includes functional testing, such as verifying proper operation of Ground Fault Circuit Interrupters (GFCIs) and Arc-Fault Circuit Interrupters (AFCIs), confirming correct polarity at all outlets, and performing insulation resistance tests on major feeders if specified.

Implementation and Best Practices

A successful electrical quality control program relies on proactive coordination and unwavering attention to code compliance. On major projects, such as a new industrial facility with hazardous area classifications, general contractors depend on highly qualified, licensed electrical subcontractors who maintain their own internal QC process, which is then verified by third-party inspectors and local authorities.

Key Insight: Treat electrical inspections as phased gates, not a single final event. A "pre-inspection" walkthrough with your electrical foreman before the official inspector arrives can identify and correct 90% of potential issues, preventing failed inspections, costly re-inspection fees, and schedule disruptions.

To effectively integrate this into your workflow:

  • Schedule Phased Inspections: Coordinate rough-in, above-ceiling, and final inspections with the project schedule. Never cover work that has not been inspected and approved.
  • Maintain Meticulous Records: Keep a dedicated log of all inspections, test results (e.g., megohmmeter readings), and corrective actions taken. This documentation is vital for the Certificate of Occupancy.
  • Verify Code Compliance: The NEC is updated every three years. Ensure your electrical team is working with the edition adopted by the local jurisdiction. Address any discrepancies between plans and code requirements with the design team immediately.

6. Masonry Quality Control and Bond Testing

Masonry, whether structural block, brick veneer, or historic stone, is defined by the quality of its individual units and the mortar that binds them together. This point on a construction quality control checklist establishes a rigorous process for verifying materials and workmanship to ensure the system’s structural integrity, weather resistance, and aesthetic consistency. The goal is to confirm that the entire masonry assembly meets the specified strength, durability, and appearance standards.

Proper masonry quality control is essential for preventing common failures like water infiltration, cracking, and efflorescence, which can lead to costly repairs and compromise the building envelope. For projects like a historic building restoration or the facade of a new commercial headquarters, meticulous attention to masonry detail is fundamental to both long-term performance and the project's visual success.

Key Testing Procedures

Verification is guided by standards from organizations like The Masonry Society (TMS) and ASTM International to ensure repeatable and reliable results.

  • Mortar and Grout Testing (ASTM C780 / C1019): Similar to concrete testing, samples of mortar and grout are taken on-site during construction. These samples are tested for compressive strength and consistency to ensure they meet the mix design requirements and have the necessary bonding properties.
  • Masonry Prism Testing (ASTM C1314): This is a critical test for structural masonry walls. Small assemblies, or prisms, are built on-site using the actual brick/block, mortar, and grout from the project. These prisms are then cured and compression-tested in a lab to verify the ultimate compressive strength (f'm) of the entire masonry system, confirming it aligns with the structural engineer's design.
  • Visual Workmanship Inspection: Continuous on-site inspection is non-negotiable. This involves checking for consistent mortar joint thickness, ensuring joints are fully packed, verifying the proper installation of flashing and weeps, and confirming that wall ties are correctly embedded and spaced.

Implementation and Best Practices

Effective masonry QC depends on setting clear standards before the first block is laid and maintaining them through diligent oversight. On large-scale projects, such as a multi-story university building with an intricate brick facade, a dedicated inspector or third-party agency specializing in masonry is often engaged to oversee the work and conduct testing.

Key Insight: Create a physical on-site mockup panel for approval before full-scale installation begins. This sample panel should include all elements: the specified brick or block, mortar color and joint profile, ties, and flashing. It serves as the definitive quality benchmark against which all subsequent work is measured.

To effectively integrate this into your workflow:

  • Pre-Installation Conference: Hold a meeting with the mason, general contractor, architect, and testing agency to review submittals, mockup requirements, testing frequency, and acceptance criteria.
  • Document Material Deliveries: Log all delivery tickets for masonry units, mortar components, and reinforcement. Ensure they match the approved submittals before being incorporated into the work.
  • Protect the Work: Ensure that newly laid masonry is properly protected from rain and extreme temperatures during the critical curing period to prevent washouts, efflorescence, or loss of strength.

7. Welding Quality Inspection and Certification

For steel-framed structures, bridges, and industrial facilities, the integrity of welded connections is a paramount safety concern. This point on a construction quality control checklist involves the systematic inspection and testing of all structural welds to ensure they meet the stringent strength, quality, and code requirements specified by project engineers. The goal is to verify that every connection is free from defects and possesses the necessary load-bearing capacity.

This process is fundamental to preventing catastrophic structural failures. It ensures that the building performs exactly as designed under various loads, including gravity, wind, and seismic forces. In projects like high-rise buildings, critical infrastructure, or pressure vessel fabrication, rigorous weld inspection is mandated by codes from the American Welding Society (AWS) and other governing bodies.

Key Testing Procedures

Verification is achieved through a combination of visual inspection and advanced Non-Destructive Testing (NDT) methods performed by certified inspectors.

  • Visual Inspection (VT): This is the most common and fundamental method, conducted before, during, and after welding. Inspectors check for proper joint preparation, correct weld size and profile, and surface defects like cracks, undercut, or excessive porosity. It is the first line of defense against poor workmanship.
  • Ultrasonic Testing (UT): This NDT method uses high-frequency sound waves to detect internal discontinuities within the weld. A transducer sends a signal into the material, and the return echo is analyzed to identify hidden flaws like lack of fusion or slag inclusions without damaging the connection.
  • Radiographic Testing (RT): Similar to a medical X-ray, this technique uses X-rays or gamma rays to produce an image of the weld's internal structure on film. RT is highly effective for identifying internal voids, cracks, and other volumetric defects, and is often required for 100% inspection on critical connections like those in pressure vessels or pipelines.

Implementation and Best Practices

Effective welding quality control depends on proactive oversight and meticulous record-keeping. General contractors on major projects, such as a new hospital wing or a bridge rehabilitation, will engage a third-party inspection agency with certified NDT technicians. This ensures an independent, unbiased assessment of weld quality and compliance.

Key Insight: Qualification is preventative. Verify that every welder on site holds current certifications (e.g., AWS D1.1) for the specific position and type of weld they will be performing before any structural steel is joined. This single step prevents the vast majority of common weld defects.

To effectively integrate this into your workflow:

  • Establish Clear Criteria: Define the acceptance and rejection standards for all welds with the structural engineer, based on AWS or other applicable codes, before fabrication begins.
  • Document Everything: Each weld inspection must be documented with a detailed report, including the welder's identification, location of the weld, inspection method used, and findings. Photographic evidence should support all visual inspections.
  • Schedule Phased Inspections: Plan NDT to occur as work progresses, not at the end. This allows for timely identification and correction of any deficient welds before they are covered by other building elements, avoiding costly and complex rework.

8. Building Envelope and Moisture Barrier Verification

The building envelope acts as the primary barrier between the conditioned interior and the exterior environment, making its integrity essential for long-term durability and energy performance. This critical point on a construction quality control checklist involves a systematic inspection and testing of all waterproofing membranes, air barriers, and weather-resistive barriers. The goal is to prevent uncontrolled air leakage and water infiltration, which can lead to structural damage, mold growth, and poor energy efficiency.

Man inspecting house exterior with a moisture meter, revealing a moisture barrier.

This verification process protects the owner’s investment by ensuring the building performs as designed, reducing operational costs, and preventing costly future repairs. For high-performance green buildings or structures in regions with extreme weather, a meticulously sealed and waterproofed envelope is a fundamental requirement driven by building codes and sustainability standards like LEED. For a comprehensive quality control plan, understanding detailed roofing inspection practices is crucial for ensuring the integrity of the building envelope.

Key Testing Procedures

Verification combines visual inspections with standardized performance tests, often guided by standards from the Air Barrier Association of America (ABAA) and ASTM International.

  • Visual Inspection and Continuity Checks: Before and after cladding is installed, inspectors visually verify that all barrier materials are installed per manufacturer specifications. This includes checking for complete coverage, proper lapping of seams, and correct flashing and sealing around all penetrations like windows, doors, and MEP conduits.
  • Water Penetration Testing (ASTM E1105): This field test is commonly performed on window installations and curtain wall systems. A calibrated spray rack delivers a uniform stream of water at a specified pressure against a section of the building facade while a negative air pressure differential is created inside, simulating wind-driven rain.
  • Whole-Building Air Leakage Test (ASTM E779): Often called a "blower door test," this procedure depressurizes or pressurizes the entire building using large, calibrated fans. It measures the total air leakage rate, which is then compared against the project's specified air tightness requirements (e.g., a certain CFM per square foot of envelope area).

Implementation and Best Practices

Effective building envelope verification requires coordination between multiple trades, including framers, window installers, roofers, and MEP contractors. It is often managed by a third-party building enclosure consultant who can provide unbiased oversight and testing.

Key Insight: Treat the air and moisture barrier as a single, continuous, and monolithic system. A small, unsealed pipe penetration can compromise the performance of the entire wall assembly, negating the investment in high-quality materials.

To effectively integrate this into your workflow:

  • Hold Pre-Installation Meetings: Gather all relevant trades to review sequencing, detailing, and compatibility of different barrier products before work begins.
  • Document with Photos: Take detailed photographs of all flashing, seals, and membrane laps before they are covered by subsequent layers like brick or siding. This creates a permanent record of quality.
  • Test Early and Re-Test: Conduct water penetration tests on mock-ups or the first few installed window units. If deficiencies are found, they can be corrected before the entire building is completed, preventing rework. If a test fails, a documented corrective action must be implemented and the area must be re-tested until it passes.

8-Point Construction Quality Control Comparison

Item Implementation Complexity 🔄 Resource Requirements ⚡ Expected Outcomes 📊 Ideal Use Cases 💡 Key Advantages ⭐
Concrete Quality Testing and Strength Verification Moderate — scheduled sampling, lab and NDT procedures High — laboratory access, curing space, trained technicians Reliable compressive strength verification; code compliance; documented batches High-rise, bridges, commercial pours, projects requiring certified strength ⭐ Very high structural assurance; prevents failures; strong documentation
Structural Steel Inspection and Material Certification Moderate–High — mill report review, dimensional checks, NDT High — NDT equipment, certified inspectors, supplier coordination Verified material grade, weld quality, and traceability Skyscrapers, bridges, industrial facilities, government contracts ⭐ Ensures material authenticity and capacity; reduces collapse risk
Formwork and Shoring Safety Verification High — engineered design review, installation inspection, load testing High — structural engineers, monitoring tools, temporary systems Safe temporary support; reduced collapse and injury risk; protected schedule Multi‑story formwork, heavy beams, bridge decks, OSHA‑regulated sites ⭐ Prevents collapse; improves safety and concrete finish
Rebar Placement and Installation Verification Moderate — detailed pre‑pour visual and measurement checks Moderate — experienced inspectors, measuring tools, photo documentation Correct reinforcement placement, adequate cover, splice compliance High‑rise, bridges, marine structures, government projects ⭐ Ensures reinforcement accuracy; enables early correction pre‑pour
Electrical Installation and Safety Compliance Inspection Moderate — circuit, grounding, continuity and load testing Moderate — certified electricians, electrical test gear, documentation NEC compliance; reduced fire/electrical hazard risk; occupancy approval Commercial buildings, hospitals, data centers, industrial facilities ⭐ Prevents electrical hazards; ensures code compliance and safety
Masonry Quality Control and Bond Testing Moderate — mortar/prism testing, visual workmanship inspection Moderate–High — lab testing, skilled masons, time for prism curing Verified bond strength, durability, moisture resistance Historic restoration, facades, multi‑story masonry, heritage projects ⭐ Ensures durability and weather resistance; prevents infiltration
Welding Quality Inspection and Certification High — welder qualification, visual and advanced NDT (RT/UT), destructive tests High — NDT specialists, radiography/UT equipment, testing labs Verified weld integrity; detection of internal flaws; code compliance High‑rise steel connections, pressure vessels, bridges, pipelines ⭐ Detects critical flaws; verifies welder competence; prevents failures
Building Envelope and Moisture Barrier Verification Moderate — visual, spray/water penetration testing, thermal imaging Moderate — moisture/spray equipment, thermal cameras, dry conditions Reduced water intrusion; improved energy efficiency; longer lifespan Commercial facades, high‑performance buildings, renovations ⭐ Prevents water damage and mold; improves energy performance

From Checklist to Certainty: Embedding Quality into Your Project DNA

The journey from architectural vision to a completed, high-performing structure is paved with thousands of critical details. As we've explored through the eight essential stages, from pre-construction planning to final commissioning, a construction quality control checklist is far more than a simple document. It is the operational framework for excellence, the practical tool that transforms abstract quality goals into tangible, verifiable results on the job site. This isn't about ticking boxes; it's about embedding a culture of precision and accountability into the very DNA of your project.

Moving beyond a reactive, "catch-it-when-it's-broken" mindset is the single most impactful shift a project team can make. A proactive approach, underpinned by the detailed checkpoints we've outlined, prevents errors before they occur. It stops a small discrepancy in rebar placement from becoming a significant structural concern, and it ensures a minor gap in the building envelope doesn't lead to major moisture intrusion issues years down the line. This proactive diligence is the foundation of risk management, cost control, and schedule adherence.

The True ROI of a Rigorous Quality Control Process

The immediate benefits of a robust quality control program are clear: reduced rework, fewer change orders, and a smoother path to project completion. However, the long-term value extends far beyond the construction phase.

  • Asset Longevity: Quality construction directly translates to a more durable, resilient building with lower lifecycle maintenance costs. Every verified weld, properly installed moisture barrier, and correctly commissioned MEP system contributes to the asset's long-term performance and value.
  • Reputation and Trust: For developers, contractors, and owners, a reputation for delivering high-quality projects is invaluable. It builds trust with investors, attracts premium tenants, and secures future opportunities. A comprehensive construction quality control checklist is your proof of commitment to this standard.
  • Occupant Safety and Satisfaction: Ultimately, buildings are for people. Rigorous adherence to structural, electrical, and fire safety codes is non-negotiable. Quality finishes and functional systems create a positive, reliable environment for occupants, enhancing satisfaction and tenant retention.

From Document to Dynamic Strategy

The power of a checklist lies in its consistent and diligent application. It must be a living document, integrated into daily workflows, site meetings, and project reporting. It requires clear ownership, with every team member understanding their role in the quality chain, from the subcontractor installing masonry to the project manager verifying material submittals.

This process is especially crucial in the nuanced fields of adaptive reuse and historic preservation. These projects introduce unique variables, from integrating modern MEP systems into historic structures to matching new materials with original building fabric. A generic checklist falls short here; a tailored, expert-guided quality control plan is essential to navigate these complexities and honor the building's character while ensuring modern performance and safety standards.

Key Takeaway: A construction quality control checklist is not a static document but a dynamic management system. Its purpose is to create a predictable, repeatable process for achieving an exceptional outcome, protecting your investment and solidifying your reputation for excellence. By embracing this systematic approach, you move from hoping for quality to ensuring it with certainty.


Navigating the complexities of commercial construction, particularly in adaptive reuse and historic preservation projects, requires specialized expertise. A robust construction quality control checklist is your roadmap, but an experienced architect is your expert guide. The team at Sherer Architects, LLC excels in creating and implementing these detailed quality frameworks to ensure your vision is realized with precision and integrity.

To see how their dedicated approach can safeguard your next project's success, visit Sherer Architects, LLC today.