A thorough commercial building inspection is the bedrock of any successful real estate transaction, development project, or long-term ownership strategy. More than a simple walkthrough, it's a deep-dive analysis that uncovers a property's hidden strengths, potential liabilities, and future operational costs. This comprehensive commercial building inspection checklist is designed to empower owners, developers, contractors, and architects with a systematic approach to evaluating every critical component of a property.
From the structural integrity of the foundation to the condition of the roof, and from complex mechanical, electrical, and plumbing (MEP) systems to crucial life-safety features, each point on this list represents a vital piece of the puzzle. Overlooking even a single area can lead to unforeseen capital expenditures, disruptive operational failures, and significant compliance risks that can derail a project or devalue an asset.
By following this structured guide, you gain the clarity needed to mitigate risk, negotiate with confidence, and make informed decisions that protect your investment. This isn't just a list; it is a strategic roadmap for ensuring the long-term value, safety, and performance of your commercial asset. This detailed checklist will guide you through the essential checkpoints, including structural integrity, building envelope, core systems like HVAC and electrical, and critical compliance standards such as ADA requirements.
1. Structural Integrity and Foundation
The structural integrity and foundation are the literal backbone of any commercial property. This crucial part of a commercial building inspection checklist involves a thorough assessment of all components that support the building's load and ensure its stability. Inspectors meticulously examine concrete slabs, footings, load-bearing walls, columns, beams, and the overall structural framework for any signs of distress or potential failure.
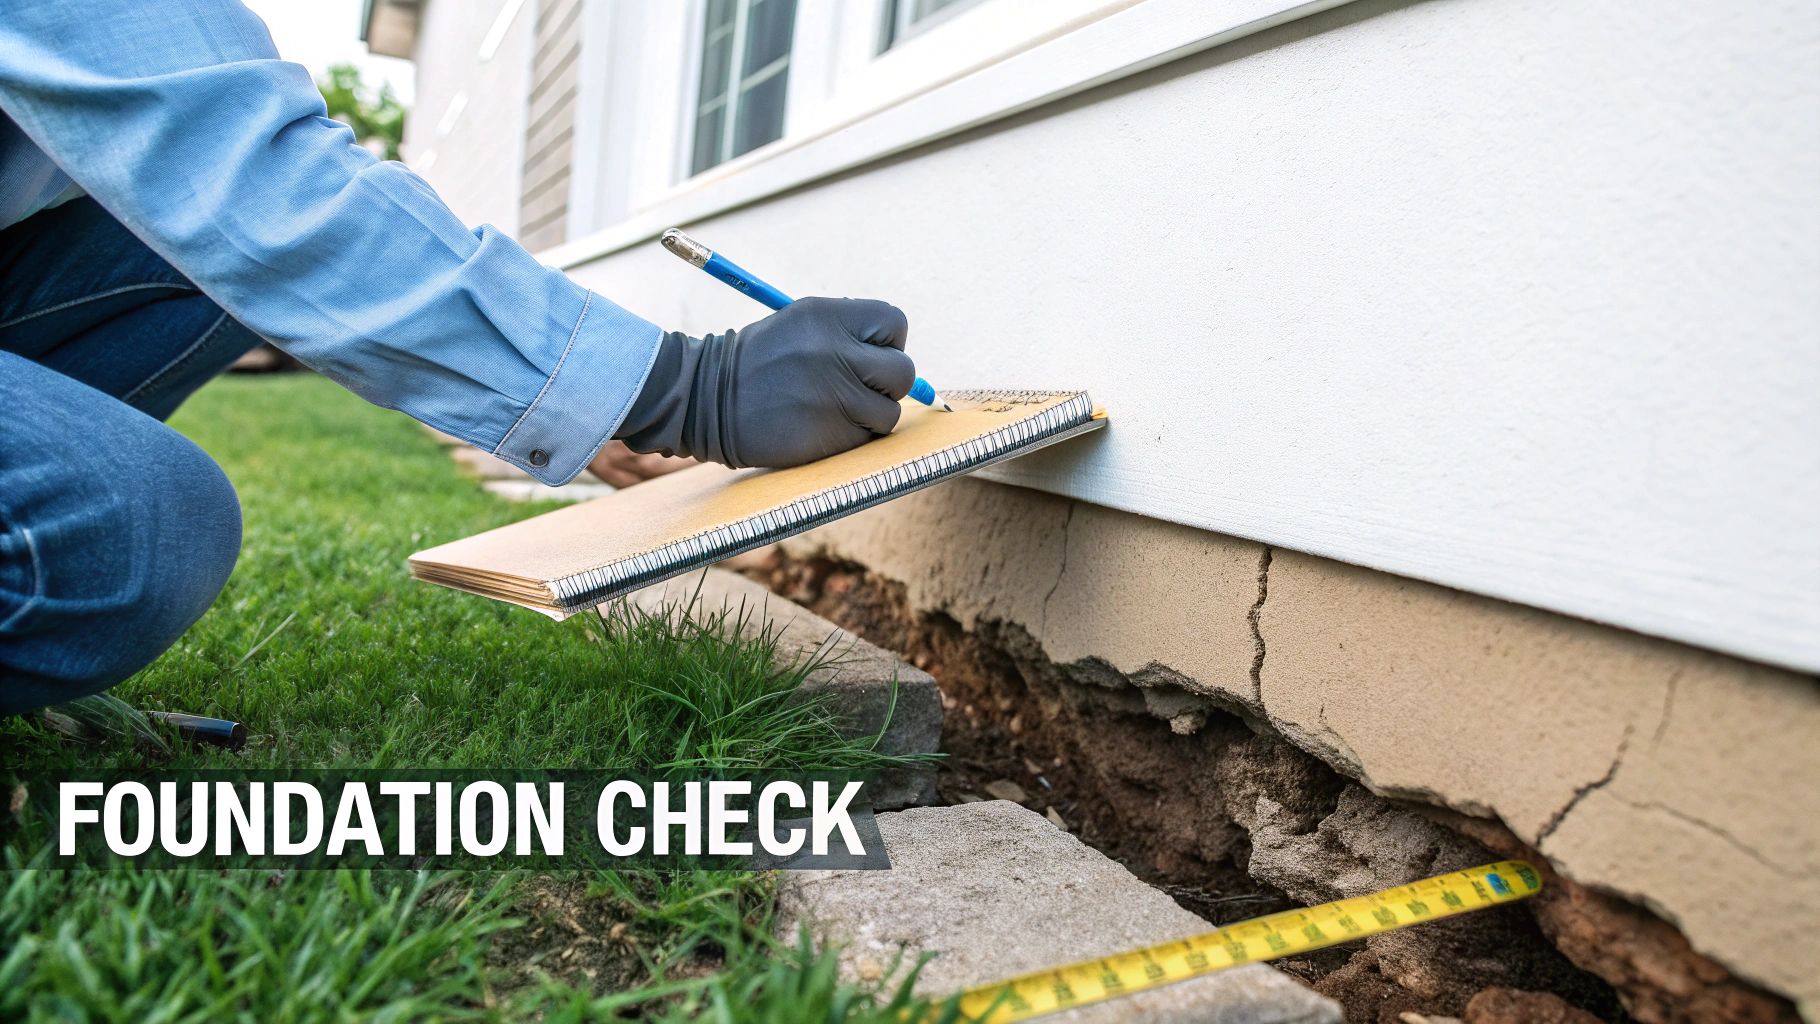
The primary goal is to identify issues like significant cracking, uneven settlement, water intrusion, or material degradation (like spalling concrete or rusted steel) that could compromise the building's safety and long-term viability. Ignoring these foundational elements can lead to catastrophic failures, costly repairs, and significant liability. This is why a detailed structural review is non-negotiable during due diligence for property acquisition or before undertaking major renovations.
Practical Implementation and Actionable Tips
A comprehensive structural assessment goes beyond a simple visual walkthrough. It requires a systematic approach to identify both visible and hidden issues.
- Document and Monitor Cracks: Not all cracks are critical, but every crack should be documented. Use a crack gauge to measure width and take high-resolution photos with a scale reference. For existing buildings, establish monitoring points to track if cracks are growing over time, which indicates active movement.
- Utilize Advanced Technology: For complex or concealed foundation elements, ground-penetrating radar (GPR) can be used to analyze subsurface conditions without destructive testing. GPR helps identify voids, rebar placement, and slab thickness.
- Engage a Structural Engineer: While a general inspector can identify red flags, a licensed structural engineer should be engaged for any complex or concerning findings. They can perform a deeper analysis, conduct material testing, and design necessary remediation plans. This is especially critical for post-earthquake assessments or when evaluating aging warehouses with known settlement issues.
2. Roof Systems and Coverings
The roof is a commercial building's primary shield against the elements, making its condition a top priority in any commercial building inspection checklist. This inspection involves a comprehensive evaluation of the roof's membrane, flashing systems, drainage components, and all penetrations like vents and HVAC units. The integrity of these systems is crucial for preventing water intrusion, which can lead to catastrophic structural damage, mold growth, and operational disruptions.
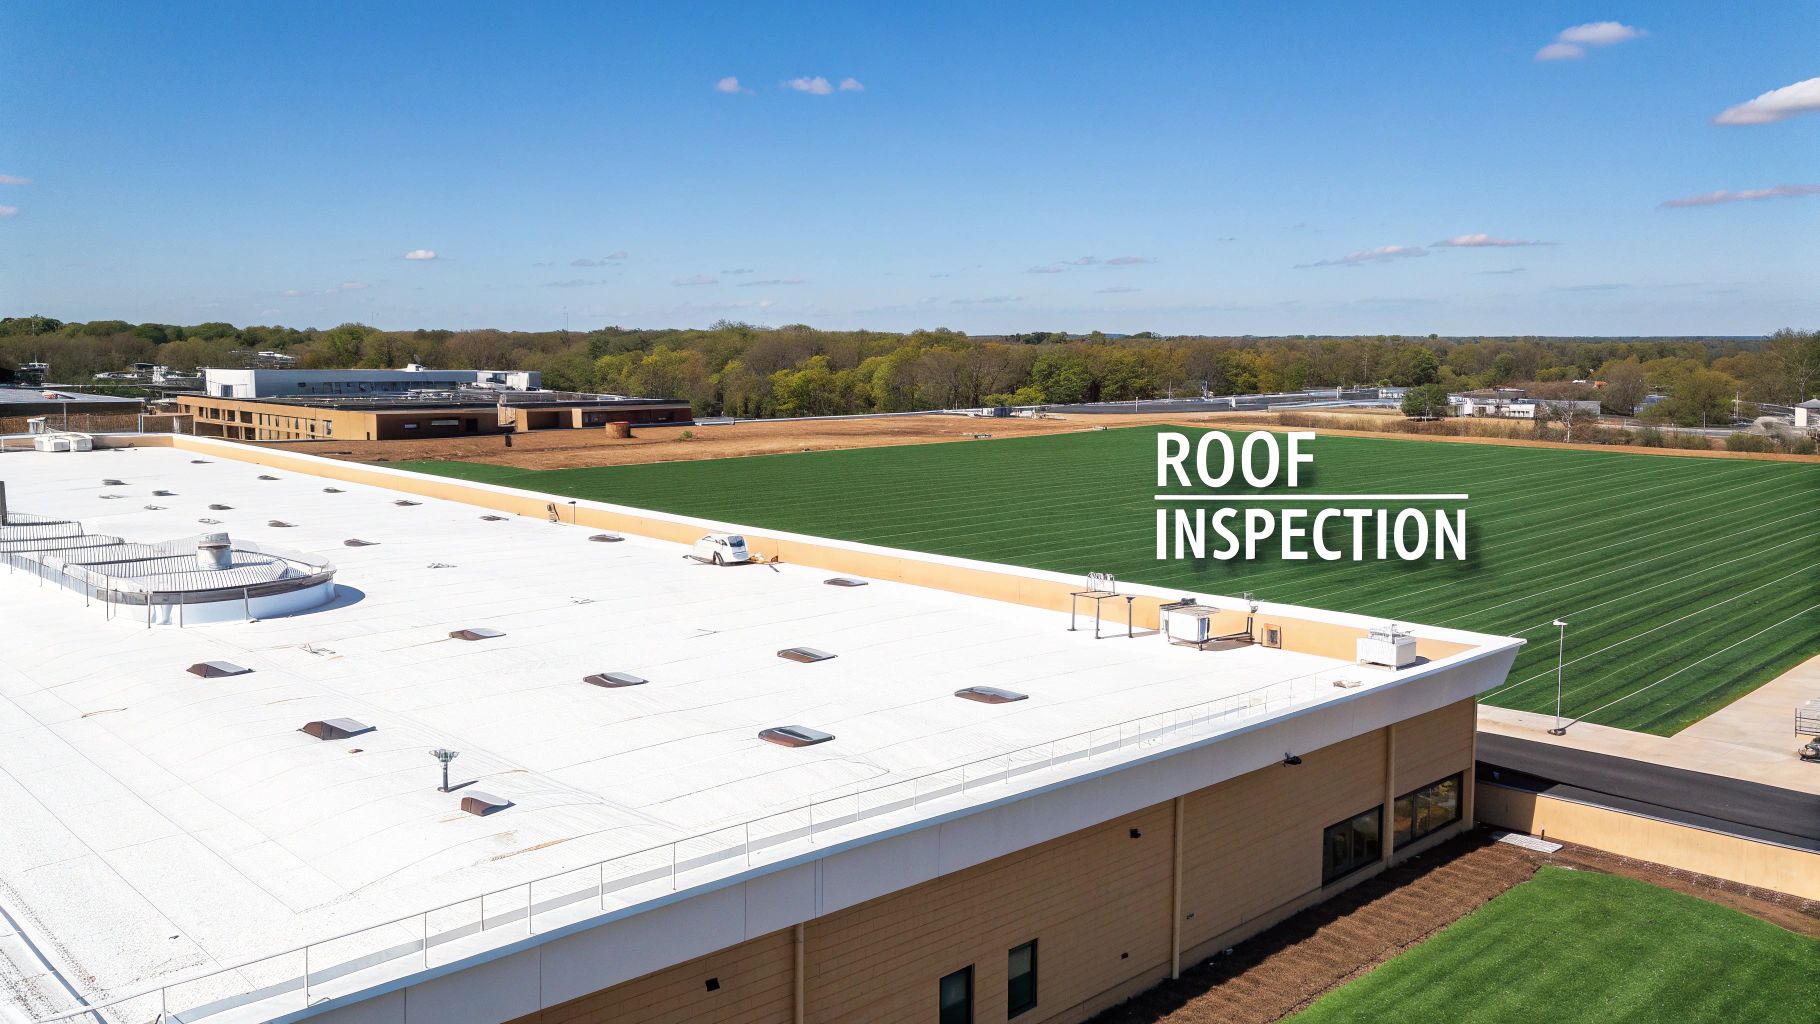
Inspectors focus on identifying signs of aging, wear and tear, and deferred maintenance. The goal is to assess the roof's overall condition, estimate its remaining service life, and pinpoint potential failure points before they escalate. From TPO membrane replacement programs in retail centers to metal roof restoration on industrial facilities, understanding a roof's lifecycle is essential for budget forecasting and risk management, making it a non-negotiable part of property due diligence.
Practical Implementation and Actionable Tips
A thorough roof assessment requires a multi-faceted approach, combining visual inspection with modern technology and a review of historical data. This ensures a complete picture of the roof's health and potential liabilities.
- Check for Ponding Water: Any standing water 48 hours after a rain event is a significant red flag. It indicates improper drainage, which can accelerate membrane degradation and increase the risk of leaks. Document these areas and investigate the cause, whether it's clogged drains or structural sagging.
- Utilize Drone Technology: Safely and efficiently inspect large or difficult-to-access roof areas. For detailed evaluations of roof systems and coverings, leveraging advanced specialized drone roofing inspection software can provide unparalleled accuracy and efficiency. This technology captures high-resolution imagery to identify defects that might be missed from the ground.
- Review Maintenance and Warranty Documents: Request all available records, including the original installation warranty, repair invoices, and routine maintenance logs. This history provides critical context about the roof's age, past issues, and the quality of previous workmanship, helping to predict future performance.
3. HVAC Systems (Heating, Ventilation, and Air Conditioning)
The HVAC system is the heart of a commercial building's operational environment, directly impacting occupant comfort, health, and energy consumption. This component of the commercial building inspection checklist involves a detailed evaluation of all heating, ventilation, and air conditioning equipment. Inspectors scrutinize boilers, chillers, air handling units, rooftop units, ductwork, and control systems to assess their condition, performance, and compliance with modern standards.
The inspection aims to uncover issues like aging equipment near the end of its service life, inefficient performance, poor indoor air quality, or deferred maintenance. An underperforming HVAC system not only leads to high utility bills but can also violate ventilation codes and create an uncomfortable environment for tenants or employees. Evaluating these systems is crucial for forecasting future capital expenditures and understanding the building's true operational costs.
Practical Implementation and Actionable Tips
A thorough HVAC assessment requires more than just checking if the heat or air conditioning turns on. It involves a systematic review of performance, maintenance history, and control functionality.
- Review All Maintenance Logs: Request and meticulously review all service records, maintenance logs, and repair invoices for the HVAC equipment. This documentation provides a clear history of the system's health, recurring problems, and the frequency of professional servicing. A lack of records is a significant red flag indicating potential neglect.
- Test and Measure Performance: Go beyond a simple operational check. Use an infrared thermometer to test temperature distribution at various supply diffusers throughout the building, ensuring consistent and adequate conditioning. For larger or more critical facilities, an HVAC technician can measure airflow, test refrigerant levels, and check amperage draws on motors to verify equipment is operating to a high standard.
- Engage an HVAC Specialist: For properties with complex systems like variable air volume (VAV) setups, large central plants, or specialized ventilation for healthcare or lab use, a general inspector's review is insufficient. Engage a licensed mechanical engineer or a commercial HVAC contractor to perform a full system analysis. They can identify inefficiencies and recommend targeted upgrades, such as an energy recovery ventilation (ERV) system retrofit to improve air quality and reduce costs.
4. Electrical Systems and Distribution
The electrical system is the nerve center of a modern commercial property, powering everything from critical operations to basic lighting. This part of the commercial building inspection checklist involves a detailed assessment of the main service entrance, distribution panels, wiring, outlets, and emergency power systems. Inspectors evaluate the system's age, condition, load capacity, and overall safety to ensure it meets both current operational demands and stringent code requirements.
The primary goal is to identify safety hazards like outdated aluminum wiring, overloaded circuits, improper grounding, or signs of overheating in electrical panels. An inadequate or unsafe electrical system poses a significant fire risk and can lead to costly operational downtime. A thorough electrical review is therefore indispensable for assessing a building's functional capacity, safety, and potential for future expansion, such as an electrical panel upgrade from 200A to 400A service to support new equipment.
Practical Implementation and Actionable Tips
A comprehensive electrical assessment requires more than just flipping switches; it demands a systematic and technically informed approach to identify potential failures and non-compliance issues.
- Perform a Panel and Circuit Audit: Open and visually inspect every electrical panel for signs of scorching, corrosion, or improperly sized breakers. Test a representative sample of circuits and outlets to confirm proper voltage, polarity, and grounding. Document all panel schedules and trace critical circuits to ensure they are accurately labeled.
- Utilize Infrared Thermography: Thermal imaging is a powerful non-invasive tool used to detect hidden electrical faults. A thermographic scan of panels, switchgear, and connections can identify "hot spots" caused by loose connections or overloading, which are leading causes of electrical fires. This allows for proactive maintenance before a catastrophic failure occurs.
- Engage a Licensed Electrical Engineer: For properties with complex systems, high-demand operations like data centers, or outdated infrastructure, a licensed electrical engineer or master electrician is essential. They can conduct detailed load calculations to assess capacity for future needs, verify compliance with the National Electrical Code (NEC), and design necessary upgrades or safety remediations.
5. Plumbing Systems and Water Infrastructure
The plumbing and water infrastructure of a commercial property are vital to its daily operations, occupant health, and long-term asset value. This part of a commercial building inspection checklist involves a detailed evaluation of all systems that supply, distribute, and remove water. Inspectors scrutinize supply lines, drainage pipes, fixtures, water heaters, backflow prevention devices, and sewage disposal systems for functionality, compliance, and signs of potential failure.
The primary goal is to uncover issues like hidden leaks, widespread corrosion, inadequate water pressure, or non-compliant drainage that could lead to extensive water damage, business interruptions, and serious health hazards. For instance, a failing grease trap in a restaurant or an undetected cross-connection in a medical facility can have severe operational and regulatory consequences. A thorough plumbing assessment is therefore essential before acquisition, leasing, or major tenant fit-outs.
Practical Implementation and Actionable Tips
A comprehensive plumbing inspection requires more than just turning on faucets; it demands a systematic evaluation using both visual checks and specialized diagnostic tools.
- Utilize Video Pipe Inspection: For main drain and sewer lines, a video camera inspection is invaluable. This technology allows inspectors to navigate the pipes and visually identify blockages, cracks, root intrusion, or pipe collapses that are otherwise impossible to detect. This is standard practice when evaluating older properties or buildings with a history of drainage problems.
- Test Water Pressure and Flow: Check static and dynamic water pressure at multiple fixtures throughout the building, especially on the highest floors. Low pressure can indicate systemic issues like pipe corrosion, blockages, or an undersized supply line. Documenting these readings provides a clear baseline for performance.
- Verify Backflow Prevention: Confirm that all required backflow prevention devices are installed, have been recently tested, and are properly certified. This is a critical life safety item to prevent contamination of the potable water supply, and health departments often require annual certification records.
- Inspect Water Heaters and Boilers: Assess the age, condition, and capacity of all commercial water heaters or boilers. Look for signs of leakage, corrosion on the tank or connections, and ensure the temperature and pressure relief (TPR) valve is functional and correctly piped. For a multi-tenant office building, this ensures consistent hot water for all occupants.
6. Fire Safety and Life Safety Systems
Fire safety and life safety systems are a non-negotiable component of any commercial building inspection checklist, designed to protect occupants and minimize property damage. This critical inspection evaluates the building's active and passive fire protection measures, including sprinkler systems, fire alarms, emergency lighting, and clearly marked evacuation routes. Inspectors ensure these systems are not only present but also fully functional, properly maintained, and compliant with current codes.
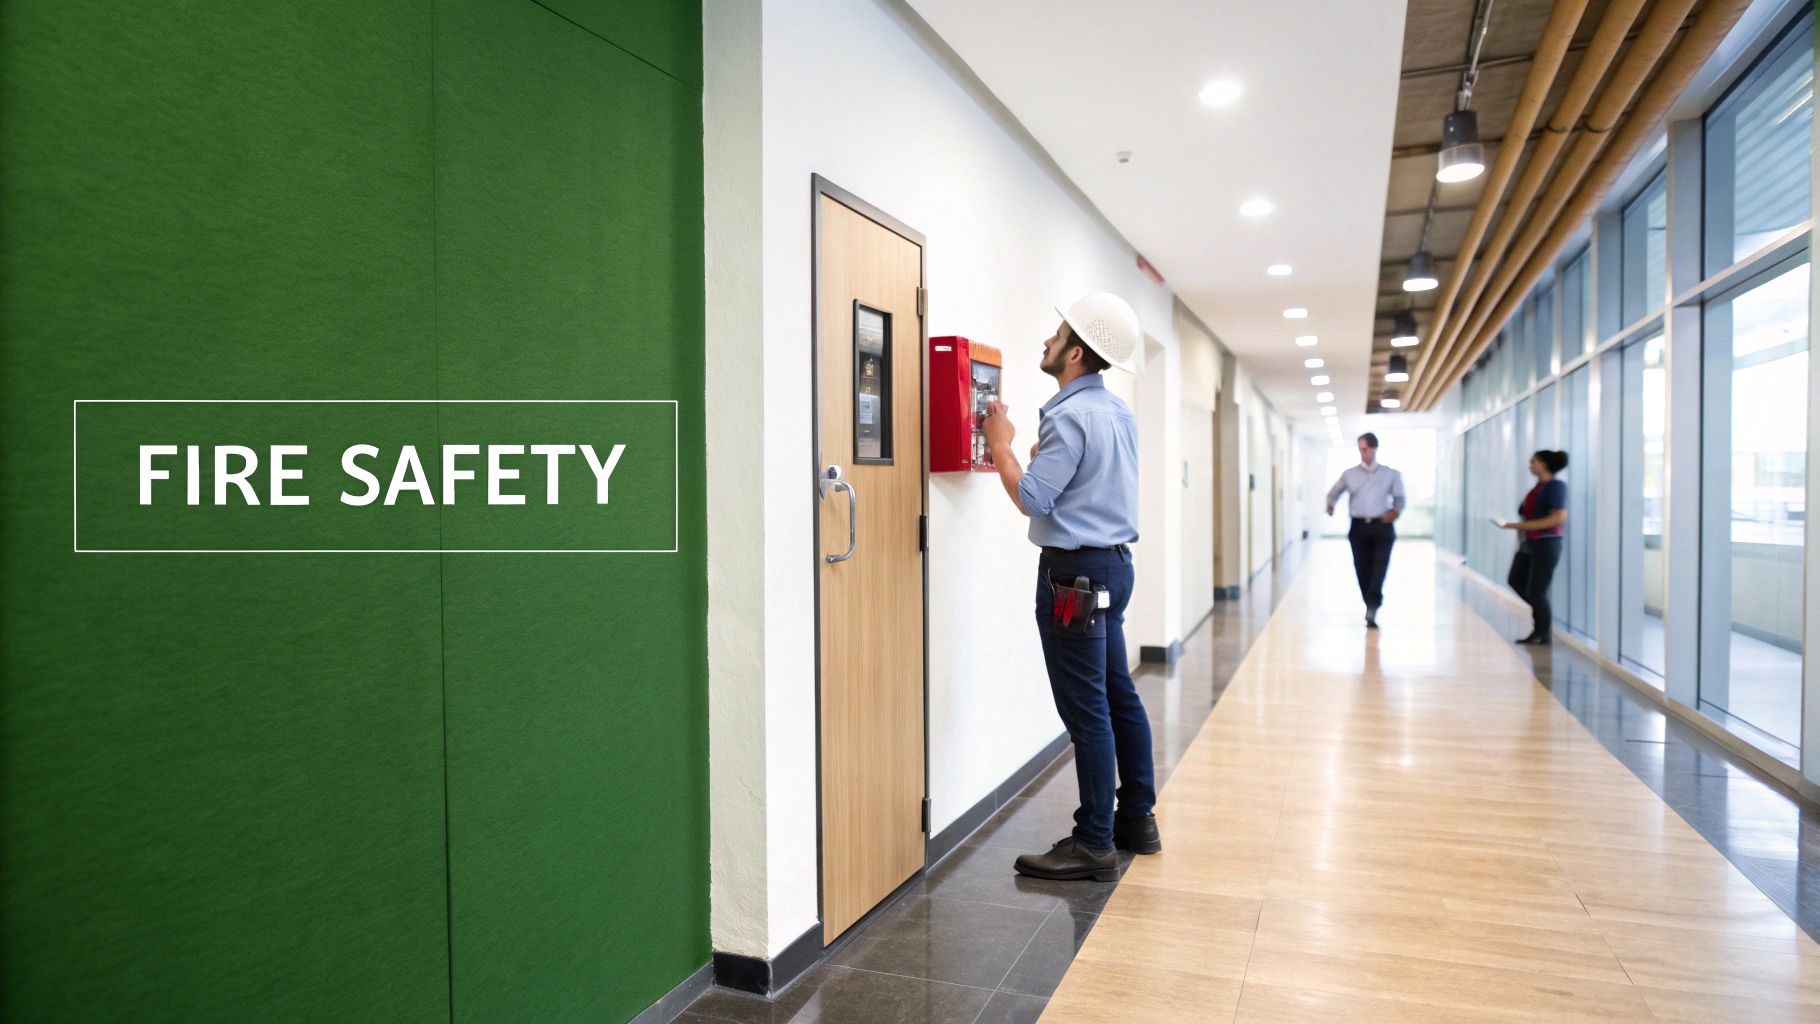
The primary goal is to verify that the building provides a safe environment for tenants, employees, and visitors in an emergency. A failure in any part of this integrated system can have catastrophic consequences, from loss of life to total property loss and significant legal liability. Adherence to standards set by bodies like the National Fire Protection Association (NFPA) and localized codes, such as the comprehensive British Standards for Fire Safety, is a key inspection point that ensures a building meets its legal and moral obligations for occupant safety.
Practical Implementation and Actionable Tips
A thorough fire and life safety assessment combines documentation review with physical testing and visual verification. This ensures all systems work together as intended.
- Review All Service Records and Tags: Request and scrutinize all maintenance, testing, and inspection records for fire alarms, sprinkler systems, and fire extinguishers. Check the physical tags on extinguishers and risers to confirm they are current. Any gaps in service history are a major red flag that requires immediate investigation.
- Physically Test Emergency Systems: During the inspection, perform a "walk test" of the emergency and exit lighting to ensure all units activate when primary power is cut. Open emergency exit doors to confirm they are not blocked, are easy to open, and that any associated alarms function correctly.
- Verify Clearances and Accessibility: Ensure that all fire safety equipment is unobstructed. This includes maintaining at least 18 inches of clearance below sprinkler heads and keeping fire alarm pull stations and fire extinguishers easily accessible. Walk all evacuation routes to confirm they are free of storage, equipment, or other impediments.
7. Interior and Exterior Walls and Finishes
The condition of a building's walls and finishes directly impacts its aesthetic appeal, occupant health, and long-term structural soundness. This part of the commercial building inspection checklist involves a detailed evaluation of both interior and exterior surfaces, looking beyond simple cosmetic issues to identify underlying problems like moisture intrusion, structural stress, or material failure. Inspectors assess everything from drywall and paint to exterior cladding and paneling.
The main objective is to detect signs of water damage, mold growth, cracking, and deterioration that could signal more significant defects. For example, peeling exterior paint could indicate failed weatherproofing, while interior water stains might point to a roof leak or plumbing issue. Addressing these finish-related problems is crucial for maintaining property value, ensuring a safe indoor environment, and preventing minor issues from escalating into expensive structural repairs.
Practical Implementation and Actionable Tips
A thorough wall and finish assessment combines visual inspection with diagnostic tools to uncover hidden issues affecting the property. This systematic process is vital for any comprehensive commercial building inspection checklist.
- Use a Moisture Meter: Don't rely solely on visual cues. Use a non-invasive moisture meter to scan drywall, plaster, and paneling, especially around windows, in basements, and below plumbing fixtures. High readings can pinpoint active leaks or trapped moisture that isn't yet visible, allowing for proactive mold remediation and water damage restoration.
- Analyze Crack Patterns: Document all significant cracks with photos and measurements. Diagonal cracks originating from window or door corners often indicate structural settlement, whereas a network of fine, spiderweb-like cracks may just be a paint or plaster issue. Tracking these patterns over time helps differentiate between cosmetic flaws and active structural problems.
- Inspect Key Junctions and Penetrations: Pay close attention to where different materials meet, such as wall-to-floor junctions, expansion joints, and areas around pipes or vents. Inspect the integrity of exterior caulking and sealant around windows and doors, as these are common points of water entry that can lead to significant interior damage if neglected.
8. Windows, Doors, and Building Envelope
The building envelope, encompassing all windows, doors, and exterior walls, acts as the primary barrier between the indoor and outdoor environments. This part of the commercial building inspection checklist is dedicated to assessing the performance and condition of these critical components. Inspectors scrutinize windows, doors, frames, glazing, caulking, and weatherstripping to ensure the building is properly sealed, secure, and energy-efficient.
The primary goal is to identify failures in the envelope that lead to air and water infiltration, which can cause significant issues like increased utility costs, moisture damage, mold growth, and compromised occupant comfort. A poorly maintained envelope can negate the benefits of an efficient HVAC system and expose the property to long-term structural risks. Organizations like the National Fenestration Rating Council (NFRC) provide performance ratings that help guide selections for high-performance window and door systems.
Practical Implementation and Actionable Tips
A thorough evaluation of the building envelope combines visual inspection with diagnostic testing to uncover hidden performance gaps. This proactive approach helps prioritize repairs and capital improvements.
- Conduct Diagnostic Testing: Go beyond a simple visual check by performing a blower door test to quantify the building’s overall air leakage rate. This provides a baseline for air-sealing efforts. Thermal imaging cameras can then be used to pinpoint specific locations of air infiltration and insulation voids around windows and door frames.
- Inspect Sealing Components: Meticulously examine all caulking and weatherstripping for signs of drying, cracking, or pulling away from surfaces. Check that weatherstripping provides adequate compression when doors and operable windows are closed. These materials have a limited lifespan and are often the first line of defense to fail.
- Verify Proper Drainage and Function: For windows, confirm that weep holes and drainage paths within the frame assembly are clear of debris to prevent water from becoming trapped. Check the operational function of all doors and windows, ensuring they open, close, and lock correctly without binding. This is crucial for both security and egress.
9. Parking Structures and Pavement
Often considered a secondary asset, the condition of parking structures and pavement is a critical component of a property's value, safety, and operational efficiency. This element of a commercial building inspection checklist covers a detailed evaluation of surface lots, multi-level garages, access roads, and pedestrian walkways. Inspectors assess everything from the sub-base integrity to the surface condition, looking for signs of wear, structural compromise, and safety hazards.
The primary focus is to identify issues like alligator cracking, potholes, sub-grade failures, poor drainage, and faded markings that detract from curb appeal and create liabilities. In multi-level structures, inspectors scrutinize concrete for spalling, rebar corrosion, and expansion joint failure. Proactive maintenance, guided by a thorough inspection, prevents minor issues from escalating into extensive, capital-intensive reconstruction projects and ensures a safe environment for tenants and visitors.
Practical Implementation and Actionable Tips
A systematic approach to pavement and parking structure assessment helps prioritize repairs and budget for long-term maintenance, maximizing the asset's lifespan.
- Establish a Preventive Maintenance Schedule: Don't wait for problems to appear. Implement a proactive plan that includes regular inspections and scheduled maintenance. For asphalt, this means applying a high-quality seal coat every 2-3 years to protect it from oxidation and water penetration. For concrete structures, sealing surfaces can prevent water and salt intrusion.
- Prioritize Drainage and Swift Repairs: Water is the primary enemy of pavement and concrete. Ensure all drainage systems, including catch basins and swales, are clear of debris. Repair any identified cracks and potholes immediately to prevent water from penetrating the sub-base, which leads to much larger, more expensive failures.
- Conduct Advanced Diagnostics: For significant issues or to assess subsurface conditions without excavation, consider using advanced technology. Thermal imaging can help identify areas with subsurface moisture, indicating potential drainage problems or voids beneath the pavement. This allows for targeted repairs rather than widespread, costly excavation. Organizations like the American Concrete Pavement Association (ACPA) provide extensive resources on best practices for pavement longevity.
10. Accessibility Compliance and ADA Requirements
Ensuring a commercial property is accessible to all individuals is not just a matter of good practice; it is a legal imperative. This part of the commercial building inspection checklist focuses on verifying compliance with the Americans with Disabilities Act (ADA) Standards for Accessible Design and other local accessibility codes. Inspectors assess every public-facing element of a property, from the parking lot to the restrooms, to ensure it provides equal access for people with disabilities.
The inspection covers features like accessible parking spaces, ramp slopes, doorway widths, elevator functionality, restroom layouts, and proper signage. Neglecting these requirements can result in significant legal penalties, costly retrofits mandated by the U.S. Department of Justice (DOJ), and reputational damage. A thorough ADA compliance check is therefore a critical risk management step for property owners, developers, and tenants, safeguarding their investment against potential discrimination complaints and ensuring the building serves the entire community.
Practical Implementation and Actionable Tips
A proactive and systematic approach is essential for maintaining ADA compliance. This goes beyond a one-time check and requires ongoing attention to detail.
- Conduct a Comprehensive ADA Audit: Use a detailed checklist that covers all aspects of the ADA Standards. Measure everything from the force required to open a door to the height of restroom soap dispensers. This audit should document all compliant and non-compliant features with photos and precise measurements, forming the basis of a remediation plan.
- Prioritize a Barrier Removal Plan: For existing buildings, it is crucial to identify physical barriers and create a documented plan for their removal. This plan should prioritize changes that can be made readily and affordably, such as restriping parking lots or adjusting door hardware, while scheduling more significant upgrades like ramp installations or elevator modernizations.
- Maintain Clear and Accessible Routes: Compliance is an ongoing effort. Regularly inspect accessible routes, including sidewalks, hallways, and aisles, to ensure they are free of obstructions like furniture, equipment, or temporary displays. Staff training is key to preventing these common and easily-fixable violations.
10-Point Commercial Building Inspection Comparison
| Component | Implementation Complexity 🔄 | Resource Requirements ⚡ | Expected Outcomes ⭐ | Ideal Use Cases 📊 | Key Advantages 💡 |
|---|---|---|---|---|---|
| Structural Integrity and Foundation | High — specialized engineering, possible invasive testing | High — structural engineers, GPR, lab tests, heavy equipment | Safety assurance, code compliance, long-term stability | Pre-purchase surveys, post-earthquake assessments, aging warehouses | Prevents catastrophic failure; identifies major repairs early |
| Roof Systems and Coverings | Medium — access and weather-dependent inspections | Medium — roof access, drones, thermal imaging | Reduced water intrusion, extended roof life, energy savings | Preventive maintenance, replacement planning, retail/industrial roofs | Prevents leaks and mold; improves energy efficiency |
| HVAC Systems (Heating, Ventilation, AC) | Medium–High — complex system testing and balancing | High — HVAC technicians, testing instruments, possible downtime | Improved comfort, IAQ, energy efficiency, fewer breakdowns | Office buildings, LEED projects, healthcare facilities | Improves occupant health; reduces operational energy costs |
| Electrical Systems and Distribution | High — safety-critical, licensed assessments required | High — electricians, testing gear, potential major upgrades | Enhanced safety, adequate capacity, code compliance | Data centers, older buildings, capacity-upgrade projects | Prevents fire hazards; supports future load needs |
| Plumbing Systems and Water Infrastructure | Medium — some hidden components require inspection | Medium — plumbers, video inspection, leak detection tools | Leak prevention, health safety, uninterrupted operations | Restaurants, aging piping systems, high-occupancy sites | Detects leaks early; supports water conservation efforts |
| Fire Safety and Life Safety Systems | Medium — systematic testing and coordination | Medium — certified testers, alarm/sprinkler service providers | Life safety, regulatory compliance, reduced liability | High-occupancy buildings, data centers, healthcare | Saves lives; may lower insurance and legal risk |
| Interior and Exterior Walls and Finishes | Low–Medium — mostly visual with targeted testing | Low–Medium — moisture meters, remediation contractors | Preserved aesthetics, moisture control, mold prevention | Tenant fit-outs, facade maintenance, post-water-damage repair | Protects envelope; prevents occupant health issues |
| Windows, Doors, and Building Envelope | Medium — air/water infiltration testing and repairs | Medium–High — blower door, thermal imaging, replacement cost | Improved energy efficiency, security, weather protection | Energy retrofits, aging fenestration upgrades, entryways | Reduces energy loss; enhances comfort and security |
| Parking Structures and Pavement | Medium — surface and structural inspections needed | Medium — pavement testing, traffic control, resurfacing crews | Extended pavement life, improved safety, better appearance | Retail centers, parking garages, high-traffic lots | Lowers long-term repair costs; reduces liability |
| Accessibility Compliance and ADA Requirements | Medium — regulatory audit with potential retrofit design | Medium–High — architectural changes, signage, construction | Legal compliance, improved access, reduced discrimination risk | Public buildings, tenant renovations, new occupancies | Prevents lawsuits; expands access and customer base |
From Checklist to Action: Partnering for a Resilient Future
Navigating the extensive commercial building inspection checklist we've detailed is a monumental but essential undertaking. From the foundational integrity and the weather-tightness of the roof system to the intricate networks of HVAC, electrical, and plumbing, each checkpoint represents a critical component of your property's overall health and value. A meticulous inspection is not just about identifying flaws; it's about creating a comprehensive, data-driven roadmap for your asset's future.
This process moves beyond a simple pass-or-fail exercise. It’s a strategic deep dive that uncovers the hidden stories within a building’s walls. The findings from your inspection report offer a clear narrative about immediate repair needs, potential safety hazards like outdated fire suppression systems, and long-term capital expenditure requirements. Understanding these elements is the first step toward transforming a property from a collection of systems into a high-performing, resilient, and profitable investment.
Translating Inspection Data into Strategic Advantage
The true power of a comprehensive inspection lies in the action that follows. The data you've gathered is the foundation for strategic decision-making. This is the point where a detailed checklist evolves into a living document that guides maintenance schedules, informs renovation budgets, and secures a building’s long-term viability.
For developers, owners, and contractors, the next steps are crucial. How do you prioritize repairs? How can you phase system upgrades to align with your budget and operational needs? What opportunities for value-add improvements, such as enhanced energy efficiency or accessibility upgrades, did the inspection reveal? Answering these questions effectively requires not just technical knowledge but also a creative and strategic vision.
Key Takeaway: An inspection checklist is a diagnostic tool. The real value is unlocked when you use that diagnosis to craft a strategic treatment plan that enhances asset value, mitigates risk, and ensures future growth.
The Architect's Role: Your Partner in Implementation
This is precisely where partnering with a skilled architecture firm becomes a game-changer. An experienced architect acts as a translator and a strategist, converting the raw data from a commercial building inspection checklist into an actionable, cohesive plan. They see beyond the immediate deficiencies to envision the building's full potential.
An architect can help you:
- Prioritize Investments: Analyze the inspection report to identify which repairs and upgrades will deliver the highest return on investment, balancing immediate needs with long-term goals.
- Navigate Complex Codes: Ensure that all proposed work, from accessibility modifications to structural repairs, meets or exceeds current building codes and ADA requirements, preventing costly rework and future liabilities.
- Design for Longevity and Efficiency: Develop solutions that not only fix existing problems but also improve the building's overall performance. This could involve specifying modern, energy-efficient HVAC systems, designing a more durable roofing solution, or reconfiguring interior spaces for better functionality.
- Unlock Hidden Potential: For adaptive reuse or historic preservation projects, an architect can identify opportunities to leverage historic tax credits and design innovative solutions that honor a building’s heritage while equipping it for modern commercial use.
Ultimately, completing the checklist is the beginning of the journey. The destination is a safe, compliant, and valuable asset that serves its occupants and delivers on your financial objectives. By leveraging the insights gained from your inspection and partnering with the right experts, you can ensure your property is not just maintained, but truly optimized for a successful and resilient future. Your commitment to this thorough process protects your investment and lays the groundwork for enduring success.
Ready to transform your inspection findings into a successful project? The team at Sherer Architects, LLC specializes in translating complex building assessments into beautiful, functional, and profitable designs for commercial, adaptive reuse, and historic properties. Let us help you navigate the next steps and bring your vision to life by visiting Sherer Architects, LLC to learn more.